


Sam Buchanan
-
Posts
2,554 -
Joined
-
Last visited
-
Days Won
83
Content Type
Links Directory
Profiles
Articles
Forums
Downloads
Store
Gallery
Blogs
Events
Everything posted by Sam Buchanan
-
I need some education, I'm probably overlooking something obvious. I have seen numerous admonitions to install the driveshaft in the same alignment as it was removed but I can't figure out why this is necessary. The shaft is balanced as a discrete unit on a test bench, not with the entire driveline intact. When we install a new driveshaft there are no witness marks to line up. I understand there are definite ways to orient the universal joints when building a new shaft to insure proper phasing but why bother with this when putting the old shaft back in the car? I've had the driveshaft out of my car several times (trans removal, servicing u-joints) and have never bothered with witness marks. What am I overlooking?
-
 Looks like we are all in agreement......for once. 😄
 -
Another 6 volt charging circuit question(s)
Sam Buchanan replied to 1949plymouthdeluxe's topic in P15-D24 Forum
This is where I got mine. 😁 https://www.ebay.com/str/HowardEnt?_trksid=p2047675.l2563 -
Standard application is install the seal spring toward the oil. In this case the inner seal spring should go toward the more fluid lubricant, the gear oil.
-
High Quality H4 Headlights for 12v Cars (Cheap!!)
Sam Buchanan replied to Sam Buchanan's topic in P15-D24 Forum
I haven’t seen any mention of any lights other than these 7” round reflectors. These were available as an upgrade for the Land Cruisers. -
1950 Dodge Coronet Rear Main Seal Replace without removing oil pan?
Sam Buchanan replied to kballein's topic in P15-D24 Forum
Or put a pan under the car at night....... 😆 -
The spring in a seal goes toward the oil/grease.
-
High Quality H4 Headlights for 12v Cars (Cheap!!)
Sam Buchanan replied to Sam Buchanan's topic in P15-D24 Forum
Some clarification is in order in regard to low beam pattern of the Toyota lights we have been discussing. The quoted statement is not born out by my comparison of the Toyota and a DOT sealed beam and has the comparison backwards. Please look again at the photo I posted earlier comparing a Sylvania DOT sealed beam bulb on the left and Toyota (Koito) H4 on the right. The Toyota light definitely is throwing more light up the right side of the road which would make signs more readable. At the same time there is sharp pattern cutoff in the center and to the left which prevents blinding oncoming motorists. All this while putting a lot of light on the pavement in front and to the left of our car. This is a similar pattern to what modern DOT projection headlights provide. The poor ol' DOT sealed beam just throws out a fuzzy circular yellowish pattern that does little for illuminating the side of the road and also scatters more light in the direction of oncoming motorist. In other words......the DOT bulb is bringing a dull knife to a gunfight..... I overlooked taking a photo of high-beam comparison because we aren't as concerned about on-coming traffic on high-beam. But the difference between the two bulbs is significant with the Toyota lights throwing out an impressive amount of useful and safe illumination. Keep in mind these are 6v halogen bulbs, the 12v bulbs are even more impressive. Photos taken with 6v alternator idling, approximately 7v delivered to the bulbs via fused relays. https://www.amazon.com/dp/B00GNTZ9SA?ref=ppx_yo2ov_dt_b_fed_asin_title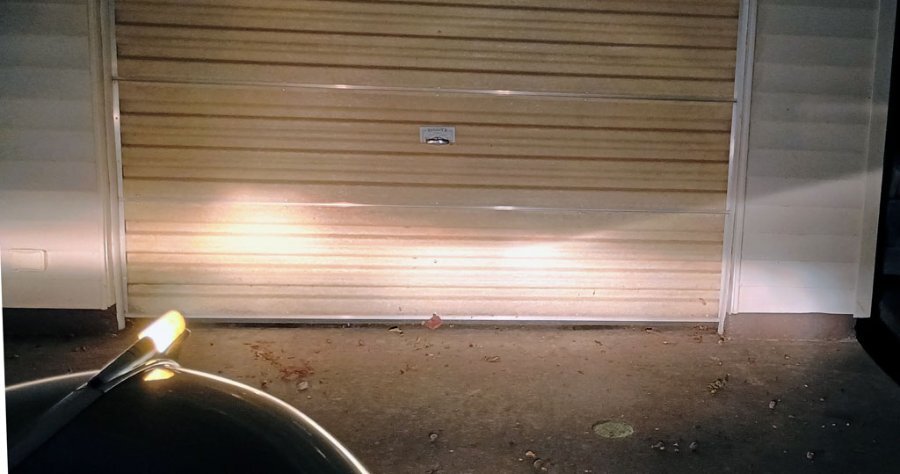
-
Learning how to do internet searches can be the most valuable tool in the garage when it comes to maintaining our old cars.
-
High Quality H4 Headlights for 12v Cars (Cheap!!)
Sam Buchanan replied to Sam Buchanan's topic in P15-D24 Forum
No problem with 12v, the light kit comes with 12v bulbs and relays. This is a standard size reflector for cars with 7" 6012 sealed beams. As I pointed out the shape of the lens is different from the sealed beam but they fit in my '48 P15. I did open up the hole in the back of the shell a little so the very nice rubber boots will fit properly. -
High Quality H4 Headlights for 12v Cars (Cheap!!)
Sam Buchanan replied to Sam Buchanan's topic in P15-D24 Forum
That was quite the sermon. Thank you for your interest in my morality. I guess I need to see if my homebrew seatbelts meet the letter of the law, the replacement glass doesn't have a DOT stamp and I'm quite sure the LED taillights aren't DOT approved. Most likely the aftermarket gas tank isn't either, or.....well....we get the point. By the way, Alabama has no vehicle inspections and it seems E-code headlights are legal in some states. I would never install lights on my car that are a hazard to other drivers, see the photos I posted in an earlier post showing the superior pattern to DOT sealed beams. -
High Quality H4 Headlights for 12v Cars (Cheap!!)
Sam Buchanan replied to Sam Buchanan's topic in P15-D24 Forum
I'm not missing any points........ -
High Quality H4 Headlights for 12v Cars (Cheap!!)
Sam Buchanan replied to Sam Buchanan's topic in P15-D24 Forum
There is a very simple solution for those who have concerns about improved and safer lighting. Don't install it. -
High Quality H4 Headlights for 12v Cars (Cheap!!)
Sam Buchanan replied to Sam Buchanan's topic in P15-D24 Forum
This discussion prompted me to do a bit of internet digging. Bottom line, the odds of failing a state inspection due to E-code headlights, especially on a vintage vehicle, is practically nil. E-code lights are superior to DOT light in all respects and hybrid E-DOT lights are on many US production vehicles. For those who want E-code H4 lights but want to retain the familiar rounded shape, here is an option: https://www.busdepot.com/nl910ch4 But this vendor clearly states the Koito H4 lights that we are discussing are superior. -
High Quality H4 Headlights for 12v Cars (Cheap!!)
Sam Buchanan replied to Sam Buchanan's topic in P15-D24 Forum
It is my understanding these Koito lights are not DOT approved, think I saw notation to that effect in some of the Toyota verbage. However......my experience with the lights when installed on the TR6 and VW demonstrate superior light pattern to what is common with DOT sealed beams. The pattern is designed to throw more light to the right side of the road and minimize light going to oncoming motorists. This is very different from the incredibly horrible LED conversions that often blind us when meeting a bro with his blue-lighted Carolina-lifted truck. I find the beam pattern to be very similar to what is found on late model vehicles with their highly refined designs. This is an area where the Europeans were many years ahead of the USA, our DOT was late to the party on headlight design. I like the idea of having modern, safe lighting performance on my old ride. -
High Quality H4 Headlights for 12v Cars (Cheap!!)
Sam Buchanan replied to Sam Buchanan's topic in P15-D24 Forum
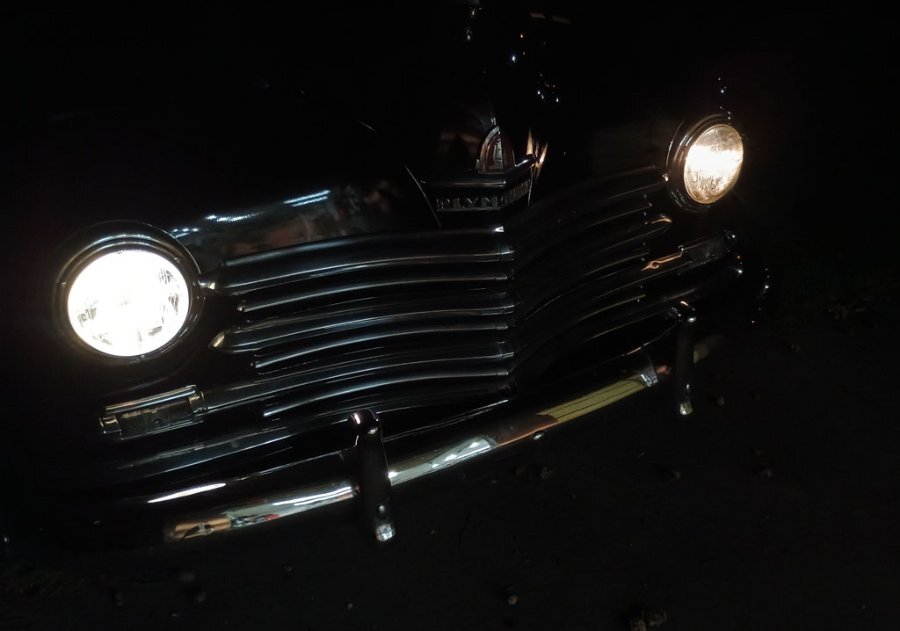
UPDATE; Installation of 6v H4 bulbs in the ridiculously cheap Toyota headlights In posts earlier in this thread I detailed installation of 6v headlight relays in my '48 P15. The Toyota headlight upgrade kit arrived and I swapped out the included 12v H4 bulbs for 6v H4 bulbs I sourced on Amazon. I installed the right headlight so comparison can be made to the 6006 halogen sealed beam currently in the car. Installation was straightforward but some may not like how the new lens protrudes from the chrome trim ring. The lenses are "European" style and look great on my TR6 and '69 Beetle but are more obvious on the Plymouth. I think I will like the better lighting enough to tolerate the new look(new light on left side of photo). I haven't fine-tuned aiming but here are some side-by-side comparisons, new light on right side of photos. The modern beam cutoff pattern is very evident on low beam when compared to the old "round" pattern. It throws more light on the road in front of the car and also up and to the right for road signs while keeping the beam away from oncoming traffic. It actually extends coverage low and to the left of the original sealed beam. The H4 bulb is higher wattage (55w/60w) than the old 6006, this photo gives some indication of the greater output. The car is driven at night so this is a good upgrade at a very attractive price. I'll have a more complete impression after the other new reflector is installed and aiming is refined.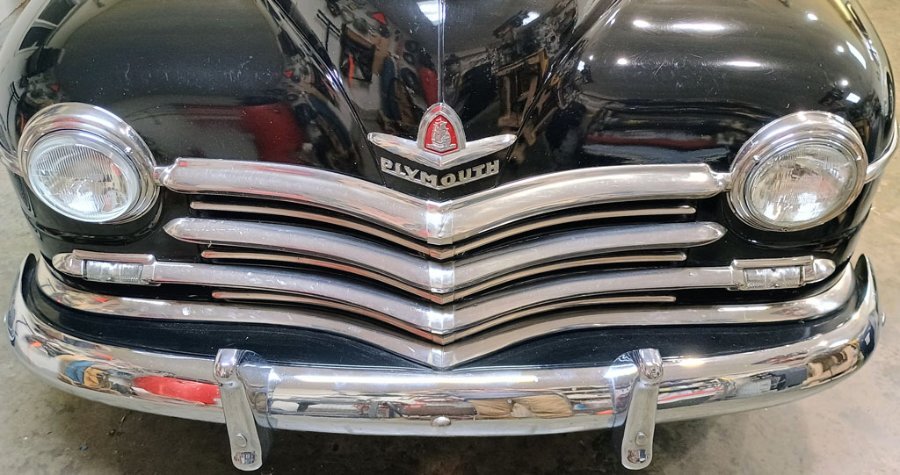
-
LED running lights and halogen headlights for my '47 Super De Luxe
Sam Buchanan replied to 46Chris's topic in P15-D24 Forum
I can't help with the flasher, my P15 didn't have signals when I got it. I installed the flasher under the dash when I added signals. -
Bolts for mounting Flat 6 to Harbor Freight engine stand
Sam Buchanan replied to Cooper40's topic in P15-D24 Forum
For the benefit of those who can't stand being left out here is the post: 😁 -
LED running lights and halogen headlights for my '47 Super De Luxe
Sam Buchanan replied to 46Chris's topic in P15-D24 Forum
To test the brake switch you can carefully put a jumper across the terminals on the switch (don't touch the jumper to ground), if the brake lights come on you have found your problem. -
LED running lights and halogen headlights for my '47 Super De Luxe
Sam Buchanan replied to 46Chris's topic in P15-D24 Forum
You need to check the brake switch, all associated wiring from headlight switch downstream, the sockets themselves and most important integrity of all ground connections. Forget the flasher until brake and tail lights are good. -
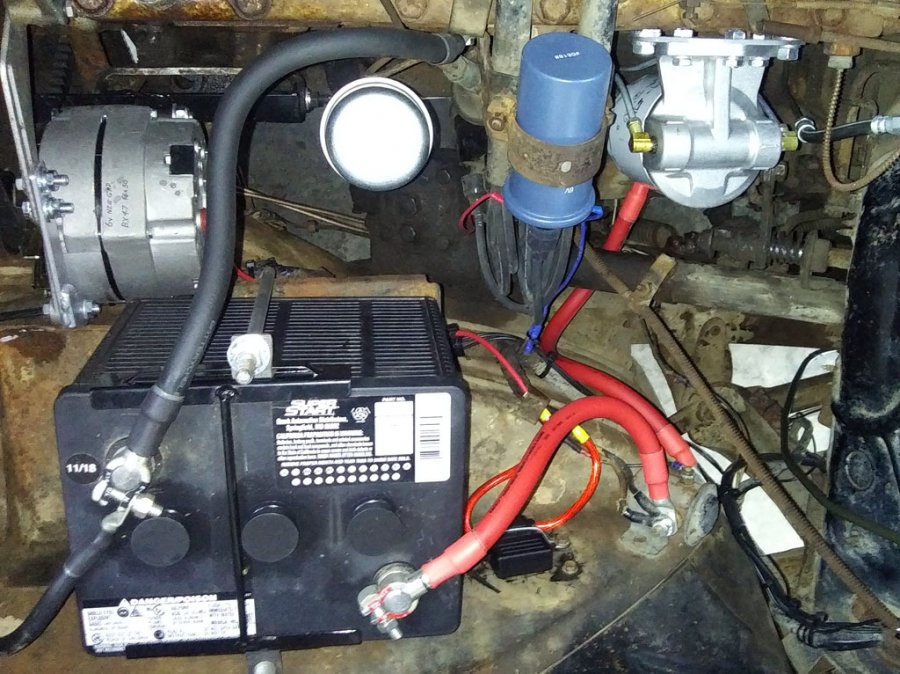
The most reliable and long-term trouble-free solution to your charging problem is here: https://www.ebay.com/str/HowardEnt?_trksid=p2047675.l2563 The installation in my '48 Plymouth is below. This eliminates the old genny and regulator and replaces it with a single-wire alternator.
-
No telling how many motorcycles and VWs I tuned up without a vacuum gauge or dwell meter, probably helped me educate my ears. A few days ago I got out the vacuum gauge for the P15 after the recent discussion, turns out my "earcrometer" tuning was in agreement with the gauge.
-
I'm more concerned about the pounded out bearings..................
-
The quick and dirty way to set idle mixture is to first set idle speed for a slow, reliable idle. Then VERY slowly turn the mixture screw clockwise which makes the mixture more lean. When the idle speed begins to slow down (this can be a very subtle difference) make note of the position of the slot in the screw. Now slowly turn the screw counterclockwise to richen the mixture, once again listening for idle speed to come back up and them begin decaying. Note the position of the screw. Now turn the screw back clockwise until you achieve the smoothest idle, will probably be about midpoint between the two positions you noted. This adjustment needs to be done slowly while listening to very subtle changes in idle speed. Repeat the process until you are sure you have the mixture screw set for smoothest idle. Using a vacuum gauge can be more accurate but a sensitive ear can often get mixture set close to where max vacuum occurs, at least close enough for satisfactory operation. You may need to reset idle speed after getting a good mixture setting. I find mixture needs to be adjusted in spring and fall when ambient temps change from summer/winter. Mixture is dependent on the density of air which changes with temperature. Your modern car does this automatically, we get to pamper our old cars with periodic attention to detail to keep them happy.
-
Some of us are old enough that we just have to stand there and let it dribble.........we are accustomed to that........... 😛


