


nkeiser
-
Posts
75 -
Joined
-
Last visited
Content Type
Links Directory
Profiles
Articles
Forums
Downloads
Store
Gallery
Blogs
Events
Everything posted by nkeiser
-
A833 transmission for my flathead
nkeiser replied to Tony_Urwin's topic in Mopar Flathead Truck Forum
Good point. I actually had to raise the idle a few years ago due to a carb tuning issue. I got that resolved (combination of junk stuck in the seat causing flooding and idle mixture) and never readjusted down. It runs great, but the higher idle helps starting from stops. I haven't messed with tuning much the past few years since I started a new project car. I'm avoiding wiring issues on that one, so I may tinker on the Dodge this weekend. I have dual Webers from Langdon and electronic ignition. I had it purring great then ran into an issue at the Salina show a few years ago. After fixing it in the hotel parking lot, I haven't messed with it--just start it and drive. -
A833 transmission for my flathead
nkeiser replied to Tony_Urwin's topic in Mopar Flathead Truck Forum
Honestly, I really haven't paid attention or noticed any issues. Drivability was pretty rough initially when I had idle set around 500. Bumping that up to around 1000 really helped drivability. The issues were mainly around starts, but the higher idle likely helped between shifts as well. -
A833 transmission for my flathead
nkeiser replied to Tony_Urwin's topic in Mopar Flathead Truck Forum
I have an A833 out of an 80's pickup, so it has the 3.09 first gear. My rearend is a Ford 9 inch with 3.73 gears. I have no drivability issues. Starts in first great. Cruises down the highway at 65 in third. Overdrive maintains speed well, but gutless on hills or accelerating. Tires are 275x60x15. Magically, my stock speedometer is only 5 mph off after that odd combination. I was impressed that a generic replacement cable from O'Reilly's fit between the transmission and speedometer that were 30 years apart and was that close. -
Longest part was waiting for the paint to dry.
-
I ordered from Mar-K. They were the correct length, and the bolts were in the right spots for my long bed.
-
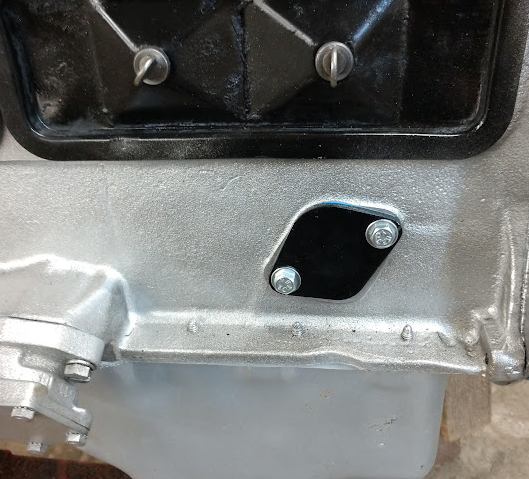
Swapping an A833 OD into a 1946 WD-15
nkeiser replied to lostviking's topic in Mopar Flathead Truck Forum
I used a brass/bronze bushing to get the throw out bearing to fit. I can't remember where or what material it was. I do remember that it was a little long, so I had to cut it to length. The info on the sleeve may have been in a blog post on this site. I think for overall shaft length and pilot bearing engagement, I didn't have to add any shims. The thickness of the adaptor plate did the trick.
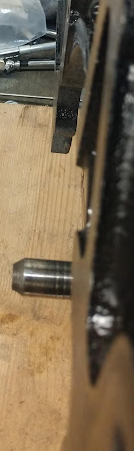
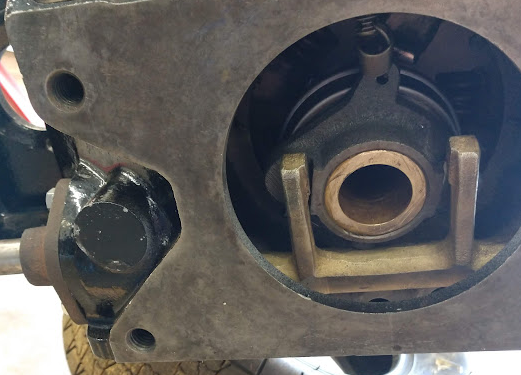
-
Swapping an A833 OD into a 1946 WD-15
nkeiser replied to lostviking's topic in Mopar Flathead Truck Forum
Here are a few views of where it lines up. I cut a little too much, but nothing horrible.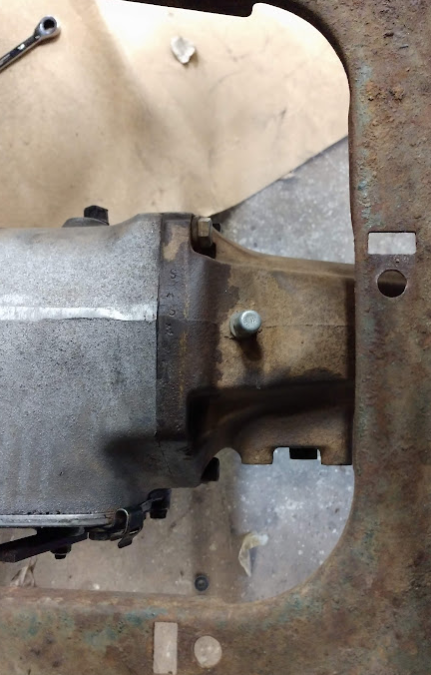
-
Swapping an A833 OD into a 1946 WD-15
nkeiser replied to lostviking's topic in Mopar Flathead Truck Forum
Forgot to add that a new generic speedometer cable from O'Reilly's fit perfect with the transmission and stock speedometer. It reads 5 mph slow. I was happy with that given the screwball drivetrain I came up with. -
Swapping an A833 OD into a 1946 WD-15
nkeiser replied to lostviking's topic in Mopar Flathead Truck Forum
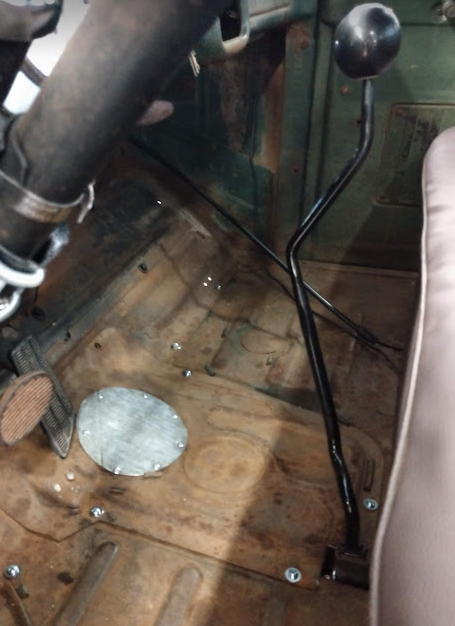
I can't remember first or second, but third is 1:1, and overdrive is around 0.73 I think. I bought after market linkage since the shifter I bought on ebay didn't come with rods. Not quite the same as I had to heat and bend a couple to fit correctly. In the middle of that I ended up with a reverse H pattern. First is up and to the right, and you work right to left across the pattern instead of left to right. Kind of an anti-theft feature. Here's a picture of my setup during mock up. A previous owner in the 60s must have pulled the original engine and transmission out of a larger truck because the flywheel was a different size, the adaptor plate from AoK required some massaging to fit the 9/16 bolts for the bell housing. Aside from that, it was a pretty simple swap and drives well. I can cruise the highway at 65 with this transmission and the Ford nine inch with 3.73 gears.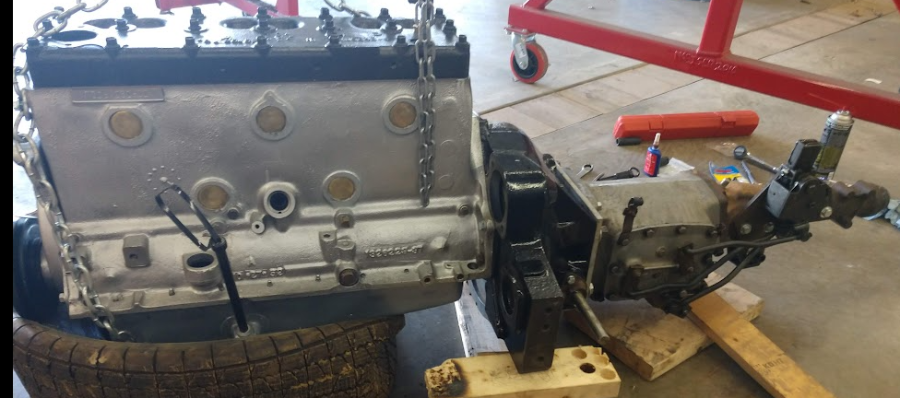
-
I was really happy with the strips I got from https://www.mar-k.com/ . I have the 3/4 ton long bed. Their kit was the correct length, number of strips, and hardware. I went with the unfinished steel option so that I could paint them myself, but they have a variety of finishes.
-
Here's the pre-modification fitment. My dad didn't have a tailgate when he drove it on the farm, so he welded on the channel iron to put a board across the back.

-
I had to do some modifications to get the narrow tailgate I found in a junkyard to fit on my wide bed.
-
Haha, I started browsing this guy's videos after watching that episode.
-
Found this video of a guy showing how to convert a Chevy 1 wire alternator to 6V positive ground. I converted mine over to 12V, but thought some might like this option in place of the generator.
-
Use an ohm meter to check resistance of the primary and secondary windings. There are lots of videos that explain which is which. The same procedure applies for both 12V and 6V. The only difference will be the resistance. I found this link that mentions what the values should be. http://www.farmallcub.com/phpBB2/viewtopic.php?t=16903 .
-
Looking for 39-47 WC-WD bed wood dimensions
nkeiser replied to 47Jim's topic in Mopar Flathead Truck Forum
Mar-K has a lot of information on their website. I used this as a reference when making my bed floor. https://mar-k.com/PDFs/Instructions/Bed_Wood_Dimensions.pdf -
Time to talk exhaust and it's gonna have to be custom
nkeiser replied to bkahler's topic in Mopar Flathead Truck Forum
Sorry for the delay. I found a couple of videos I took right after I got it installed. One is at idle. One has it revving up. -
Time to talk exhaust and it's gonna have to be custom
nkeiser replied to bkahler's topic in Mopar Flathead Truck Forum
I have Fenton style headers from Langdon. When my uncle had this in the late 80's, he added the stacks. When redoing it, I had to keep them. I kept the pipes separate but added an H pipe. I have an 18" Cherry Bomb on each pipe. I used 2" aluminized tubing and bought some premade mandrel bends to splice in where needed.
-
Most speedo cables are generic. I picked one up at O'Riley's--it's just a matter of getting the right length. The cable connected the A833 to the stock speedometer in my '53.
-
Dual single carb linkage, planning stage
nkeiser replied to lostviking's topic in Mopar Flathead Truck Forum
I used Tom Lagdon's kit for the linkage on the carbs. I used a Chevy gas pedal they used in the 80 on vans and trucks I think. O'Reilly's had a new cable the right length. -
I ordered one from Application Associates in early March and finally got it yesterday. Somebody contacted me from the company early on and said they had a cross-reference to a Fleetguard number. The Fleetguard never showed up, so I don't know if it was a match or not.
-
I have Statefarm and was able to add mine and get their "antique" rate. As far as towing coverage, that may depend on your state--the insurance of the tower should cover the trailer and contents. The towee vehicle should be covered by it's own insurance.
-
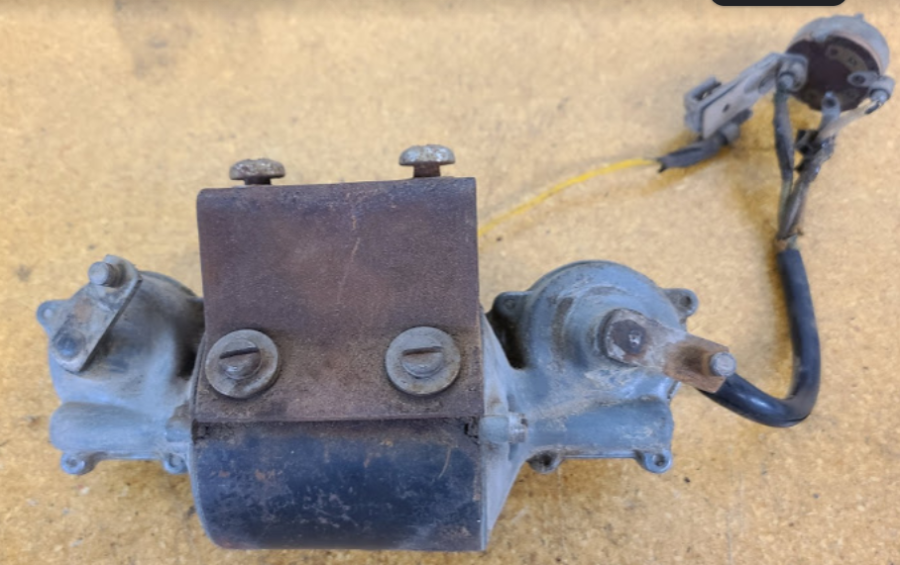
Thanks. That's a different motor setup, but it shows the orientation of the pivot arms facing opposite directions from each other. Those on the motor face forwards, and the ones on the blades face backwards.
-
My lack of pictures during disassembly five years ago is biting me again. My '53 B4C has a single wiper motor in the center that runs both arms. Do the pivot arms on the motor point to the front or back of the vehicle? The picture in the manual doesn't clarify much in this regard. I've tried both directions and and seemingly every combination of left, right, up, down on the linkage arms and can't seem to find the happy spot. I've tore apart and cleaned up the inside and replaced the wiring since this picture.
-
Mine were stuck as well and wouldn't budge no matter how much I beat on them. I finally removed the axle and used a 12 ton hydraulic shop press to get them out.
