


Vin's 49 Plymouth
-
Posts
179 -
Joined
-
Last visited
-
Days Won
1
Everything posted by Vin's 49 Plymouth
-
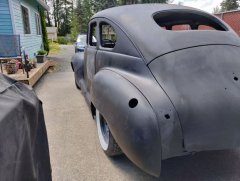
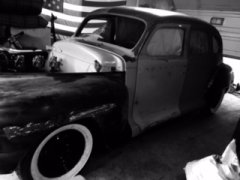
From the album: 49 P15C off frame restomod
-
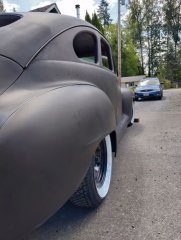
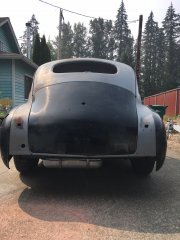
From the album: 49 P15C off frame restomod
-
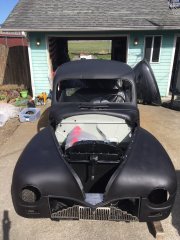
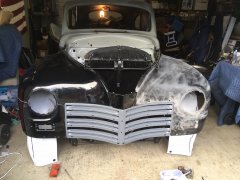
From the album: 49 P15C off frame restomod
-
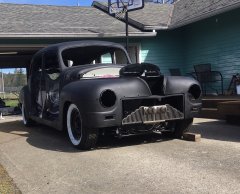
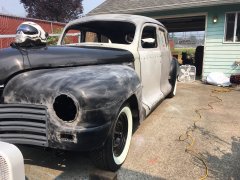
From the album: 49 P15C off frame restomod
-

My First Car -- P15 1947 Plymouth Deluxe
Vin's 49 Plymouth replied to NickPickToo's topic in P15-D24 Forum
Nick, I did the same as you. Look at my photos in my profile. A word of advice, don't rush. You will regret it later. The floors took me three or four months and just weekends. I'm at the body work stage after putting the body back on the frame, watch Eastwood videos if you don't know about fillers. These cars have a ton of curves, so they show everything. Keep the updated photos coming. -
The Lowered Stance Picture and Build Thread
Vin's 49 Plymouth replied to 55 Fargo's topic in P15-D24 Forum
Hi Everyone, Here is my work in progress and another I found that I like the stance.

-
From the album: 49 P15C off frame restomod
-
From the album: 49 P15C off frame restomod
-
From the album: 49 P15C off frame restomod
-

From the album: 49 P15C off frame restomod
-
From the album: 49 P15C off frame restomod
-
Good Idea, This is one reason why I chose Evans Coolant. The perfect time to switch is during a restoration.
-
Can you take a photo of the original or are you missing them completely? I restored mine and took a few photos, but mine was totaled in the fifties and different parts were added. Like an axle from a 47 Plymouth truck and only one body mount in the trunk above the rear axle.


-
If you would like to drill any hard metal cobalt bits at slow rpm with some lube. I teach my students this after drilling out screws when I was in the navy on P-3 Orions. And studs are the original fasteners. Mine looked like they were on the titanic, they had fused together.
-
Beautiful photo, my great grandfather started the first Montana state fish hatchery. Their lake was just north Kalispell and fed into flathead lake. Here is a photo of my grandfather in the hatchery truck in the late 1920's.

-
If you are going to recover your seat in the original wool as I did, you will need a pattern. The top stitches from the 40's are a bit tricky to learn. also the arm rests in back are very important to keep.
-
This looks like the poor dodge had been sitting in the weather for a long time. Time for the Navy/ Marine Corps corrosion control manual! My experience with these metals tells me that heat is not going to do much, other than change the hardness. So I recommend (for the broken plug) easy-out and let it crumble so you can dig it out with a scribe. The rest of the motor use an impact socket with a breaker bar (very very slowly) so you can feel the threads and bolt twist. I learned my lesson with my P15, that being patient is important, but I got too excited to get the damn thing apart.

-
We live very close, & my restoration project is 3/4 done. If you want to stop in and check out my project, it's in Granite falls. So you can get a grasp on what your in for, also check out my photos on my profile. I'm a weekend only guy, with a family the project sometimes takes a backseat. I will be there this Sunday, it is at my brothers house. I live in a condo in Kirkland. Welcome to the club! Vince
-
d42 dash paint 51 coronet d42 dash refinishing?
Vin's 49 Plymouth replied to cadillackid1955's topic in P15-D24 Forum
I was looking in my P15 maintenance book and found a section on trim codes. If you still have the original tags under the seat like I did and look at the build sheet, the book tells you the color of the trim package. One thing I noticed about the photo of your door trim, is that the color is distorted because of spider cracks in the finish. -
1949 plymouth chassis 1949 Plymouth super deluxe 4 doors
Vin's 49 Plymouth replied to Hutch Gahin's topic in P15-D24 Forum
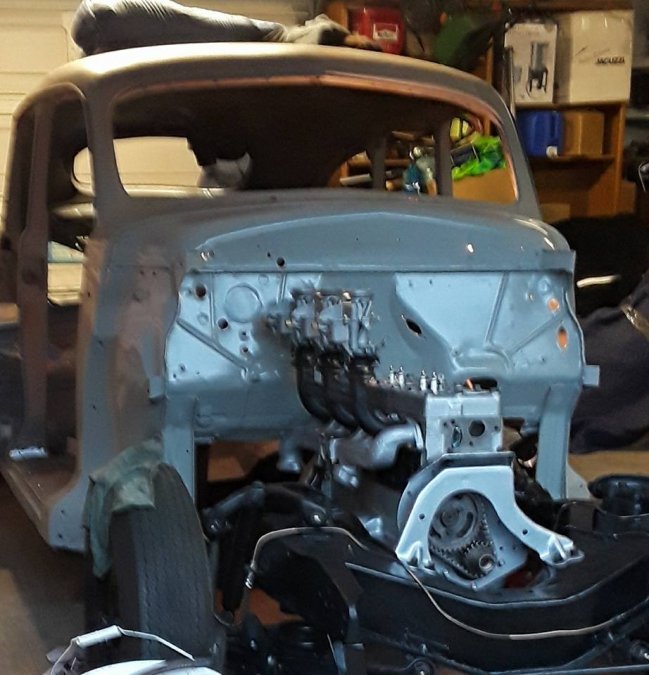
I had taken the body off the rotisserie in November or so. Here is another view from the side. Triple carbs and painted fire wall matching the 1948 Airwing grey.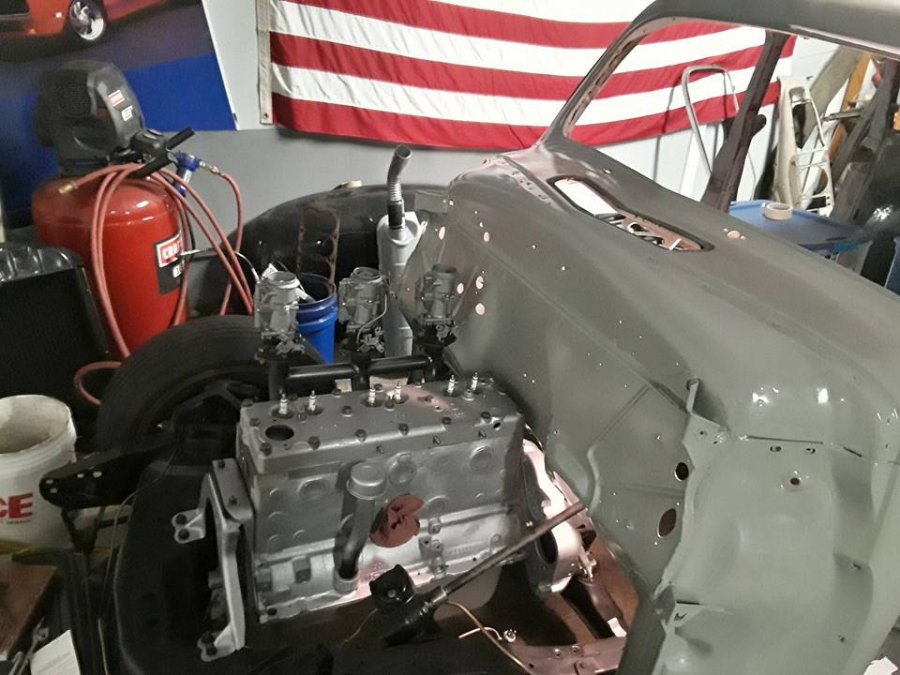
-
1949 plymouth chassis 1949 Plymouth super deluxe 4 doors
Vin's 49 Plymouth replied to Hutch Gahin's topic in P15-D24 Forum
I do have a photo from the front after sand blasting. And my resent photo I will include as well.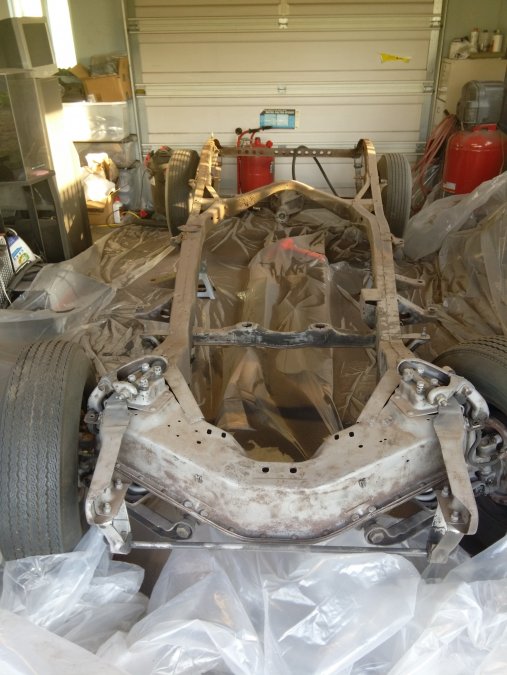
-
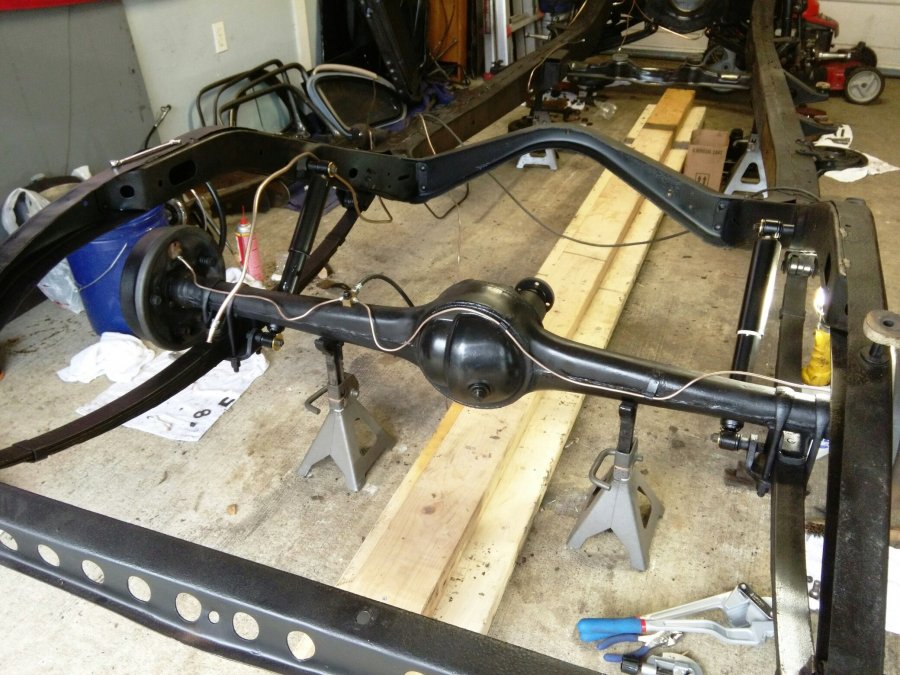
1949 plymouth chassis 1949 Plymouth super deluxe 4 doors
Vin's 49 Plymouth replied to Hutch Gahin's topic in P15-D24 Forum
I have a 49 1st series and completely restored the frame. I will include some photos.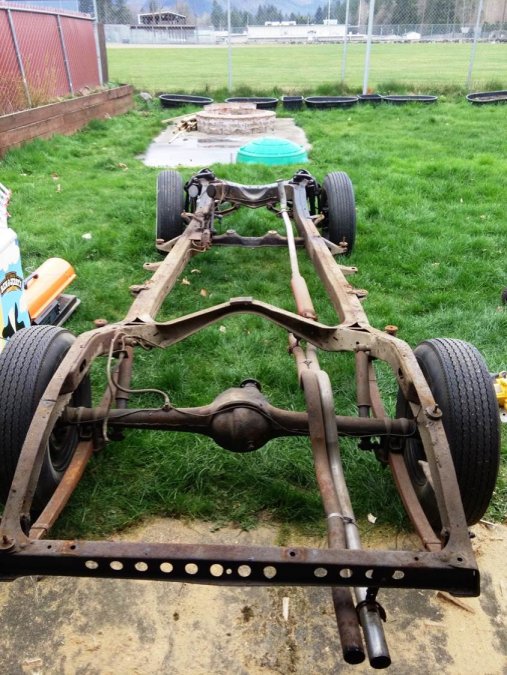

-
Bronze bushing/ spacer for flywheel bolts, Help!
Vin's 49 Plymouth replied to Vin's 49 Plymouth's topic in P15-D24 Forum
Thanks D' That is very generous of you! I work a technical college and one of the faculty has an extra one as well. When I get it finished we will definitely have to drive across the border and meet up.
-
Bronze bushing/ spacer for flywheel bolts, Help!
Vin's 49 Plymouth replied to Vin's 49 Plymouth's topic in P15-D24 Forum
Well this weekend I got the engine, flywheel, clutch, pressure plate and bell housing installed. But as you can see from the photo the step in the flywheel is too far away from the bolt heads to do its job. Any thoughts?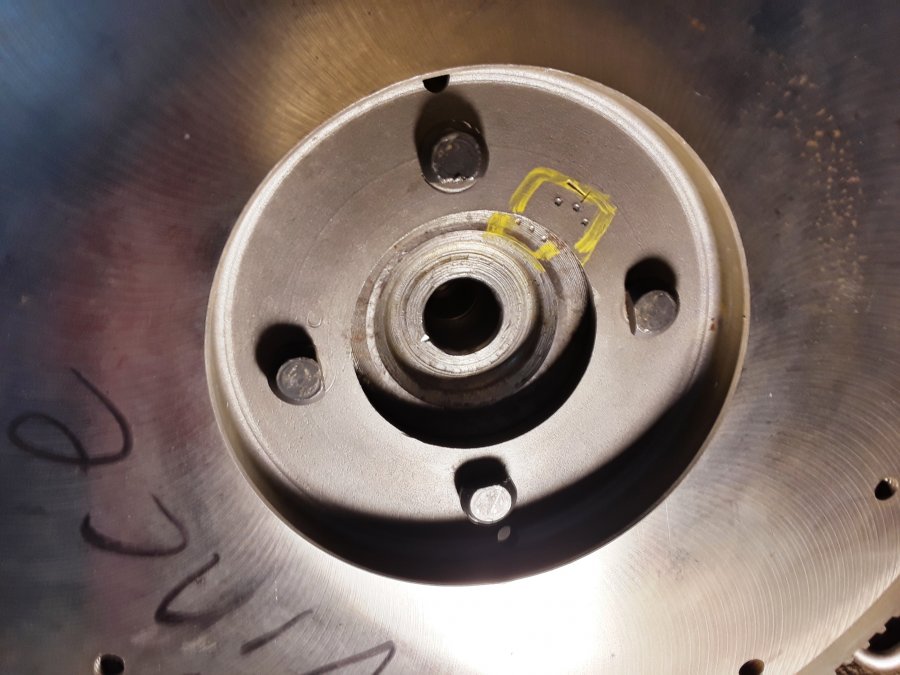
-
Bronze bushing/ spacer for flywheel bolts, Help!
Vin's 49 Plymouth replied to Vin's 49 Plymouth's topic in P15-D24 Forum
Thank you both, I think what may have happened is that someone put the bolts in backwards and made a disc to fit inside the bolt pattern? I remember the nuts being on the engine side, not the transmission side. So i guess I will be putting the motor back on the stand and removing the rear main and oil pan before installing the flywheel?

