splat1955
-
Posts
371 -
Joined
-
Last visited
Content Type
Links Directory
Profiles
Articles
Forums
Downloads
Store
Gallery
Blogs
Events
Classifieds
Everything posted by splat1955
-
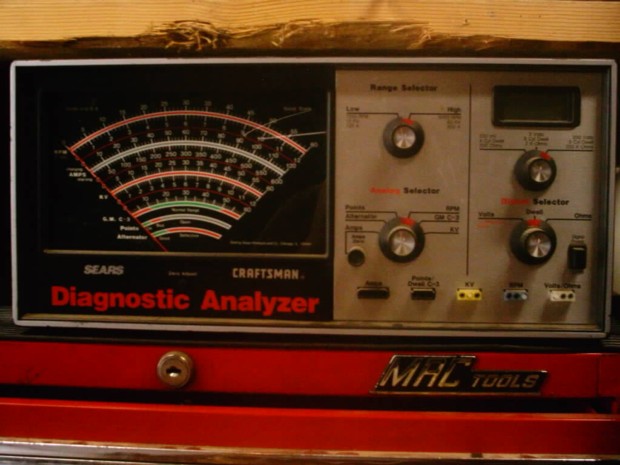
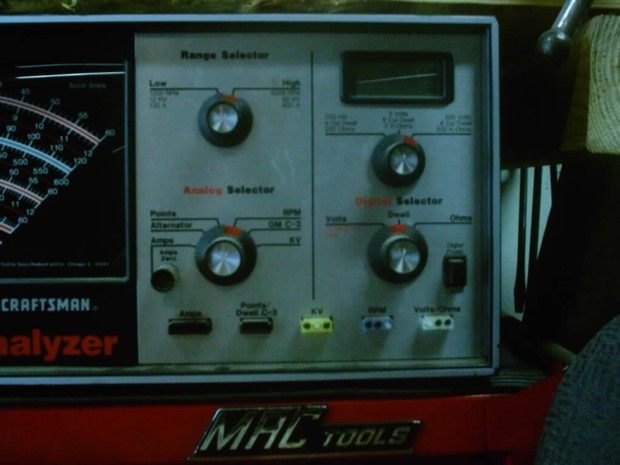
Hey Guys, Just wondering if this looks familiar to anyone. Anybody have one of these and might still have a manual or know anyone that might? The front say's Sears Craftsman Diagnostic Analyzer. Face plate says " sears, roebuck & co. " The fact that they use Roebuck in the name and a comma after sears should indicate that it is probably '70s era....not much later if at all. I could not find anything on the body that specifically stated " Model #". There is just a tag on the back with two lines, the first line is " A 85 ", the second line is " 161.2104500 " Nothing on the gauge face or control panel says anything about 6 Volt....but then again, nothing really says 12 Volt either. I was hoping it could be used on the 6 Volt system of my '48 Dodge..but I know it works on a 12 V system cause I've used it on my '69 Jeepster. It came with a cable for each of the plugs you can see on the control panel. Anyway, any info that anyone can give would be greatly appreciated and I could really use a copy of the manual.


-
Hey Shel.....I recently put in the same mirror as you just installed. Big difference.....I don't feel like I'm " Trippin " anymore when I look in it. It's not the Guide " Day/Night " mirror that I wanted, but then, it was $10 instead of $70 for the new Guide.
-
Now you got me thinkin' Shel. About 3 years ago I got this cool tach/dwell meter....actually it does a bunch more. I bought from a guy off the bay. It is a craftsman, and it's definitely not a hand held, but rather sits on a bench. It came with a bunch of wires and hookups for the front. I've only used it twice when I had the Jeepster and it worked great...but it was 12V....I'm gonna have to go out and see if it's 6 Volt too. It's gotta be from the '70s or so. It's in like new condition and runs off a 9V battery. I didn't get the instructions with it, but it's pretty cool...I'll try to remember to take a pic of it tomorrow and post it in this thread. Just gotta go see if it'll work on Peg!
-
Hmmmm, now ya got me thinkin' Norm....Isolators! I don't need no stinkin' isolators! I guess I could run the old ones, man, it takes like no time to pull it apart and put the new ones in when they get here. Takes more time jacking & setting the car than it does to get the springs out anyway. Gonna have to think this one out this evening.
-
Hey...I like that idea, I've had to remove a few myself over the years...and besides that feeling you get just before they snap.....is the feeling you get after the breakage knowing the worst is yet to come. I'm think I'm going to look into these as well.
-
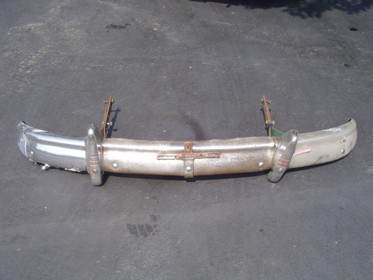
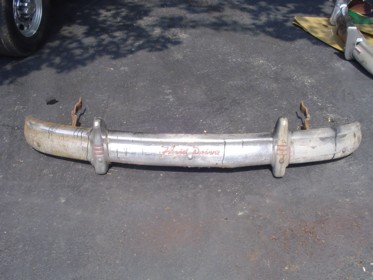
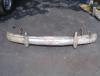
Hey Jon, These are the pics I was going to email you...I have a more detailed pic of one of the ends if you need it. Let me know what ya have....And thanks. Brian

-
I'd suggest going through the " Collectible " group and find the appropriate sub-group......
-
Hey Ed, I agree with Marty, Greg & Tim....Get it. Agreeing with Tim that having all those spares can be a plus. As far as storing it or dropping it in, well, only you can decide how quickly you want to get behind the wheel and be driving the car. But if you are only at the stage of having collected the parts for your build and haven't assembled yet, then I'd go with the idea of dropping the DeSoto motor in if it's pretty much just a " plug & play " swap...that way you can find out pretty quickly what the motor is like...if good, drive it while your building your 218...no hurry. But if you find the motor is not what you expected, you've still been building your 218, yank the motor out of the car and set it aside....nothing lost but a little time. My 2 cents worth is only worth 1/2 my wife says though.
-
Is there anywhere on this site...or any other that has a copy of the Mitchell Collision part number service I can get. I'd like to have all the actual part #s for my cars body, trim, rubber, etc. for my car. Can anyone help me out. Thanks
-
I know what you mean Norm....it's a beautiful morning here also. At the beginning of the week, when autumn settled in, it was like our weather was watching the calendar.....cause before that we'd not been below 80 degrees for months....and only a few days in the low 80s...and now, since Monday, it's dropped to the mid 40's and low 50's in the evenings...but the days are awesome. But the cold weather and snow we will be getting is not too far down the road. Man, I hope my spring isolators get here next week...gonna call on Monday, and if they cant get them to me during the week, I may just put in the old ones so I can get Peg off the jack stands and drive!
-
I'm with Normspeed, I'd like to know more about the bags....I'm familiar with them but I'd like to know which MFG and part # you used. They replaced the coils, correct? And I'd think the installation was pretty easy...but tell us more about the swap....any major issues?
-
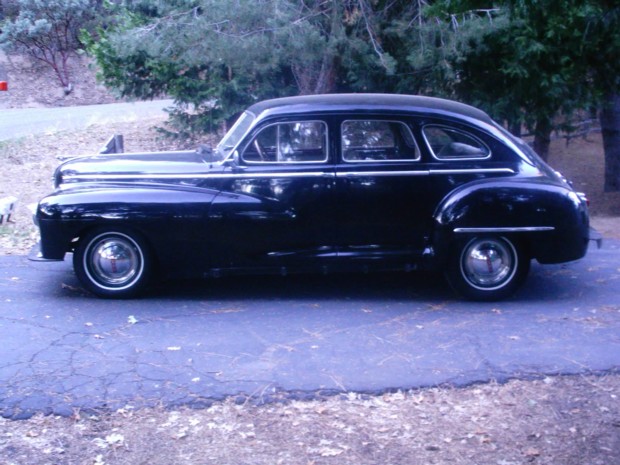
Right on Greg.....good to hear things have come back together for you since you started having the problems with the gen and leaky intake. Like your area, we are probably getting close to the time of year when I won't be able to take the Dodge out too often...which is a bummer, cause we just got it and haven't had it out much yet. But I can feel the snow on it's way.
-
Pollock Pines, Calif......between Sacramento & Lake Tahoe
-
Hey Shel, I've got nooooo problem with getting a drain plug from a car stuck in a tree....hey, maybe that mean once I install that plug in my oil pan that in some form my car could be thought of as having been put together with the environment considered.....Hey, yeah, I've done my share to put together my car with " green " materials....you know, enviromentally friendly! Stand back Toyota Prius and all other EF cars...my old '48 might be wearing one of those yellow stickers someday!
-
I've always been a big fan of " different ". I think someone had the right idea. Personally, I think I'd have chopped just a bit less in the rear...but all in all, I think it's got a look all it's own. I'd have like to seen a pic of the inside to see how much really needed to be straightened away there, but for $3500 in CA...I bet it sells...and fairly quickly. Another consideration is the fact that if the chopped top was done correctly, that can be worth the $3500 alone to a guy that hasn't got the experience or facility to do it himself. If all the mechanical is good to go, then actually $3500 is a deal, IMHO. Hey Dennis, where is Boron anyway?
-
Hey Shel....where the heck was that picture taken? Man, looks to be all kinds of cool stuff back in those sticks. As far as the trunk repair, once you get it out, I'm thinking it's the trees trunk that's going to need some repairs:D
-
Hey Jim....welcome! I'm a fairly new member myself. I've got a '48 Dodge 4 Dr. It's up on jackstands as we speak. I just cut my springs and am waiting for new spring isolators so I can re-install the springs. Before cutting your springs, make sure you know exactly how high your car sits now and how low ya want to go. Once you know how many inches you need to remove from your coils, your on your way. Don't think of " coils " as what you need to remove from your spring...but think of inches. More often then not, people talk of removing " coils and then find they have cut too much and the car sits lower than they expected. I talked to Lori at "ESPO springs and things".....you can google that name and find them. They are a wealth of knowledge and carry many of the bushings, springs, suspension parts, etc. for our cars and many others. Lori explained to me how to measure the amount of spring I wanted to remove to get my car down to where I wanted it. Remember, I got this info from her, I've cut my springs and haven't put them back in yet so I don't kow how close she is to being correct, but I think they are going to be pretty close to exactly what I wanted. One end of your spring will be flat...on mine it's the top, should be the same for yours. Flip it over and on to a flat surface so it sits on the flat side. Measure from the bottom (the flat end that is now sitting on the floor or workbench) of the spring to the highest point on the top end. That is the total length of your spring. You should already know the amount (in inches) that you want to drop your car. Lets say your springs are 13" total length and let's say you want your car to sit 3" lower for example. The amount in inches you would want to remove from your springs to get the 3" drop is exactly half of 3.....so you'd want to remove 1 1/2 inches from your springs making your springs 11 1/2 inches in total length. Now, but the tape back inside the spring and up against the side of the spring at the 13" or highest part of your spring and slowly rotate the spring until a part of a coil is at the 11 1/2 mark. Mark your spring there and do the same for the other spring. I believe my springs were 13 1/2 in total length, wanted a 3 " drop and cut them to 12". Again, I haven't installed mine yet, but I am repeating exactly what Lori from ESPO told me and they've never steered me wrong. Also, as Normspeed suggested to me, take your time and cut maybe half of what you need to cut the first time and alternate between springs. This will help with keeping the springs cool. I also soaked a rag and tied it around the coil, just below where I was cutting so any heat on that side of the cut would sink into the cold rag. Anyway, if you have any questions, about anything, you picked the perfect site to get answers to any questions you might have. Like I said above, I've only been here a couple months or less and I've learned a ton from this great group of guys & gals. Updated with a pic after springs were re-installed without isolators.

-
Ya know Norm, glad you brought this point up.....Just the other day I started doing the same thing...just started at the beginning and checking out the profiles...didn't get too far though before another chore came along that needed finishing. But going to pick up where I left off....also I'd better check out my own profile and see if there is anything there...Don't remember if I ever filled it out.
-

Door Lock Question...well, actually not the lock.
splat1955 replied to splat1955's topic in P15-D24 Forum
Hey Chester...thanks for the link. Sounds like some good stuff. I may try this stuff on a couple of applications and if my JB doesn't hold up, I'll give this stuff a try next. -
Hey Ed, Thank again for the " heads up " on the bumpers. Here is a link to the JCW sending link that I got recently for my '48 Dodge. Mine's still got the 6V system and this one was recommended to me by a few members. http://www.jcwhitney.com/autoparts/Product/tf-Browse/s-10101/Pr-p_Product.CATENTRY_ID:2007297/p-2007297/N-111+10201+600002115/c-10101 I can't tell you how well it works cause my cars still up on jackstands, but I will say my guage didn't work at all, put the sender in and at this point, my needle is registering that I've got fuel. Hope this helps. Brian
-
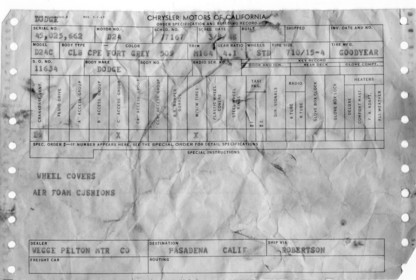
Hey Guys, after purchasing my Dodge a couple months ago I was going through all the paper work. All kinds of stuff...a very very old copy of the 29th annual edition of the manual that would have originally come with the car..maybe even the original? There was also documention from each year the car had been registered, at least as far back as 1963. Other stuff also, but in with all this stuff there are 3 of the sheets as in the picture I posted...except they are all different. At the top they say " Chrylser Motors of California " then below that it says " Order Specification and Building Record ". You will notice a serial # up in the left hand corner. The other 2 I have are consecutive #'s lower...# 45,025,661 & 45,025,660. You'll notice also that there is a dealer name in the lower left. All the dealer names are different and the dealers were in 3 different cities. 2 are for a Club Coupes and 1 is for a 4 Dr Sedan. These are the back part of multiple sheets that had cabon paper between them. There are S.O. #s on them as well, whatever those are. The paper is really old, and they did come through some type of printer as is evident by the holes on each side of the sheet. Anyway, I thought these were interesting, but don't know if the one 4 Dr spec sheet is for my car. As of yet, I don't know what color mine was origianlly, but I did just find the vin#. I haven't had time to remove the paint from the tag in the door jamb of my car yet either. Anyway, I thought these might be worth something to someone....if they new the serial number of there cars and if these are authentic, although I've got no reason to think they are not. I've listed a link here also to pictures of all 3 spec sheets that are much clearer. How about some feedback. Anyone? http://s201.photobucket.com/albums/aa23/splat55/Chrysler%20Build%20Sheets/
-
Hey Shel....Was just on JCW ordering some mirrors. Had to call in my order cause for some reason, the " buy/info " button wouldn't take me to the page to order quantity...was just frozen on the item description page. Anyway, told the lady about the issue with the page, then told her I had a " free shipping " code. Told her I thought it expired yesterday. Anyway, she entered it, processed my order, and it took the shipping off. Cool...Thanks man. Again...you da man!
-
Hey Don and the rest, you guys have talked me into it! It's a pair of the 5" rounds....I rebooted my PC last night before bed, got online this morning and the pics are showing in the posts again. Yup...on my way to JCW right now to order.
-
Door stops inside door..what is supposed to be there?
splat1955 replied to splat1955's topic in P15-D24 Forum
Oh, okay, that explains another thing. I was able to pull the pin right out to remove the arm, but a closer inspection showed that it must have been longer cause I could tell something had been broken off of the end....probably to pull the arm out although I don't understand why someone would have pulled the arm out. But it does look as though whoever painted my car did pull everything...interior panels, door sills, etc. to paint cause the paint on the inside looks to be the same paint as the outside....which impressed me...but still doesn't explain why those arms were pulled unless the doors and everything were off the car at one time for paint. Anyway, guess I will be watching for the clips and stuff. Oh, I did find a guy with some front and rear bumpers...he was auctioning off the front bumper on the bay. I won that one and after some " back and forth " emails, he still had the complete parts car with a rear bumper...not in great shape, but for $20, it's a start. Anyway, I've emailed him about the Snubber arm in the doors to see if he's got those. Hopefully they'll still have the parts on them. Glad ya didn't have to pull the panel on the 51 to get those pics Shel...I didn't want anyone to go through all that. But man, with all the pics you've sent me of parts the last couple of months, you should start a folder just of pics...you could almost start your own manual of stuff that isn't in the printed manual we have! Oh, also, you just reminded me, I've gotta go out and charge my cordless dremel....so I can take it with me to the wrecking yard today if it doesn't rain. Thanks again Shel. -
Door stops inside door..what is supposed to be there?
splat1955 replied to splat1955's topic in P15-D24 Forum
Hey Thanks Don...but dodgepu is right, I was trying to get pics of the other end of that arm. Shel supplied some great pics of what I need to do. And Dodgepu, sorry, I didn't have your first name....Thanks again guys....