


MarcDeSoto
-
Posts
1,860 -
Joined
-
Last visited
-
Days Won
10
Everything posted by MarcDeSoto
-
Of course, the upper control arm rubber bumper takes a lot of abuse due to the nature of its job. I think you are OK, as long as you are not feeling any roughness in the ride.
-
hey 46DeSoto, I have a 48 DeSoto I'm restoring. Maybe you read my thread on rebuilding my front suspension. That slant 6 engine is beautiful and brings back a lot of memories I have of the 70s and 80s when I owned a few of those. They were dirt cheap then and easy cars to work on! I think my favorite was a 1973 Dodge Dart sedan I had. Part of the reason it was my favorite was it was free from a guy that had bought it for his daughter. It was the first year for electronic ignition and it had my first disc brakes on the front axle. I loved its Smurf blue color and it had those cool fender top turn signal lights! Turns out a midnight bandit liked 'em too. Some guy ripped off my engine wiring harness and turn signal lights one night. Had to go to the junk yard and get a wiring harness out of a Plymouth for about $8, but all the Mopar were missing the fender top lights. Mopar cars are so easy to work on, it took me only a few minutes to install the new engine wiring harness. Luckily, it plugs into the cowl! Keep in touch since were both restoring an S-11 DeSoto. Marc.
-
Is your Plymouth a club coupe or a business coupe? If you don't know the difference, a club coupe has a back seat, but the business coupe doesn't have one, just some small storage space and a shorter cab.
-
Excellent advice from Joe there! Also since youre a newbie, I always recommend educating yourself about basic auto mechanics. You don't have to go out and buy a boring auto mechanics textbook. Just go to MyMopar.com where they have the booklets and filmstrips hosted by that gravel voiced brother of the Pillsbury Doughboy, Master Tech, that Chrysler put out starting in 1947 to educate dealer mechanics. For example: http://www.mymopar.com/index.php?pid=388
-
Did you replace your brake lines? If not, the lines could have a tiny rust hole where air could suck in. That can mess up your fuel pump too.
-
Just got the front suspension rebuilt and buttoned up tonight. Don't believe the shop manual when it says Step 3 Align the steering knuckle support with the lower control arm and install pin. Screw on nut and torque to 110 lbs. Step 4 Install spring! Of course they don't tell you if you do step 3 before step 4, you will have to undo step 3, then do step 4, then do step 3! Got it! I guess the shop manual didn't care too much about getting the order right on assembly. Shop manuals were not written for DIY's, so you have to use common sense to avoid having to do the work twice.
-
And that's what I just did. I just unscrewed the pin and installed a 4th O ring. I think it's going to work fine now. Thanks to our man in Oz, Andy!
-
Well, I decided to go with the Andy's suggestion. O rings. I tried the tip of screwing the pin in to hold the seal, but that's a no starter because the pin takes up space needed for the steering knuckle. C clamp didn't work because it's in the way. So, I took the tip of buying some skinny 0 rings. They are 1/8" thick and I used three. The original seal is 5/8" thick, but some of that 5/8" is just covering the bosses. I think the 0 rings might work, so I'll try it. It was easy to install the steering knuckle with the O rings. I put two on the upper control arm boss, and one on the bushing. I'm talking here about the right side of the knuckle. On the left side of the knuckle, I put the regular seal. It was fairly easy to slide in, in fact, I think I might have been able to put in four O rings?
-
I'm doing this job now too if you saw my thread. One part of this job I found to be impossible to do. That is installing the upper outer rubber seals and eccentric bushing into the steering knuckle. I tried to make a crude copy of the Chrysler tool, but it's worthless. I decided to put my steering knuckle on with just one seal. Since the car will need a major alignment when I get it running, I'll just tell the alignment shop to do it. Hopefully they can!
-

The first year of the "Spitfire" head
MarcDeSoto replied to Stewart Woollard's topic in P15-D24 Forum
I found a pic of a 1956 Chrysler engine and can just make out the name Spitfire on one of the valve covers. So Spitfire V-8s did continue the name on the lower priced Chryslers. For how long, I don't know.
-
The first year of the "Spitfire" head
MarcDeSoto replied to Stewart Woollard's topic in P15-D24 Forum
I did some more research on how long did Chrysler use the Spitfire name on its engines. I learned that they used the Spitfire six all the way to 1954, which was the last year that Chrysler offered a six cylinder flat head on its lower priced cars. In 1955, Chrysler only offered V-8s, and continued the name Spitfire V-8 on it Windsor model cars. The bigger New Yorkers used the name Firepower V-8s on its engines. I'm not enough of an expert on these early V-8s to know if Windsor actually put Spitfire on the engine, or just used the name in its literature.
-
The first year of the "Spitfire" head
MarcDeSoto replied to Stewart Woollard's topic in P15-D24 Forum
here is some evidence of my research. 1940 Chrysler engine doesn't have the Spitfire name, where as the 1941 engine does. The proper color of Chrysler engines is silver. The last example is painted incorrectly in red.


-
The first year of the "Spitfire" head
MarcDeSoto replied to Stewart Woollard's topic in P15-D24 Forum
From searching pictures of Chrysler engines on the web, I'm pretty confident that 1941 Chrysler cars were the first production cars to use the Spitfire name on their heads. It was somewhat common then for some car manufacturers to use WWII popular names on their cars. General Motors used WWII names also. It's possible that the Chrysler show car, the Thunderbolt, made in 40-41 may have been the very first car to use of the name Spitfire on its engine. My first car was a 1950 Chrysler Windsor, and I know it had a Spitfire six engine. What I don't know it how long did Chrysler continue to use that name. 1950 may have been the last year of it. I know they didn't use it on their new hemi V-8's that came out in 1951. -
The first year of the "Spitfire" head
MarcDeSoto replied to Stewart Woollard's topic in P15-D24 Forum
I have seen the Spitfire name on 41-42 Chryslers. I think the first use of that head was in 1941. Makes sense since the British were fighting the Nazi invasion with Spitfire fighters. -
1949 p 1 knuckle lower bushing and king pins
MarcDeSoto replied to 1949 p17's topic in P15-D24 Forum
Andy Bernbaum has them. https://www.oldmoparts.com/parts-front-axle.aspx -
That would be a two man job would it not? One to hold the wedge tools and one to hold the steering knuckle support.
-
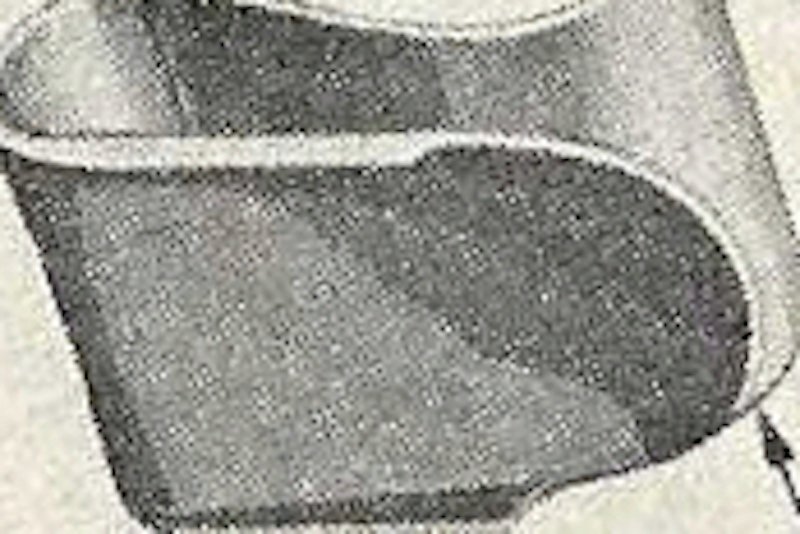
Here is the special Chrysler tool I am trying to make.
-
Below are two pics showing the main problem right now. It is virtually impossible to install the steering knuckle into the upper control arm with both rubber seals in place. I'm going to try to make the Chrysler special tool above out of sheet metal to try to accomplish this.

-
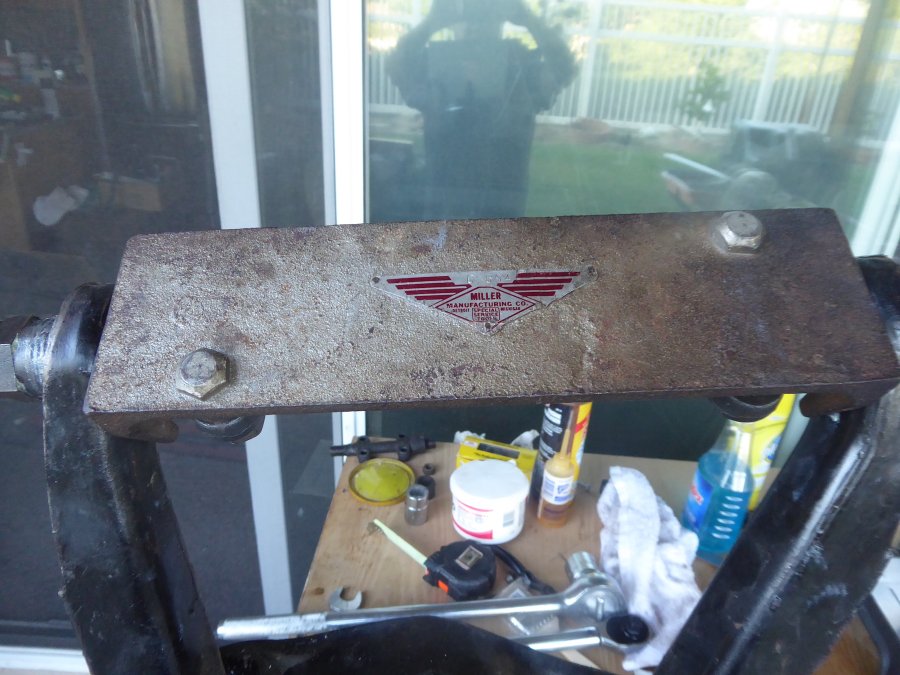
The two pics below show the Chrysler tool for installing the lower control arm pivot pin. It requires 160 ft. lbs. according to the manual. I was only able to get 130 ft. lbs. I think you need a bigger torque wrench, but those cost around $200 to $300. So I can just further tighten it with an air wrench.

-
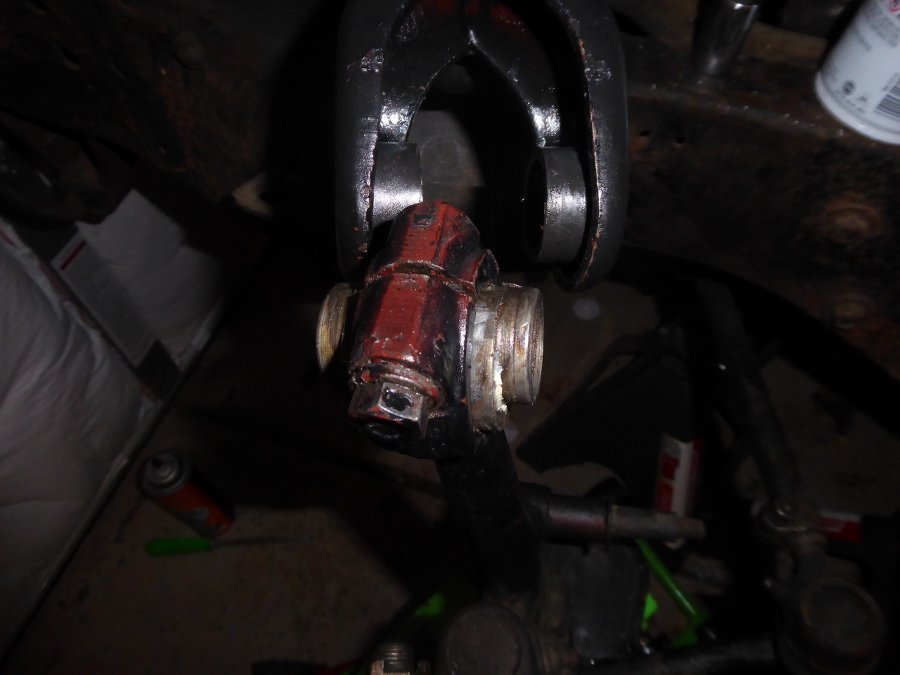
Thanks Andy, well I guess that is one way to do it without the tool and without the correct MoPar seals. Looks like your steering knuckle is a bit off-center in the yoke, but if it works, that's fine. The Mopar seals fit exactly on the lip of the eccentric bushing and the steer knuckle and the inside lip of the control arm. I went out today to HD and bought a piece of 22 ga. sheet metal because I'm thinking of trying the make a homemade copy of the special Chrysler tool 736. Also here are some pics of the Chrysler tools I used to install the pivot arm bushings.


-
Thanks Joe. Will do. I've noticed that some kits are just all circles, and the expensive $297 kits have some mounts with the long necks. I guess I should remove my mounts to see what I need?
-
I think you mean go and have some tea! This is England!
-
Yes, I'll check that. But now I have a real problem. Have you ever disassembled your upper control arm? You are supposed to put a rubber seal on BOTH sides the steering knuckle. Chrysler made a special tool (C-736) for compressing the rubber seals so you get the steering knuckle in. It kind of looks like a metal shoe horn that has been bent over. It could probably be made by a good sheet metal worker. Does anyone have one I could borrow? I have a ton of Chrysler tools, including a complete fluid drive rebuilding kit, but not C-736. I looked at the other side of my car to see how I put that side together many years ago. Looks like I got around it by just leaving one the seals off.
-
Can you replace the body mounts by just unscrewing the bolts and nuts and jacking the car body up a couple inches? I heard the open cars don't have rubber body mount because of the extra flexing of a convertible body.
-
I ran into a problem when I installed the pivot bars in the control arms. The manual said to torque the Upper control arm bushings to 120 foot pounds. I did that with much effort, but then the pivot bar would not rotate. So I had to back off the bushings until there was some play. Then I assembled the lower control arm and tried to torque the bushings to 160 ft. lbs. I could only get to 130 ft. lbs though.


