


bkahler
-
Posts
1,951 -
Joined
-
Last visited
-
Days Won
39
Content Type
Links Directory
Profiles
Articles
Forums
Downloads
Store
Gallery
Blogs
Events
Everything posted by bkahler
-
51 B3B build thread - after all these years
bkahler replied to bkahler's topic in Mopar Flathead Truck Forum
Good point about the dual carb setup. It will be interesting to see just how nice or how much of a pain the dual carb setup will end up being -
51 B3B build thread - after all these years
bkahler replied to bkahler's topic in Mopar Flathead Truck Forum
That would be a lot better than I was expecting I was thinking 9 to maybe 12. I do have the 3.73 diff so that's in my favor. -
51 B3B build thread - after all these years
bkahler replied to bkahler's topic in Mopar Flathead Truck Forum
A 1.5 gallon heel in the tank isn't to bad. I'm hoping my 1/2 ton gets a little more than your 1.5 ton truck -
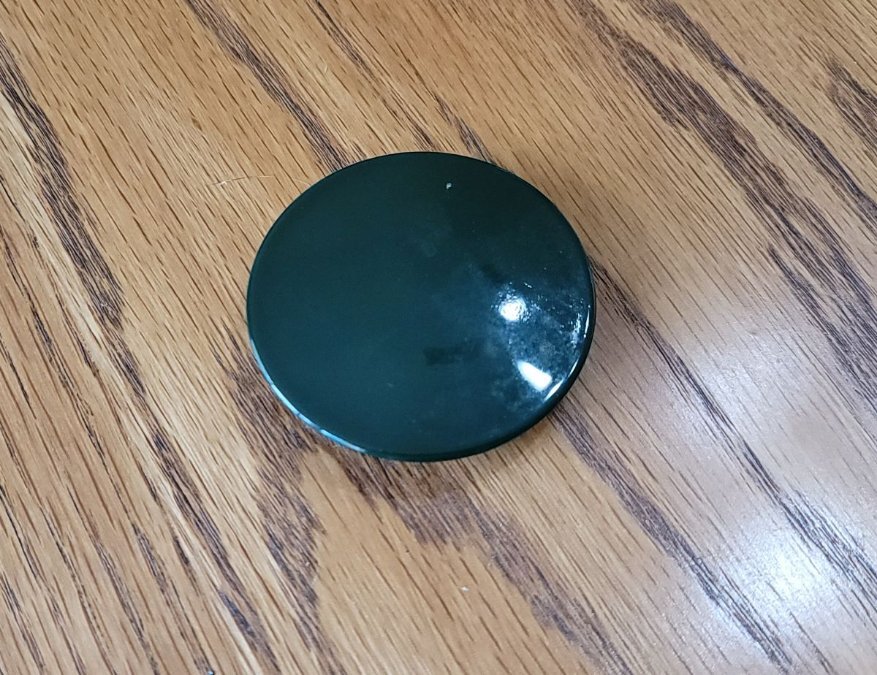
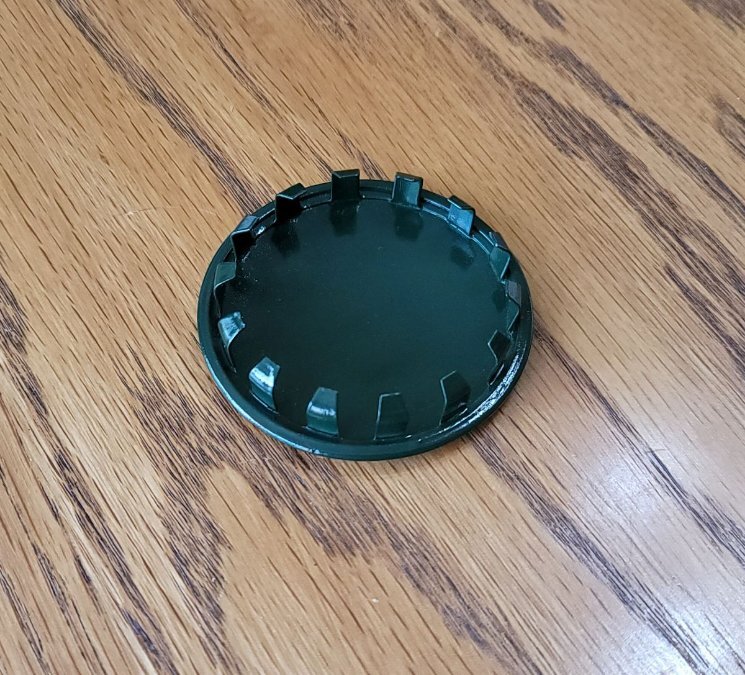
So which one of these clips would be correct for a 51 B3B ?
-
Today I was digging through the various bits and pieces I still need to install and found this hole plug in one of the boxes! After all these years I don't remember having the plug but obviously my truck had at least one when I bought it Unfortunately I only have one but hey, that's a start!
-
51 B3B build thread - after all these years
bkahler replied to bkahler's topic in Mopar Flathead Truck Forum
I was kind of surprised to find after reading the manual page that Merle provided that there is no adjustment on the fuel gauge. I had 5 gallons of gas in the tank and the gauge needle hadn't moved so I assumed that either the gauge was bad or the new sender was bad. First thing I did was disconnect the wire between the gauge and the sending unit. Next was to test the sending unit. I believe the sending unit is a 90 to 10 with 90 being empty and 10 being full. The reading with 5 gallons was 70 to 71 ohms. I poured about 1/2 gallon more into the tank and the reading changed to 69 ohms. That told me the sending unit was working (it's new so it should be good!). Next I grounded the sending unit wire to the gauge and the needle pegged at full! Ok, the gauge is good, or at least functioning. I then hooked a 0 to 100 ohm wire wound potentiometer between the gauge and ground and slowly started turning the pot until the needle moved on the gauge. At 63 ohms the needle was just starting to come off Empty. I plan on pouring more gas into the tank In order to determine just how much gas will be in the tank once the needle drops to Empty. The only thing I won't know is how much gas is in the tank before you can no longer suck anymore out. -
Merle, thanks for posting the page out of the manual. It would appear there is no adjustment of the gauge. So things either work or they don't Thanks again. Brad
-
51 B3B build thread - after all these years
bkahler replied to bkahler's topic in Mopar Flathead Truck Forum
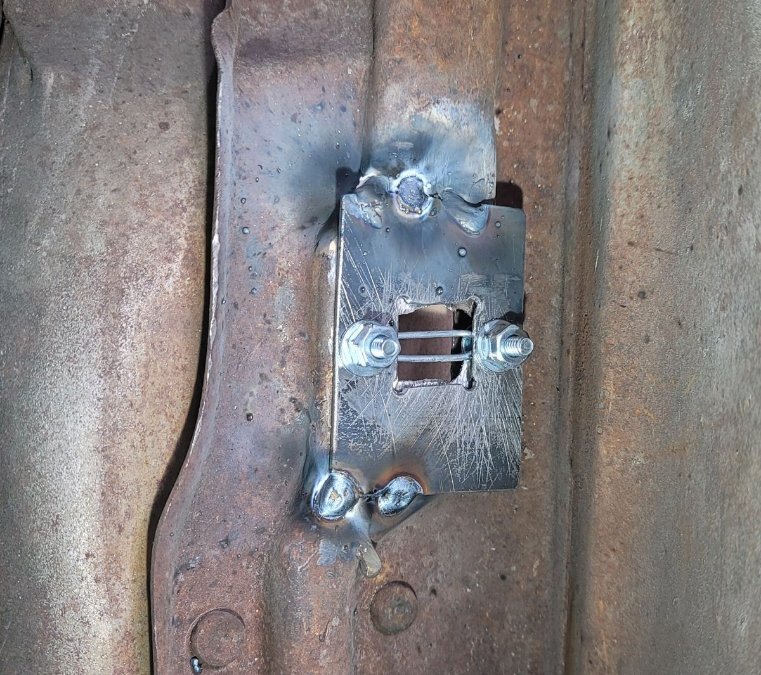
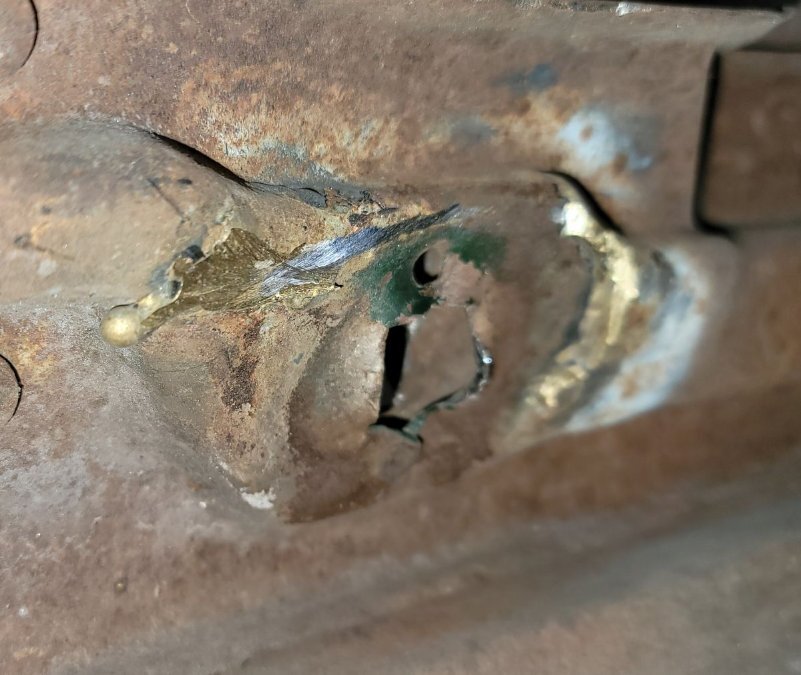
Well for what it's worth the door catch repair is done. From the inside it's not very pretty but I think it's serviceable. I debated for a few minutes as to whether or not to weld the plate in place but in the end I decided it would be stronger and make it easier to replace the catch if it ever breaks again. For the most part I think it's a good repair and should work just fine. The outside opening needs to be smoothed out some and I'll have the painter take care of that little problem. The door is heading to the painter this afternoon. Big thanks to JB for finding a source for the door catch parts, it's kind of hard to repair something if you don't have parts I now have all the parts and supplies on hand to repair the radiator and the water pump gasket. I hope to have that work completed by the end of the Memorial day weekend.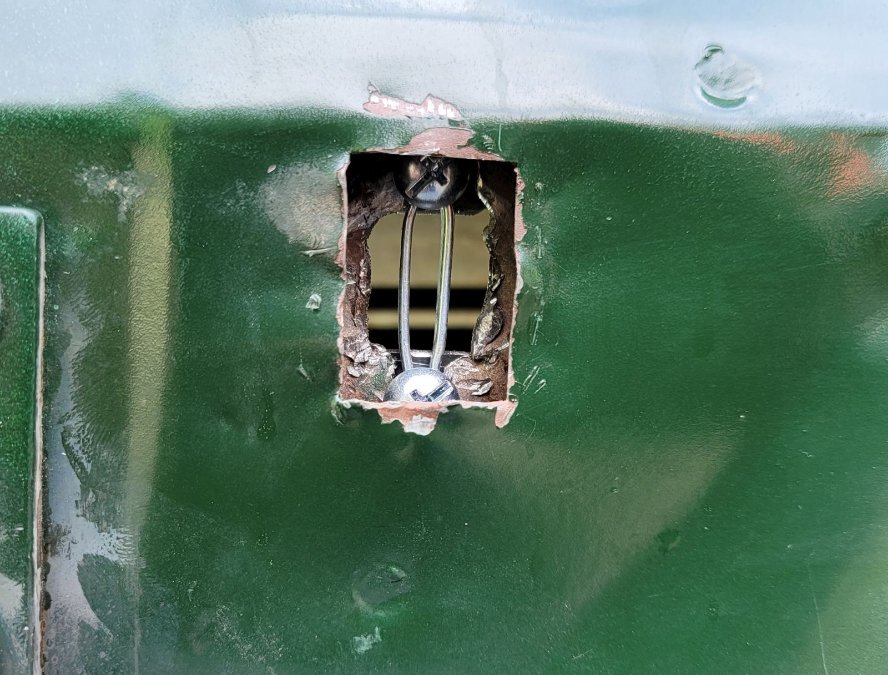
-
Merle, I realize this is somewhat of an old post but it sort of hits home for a problem I'm having. My B3 Series service manual published in 51 does not have any info on the fuel gauge. It covers the horn, lights, ignition, etc. but does not cover the fuel gauge. Does your service manual have any details on how to adjust the fuel gauge for proper readings? Thanks, Brad
-
51 B3B build thread - after all these years
bkahler replied to bkahler's topic in Mopar Flathead Truck Forum
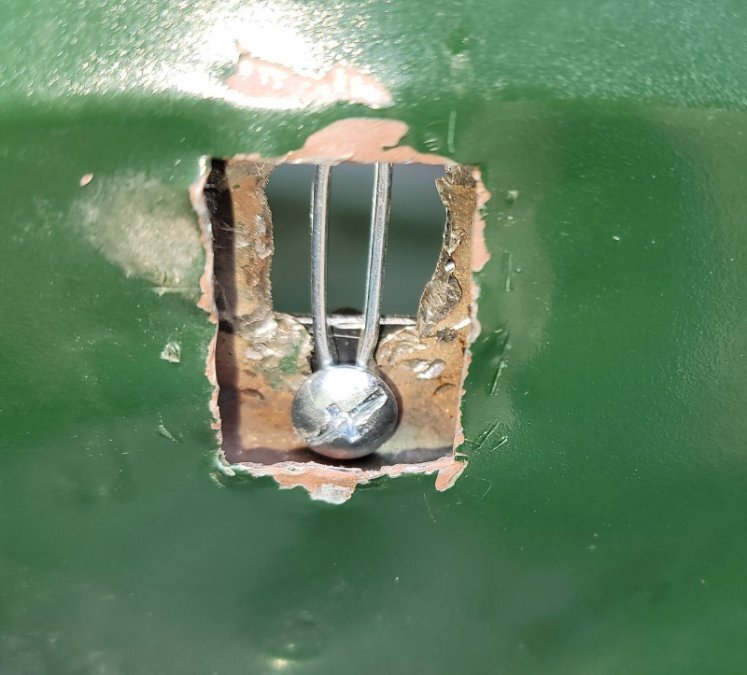
That's definitely an idea worth trying however I have a hunch that I won't be able to get a big enough washer through the rectangular opening on the outside. I'm pretty sure the opening is only 7/8" wide. However after thinking about it for a few minutes a rectangular flat plate might substitute for a washer and I believe a long narrow (7/8" wide) strip with a hole drilled in it just might work I'll report back this week. Thanks! -
51 B3B build thread - after all these years
bkahler replied to bkahler's topic in Mopar Flathead Truck Forum
JB found them at LMC Trucks. The hole spacing is slightly further apart, 1-3/8" vs 1-3/16" but as mucked up as mine was that turned out to not be a problem. -
51 B3B build thread - after all these years
bkahler replied to bkahler's topic in Mopar Flathead Truck Forum
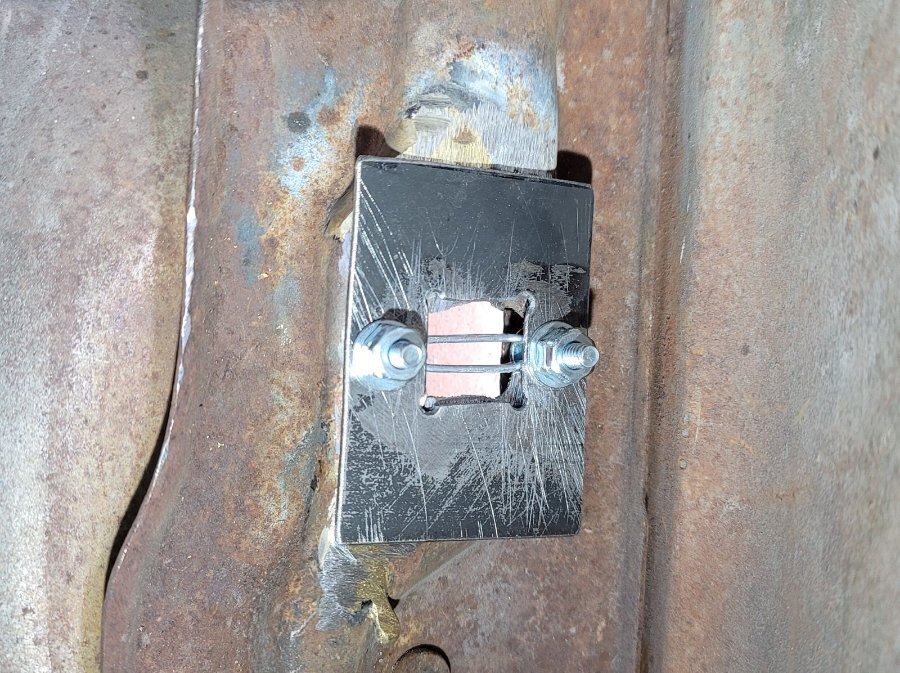
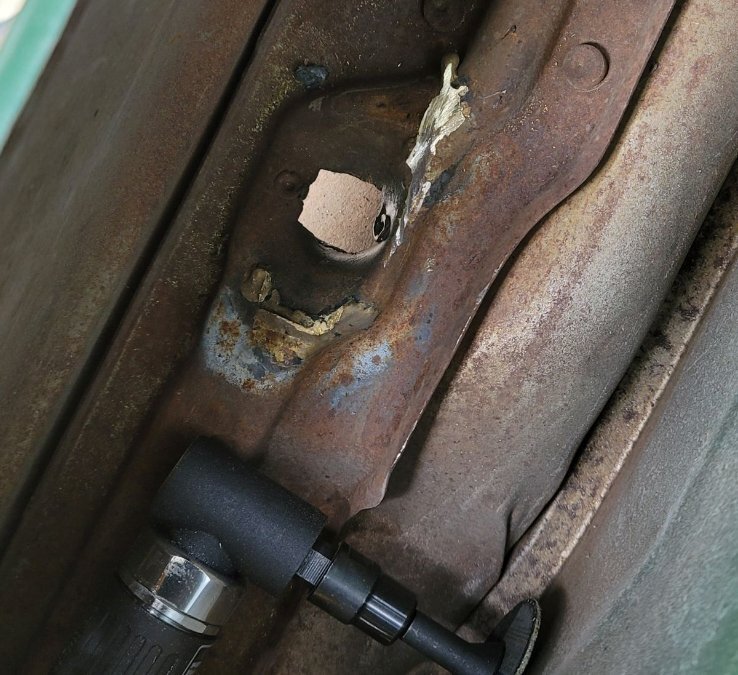
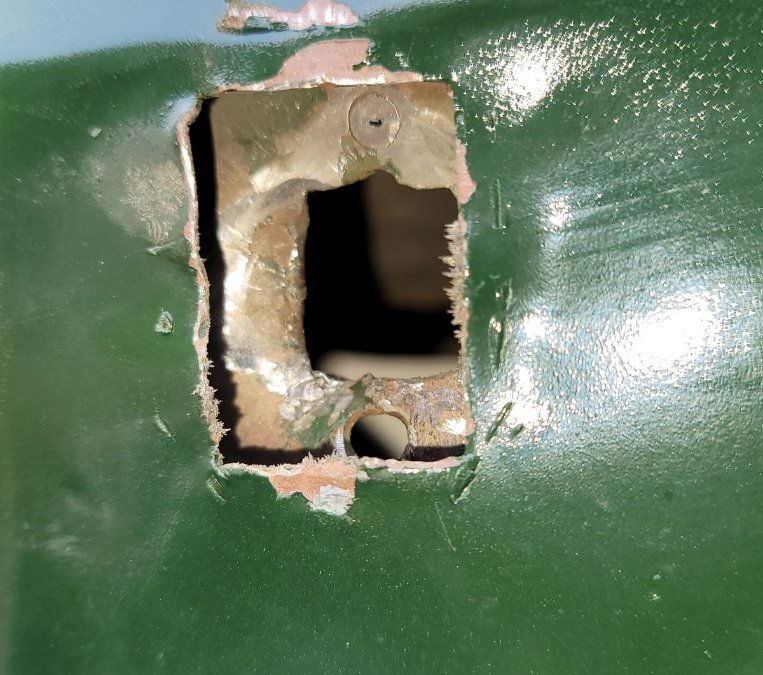
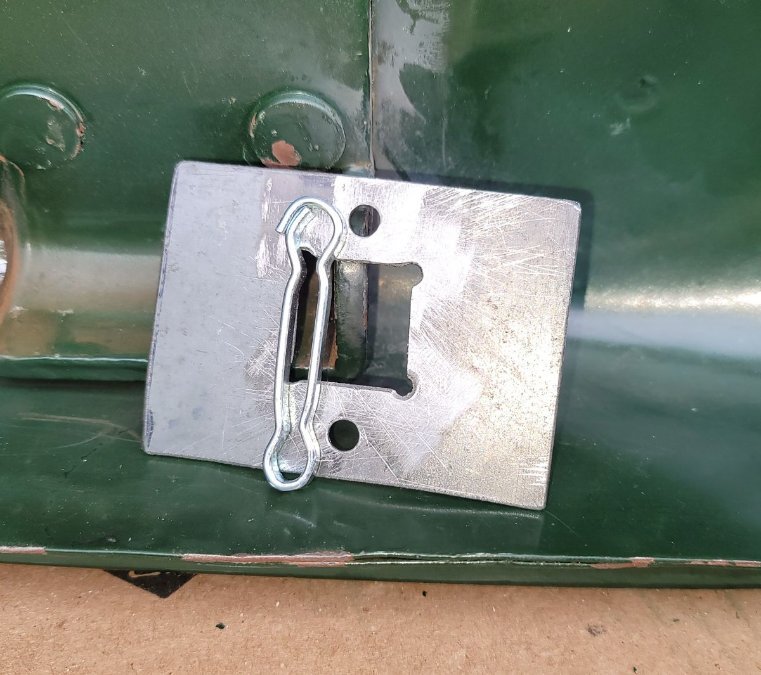
I have ordered gaskets and hose clamps from DCM Classics and I should have them early next week. After doing some research I've decided to try and solder the radiator seam myself. From what I found, using a micro torch with solder will allow me to target the small spot that is leaking. Solder and acid flux is on order as well and I'm hoping to work on the radiator next weekend. This morning I tackled the damaged driver door catch. Whoever made the "repair" was more of a butcher than a repairman. They brazed a small bracket on the inside of the door that the door catch arm passed through. It definitely worked as a door stop but it was crude at beset. From the looks of it he used a large round punch from inside the door and beat the opening until it was bulging towards the outside edge of the door. After removing the brazed in bracket I did what I could to beat things inward and used a small rotary grinder to cut out the old broken pieces. if you look close enough you can see where I've sort of reversed the direction of the bent opening. This will allow me to get the new catch piece inside the opening in the right orientation to work with the door catch arm. What I need to do now is figure out a way to flatten the opening. This will likely require some heat, a bucking bar and some help. The goal is to use the pieces in the picture below to repair the opening. The metal plate will be on the inside of the door and the catch piece will be between the outer skin and inner support frame where it belongs. I plan on using a couple #10 screws to hold the two pieces together, sandwiching the inner door brace and once everything position I'll weld the plate in place from inside the door. Stay tuned......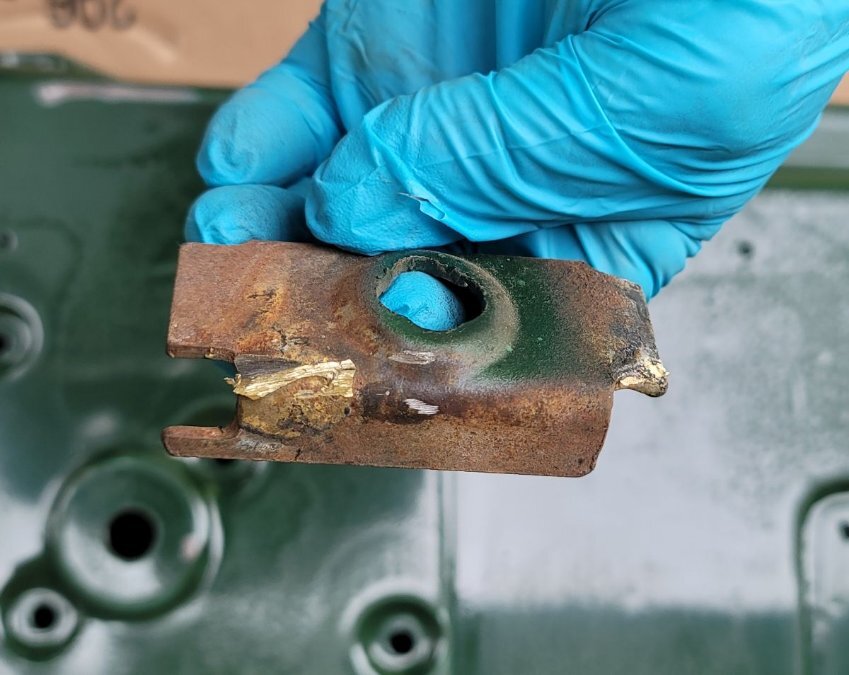

-
51 B3B build thread - after all these years
bkahler replied to bkahler's topic in Mopar Flathead Truck Forum
Well, I think it's pretty conclusive that the gasket between the water pump and the block is weeping. So it's time to drain the coolant system again and then pull the radiator and the water pump. So far the closest radiator shop I've found is about 2 hours away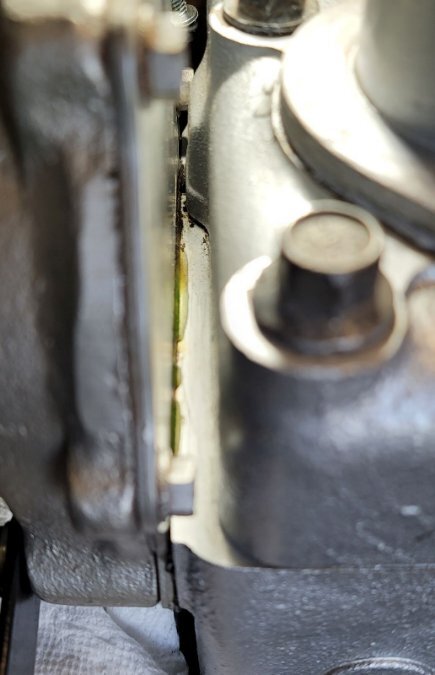
-
51 B3B build thread - after all these years
bkahler replied to bkahler's topic in Mopar Flathead Truck Forum
Well the news just keeps getting better and better..... The radiator shop that has done all of my radiator work for years is out of business Aside from this one small leak they always did great work. So now I have to try and find a shop somewhere in the region that can fix it. While checking for leaks yesterday I found one between the head and the water pump just on top of the block. I wiped it clean thinking it might have been from when I replaced the thermostat housing. Fresh coolant showed up overnight so that tells me either the head gasket is leaking or the the back side of the water pump is leaking. I'm going to have to keep wiping it down until I find find out from which direction it's coming from. I've built and installed a lot of engines and have never had this many issues with small leaks before. Starting to get frustrating!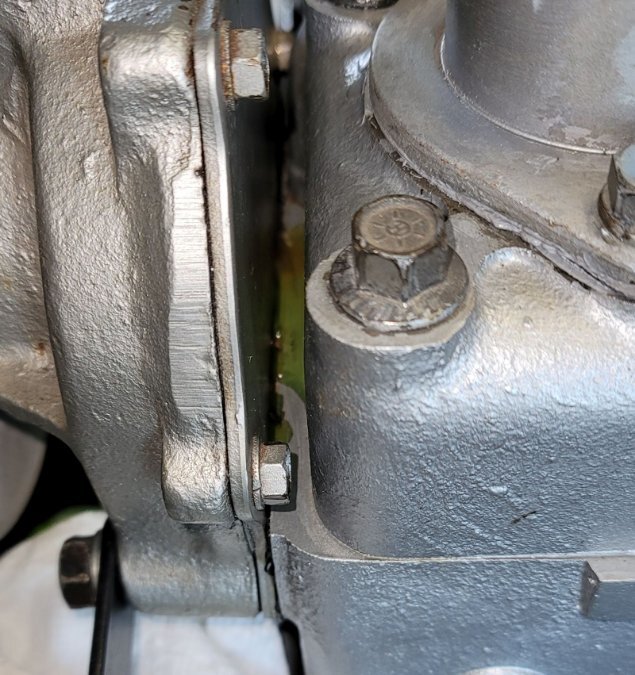
-
51 B3B build thread - after all these years
bkahler replied to bkahler's topic in Mopar Flathead Truck Forum
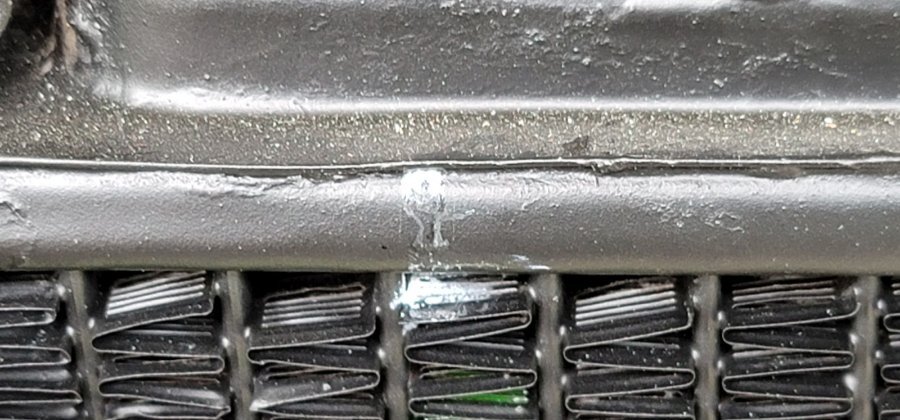
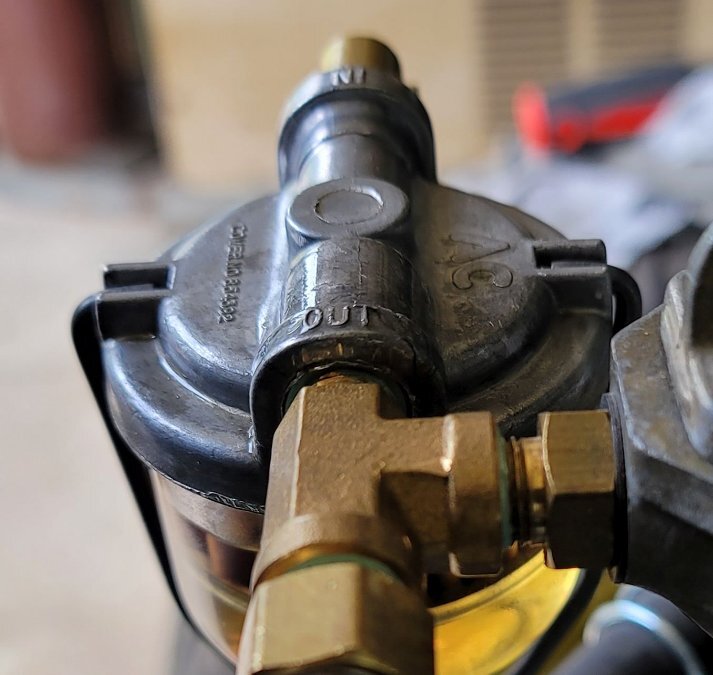
It would appear I'm going nowhere fast While poking around looking for more leaks I noticed this one on the top front of the radiator. It appears to be leaking right at the seam. I guess the next step would be to pull the radiator and take it back to the shop to be fixed. I'm not sure yet but I think I might have missed putting sealant on the threads of the bolt holding the generator pivot bracket to the water pump. I'm not 100% convinced it's not residue from previous leaks from above so I'm going to watch it for a little while to see if it progresses. As far as the fuel system leaks I'm beginning to think there is nothing wrong with the front carburetor gasket. I pulled the top housing off of the carburetor and the bowl wasn't filled entirely which tells me fuel hadn't reached the level where it would be forced through the gasket. The other reason I think that might be the case is because the top surface of the carburetor housing was damp and it wouldn't have gotten that way from fuel seeping past the gasket. I think what happened is a mist or very faint stream of fuel is/was coming off the top of the fuel filter housing. You can see in the picture below that the top of the filter housing is wet but there is no fuel around the fittings or around the edges of the filter. It's coming through the top! I'm not going to pull the radiator until I'm sure I've spotted and fixed all of the other coolant system leaks. Once I'm convinced there aren't any more leaks then the radiator can be fixed. What fun
-
51 B3B build thread - after all these years
bkahler replied to bkahler's topic in Mopar Flathead Truck Forum
What's that old adage, fix one leak and two more show up? Well that's what just happened on the fuel system today. I replaced the tube going from the front carburetor to the rear to due to the mucked up fitting. That leak is now gone. One of the two new leaks that are now present is where the top housing of the carburetor bolts to the carb body. Back when I rebuilt the carburetors I spent a lot of time getting the two mating surfaces flat using a thick piece of glass and sand paper. I'm actually surprised that it's leaking there. I'll have to pull the cover off to see what I might have done wrong. I'm wondering if that could that be a symptom of a leaking float needle? I believe the second leak is actually the result of a cheap porous filter housing casting. The leak seams to be coming out of the top of the casting and not at any seams or joints. I bought it new and I'm sure it's a cheap Chinese knockoff which means I get what I pay for I also started filling the coolant system today so tomorrow we'll know if that problem is fixed. Assuming I can get the fuel system leaks fixed and the coolant system doesn't leak the engine is 100% ready to try and start. All I need to do at that point is turn the key and stomp the starter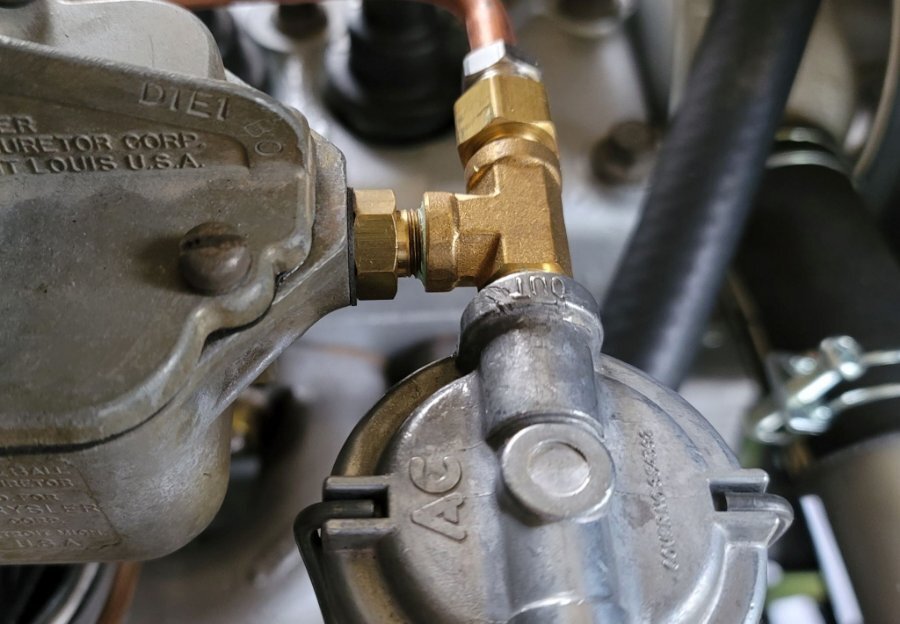
-
Sorry, didn't mean to post on this thread
-
I did see that paragraph in my shop manual on page 247 earlier today while trying to find what I was looking for. For whatever reason I was thinking the reference I had read about in a post had to do with how the mounts were assembled. This paragraph makes more sense and is something I'm going to have to remember to do. Thanks!
-
Just checked again. Nothing in the B3 Shop Manual that discusses or shows pictures of the engine mounts. I've noticed in the past that that B3 manual isn't as detailed as manuals for other years and models.
-
Quite some time ago I ran across a thread that discussed something along the lines of "follow the procedure in the service manual for tightening the rear motor mounting bolts". At the time I told myself that before I start the engine for the first time I would look in the manual to make sure I installed them correctly. So last night I looked in the manual and couldn't find any reference to the rear mounting bolts. Did I misinterpret the thread I had been reading (sorry, I can't find it again either!) or did I miss something in the service manual? Inquiring minds want to know......
-
51 B3B build thread - after all these years
bkahler replied to bkahler's topic in Mopar Flathead Truck Forum
Put the seat back cushion in last night so I could measure for lap belts. I forgot just how comfortable the seat actually was to sit in. Much better than I remember. Interestingly I found the truck seems taller than I thought it was to climb into. I took a measurement and found from the ground to the very top edge of the bottom cushion was 43". That's more than I expected.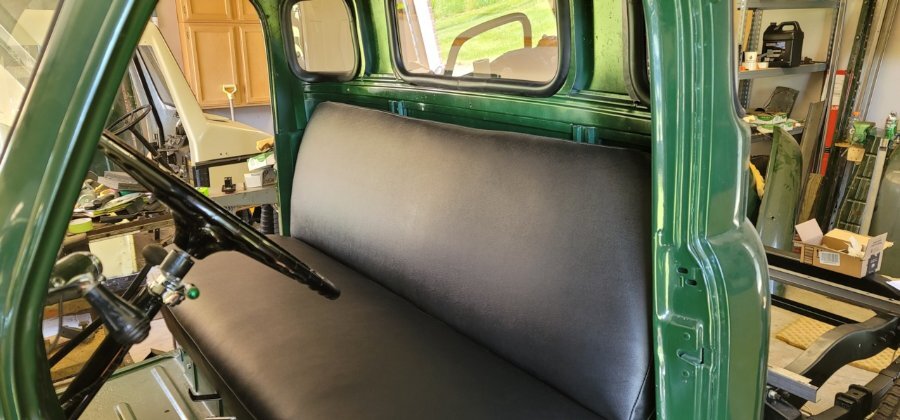

-
51 B3B build thread - after all these years
bkahler replied to bkahler's topic in Mopar Flathead Truck Forum
Practice? Who has time to practice?!! That's an interesting looking product. I'll have to keep it in mind for future projects. I talked to the painter and he suggested welding as well and would fix any damage I might cause to the currently finished product. -
51 B3B build thread - after all these years
bkahler replied to bkahler's topic in Mopar Flathead Truck Forum
"Adhesive is made to create permanent adhesion between dissimilar and non-porous materials such as plastic and fully cured painted automotive surfaces" It doesn't really seem to be suitable for metal to metal applications. I've never used the stuff so I don't know how hard it gets. Gotta admit, that was a good one ? After reading Mark's reply and looking closer at what needs to be done welding will likely be the answer. I have a TIG welder although I am nowhere near proficient at it. I also think wrapping it in wet rags and using the MIG welder to do quick spot welds might do the trick. Worst case is I can have the painter touch up any spot that I damage with heat. I'll ponder on the situation for a day or two and let y'all know what I end up doing. -
51 B3B build thread - after all these years
bkahler replied to bkahler's topic in Mopar Flathead Truck Forum
I wish it would have been lack of sealant on the bolts! I did use sealant, just used the wrong gasket.... -
51 B3B build thread - after all these years
bkahler replied to bkahler's topic in Mopar Flathead Truck Forum
I plan on working on the door this weekend. I had to ordered some small cutoff wheels and an arbor. This should be an interesting challenge

