


PatS....
-
Posts
3,585 -
Joined
-
Last visited
Content Type
Links Directory
Profiles
Articles
Forums
Downloads
Store
Gallery
Blogs
Events
Everything posted by PatS....
-
Give me your opinion on this...
PatS.... replied to Tony_Urwin's topic in Mopar Flathead Truck Forum
I like it just the way it is...always like truck beds like that. You may think about trying a wider wheel in the rear, or even mini duals. But, you know, if you would like it better narrow...do it!!! Please youself. -
These on my nephews trailer are hinged as well. It's a converted travel trailer chassis.
-
Welcome to the forum. I am a few months away from rewiring my '49 Chrysler to 12 volts and will be encountering the Fluid drive/Gyromatic 12 volt problem as well. I am replacing the 3 speed with an M6. From what I have gathered the solenoid and governor don't care about voltage, but that remains to be seen. The carb is an integral part of the shifting process in these tranny's. It won't shift at all without the special carb. You could possibly use one special carb, and one standard carb, but I'm unsure of how/if it would shift My Chrysler is a Royal and came from the factory with a regular 3 speed behind the fluid coupling, so it did not require the special carb, so you could go the 3 speed standard route to use the dual carbs. Possibly you could do like Don C. and put a 4 speed in...although Don didn't use the fluid coupling. Or, you could get an adapter to use a modern automatic behind the flat six, and use the dual carbs. You are only limited by your imagination (and wallet )
-
If you go the plywood route, there is marine grade plywood available. It uses different glue to stand up outside better. Don't forget to paint or stain or seal both sides, otherwise the painted side will peel after a while. The only reason I wouldn't use plywood is that if you get a gouge or scrape, it will show the next ply, with grain going the other way. If you use solid wood, you can sand, reseal and it's repaired. If going the solid route, I would groove the sides with a router and install splines to keep the boards level to each other and prevent road moisture from getting in from underneath. Similar to tongue and groove, the spline acting as the tongue. Renting a surface planer to ensure the boards are flat and uniform thickness wouldn't hurt, as well as a jointer to ensure the sides are a good fit.
-
-
Yes, they will.
-
Tim, if it wasn't a 5 hour drive, I'd have it for you...even if he wasn't selling parts
-
Norm, I have a project that I'm not quite able to devote the needed time and money to. I'm not sure there IS another project in my future. Like you, if there is a next one, it'll be 95% done, not needing 95% Maybe a 56 Caddy Coupe deVille.
-
Seen advertised locally but actually in Saskatchewan. Looks decent, price is right. Always liked the proportions of these two doors. http://calgary.kijiji.ca/c-cars-vehicles-classic-cars-1954-Plymouth-2dr-Ht-W0QQAdIdZ12487248 Same seller also has a Pilothouse Panel truck
-
PETE...remember: "Old age and treachery will beat youth and skill anyday" Sorry Don, couldn't resist;)
-
Will it be a show truck or are you going to haul once in a while? Lumber prices vary widely, but I would look at Fir if it will be a hauler. Quite hard and not exotic so priced reasonably enough.
-
Valving...from Master Power Brakes: http://www.mpbrakes.com/uploads/documents/discdrumdiagram.pdf How to plumb your underfloor pedal assembly: http://www.mpbrakes.com/uploads/documents/underfloorpdf.pdf Main How to page: http://www.mpbrakes.com/technical-support/configurations.cfm
-
Snowfall Warning for tonight!!!!! Rain turning to snow. 10-15 cm accumulation by morning. 32f low, maybe 50 tomorrow..BBBRRRRRR Supposed to be done with this crap
-
Pretty sure PlyDo has the kit for this. Fatman has generic cut to fit mounts as do others.
-
Maybe a front mount similar to the Mopar would work. I had a 1958 Rambler automatic that we put an engine in from a '59 Rambler standard that had a turning on the flywheel that the automatic didn't We spent 4 days and about 50 hacksaw blades cutting that durned thing off! The old 58 lasted quite a few years after that between my Dad, brother and I. Good cars.
-
The terse response to my polite email sent today asking whether Coddington will be washing or primping the car before the public sees it. From Paula Hale: "We are not washing or primping the car. We will respect its historic integrity."
-
These folks sure aren't "car guys" or they would know that we want to see it as is as it comes out of the vault!!! No primping and preening, just the dusty, musty, rusty facts. What a letdown if they don't let people see the actual first lift out:(
-
A "beautifully restored" 49 Plym coupe, except....
PatS.... replied to BobT-47P15's topic in P15-D24 Forum
This one sure looks familiar...does it belong to a forum member? Sure is nice. -
A "beautifully restored" 49 Plym coupe, except....
PatS.... replied to BobT-47P15's topic in P15-D24 Forum
Crappy orange paint, crappy chrome wheels, droopy door handle and a filthy engine compartment and they call it restored?? It's missing the huge stuffed animal and the sign in the open hood saying "Creampuff" -
Thanks Norm.
-
Here, the zoning won't allow industrial to be close to residential, the subdivisions are designed for the car...no corner store anywhere near walking distance...some collector streets have no sidewalks. Residential streets are just a sea of double garages The old inner city neighborhoods with apartments above retail are a great thing. Narrower lots with no setback and porches so people can see each other and parking for the car in the alley is the way it should be.
-
Looks great, Greg. Keepin ya outta trouble!!
-
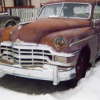
Norm, that pic is NOT mine...it's from the R&C article linked at the bottom of the post. Mine is, at present, almost as clean. I have yet to do the final reassembly so it may get banged up a bit THIS one is mine: It will be getting muddy, but not this year by the looks of things
-
Body looks very straight and completely rust-free. Makes for a very good start for a nice old truck
-
I have my stabilizer bar out. The procedure in the manual actually has the 4 bolts on the inner bushing bar as the final assembly method. I only just got my spring silencers so have not done the final assembly yet. If you have the for bolts in the lower inner bushing bar, the outer pivot pin should go in as Norm described. Don't fight the stabilizer bar as well at this point, just remove it and replace it after the rest is done.