


FarmerJon
-
Posts
470 -
Joined
-
Last visited
-
Days Won
1
Content Type
Links Directory
Profiles
Articles
Forums
Downloads
Store
Gallery
Blogs
Events
Everything posted by FarmerJon
-

Found my camshaft! - Pulling motor on 1948 Dodge.
FarmerJon replied to Bryan's topic in P15-D24 Forum
Try ups or FedEx. USPS is only cheapest if it is flat rate or small. ETA-also try a USPS Large "Gameboard" box, I think they are 23"+ -
Found my camshaft! - Pulling motor on 1948 Dodge.
FarmerJon replied to Bryan's topic in P15-D24 Forum
For the rods, if you are going to replace the bolts and have balanced and resized anyway, I usually will pull the rod bolts, debur, grind smooth the forge lines and have rechecked for cracks. These are stress risers, but also can hide cracks and flaws. I believe ARP has rod bolts that fit our rods (maybe intended for Ford FE engines) There are several online guides for 'race prepping' stock connecting rods,but I marked up a picture of what you are after ETA: unrelated to rods, but relevant to balancing, usually the crank can be balanced, then have the flywheel and pressure plate installed, marked for location and balanced again. On some things I have found the pressure plate to be out much more than anything else!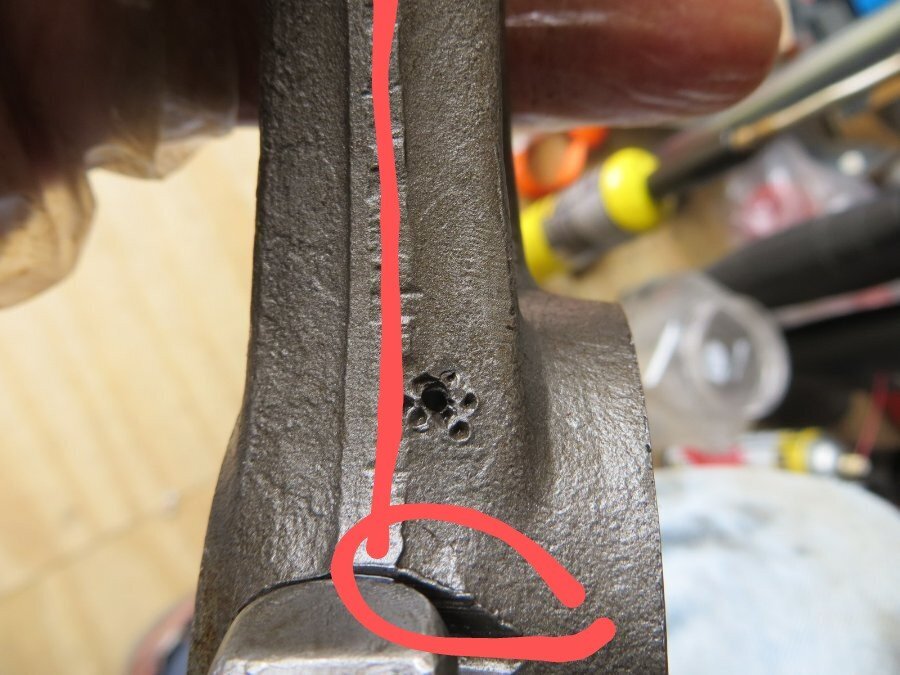
-
.jpg.8fb8841a0fc54ecda54f2fae41408437.jpg)
-
Do I have the wrong thermostat for 48 DeSoto?
FarmerJon replied to MarcDeSoto's topic in P15-D24 Forum
Iirc It isn't the outer flange that is wrong. It is the upper "bubble" that is formed wrong. It is a manufacturing defect. -
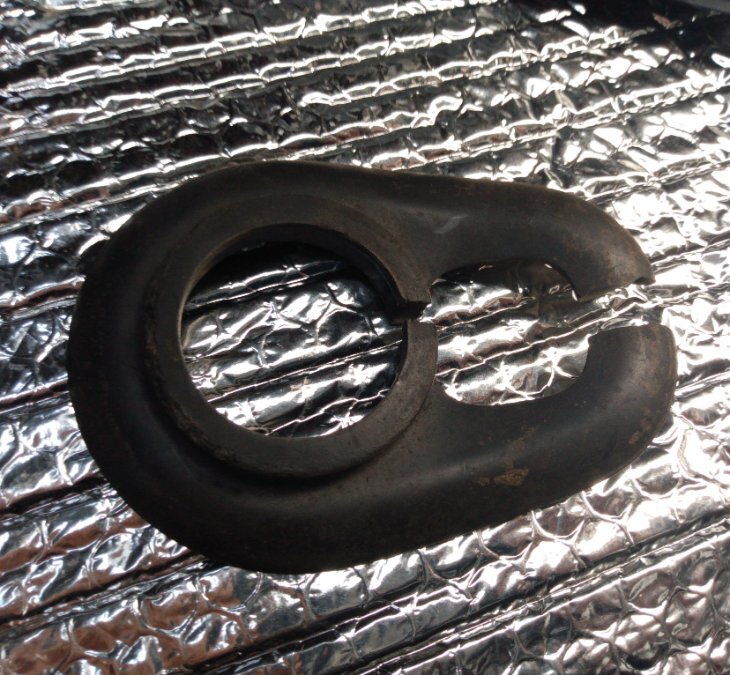
There is a small rubber pad under there, I will try to gently pull it tomorrow and take a peek. The cam bolt is difficult to turn due to corrosion. Also when I media blast the backing plate, abrasive will likely get lodged in between, making it worse.
-
Tearing down a set of '53 DeSoto brakes to refurbish for my Plymouth, need to sandblast everything. Can the cam pins be removed? The manual only details adjusting their height, but makes no mention of them being removable, and the cam side doesn't have anything obvious to grab onto. Any tips or tricks?


-
Somewhere there is a chart/list of abrasive blasting media vs what it removes. There are several that should work iirc. I know that piston coating companies blast the areas to be coated. I wouldn't be afraid to use 400-600 grit sandpaper on the crown, on the glass. You aren't going to take .001 off with 400 grit without major effort. Usually when a shop bores a block, they hone it to match each piston. If your skirts 'shrink' by a tenth or two, there will be no consequence. Now, to be fair, usually the piston skirt isn't just a cylinder, but has some barrel shape to it, but again, with ultra fine abrasives and some care, you aren't likey to take enough off to matter.
-
Any whichaway $95 for a set of 6 pistons inst bad at all. Please post what you find when you weigh them, and a picture of their underside
-
Do I have the wrong thermostat for 48 DeSoto?
FarmerJon replied to MarcDeSoto's topic in P15-D24 Forum
Part number is likely right and part is wrong. I bought 15 different store brand t-stats, including Napa 155, none fit, and or were missing the rubber seal. Bought NOS Napa 155 from the 1990s, fit fine. -
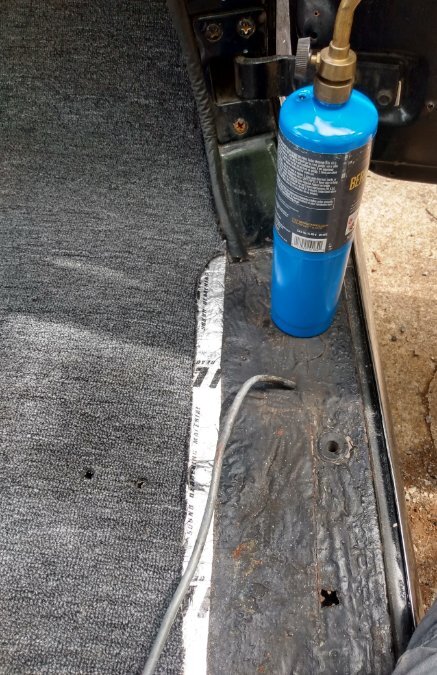
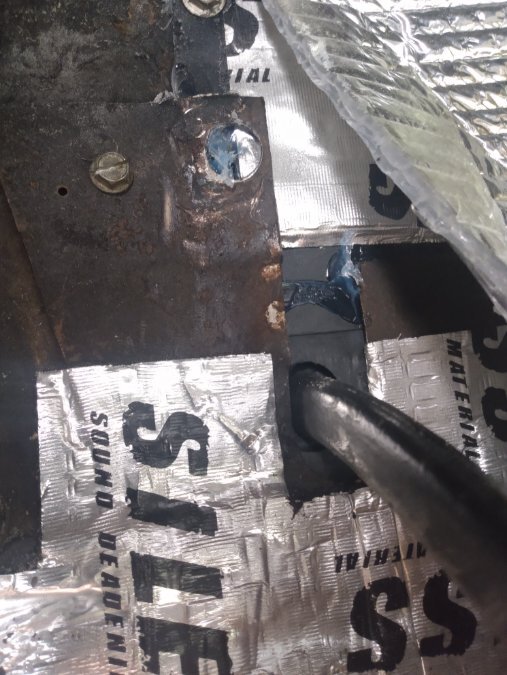
Been working on a number of things, trying to take this month to wrap up some of the things I have apart waiting for this or that. My dual point distributor and WA-1 are both apart, clean, repainted, and awaiting some hardware nitpicking. My DeSoto drums have been blasted, magnufluxed, repainted, and REM polished bearing races installed, waiting to go to CH Topping to be turned and drilled, but first I have to get my shoes free of the backing plates, so that they can ride along. I plan on drilling the outside rib of the backing plate while the shoes and drums are being serviced, I can fit roughly 75 .250 holes around each. I have half a mind to send them off to be plated, but think they are too pitted to get a good polish on without major sanding. Not sure when chrome brakes started being a thing. In the meantime, I got the wild hair to tear out my upholstery and fix several things that were bothering me, although stopped short of having the seats and headliner redone. I started by adding sound deadening mat (Siless brand 50mil) inside the doors, then inside the body by rear seat area. Then I got a box of 80mil and did the floor, rear wheel wells and some of the trunk floor. I still have one tile, that I plan on sneaking up under the headliner. I then added a layer of "reflectix" insulation to the floor, and a layer of foam carpet pad before laying down new carpet. I also installed new rubber draft seals around the pedals. Here you can see how I made holes in the carpet for bolts, pedals and such. I used a butter knife for slots, a piece of fuel line for small holes and a piece of 1" conduit for the dimmer switch grommet. I got the rear area back together today, adding heavy plastic between the body and the upholstery card, something that hadn't been done before, causing the door cards to get moisture damage. I also added a layer of the carpet pad to the inside of the upholstery card, and behind the rear seat back, to hopefully absorb some more sound. It isn't much, but I had a whole roll of it in my attic, so may as well use it. If the weather holds out this weekend, I will get the door panels and kick panels in, and be ready to pull back the headliner to put the deadening in, few layers of the reflectix for heat, and get the sun visors installed. On the test drive around the neighborhood, I noticed it was running fairly hot, but without any signs of boiling, so I need to check the accuracy of the gauge (some aftermarket one, cut into the stock dash) but it may be time for me to flush my block and install the new radiator I bought several months ago. Lots to do still, but starting to come together.

-
If you don't have a mill, you can use a large end mill or drill bit with a shallow angle tip in a drill press to remove material from the underside. I balance pistons myself and aim for 0 to 1/2 gram, whatever I have patience for. I write beginning weight on the crown in permanent marker, then write final weight when done. If you find a set of rings weights more than the rest, match them with the piston that will make up the difference. Same as wrist pins. You can practice on your junk pistons, so you get a good idea of how much to remove to get a certain weight. Not worth paying a machine shop to do, but only costing your time and effort, may as well be particular. If you ever do a performance import engine build, you will find that they are usually VERY well balanced from the factory. I think that is one of several reasons they have such a good reputation for reliability.
-
Reproduction door sill step mat installation?
FarmerJon replied to FarmerJon's topic in P15-D24 Forum
Got carpet in, was able to trim it to fit nice, so step mat lays OK. Will likely put several sheet metal screws in selectivity, and paint the heads black, like you said. For now they will sit in place till I get interior back together -
Reproduction door sill step mat installation?
FarmerJon replied to FarmerJon's topic in P15-D24 Forum
So short of fabbing a plate to glue the reproductions down to, external hard ware or glue in place are my options? -
My car came with reproduction door sill step mats in place, but we're just laid over the edge of the carpet loose. How are these supposed to be held down? They have no holes on them for hardware and the underside is smooth, other than the lip that the carpet is supposed to fit into. I see some of the grommets in the floor pan, but don't understand how the original would have used them. Also the way PO repaired floor pans, many of the grommet holes are covered by sheet metal. Thanks guys!
-
Found my camshaft! - Pulling motor on 1948 Dodge.
FarmerJon replied to Bryan's topic in P15-D24 Forum
Can you tell if it has made any progress so far? -
Is it correct to assume engine is some size of Hemi V8? Take a few pictures of the transmission, with a custom engine swap almost anything is in the the realm of possibility.
-
Barney Navarro was certainly one of the greats. He seemed to have a good grasp of the physics, and a healthy ability to think outside the box. I have read his column a few times in various early hot rod rags. However it strikes me how little those type of publication have changed over the years. 75% of the content is with the aim of getting guys to spend $. Given the common aftermarket flathead combustion chamber shape in the early 1950s, I would bet that a late model Mopar iron head, milled to equal compression, would perform as well or better than his $74 one, for significantly lower cost. Interestingly, George Asche has the same opinion about dual points distributors, no gain. Another thing to keep in mind is that dynos were even less common, and even OEM numbers were VERY generous. I would suspect many companies based gains off of improved track times, or timed laps around their shop parking lot. Does that invalidate their claims? No, but just something to keep in mind. I believe it was the late '60s before OEM companies started rating engines with a full exhaust, water pumps and alternator being driven by the crank...if you look at a model before and after, same engine, same trim car, will usually have a good bit less power than the year before. But,if we look at the factory HP rating, we can see that as they needed more power, they added more compression. There were changes to cam, chamber design (flow) and carb (56 power pack) but compression was a major factor in raising power 30+% (with only a 14.3% increase in compression) while not causing problems with the drivability, reliability or fuel consumption. If a person had a stock 100hp F*Rd (target hot rod audience) with 6.7-1 compression, and aftermarket heads brought it up to 8.5-1, expecting 122hp total would not be out of line. Adding a dual exhaust for a 15% gain would give another 18 HP, bringing total to 140. Seems about right for what guys get with warm flathead V8s. This was one of the main reasons WHY hotrod flatheads were SO popular thru the '50s: a few cheap mods give a huge percentage gain. But once you got the low hanging fruit, you get into smaller and smaller gains with every $. Even full house, naturally aspirated, $12000 stroker flathead V8s rarely break 200hp, usually 175-180 max for anything that can live on the street. Now superchargers do change that, with 250-300 realistic. So, he is right in a lot of ways, even if he wants you to buy his stuff. For a mostly stock car from the late '40s early '50s, raising compression is likely to be a reasonably economical first step in improving performance, in a way that you can feel. Many other modifications, like cam and intake are dependent on adequate compression to give the desired results.
-
'48 Plymouth pedal box floor-whats supposed to be there?
FarmerJon replied to FarmerJon's topic in P15-D24 Forum
I checked in my box o parts and didn't turn it up, but did find this: Doesn't match any holes on my floor, but may be the cover for the master cylinder fill? Anyway, good to know that my suspicion was right about around the column. As far as the pedal seals- my one surviving one is totally trashed, I can't tell whether it was originally'billow up' or 'billow down', I am assuming down, but I want to do them right the first time, because they are not particularly interesting. Looking at the seals and the small removable plate above them, I assumed the outside rectangle of them sandwiched between it and the floor surrounding them. This would hold them in place and force the pedal arm to slide through the slot in the rubber, which is basically what Harmony describes (plus needing grease) Or do they just install on the outside or the toeboards, and only seal when pedals are not depressed? I get that both will work, which way is correct? I looked through my repair manual and they don't detail floor draft seals or the like.
-
'48 Plymouth pedal box floor-whats supposed to be there?
FarmerJon replied to FarmerJon's topic in P15-D24 Forum
So this is what I have now: Plate above the pedals is just laid in there. The rubber pulls down over my (soon to be) carpet and screws down into the floor? The existing holes don't seem to line up at all. Also, where is this supposed to fit? I may make something to go over the hole, been trying to get the cab sealed better- one of wife's complaints is excessive engine smells while riding.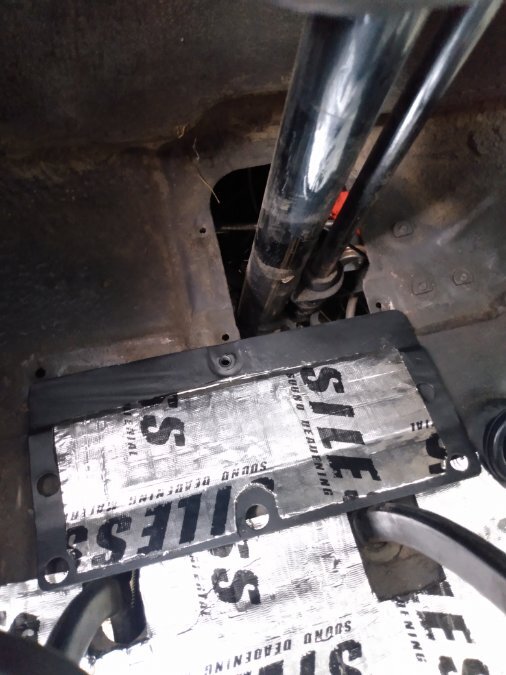

-
'48 Plymouth pedal box floor-whats supposed to be there?
FarmerJon replied to FarmerJon's topic in P15-D24 Forum
I have the rubber piece, what is under it? Sheet metal or a hole into the engine bay? -
Been working on insulating the floor and doors of my car ahead of installing new carpet. I got new rubber seals for around the pedals, but it seems I am missing one of the pieces of sheet metal from around where the steering column goes through the floor. I have the 4"*8" one that bolts right above the pedals. Can anyone post a picture of what is supposed to be there so I can make a replacement? I assume most Mopar of the same era are about the same. I will try to get a picture of what I am talking about tonight.
-
I believe there are two styles of horn button, one piece and two piece. Mine was one piece, and had screws holding it from the underside of the steering wheel. My horn was also blasting when connected, it was the power wire broken going up into the steering column.
-
On my Plymouth coupe, no push buttons inside either, doors lock from the inside by lifting the handle up. Pushing the door handle down simultaneously unlocks and opens door. I would grab entire brakes and spindles/control arms. Steering parts too. Wont even have to get drums free that way. Stuff like that can get damaged in collisions. As others have said- trim, gauges, any small parts that unbolt, rear glass, any good sheet metal you have room for/can unbolt.
-
I really like those early falcons. All in all, a pretty practical, easy to keep car, thanks to the first gen mustangs sharing so many parts. I hope you can track it down and talk the current owner out of it!
-
Found my camshaft! - Pulling motor on 1948 Dodge.
FarmerJon replied to Bryan's topic in P15-D24 Forum
Feel and judgment go a long way. Even 1970s and 1980s castings have occasional core shift that limits further work on them. You can sometimes make wire "pincers' to feel/ measure port wall/cooling jacket thickness. I will also take paper board and make small port templates to try to make sure they are all similar in size and shape.
