grea235
Members-
Posts
76 -
Joined
-
Last visited
-
Days Won
1
Everything posted by grea235
-
Bob's Auto Glass in Oregon has glass for a 1940, if that helps.
-
-
Thank you, Sir.
-
Good idea. I made a new thread called Backup Camera and Stereo Schematic.
-
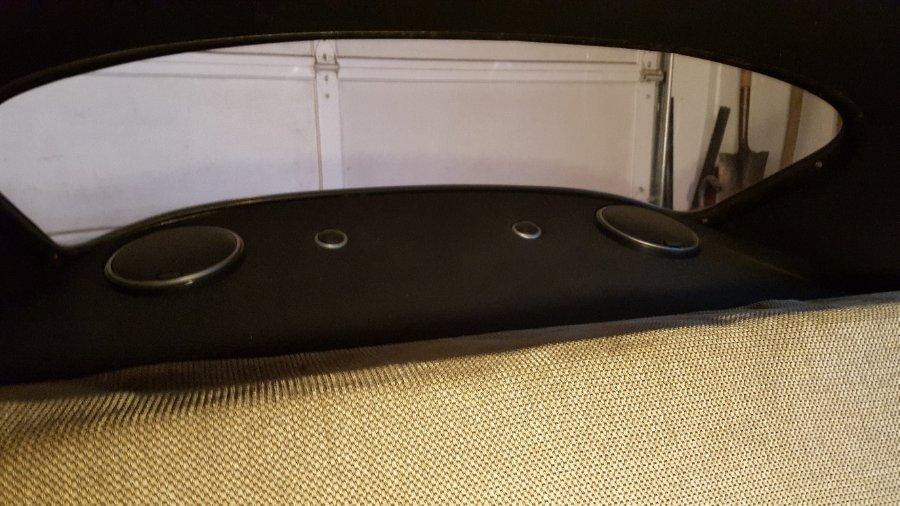
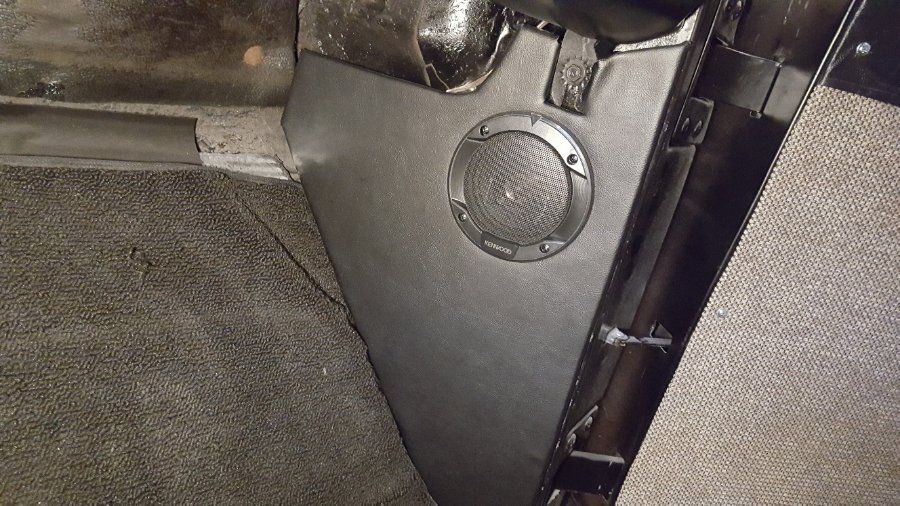
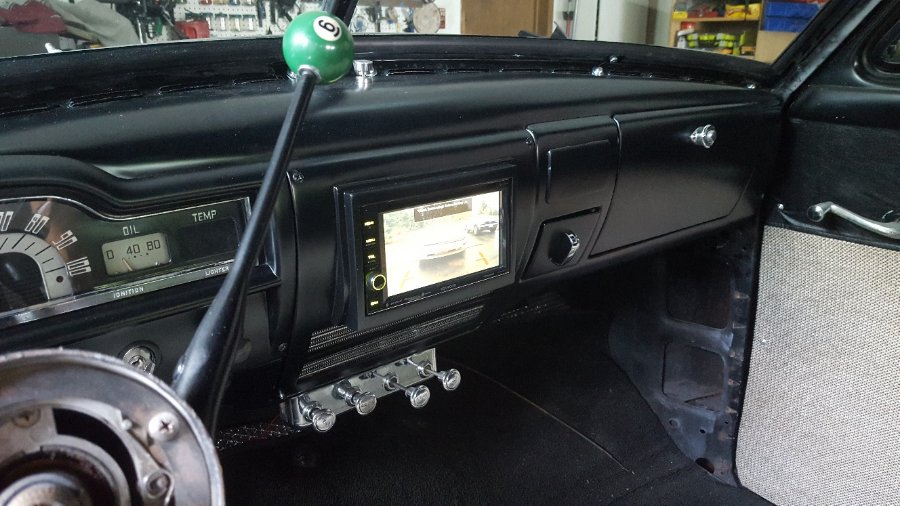
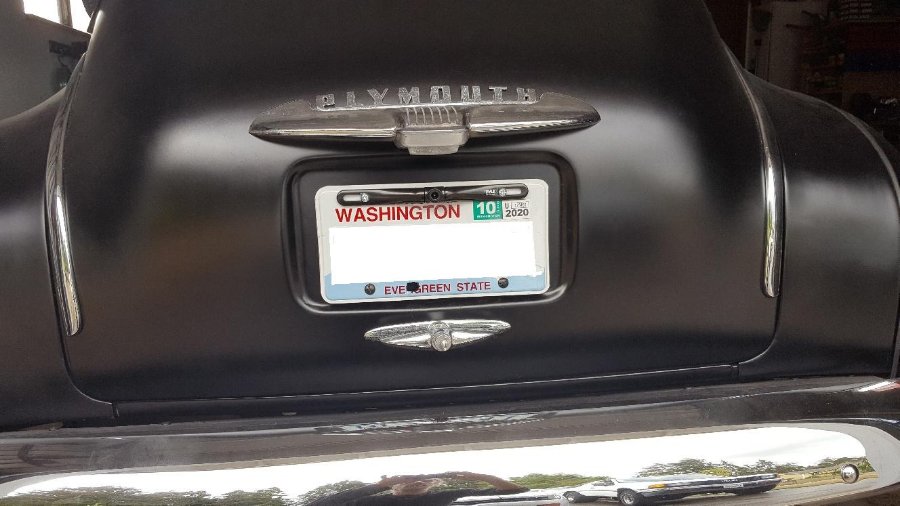
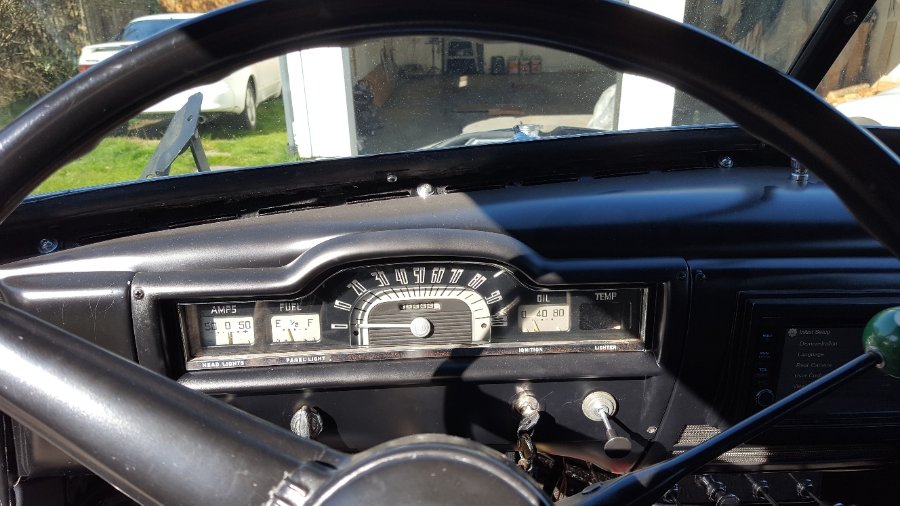
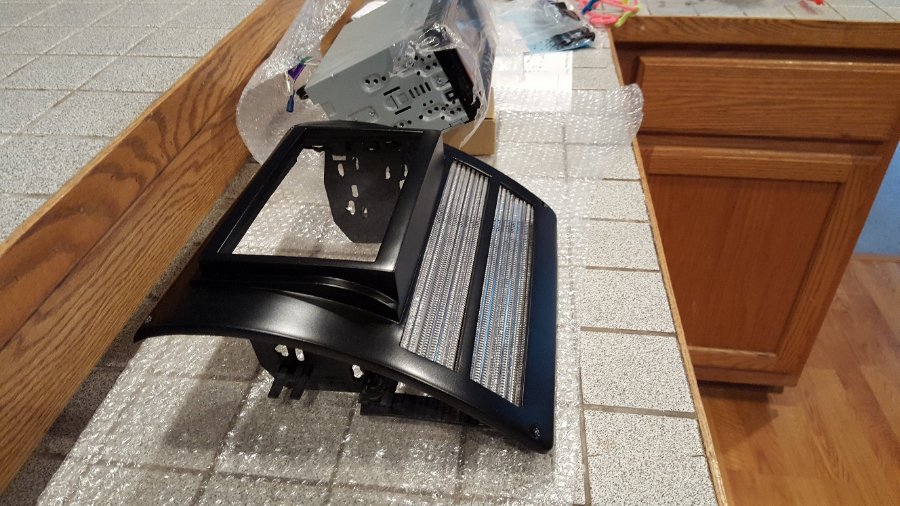
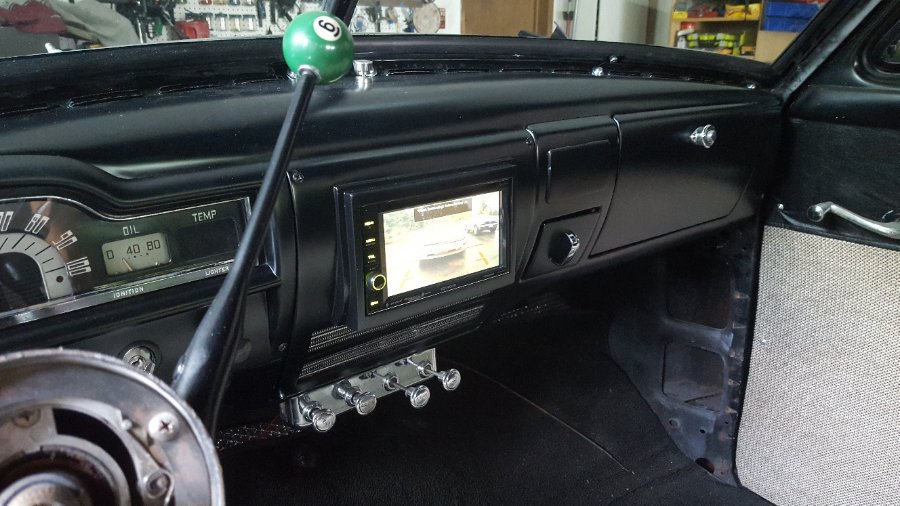
I recently added a double din size Kenwood stereo, an inexpensive backup camera and a universal power antenna to my 1952 Concord. The stereo does everything except for nav. My radio plate was buggered up already because someone cut it up for an aftermarket radio. The car was already converted to 12v when I got it. On Kenwood stereo's if ground out the Park Switch, you can play DVD's without it being in park...not that I will play DVD's whilst driving but we don't have a 'Park' mode, unless you put a switch on the service brake. I molded the stereo into the radio plate using a universal bracket. It had to stick out a little because it hit the wiper motor behind it and I wanted it as high as I could get in the radio plate. Below the radio and behind the radio grill is the microphone. I haven't tested the bluetooth\hands free with my phone yet. I have speakers in the kick panels and in the back deck, all Kenwood. Sounds pretty good. This is a Concord, so it has the shorty transmission. There was no backup switch in it. The schematic in my book didn't have anything about a backup switch, so at first I thought I was going to have to fab something, then I looked in the index and in the the back of my book it had the backup light and switch as an accessory and it showed where the switch went. I checked out the transmission and it had a plug in place where the backup switch goes. I got a backup switch off of ebay and it worked. The transmission was out so it was easy to put it in and test it. Why stop with a stereo and backup cam, why not add a power antenna. So I got a universal power antenna and put it the drivers fender which had a plug where the antenna would go. So the stereo comes on, the antenna goes up. For the backup mode operation, one terminal on the backup switch goes to key on power, then the other terminal splits into two...one to the stereo to actuate reverse mode, the other provides power to the backup camera. Video goes straight from the camera to the stereo. When you put it in reverse, the backup switch closes, the backup cam gets power and the stereo goes into backup mode and gets the video feed. This stereo will allow you to manually turn on the backup mode while driving so you can see how much smoke you're putting out. I attached a pdf of the schematic I concocted. Backup_Camera_Schematic.PDF
-
Thanks. It stuck out farther than I wanted because of the wiper motor. I put the mic behind the grill. Haven't tested it yet.
-
With the "plain janes", I think you can get away with mods that you wouldn't normally do with a pretty car.
-
1948 Sedan Seals, windows and more seals. Whats the best!
grea235 replied to MeticulousFab's topic in P15-D24 Forum
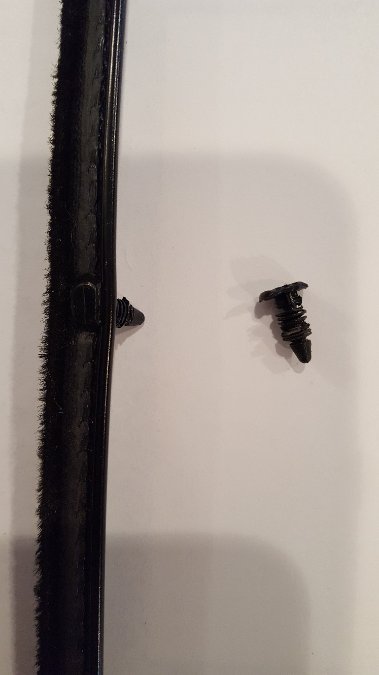
Me too. It was nerve racking getting the side windows in. I wrapped them in bubble wrap so they wouldn't get scratched. The pain was the window sweeper. It's generic stuff. I could find any clips but they may be out there. For the outside, I used those plastic push holders. I poked a hole with an awl and trimmed the button part. Thr inside ones were put in the existing staple holes with t50 staples. Worked ok for my non-original car. -
1948 Sedan Seals, windows and more seals. Whats the best!
grea235 replied to MeticulousFab's topic in P15-D24 Forum
Last year I replaced all the glass in my 52 Concord except in the back. I ordered them from Bob's Classic Auto. Each of the 8 pieces was a perfect match to the original. I got a front window seal and vent window seal from Steele. The front window seal wasn't cheap but it fit well. The door seals came from Bernbaums and it was in lengths. This was the first time I ordered this kind of stuff so I don't have a comparison. I thought about deleting the vents but that was beyond my expertise. -
I got it at an antique store. It's a mini pool ball. I drilled it with a forstner bit, ground down a nut and epoxied it in.
-
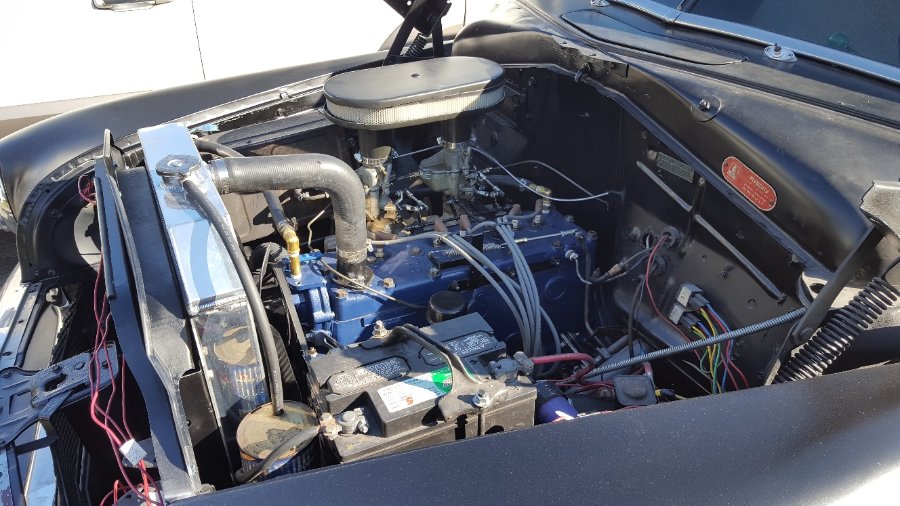
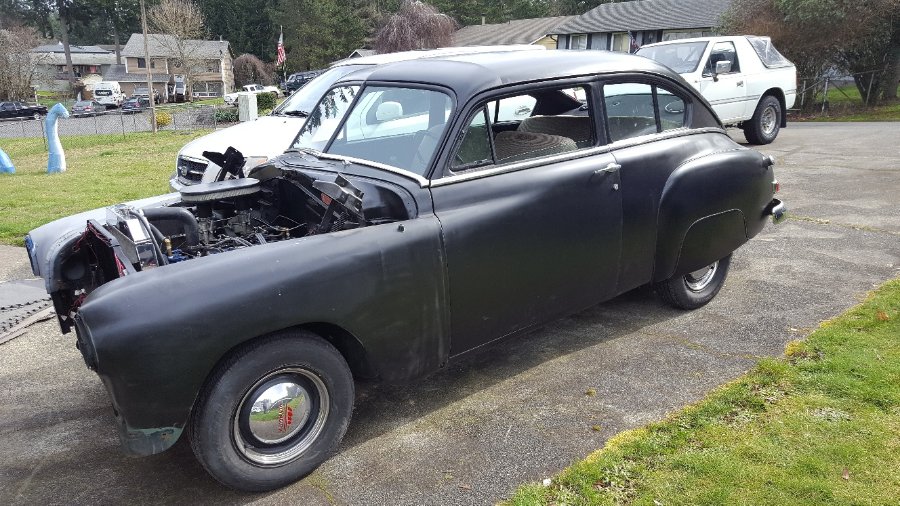
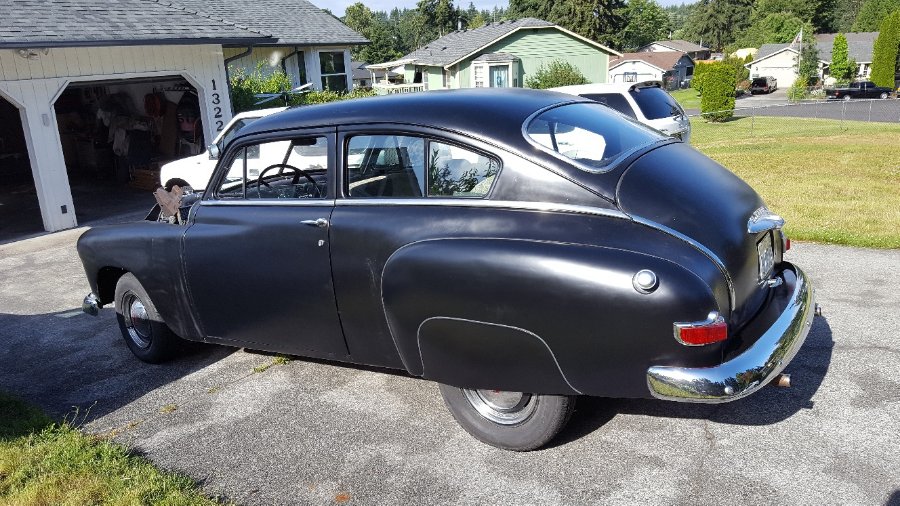
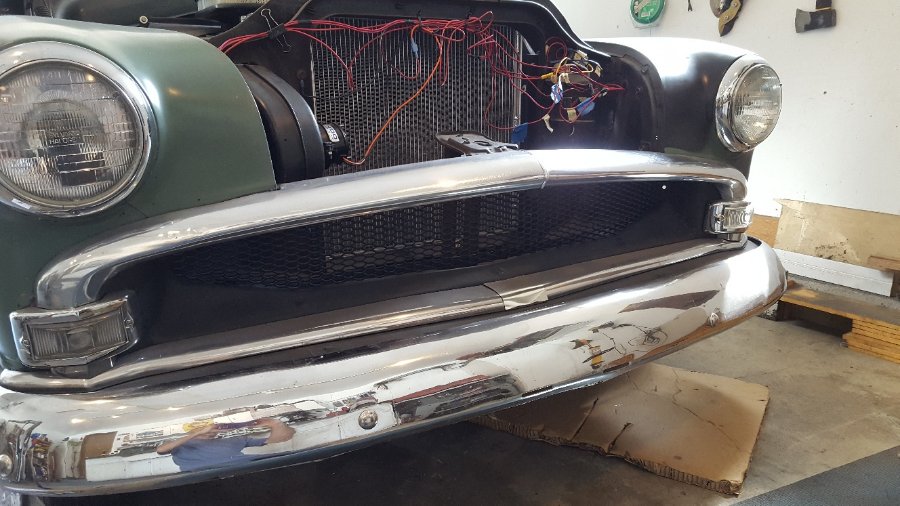
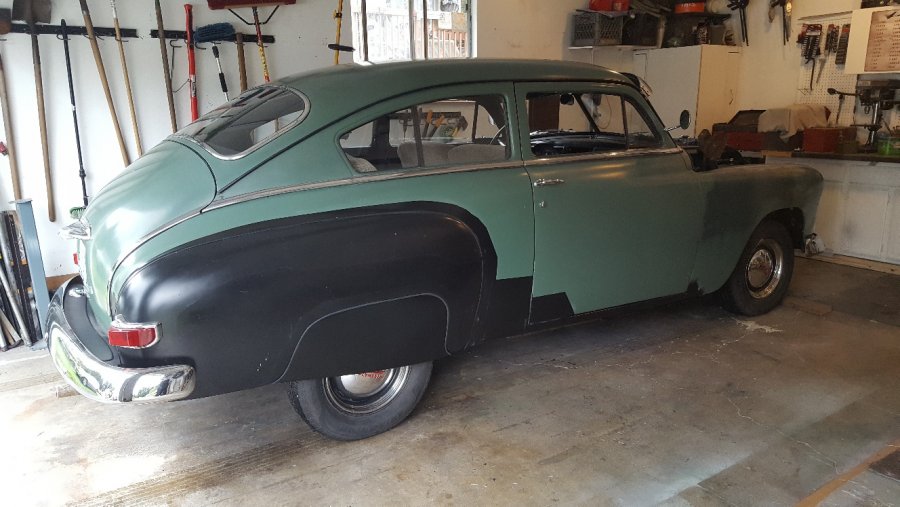
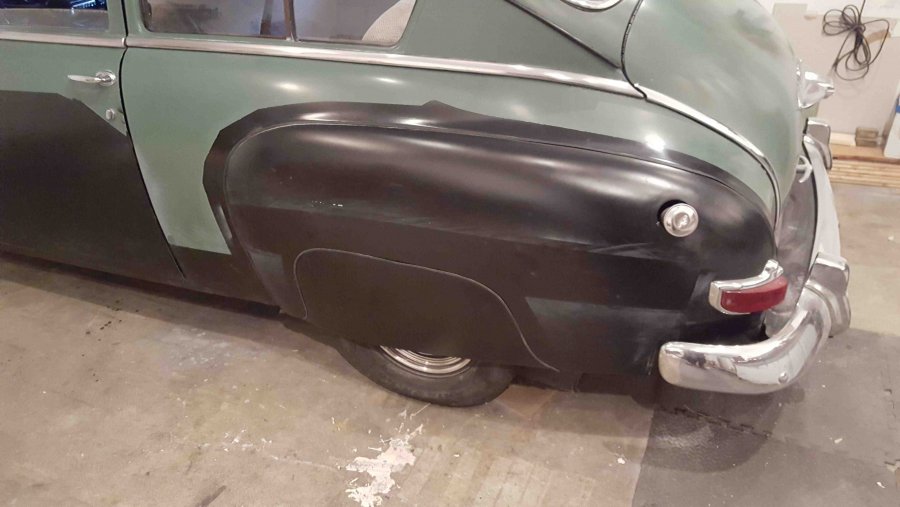
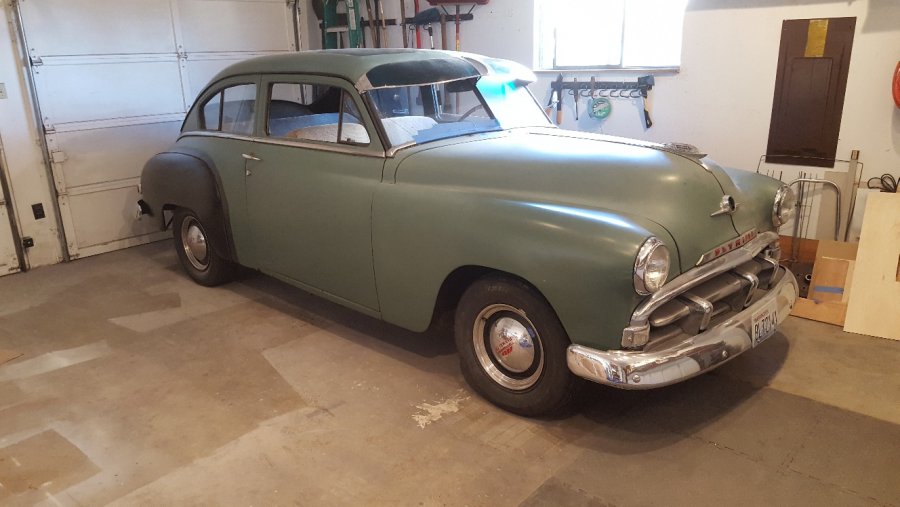
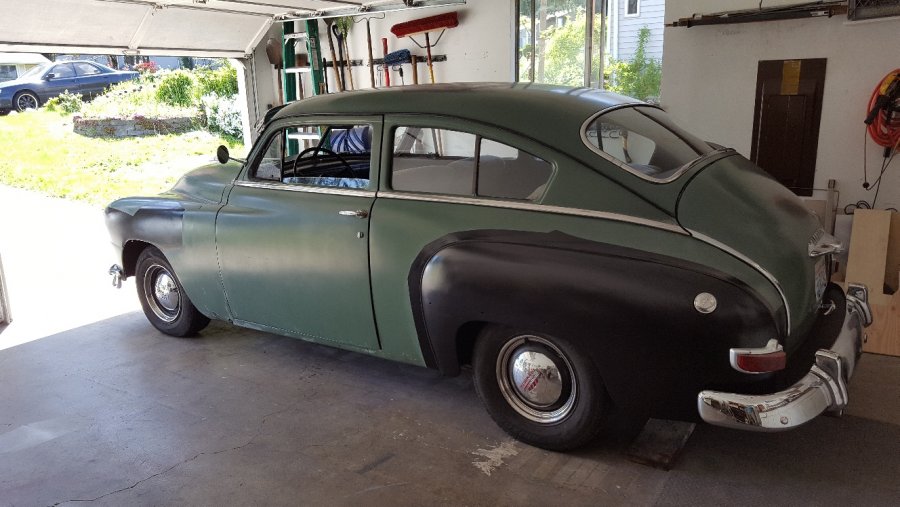
I have a 52 Concord Fastback. You can tell by the hood ornament too, a 52 is round, not a crest. If mine were closer to stock I would have absolutely left it alone, but it had a lot of work done to it, so I added to it. Motor (p23) is in the shop for a rebore. All the top rings were broken and the #6 was scored. I just put in a double din radio and a backup cam. The radio plate was already botched up. I have an original if I ever take it out. Transmission had a plug in the backup switch location so it was as easy as finding a backup switch. I messed around with lowering it but it rode terrible in the front, so I put it all back to stock except for a F1 shock relocation kit. Rides very well. Made my own fiberglass fender skirts. The middle bar and teeth on the grill were pretty pitted so I took them out and put in a plastic mesh grill. I think it matches the dechromed look. Still cleaning up wiring as you can tell. I put in new three point belts from Julianos. The retractor sits on the floor in front of the back seat. Putting the pivot into the pillar was pretty easy; I just had to modify the mount they had in the kit.
-
I can't help very much, but I just pulled one with the same casting number from a 1952 Plymouth Concord 2 Door Fastback. I believe that the 'short' tailshaft is for the short wheel-based cars. I don't know about trucks though.
-
I ordered a glass kit for my p22 from Bobs Classic Auto Glass. For mine they had clear or green tint. I got a kit because I took my drivers door window to a local shop thinking that I would support local businesses and they wanted 260 for two door windows, safety glass. The kit was 425, so it was more cost effective. The glass I received looks good and matches the originals so far. They may do individual pieces. Andy Bernbaum lists individual glass, but I passed on it because the kit was cheaper.
-
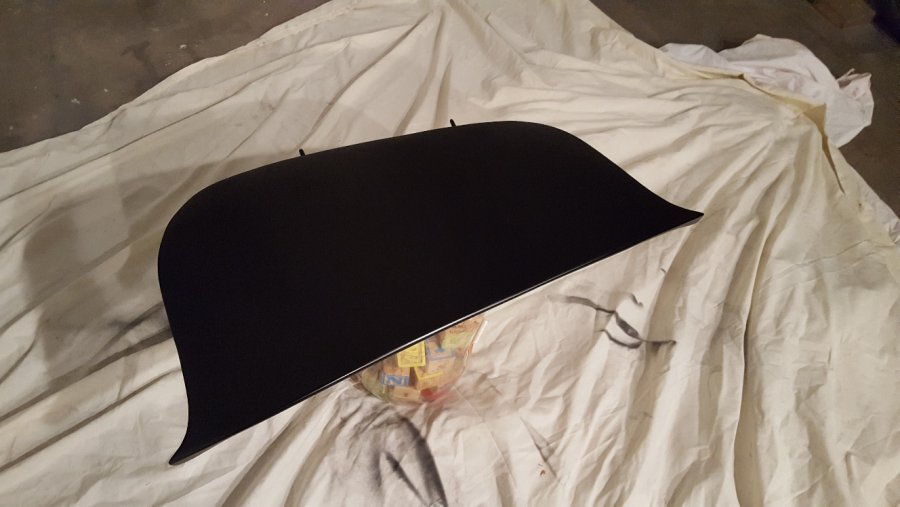
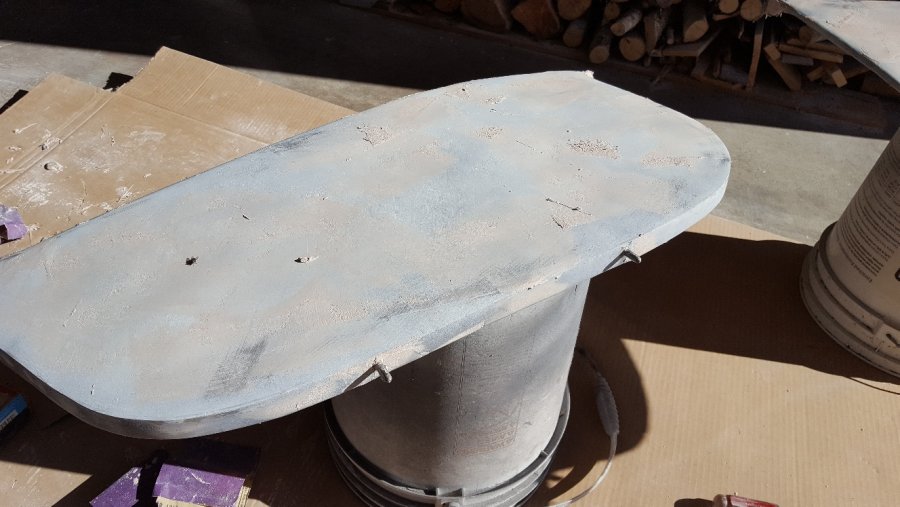
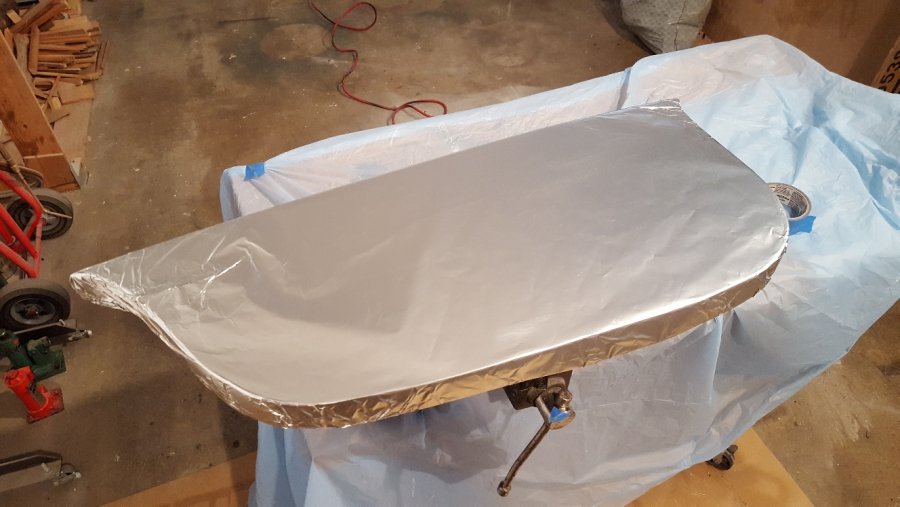
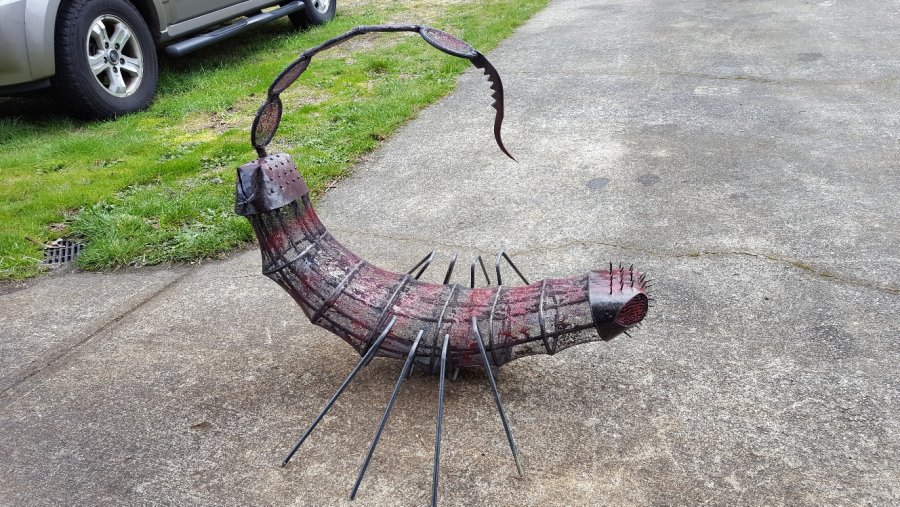
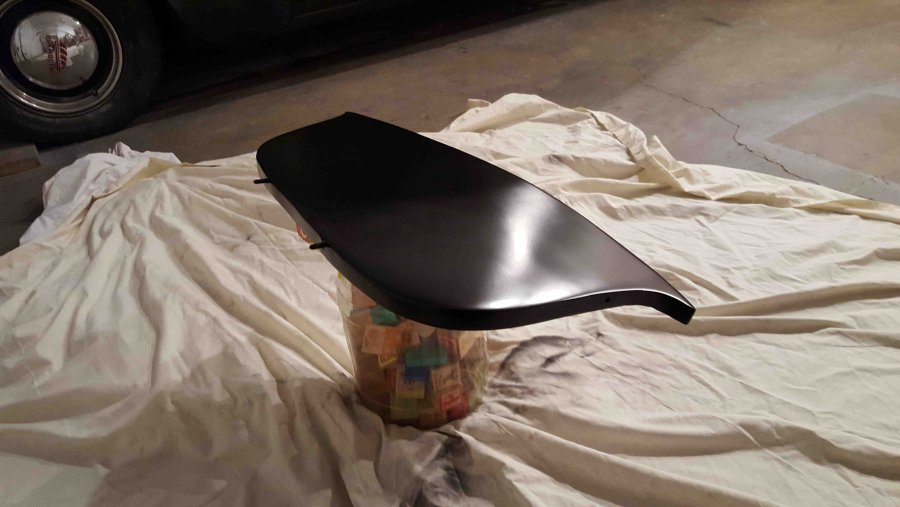
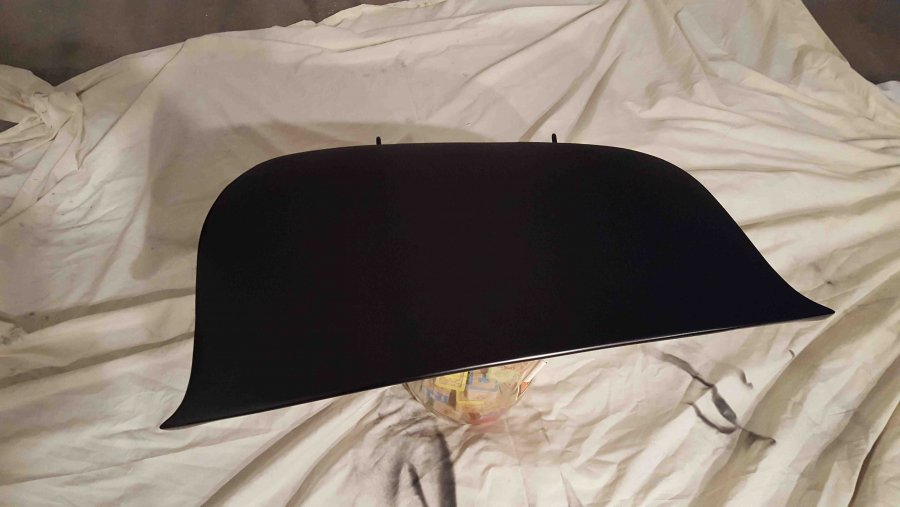
Just like my homemade fender skirts, I made wood bucks, two for the traps, and covered then with a couple layers of fiberglass. I used aluminum foil as a release layer. I let it overhang and trimmed it flush with shears. The pod covers were just attached to the hoops with stips of fiberglass and resin. They weren't heavy at all so it was enough to hold them on.
-
-
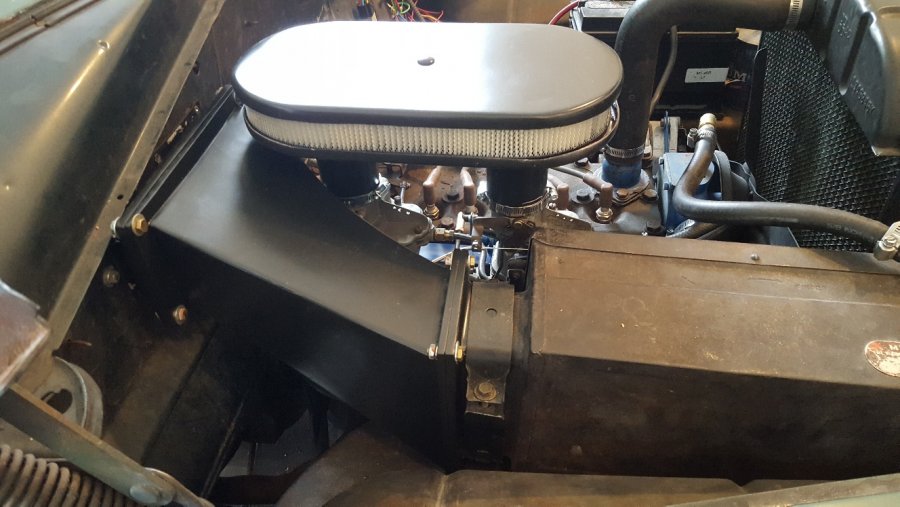
First, I would like to thank everyone on this forum for all their help. I've worked on several areas of the car now and your posts, suggestions and solutions have been a huge help. This is long, but we have more time on our hands now unfortunately. Finished a dual carb project on my 1952 Concord. I wanted to get it in and working before I pull the motor to replace leaking seals. This way I know I can get the manifolds in and out with no problems and I know that the setup works in case other things change when I do the motor work. Got an Offenhauser 2691 manifold and linkage from Speedway. I had to 'clearance' the firewall some and shorten the rear manifold studs to get it to slide in and out. I had put new ones from a kit and I think some were too long. I'll put the right washers and nuts on when I pull the motor and change the blue paint to something else. Used two D6A2 carburetors because of their manual choke setup. My Sisson choke was toast. I got one carb at the Portland Swap Meet from the Plymouth Club for 15 bucks. The other I paid 50 bucks on eBay. Both needed rebuild kits. Bought a couple other cheap just for parts. Had a huge vacuum leak, which turned out to be the manifold not sealing up to the block. Cinched it up. More leaks occurred because the carb bases wouldn't sit flat on the manifold because the outboard carb studs were slightly too high and hit the base even with the thick gasket on. Ground them down. I expected more carb issues, but after tweaking the carbs, I have a Unisyn, it runs pretty good. Starts good with a pump and a liitle choke. The supplied linkage didn't work because my throttle linkage on the carbs only has one hole. I cannibalized it and made my own linkage. The carbs return to closed position ok after adding a supplemental spring outside the original spring. The throttle linkage plate bolts in to the exhaust studs not the head bolts so I can remove it easier. I'n running one choke on the front carb. Exhaust was already split and I'm not running heat riser; I blocked it off with a plate. Seems ok for now. Got a WIX 46013 air filter which fit pretty good as far as distance around and between the top of the carbs. I feel more comfortable working with fiberglass than steel. (Whenever I weld, an Angel losses its wings and I hear my Father cry.) I made a wood buck and made a top and bottom out of fiberglass, several layers, and put in some metal plates to give it some rigidity. Had to raise it up with tubes to get it above the heater duct. Ended up making a flanged fiberglass heater duct to get around the rear carburetor. The flanges unbolt and lets me slide the duct out. Has a little more power with the dual carbs. We'll see what happens after the rebuild. My plan for getting better welds is to take a class..and meet a woman who can weld...
-
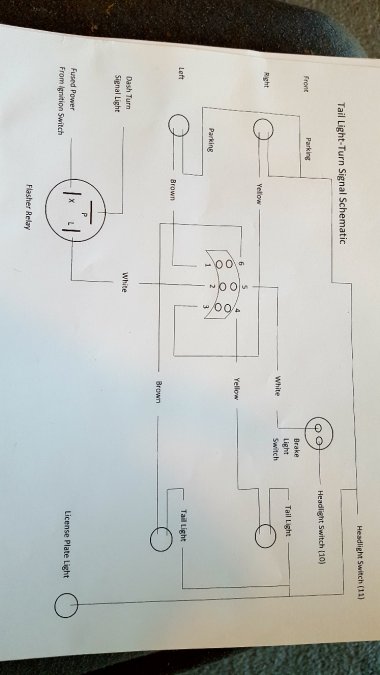
This may or may not help. I just wired in a turn signal into my 52 Concord. I made a schematic for it. I replaced the wires, so i don't have the original color codes, sorry. It was funny...when I first wired it up, my brake lights didn't work. Then it dawned on me, I looked at the front of the car then stepped on the brakes and my front lights came on. Switched the wires front to back and everything worked fine. The attached schematic is what I ended up with. My labeling is different tho.
- 1 reply
-
- 2
-

-
Thank you!
-
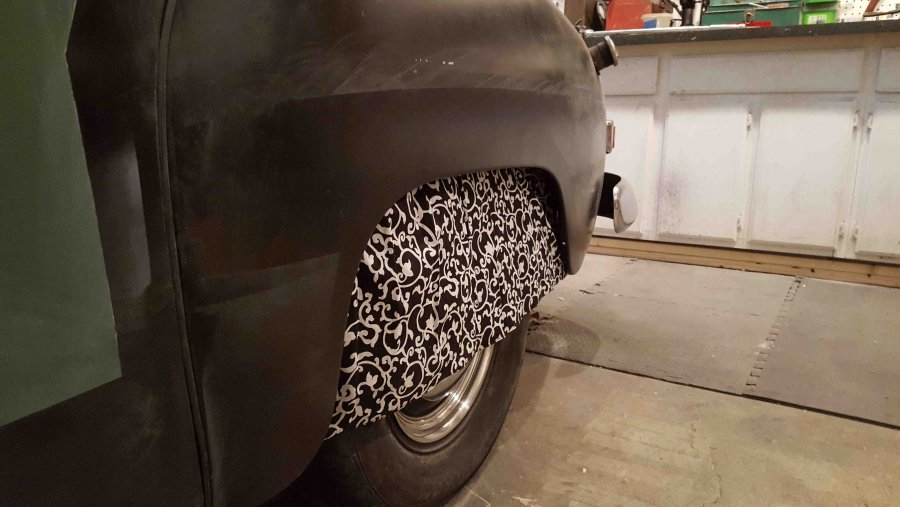
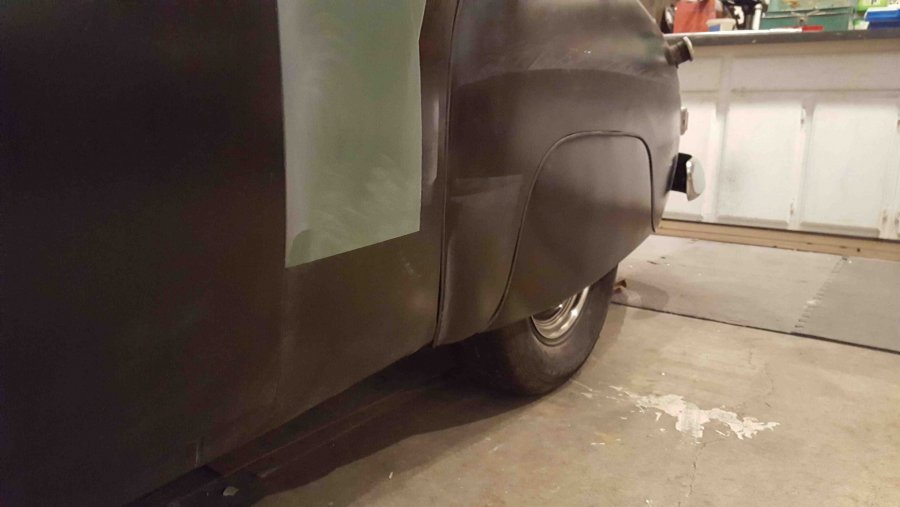
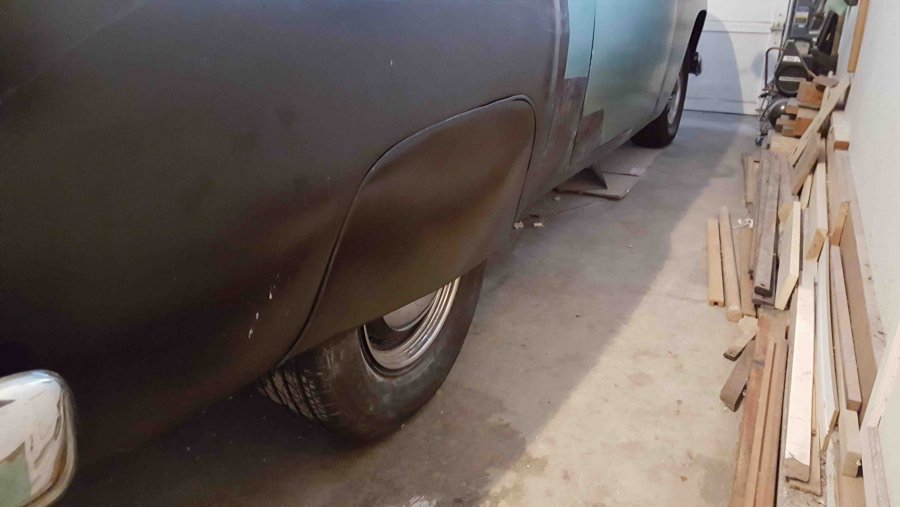
Decided to make my own fender skirts for my work-in-progress 1952 Plymouth Concord. The price of 350ish for a reproduction set is too much and, from my experience with VW repop parts, they probably wouldn't fit. I tried fabric from a dress and drove around with it. I liked the pattern but it flapped around too much. Boy, was my granddaugher mad when she found out I used her dress!! Just kidding. The real skirts are made from fiberglass from a wood \foam mold. I flatted out the fender lip in two spots at the top and on the sides and drilled them with 1/4". I molded in locator pins for the top two holes and holes for the sides. So it pins into the top holes, then bolts in at the bottom. I embedded two flat bars horizontally to give the skirts some strength and a round rod at the bottom to keep the curve and provide a rolled lip. They had to curve sharp in the front bottom corners to get around the tire and arc around the hubcap. I think it looks gangster. I used the same fender beading as the fenders to give it some consistency, so I had to keep a consistent, more like tried to keep a consistent gap\reveal all the way around. The passenger side has a little deformity in the gap, but I'll get that straightened out. If they were perfect, they would outshine the rest of the car. Pictures.lnk
-
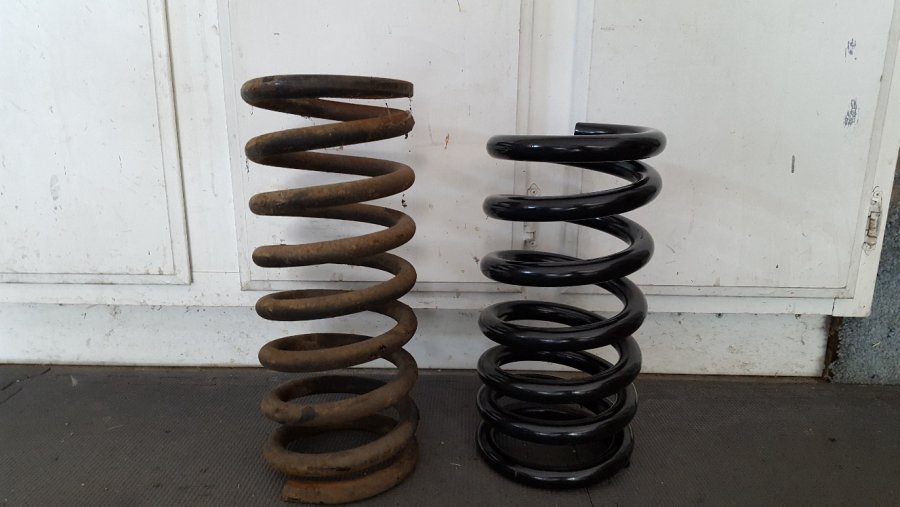
Could you split the difference and put in 2 inch lowering blocks in the back and stiffer springs up front to get it higher? I have a 52 Concord and I recently tried some moog cc850 springs. About $60 on ebay. They were shorter than the originals, but after putting them in, it sat about 2 inches higher because they were stiffer. For reference, the moogs were about 12" high. Increasing the height in the front may make it 'boat' in front. I resolved my boating by putting in 'F1 Shock mounts'. I got them from Speedway Motors - 1948-52 Ford F1 Forged Upper Shock Mounts, 6-1/2 Inch. They were 84.99 plus shipping/tax etc. You drill holes in the frame and bolt them on. They replace the upper shock mount. The bottom stays the same. It really stabilized it out. You will of course need different shocks for it. There's some posts on the forum, if you search for 'upper shock mount relocation'. If your back leaf springs are really weak, you would have to watch for bottoming out on speed bumps and such. Mine wallowed quite a bit, so I put in new leaf springs and then 2" lowering blocks for 1 3/4" leaf springs.
-
Thank you for that Mr. Buchanan. It is working ok at the moment, but I am pulling the motor in a month or so to do some work on the motor and I will be changing the front motor mount. A new front mount may affect the reverse, so at that time I will more than likely need to adjust the rod. I really appreciate the diagram!
-
I have been experiencing the same issue with mounts on my 52 Concord. I was changing them because it wouldn't go into reverse on a decline. Got uppers and lowers from Bernbaum. My car had no lowers...don't know if they were removed or not. Put them in and got a lot of vibration, but got reverse back. I had to slacken the bolts to where they were just barely tight to get the vibration to go away. I wasn't comfortable with the barely tight bolts and figuring that the rubber was too hard, I ordered the A2014 Marmon mounts from Rock Auto. I received them yesterday and what I got was extremely hard plastic. I don't think they are rubber at all and really hard, I mean probably a 7 on the Moh's scale of hardness. They are so hard that they are chipped at the top. The ones I got from Bernbaum were way softer than these. I ended up removing the lowers and keeping the Bernbaum top mounts and don't have any vibration and I have my reverse.
-
I used a 6 1/2 inch one from speedway motors and gabriel 81676 shocks. Thanks for the info on the springs, at least I won't be too high.
-
I've driven the car around town and on the freeway after the shock mounts and shocks were installed for a month or so and it really stopped the boating of the front end around the corners and is a lot more stable. It had a sway bar, so I couldn't tell you if a sway bar helped or no. I had previously put on new rear leaf springs because they were flat, new shocks and 2 inch lowering blocks because the back sat a little too high. If the springs relax some, I will take them out. I am very happy with this part of the suspension changes. I do have a little problem with speed bumps and vibration but I doubt it's anything to do with the shocks or mounts. If I slow roll over a speed bump, it is just fine. If I hit them a little harder, the front end bangs a little. It has what looks like the original springs and with the amount of crud on the suspension parts, it looks like they haven't ever been changed....ever. The right side is a lot worse than the left. The crud will come off soon...it will probably decrease the weight of the car by 100 lbs. I have a set of moog cc850 springs coming in. I'll put those on and see what happens. If it sits too high, I'll either cut the springs or swap the lower spring mount, then move on to replacing the suspension bushings. The vibration could be motor mounts, which is a little bit of a story. It started because it would not go into reverse after I would crest the peak of my driveway and go down hill into the garage. It would go into first just fine, but once it was nose downhill, it wouldn't go into reverse. No amount of nudging, clutching, pleading or praying would help. I would have to open my garage door, and get it into the garage to get it level, then it went in to reverse just fine. Thanks to your forum, I attributed it to the rear motor mounts and got a set. I didn't realize that the top ones had sleeves that went in from the top, so I couldn't change the top ones. (I will pull the motor this winter for this, a re-ring and clean up). I noticed though that there were no lowers motor mounts installed. So I put in the lowers and it significantly helped it to go into reverse. Here's a couple pics. It is a work in progress with the intent of a somewhat daily driver and keeping most of it stock. I have a list of things to do on it and am trying to keep things with in scope. It has been converted to 12v, but I've had to do some electrical work to straighten it out. Since the picture, I put on a better hood ornament, front emblem, tail lights and door handles. I put in three point seatbelts from Juliano's which went in pretty smoothly. I had to do minimal fabrication for the B pillar mount. I got it with a split exhaust manifold and dual exhaust. It sounds pretty good. The sisson choke was shot so it had a manual choke setup, but it wasn't well designed. I got an older carb with a manual choke top and it works a lot better. It will slowly turn black as I fix body parts and rust and then it will turn another colour. It's great to run around town in it. I get a lot of compliments\comments on it, even though it is pretty rough.
-
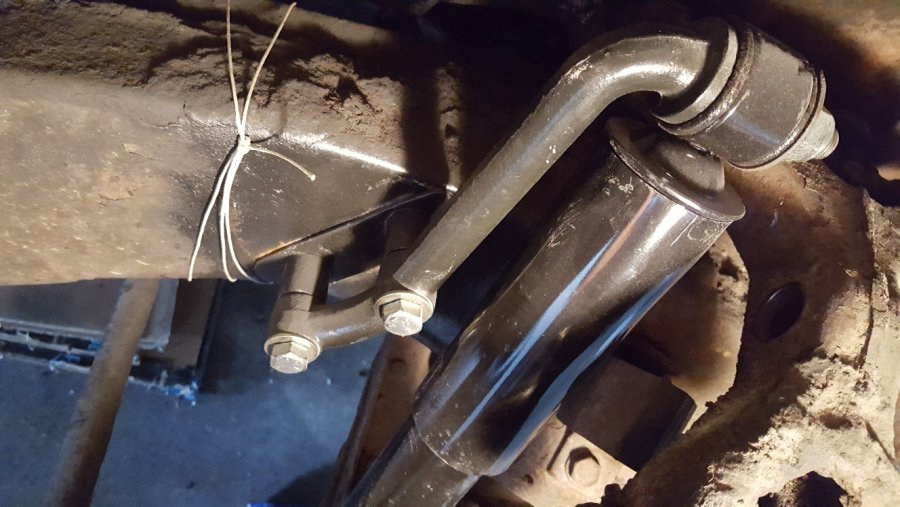
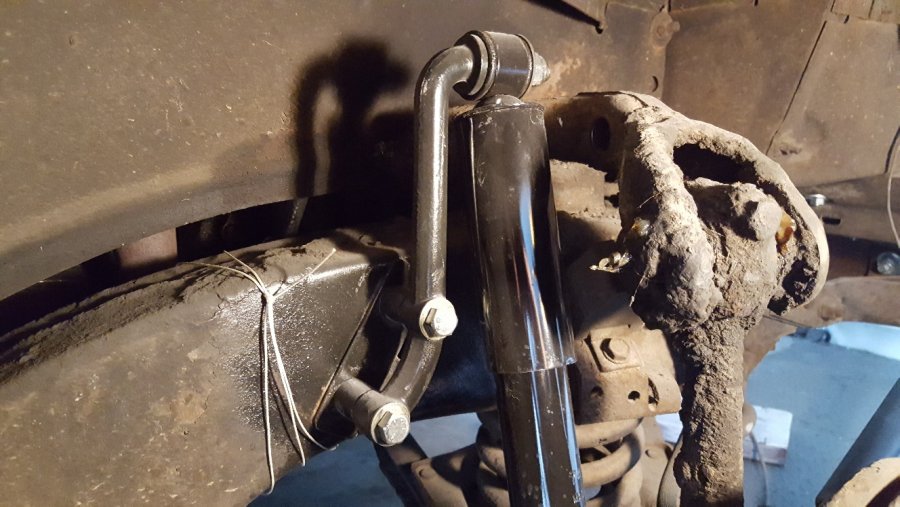
I recently put in F1 shock mounts on my 1952 Plymouth Concord. I'm not that good of welder so I wanted an approach that was minimal fabrication/welding. I ordered a set from Speedway Motors - 1948-52 Ford F1 Forged Upper Shock Mounts, 6-1/2 Inch. They were 84.99 plus shipping/tax etc. I didn't have an extra shocks to help locate where the mounts would go, so I make a shock simulator by cutting 2 short steel tubes the same size as the eye in the shock, then slid them on to the upper and lower mount studs. Then I welded a rod between them to simulate a shock. I put in a sleeve on the rod so that I could adjust it up and down to get the top located in a position so it wouldn't hit the control arm or be too high or too low. I mounted the fixture to the lower mount and bolted in the F1 mount at the top. I tighted the bolts and got it into a good position. The mount itself ended up hanging about 1 inch from the frame, so I used that measurement as the spacer, but subtracted for an 1/8" backing plate I was putting between the mount and the outside of the frame, so the spacers ended up at 7/8". I cut the spacers out of steel spacers I got at the local Ace Hardware that were pretty thick wall. After marking and drilled the holes in the frame, I make some backing plates out of 1/8" by 1" steel. I drilled one set with holes and welded on nuts to go inside the frame and one set to go outside the frame with the intent of sandwiching the frame between the plates. It was a bit tricky to get the backing plate up through the triangle slot in the bottom of the frame up into position on the frame. I fed a string through the mount\washer\spacers, then through the top frame hole, down through the slot in the frame, then into one of the nuts on the backing plate and tied on a nut, then pulled. It pulled the plate into position and I could get the bottom bolt in. I tightened it and then spin the top of the plate into position...if that makes any sense. I made a wag at the shock length and got Gabriel 82607's, but unfortunately they bottomed out. So I make a swag and got some Gabriel 81676 shocks. They are working fine and I was able to use the 82607's in the back. The whole thing went pretty easy, but I had some issues, like my shock simulator was off a little, so the top shock mount stud wasn't parallel to the bottom, so I had to redo the bottom hole. I was thru bolting the shock mount, thru one plate, then the frame then into the backing plate. I was off a little and had to adjust the holes a little with a file. It has a sway bar, I think it's a stock one, so with the shock relocation and the sway bar, it really stopped the boating of the front end. I hope this helps. FYI - The string is temporarily there because I have some clean up to do and if I take off the shock mount, I don't want the inside plate to fall down in the frame and be unretrieveable.

