55 Fargo
-
Posts
10,373 -
Joined
-
Last visited
-
Days Won
21
Content Type
Links Directory
Profiles
Articles
Forums
Downloads
Store
Gallery
Blogs
Events
Everything posted by 55 Fargo
-
correction off -set is 1/8 of an inch from center, at least from 1 off the mounting clips that has a bolt and nut, but this bolt is about a #12 machine screw size or 3/16. If you then used a fender washer , you could grind off enough material to be abn off-set from center mounting of 1/8 of an inch...........
-
Another option is to oval out the body holes, which in my mind would be out of the question, as it would not be overly precise or complimentary to the value of the car. Or how about using punch out slugs,square pieces of steel tabs, about 10 gauge material or something similar, then set up jig on drill press and drill your own off set holes into the washer at the correct off-set........Fred
-
I would be inclined to sandwich all the washers,between 2 pieces of flat steel,suing small c clamps to hold them tightly, having exactly the amount exposed to be ground off, this could then be held in a vice, run the grinder, and cut off material. I would use 1 1/2 or 1 5/8 OD 1/4 fender washers, off set is around 3/16 to 1/4 of an inch. Would this work?
-
In this case you would need washers larger than a 1 1/4 OD, as you would need to grind off 1 end on each washer to allow the position to be correct for the trim to fit alongside the body contour. This could be done, but now becomes a little more labor intensive.
-
Hold the Train, just was looking at this idea, the OEM clips are off-set, that is , the holes on the body, in relation to the clip, and it installs on the trim off-set not center, as would be if you used a washer, that has an OD of 1 1/4 inch. If you used a washer with a larger OD, then you could grind off one side to give you the off-set, or this will not allow th trim to sit on the body in the correct position. Is my observation correct?
-
-
Just tried this with a fender washer and 1/4 bolt, will work fine. I may even buy some today and weld a few up for a test fit, even if a washer was a bit big, it could be ground down on 2 sides. 5/16 bolts may work, but the clip holes would be a tight fit. I concur on the removal of the trim, once the car is done, it would be a long time if ever to be removed. How should I weld them, just 1 or 2 small tacks, on the bottom side of the washer, that should do it, any advice.....Fred PS IO have lots of welding wire, and I have a bolt supply house nearby, where you can buy fender washers, nuts and bolts, by the lb, and its cheap..
-
Hi all, I need 46 body side trim clips for my side trim, I have only about 10 decent clips. I looked up on Restoration Specialties website, they are $2.50 US per clip, that translates to $2.75 Cdn per clip. Now I need to buy about 40 clips,case some of mine break, or maybe I should replace all of them. That works out to $126.50 plus postage or shipping. Is it me, or does this sound pricey, now in the grand scheme of things we buy for our cars, a $150.00 does not seem like much, but for little tiny metal clips it does, but I need them. Is there any other less expensive suppliers of these clips, does anyone have any good used ones for sale etc..............Fred
-
Welcome to "The Place For Flat Head Action", hope you make yourself a permanent resident. Dont' forget to fill out a user profile, if you have not done so yet, helps us help you. Yes you can go bolt on front disc conversion, or if you decide to stay stock, there parts available, and the stock brakes work well if they are in good shape, and adjusted correctly, not a s good as modern disc brakes, but pretty good if working optimally..........Fred
-
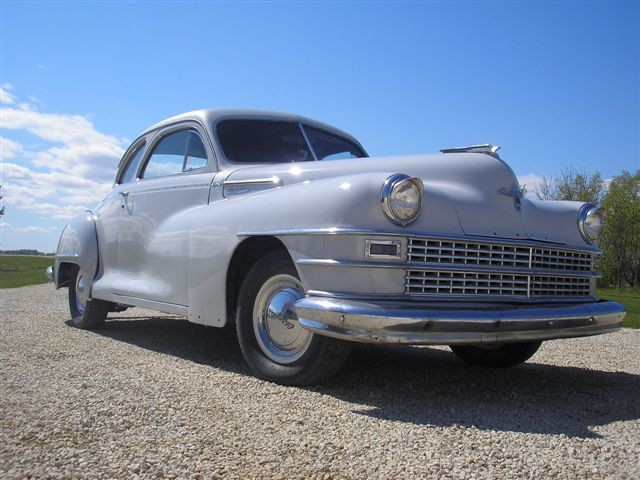
Hi, it's another 48 Chrysler Coupe, but just a parts car, very rough, and lots of parts picked off. I know a guy up here with all the parts for a rag top, maybe make her into a rag top some day, well I can dream anyway........
-
Looks real nice Rodney, where do yall find the time for this stuff...............Fred
-
Here are pics I just took about 5 minutes ago. The side trim needs to got back on, and the fender welting, some other items, like side mirrors, rocker trim, etc. The car needs a good clean up, especially the windows and window stainless. The one big shows where my awful runs , from my poor painting skills,may be hard to see in this pic. I plan to drive the car a bit, let the enamel cure well, and see if I can cut and polish out the runs, dust etc. I like about 95% of my results, but I am a little forlorn about 5% of myworkmanship, I know mostpeople will walk to the car, and zero in on the runs................Fred ps its a 20 footer now, was a 10 footer, till the runs on the roof

-
On my 47 Chrysler, I have it wired to the signal flasher, then to the courtesy light under the dash driver's side. When the e-brake is on, the light flashes, this is an OEM 46 to 48 Chrysler feature.....Fred
-
True enough, will not be attending any car shows,because of my lousy painting. Maybe just cruises, or just my own cruises,I like my paint, but the runs are embarrassing, kinda like if you had the real runs and no imodium, in public................hehehehehe
-
I like the results, but those nasty runs have me disappointed, will send pics when I can.........Fred
-
Hi all, the paint job is complete, now for all the corrections, some dust, and runs. I painted the roof last night, got this backaswards, shoulda done it first, no big deal though as rest of car was plasticized off. The paint went on beautiful, but got some nasty runs on drivers side where the roof slopes down around the back windw, very butt ugly. It was a little cooler in the garage, about 62 to 64, I may have over reduced, but the paint seemd to tack up fine on the first very light coat, it was on the 2nd coat it ran, maybe should went lighter, and then did a medium 3rd coat, who knows. I will let this paint really dry good, as it is old time enamel/w hardener, then will wet sand runs, but might first shave the worst runs down with a razor blade. I am thinking if I need to do some re-coating, since this is a solid light color, and it is enamel, might spot paint, and am thinking of trying a very fine badger brush, and seeing if this may blend in well. These brushes can lay out enamel like spraying, they paint the Queen of Englands Coaches like this, I have seen paint work using badger brushes with marine urethane paint, that looks like gl***. Well at least it's done, looks decent from 5 to 10 feet, body work not too bad, can see where I need improvement, areas I suspected before. Next time, will be a heck of a lot more fussy, using guide coats, going over the panel very slowly, and will use Urethane topcoating system, as it is much easier to spray according to car painters, synthetic enamel is not so easy to get right and spray, at least not for this neophyte. Special Thanks Thanx to the following for your guidance, patience and tolerance, Tim Adams, Stevesplym, Dezeldoc, Robert KB, Young Ed ,joel Okie, Dusty Ole Spraygun ( Autobodystore.com), Norms Coupe, and for the rest of you guys that took interest. This body work and paint was a long arduous task, my first like this, so mostly happy with the results, could not done this without this forum................Fred pics to follow
-
Good News Ed, hope al is well with your trip to Wiscansin
-
looking good Greg, nice color, will look sharp with the brown fenders
-
Thanx Greg, did you post some pics of your painting....
-
Not too bad, sure wish the chrome, pot metal and stainless were better, but some other time they will be done or replaced. Gotta paint the roof yet, will bag rest of car and shoot paint. Yes My front bumper bracket/frame is a bit out, will need to borrow friends porta power and make some adjustments.........


-
Thanx Deez, it will be alright, may re-shoot 2 or 3 panels at a lter date, will isolate tem anby covering rest of car with ploy and paper. Doing 1 panel at a time is actually fun, and more relaxing then diving in on a whole car or even major sections on a big car like this. I would have had a hard time painting this car in 1 session, in a modern spray booth, with good equipment, and experience yes, but not at home without anyof the before mentioned. But I am happy with it, car is sitting on the driveway, it's been sunny/cloudu/partly sunny, it looks pretty good outside.......Fred
-
Thanx Bob, weather,temps, redcution of paint can all affect outcome, then throw in my inexperience to boot. Thank God , it may have turned worse with many other paint problems. I will live with most of it, might immediately re-shoot 2 panels, right after I do the roof, the roof is getting painted within a week.........Fred
-
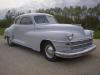
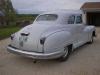
Some outdoor shots of the paint job, she's far from perfect, but perfect from afar...........But I did it myself, so no one to blame for mistakes but me


-
Tim, I am sure hoping for this, the worst runs below 1of the 1/4 window, and right rear fender, I may re-shoot with roof. Any chance I can do a spot spray, especially on fresh paint, probably not as there is hardener in the paint.........
-
Thanx everyone for your "votes of confidence", the runs, are hard to see until your about 5 feet from the car, this color hides well. We will see how it is in the sun. I may let everything sit for a few weeks, then paint roof, and rear 1/4 and rear fender where the run is, or may drive like this for now, and correct them panel by panel in fall. If I can isolate and paint 1 panel, can get better results. I really had to develop my own mix, with the paint,wnet with 8-4-1 adding wet look hardener too, as it being Industrial enamel, it had very limited instructions. So add this to a very green spray painter, and a cheaper gun, and it becomes challenging. No doubt an experienced paitner would have made her lay down better than I. I did reduce paint almost 50%, then for the 3rd coatreduced to 60%, my runs happened in the 2nd coat. The 3rd coat being reduced more, helped the paint flow out, and made it super glossy and smooth. My gargae temp was only around 62 to 64, this did not help matters...........Fred