rolnthunder Posted December 9, 2014 Author Report Posted December 9, 2014 The 100% original Highway Patrol car I mentioned above. Today's progress consisted of me realizing that Im am in need of new calipers for the turbo coupe axle, I have decided to grind on the caliper brackets to enable the use of the larger turbo coupe calipers with the slightly larger V6 mustang 5 lug rotors. I did one today to see how much it would take and its really not much at all, so that is good. The spring seats were fully welded onto the axle as well. Now I only have to make the shock brackets and weld those on. I also went to work on getting the 5.0 tore down and ready to be cleaned/ painted. Wednesday I hope to degrease and possibly paint it depending on weather. 5.0 in the F-150 Disassembled somewhat so I can clean it all up. Quote
fstfish66 Posted December 9, 2014 Report Posted December 9, 2014 nice project,,nascar team help...im guessing from dale jr??based on ur location,,,,love it there Quote
rolnthunder Posted December 11, 2014 Author Report Posted December 11, 2014 Thanks fstfish66! No not one of Jr's helpers however Im only a few minutes away from Sr's 8 foot tall statue haha! Not much was accomplished today, I degreased the engine then opened it up. It had the predictable top end sludge from sitting and never being opened up, but the bottom end wasnt that bad. I called Doug, the NASCAR buddy, and he said buy a case of brake clean and go to town then coat everything in oil when its all clean. I think Im going to media blast the valve covers and intake sometime this week hopefully. I had planned on using a few brackets I made for the railbuggy I built a few years back for rear axle shock mounts but it didnt workout. So Im just going to buy a few to save me some fab time. Also I'd like to know what a "fair" price would be for soda blasting the car. A guy at my station on a different shift owns a soda blasting company and he said something in the $1000 to $1500 area for the exterior only. Is this above/bellow average or on target? Quote
deathbound Posted December 11, 2014 Report Posted December 11, 2014 You seem to be getting a lot done in quick time.....keep at it. Check out this thread, post #44.....http://p15-d24.com/topic/36234-1950-suburban-57-hemi-project/page-3 Quote
rolnthunder Posted December 11, 2014 Author Report Posted December 11, 2014 You seem to be getting a lot done in quick time.....keep at it. Check out this thread, post #44.....http://p15-d24.com/topic/36234-1950-suburban-57-hemi-project/page-3 thanks, I have been trying to keep things moving but it isnt going quite as fast as i would like. seems like my quoted price may be a bit on the high side. I will have to look around some more. thanks again for the link! Quote
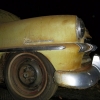
rolnthunder Posted December 12, 2014 Author Report Posted December 12, 2014 (edited) I feel like I made quite a bit of progress today... I spent the morning getting fire wood for the family BBQ next week then returned home to get the ol gal back under her own weight. If you remember, two of the tires I brought her home on were flat and wouldnt hold air. My other grandpa gave me two old trailer tires to get her rolling. They were larger than the originals but I got to say they fill out the fenders nicely! Under wieght Shes a roller! and thats it. There are no brakes what so ever. No break shoes up front or calipers/pads in the rear. I have to buy new calipers/pads and but the disc conversion for the front. It took some big hammers to free up the front brakes but now ill be able to roll her outside and get her all cleaned up tomorrow. I feel like this is a big step! Here is a rear axle shot, after it was all bolted in and checking the pinion angle. Edited December 12, 2014 by rolnthunder Quote
rolnthunder Posted December 17, 2014 Author Report Posted December 17, 2014 This past week has been pretty busy. Dad retired so we have been throwing parties and running all over town. Not to mention jesse has come home from graduate school and I am having to work on "more important" wedding stuff than the Plymouth. Anyway it only took 4 days to find time between work and everything else to finally wash it. After it was power-washed Jesse and I scrubbed it down and pull it back inside. Then we started cleaning the interior in order to take a better look at the floor pans. I found a few holes and tapped around with a hammer. Looks like I am going to be replacing most of the floor. While we were in there someone else showed up to supervise. The dash after it was wiped down I hope to get a gasket set for the engine sometime in the next week or so and get the 5.0 hanging in the engine bay. In the mean time Im going to be pulling all the original wiring out, anyone have any suggestions for that? It seems straight forward but Im sure someone has a few pointers that could save me time when I run all the new stuff. Is there anything I should leave? Also Im debating on whether or not to leave the original heater system or install an under the dash unit to clean up the engine bay a bit. Any suggestions here? Quote
rolnthunder Posted December 17, 2014 Author Report Posted December 17, 2014 ....Have you located any source of replacement parts.........like a parts car you can buy.....maybe for bumpers and such. Just some things for consideration. I forgot to mention, while at one of my dads retirement parties, a friend and were talking and he was going to take his 53 cranbrook to the scrap yard and said he would sell it to me for scrap price. A tree has fallen on it and crushed the roof and busted the rear glass and the floor boards are all gone. I told him id buy it in a few months. once I got what need off of it I thought about cutting the roof off and making a California convertible. his is Identical but is baby blue with a white top and has the overdrive tranny. Quote
JerseyHarold Posted December 18, 2014 Report Posted December 18, 2014 The overdrive transmission in your friend's Cranbrook is worth a lot of money. Definitely pull it if you can. Quote
fstfish66 Posted December 19, 2014 Report Posted December 19, 2014 love that stock dash,,,,a new heater would work better and clean it up,,there are tons of after market wiring kits available,,,if u get a newer heater make sure it has defrost ports on it, not all after market heaters have defrost check speed way motors jegs or summit Quote
rolnthunder Posted December 23, 2014 Author Report Posted December 23, 2014 Thanks fish, I almost dont even want to paint it! I believe Im going to have to use an after market heater. I dropped the 5.0 in the engine bay for the first time today and I believe that removing the factory heater and associated parts will make the engine swap that much easier. So far it looks like Ill only have a few clearance issues. Here are a few pictures from this evening. Here the harmonic balancer is hitting, however this may be fine after I remove the throttle cable bracket on the firewall. Throttle cable bracket causing a few issues. Also, after doing some research on the 5.0 I found that there are many different intakes. The one I had off of the F150 was the tallest and also one of the most restrictive. Come to find out, one of the best is off of a 1996-2001 Ford Explorer. So Jesse and I went to the junk yard and found one complete with throttle body, fuel rail, injectors. This is a 2 piece intake and after bout 2 hours I had everything off and Jesse even paid for it. I have to say I have the best future wife! I wasnt even going to go to the junk yard but its one of here favorite places. So now I have a 20 - 30 hp increase just from the intake according to my findings, its also a lower profile, and it has the 5.0 V8 plate on top which I plan on replacing with something with a Plymouth logo or something. Quote
rolnthunder Posted December 23, 2014 Author Report Posted December 23, 2014 (edited) Engine is now sitting in the car, now I just need some friends over to help me get it aligned and come up with motor mount solution since the universal SBF mounts I bought wont work as intended due to their width. I may be able to come up with something. Suggestions anyone? I need all the help I can get it will be greatly appreciated! Heater and throttle cable braket removed. The fan was also removed to get the engine where it needs to be, I just didnt take a picture. 5.0 in its new home for the first time, kinda. Motor mount. Edited December 23, 2014 by rolnthunder Quote
Old School Posted December 23, 2014 Report Posted December 23, 2014 Great thread. Good of you to take the time to tell the story in words and pictures. Good luck with your project. Quote
rolnthunder Posted December 24, 2014 Author Report Posted December 24, 2014 Great thread. Good of you to take the time to tell the story in words and pictures. Good luck with your project. Thank you, that was one of Grandma's requests. She wanted to see what I was doing with it. I have never been good at taking time to snap pictures at each distinguishable step. In the end Id like to make a photo album like you see the guys at car shows have propped open under the hood or laying on the seat. Quote
Adam H P15 D30 Posted December 24, 2014 Report Posted December 24, 2014 Thanks fish, I almost dont even want to paint it! I believe Im going to have to use an after market heater. I dropped the 5.0 in the engine bay for the first time today and I believe that removing the factory heater and associated parts will make the engine swap that much easier. So far it looks like Ill only have a few clearance issues. Here are a few pictures from this evening. Here the harmonic balancer is hitting, however this may be fine after I remove the throttle cable bracket on the firewall. Throttle cable bracket causing a few issues. Also, after doing some research on the 5.0 I found that there are many different intakes. The one I had off of the F150 was the tallest and also one of the most restrictive. Come to find out, one of the best is off of a 1996-2001 Ford Explorer. So Jesse and I went to the junk yard and found one complete with throttle body, fuel rail, injectors. This is a 2 piece intake and after bout 2 hours I had everything off and Jesse even paid for it. I have to say I have the best future wife! I wasnt even going to go to the junk yard but its one of here favorite places. So now I have a 20 - 30 hp increase just from the intake according to my findings, its also a lower profile, and it has the 5.0 V8 plate on top which I plan on replacing with something with a Plymouth logo or something. Heard the explorers used some of the best cylinder heads also. FWIW Quote
rolnthunder Posted December 25, 2014 Author Report Posted December 25, 2014 You're right Adam. I was planning on going that route until I started doing more research today. It turns out that the engine I have when paired with the truck intake only makes about 150hp. With a cam swap, the new explorer intake and heads it would be about 225hp. the heads would run me about $400 after sending them to the machine shop, and I dont have that kind of money to spare on power adders right now. The plan is at this point is to go with what I have and save up for a set of twisted wedge heads and Ill be close to the 300rwhp mark with a few other parts. I have been building the engine in my head all day and I just have to stay focused on getting it running until after June. Im still looking of options on how to mount the engine any advice? 1 Quote
Dave72dt Posted December 25, 2014 Report Posted December 25, 2014 First thing I'd do is get the parts back on the engine that can't be or would be difficult to move from Ford's intended location, like the starter and exhaust unless your planning on fabbing up a set of custom headers, oil filter, etc. things that take up space and you need to have to run and then see where you have clearance and what obstacles Mopar put in the way, like that big steering box and column. From there you may find the engine needs to go back further to gain space. Figure out your cooling system too, before building mounts. You need room for that. 1 Quote
rolnthunder Posted December 28, 2014 Author Report Posted December 28, 2014 First thing I'd do is get the parts back on the engine that can't be or would be difficult to move from Ford's intended location, like the starter and exhaust unless your planning on fabbing up a set of custom headers, oil filter, etc. things that take up space and you need to have to run and then see where you have clearance and what obstacles Mopar put in the way, like that big steering box and column. From there you may find the engine needs to go back further to gain space. Figure out your cooling system too, before building mounts. You need room for that. Good looking out, Im not sure if my exhaust would have fit quite right. The other day I went over to Mom and Dad's and picked up the manifolds and alternator. Once I lowered it back In I noticed that I needed to move a few unnecessary items. Ill post pictures later of that. Today however I felt pretty accomplished. I got home about 8am from work, between then and about 8pm Jesse and I were able to to pick out the suits for the wedding, eat lunch, go to a junk yard and pull a s10 T5 tail housing, shifter, and shifter forks, return home then go teach her sister how to shoot. All in all I had a pretty successful Saturday. I also ordered a different style of motor mount to look at and see from what direction I want to attack this thing. Im feeling pretty good right now on the status of the build, but Ill fell much better once I get the motor mounts welded in. After that I think it will be just like working on the fords that Im used to and the pace should pick up a bit. 1 Quote
rolnthunder Posted December 28, 2014 Author Report Posted December 28, 2014 With the manifolds on the shifter linkage was in the way, it was disconnected and flipped over to the left hand side of the steering wheel. Now it looks like it was almost meant to be. the manifold slides right over the steering box. There is minimal clearance maybe 1" or so. Is that enough or should there be more? Passenger side. Now that the engine is further back the crank pulley clears up front so far and Im waiting on an alternator bracket to come in to confirm that it will fit. If it doesnt I should only have to massage the inner fender slightly. Quote
Don Coatney Posted December 28, 2014 Report Posted December 28, 2014 I understand you are working on a deadline but I must ask why you are installing a high mileage dilapidated engine that most likely will produce more smoke than the best mans cigar and looks as if will not live much past the deadline. Quote
rolnthunder Posted December 28, 2014 Author Report Posted December 28, 2014 Yes, it has about 100k on it but it looks worse than it is, the heads are still a little sludgy but the bottom end Is nice and clean. It ran like a top before the wreck, turns over nicely and still has good compression I have a pile of all new parts for it in the garage: H20 pump, Oil Pump, Timing Chain, Thermostat, Water outlet the whole 9. I just want to have it mounted and ready to go before I put all new parts on to prevent from having it swinging everywhere beating on the new parts. I also just spent a good bit of change on rebuilding a 351 for my 85 bronco so this will have to do. A full rebuild will happen without a doubt but it may be after the wedding. Worse come to worse I have a brand new 351 I can throw in it in no time at all that would bolt right up. But right now Its just mock up, there will be more cleaning and prepping that will occur before I try to crank it for the first time. Quote
rolnthunder Posted January 6, 2015 Author Report Posted January 6, 2015 Time for an update, The past week has been a bit crazy with wedding planning so the cranbrook hasn't received much attention. Today I did some more figuring with the motor mounts. I came to a few realizations. 1) the universal small block ford cross member i bought from speedway motors isnt quite universal enough. 2) there is no chance of the motor mounts from welder series is going to work either due to how wide they are. 3) the mounts are going to have to be 100% one off. No pre-made universal mount is going to come close. So now I have the material to make my mounts and hopefully in the next week everything will be welded up and I can move on. Ill be using mid 60s sbf mounts to bolt to the block. From the frame to the motor mounts Ill be using some 3/4" x .120 wall DOM and 3" x 1/4" plate. Hopefully after that Ill be able to get back to a good pace only 5 months to go till D-day literally. I did buy a small air compressor and picked up all my air tools from my parents so my wrenching speed should pick up a but with my air ratchets. Oh how I missed my air tools! 1 Quote
rolnthunder Posted January 7, 2015 Author Report Posted January 7, 2015 Im back in the saddle again... finally. I was able to fine tune the position of the engine using wire on all side to keep it from moving around, made a cardboard template of the passenger side bracket and was able to get it tacked in place. Thursday I should be able to make the drivers side bracket. These are the mid 60s factory sbf mounts. It uses a sleeve that is welded to brackets that attaches to the frame. The sleeve is 3/4" x .120 wall DOM tubing so a 1/2" bolt fits nicely inside. The factory mounts would not accept a 1/2" bolt so I used my air die grinder with a 1/2" diameter carbide bur to make it fit. Once I had the sleve and the bolt in place I bolted the mounts back to the engine and broke out the cardboard. Then cut out the brackets from 3" x 1/4" plate steel. Drivers side Passenger Side Please dont judge the welds too harshly, I couldnt fit my big head and the helmet under the car so it was done pretty much blind. finish welds will be with the car on stands so ill be able to get a better position. Quote
rolnthunder Posted January 7, 2015 Author Report Posted January 7, 2015 Also gussets will be added once the engine is pulled back out. 1 Quote

Recommended Posts
Join the conversation
You can post now and register later. If you have an account, sign in now to post with your account.