


rustyzman
-
Posts
218 -
Joined
-
Last visited
-
Days Won
1
Content Type
Links Directory
Profiles
Articles
Forums
Downloads
Store
Gallery
Blogs
Events
Everything posted by rustyzman
-
My '54 headlight switch operated the same way originally. Front running lights turned off when the headlights turned on. I have since rewired it all and they all come on in the headlight position now. Interesting but odd functionality that they had originally.
-
Congrats on making the purchase! That truck looks very good from the pictures and that alone will put you ahead of the game. My '54 C1D was in very poor shape when I bought it, with issues in absolutely every system ranging from inconvenient to pretty devastating. Plus it is a 1 ton, so many parts are harder to source. Even with that, I have gone through all the mechanicals and located most everything I needed, even if some took a bit of time to find. Good news is that a whole lot of parts can be had, especially for a 1/2 ton. Engine mechanicals are all available. Brakes are available (minus drums, maybe? not sure) Wheels and tires are much easier for that one. Glass is available. Wearing components for the suspension and steering are available. Bed kits are available. Driveline parts are available. None of it is as easy as buying parts for a ford or a chevy, but these are much more unique and rare, at least around here. Looks like you will have a great base to start with and a really nice truck to have fun with. Good Choice.
-
Nice! We had that ATLAS or a very similar model at one of the service stations I was a tech at. It was a good unit for it's day. You can get an idea of if the combustion process is too rich or too lean by reading the firing line and the spark line shape on the scope, but without a probe, you won't be able to easily see the change point from too rich to too lean as you adjust. Need to see CO and HC, and watch where they diverge to get stoic ratio correct. A wideband O2 sensor in a welded bung in the exhaust up front and an air/fuel ratio sensor will really get you much closer. I would still use that to get the basic tune-up settings right if I had it.
-
And I thought I've seen all the wacky vintage car accessories...
rustyzman replied to Pep48's topic in P15-D24 Forum
I'm a big pocket watch fan. I would absolutely dedicate one of mine to a vehicle. I have also seen that accessory once before, not too long ago. Judging by the illustration of the steering wheel, that one was meant for very early cars, though the phillips screw brings the manufacture date to a bit later... Interesting... Super cool. -
Mcmaster Carr has several versions of zerks for unthreaded holes if needed. I have no doubt they will ship anywhere too. Might make more sense to do what Sniper suggested and thread it instead for a more common one instead. Normal locking style https://www.mcmaster.com/products/zerk-grease-fittings/grease-fittings-for-unthreaded-holes-6/ Flush style for use with a grease needle https://www.mcmaster.com/products/zerk-grease-fittings/flush-style-grease-fittings-for-unthreaded-holes/
-
License plate bracket - is it bent?
rustyzman replied to bkahler's topic in Mopar Flathead Truck Forum
You know, now that I look at a few other pictures, I might have that wrong. It looks like some pics show it mounting the other way, jogged toward the front. Sorry, not being much help on this one... -
License plate bracket - is it bent?
rustyzman replied to bkahler's topic in Mopar Flathead Truck Forum
Could be wrong, but I think that is correct. I have not had my original one in my hands in a long time. As I recall, it mounts with the taillight bolts and jogs the plate to the reat, under the clear lens on the bottom of the taillight. -
My '54 has a knockout stamped on the front face under the grille that you can punch out and setup for a crank. Has the crank nut on the crankshaft as well.
-
Nice!
-
Nice. Put up some pics when you get them and as you restore them!
-
Any info you can give would be appreciated!!
rustyzman replied to Rhino71's topic in Mopar Flathead Truck Forum
That is a great looking truck in excellent condition! For my 1 ton, the rear shoes took about 5 years to find in the wild on ebay. I have the oddball Timken style they only used for about 2 years on the rear. Fronts were just Lockheed and readily available. I have since obtained extra linings for front and rear and will rivet them on the old shoe cores once I get time, so I have spares. Rear wheel cylinders were an odd bore size too and all modern catalog listings are incorrect for my year. Had to go to Kanter for those, but they had what I needed. Biggest issue that I found was no availability of replacement drums at all. I have snagged a few used ones, but condition is a bit questionable. Better than nothing at all though. If you can, a dual circuit master cylinder would be wise. I am assuming it still has a single pot unit. I found a '75 Chevy 1 ton unit that has the correct bore size but had to make an adapter and new pushrod to get it to work. Certainly feel better about the dual circuit though. Love that relining station there Dodgeb4ya. I have a STAR relining unit in my watch list on ebay that I have no business buying, but man I want it! -
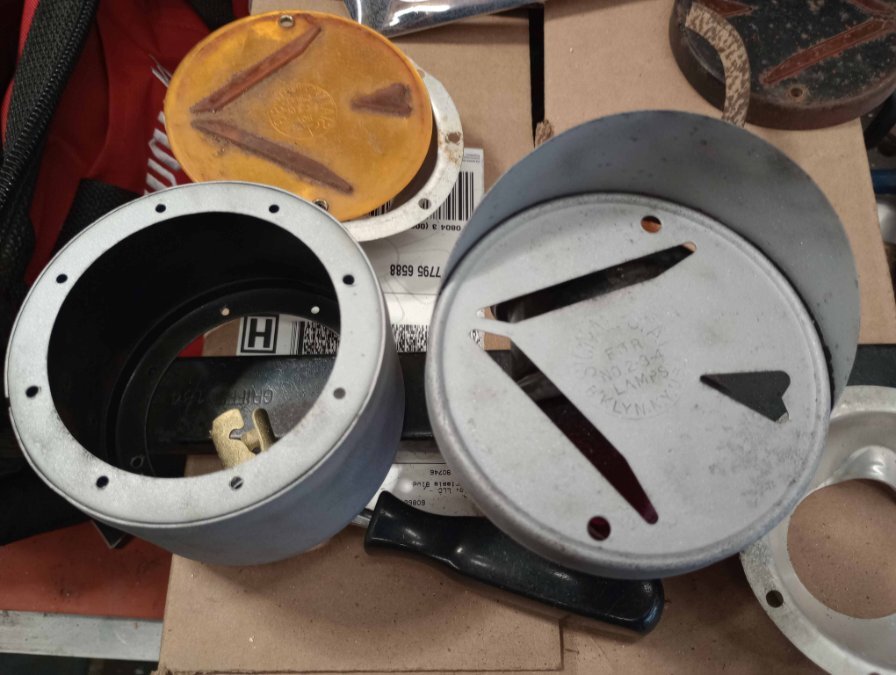
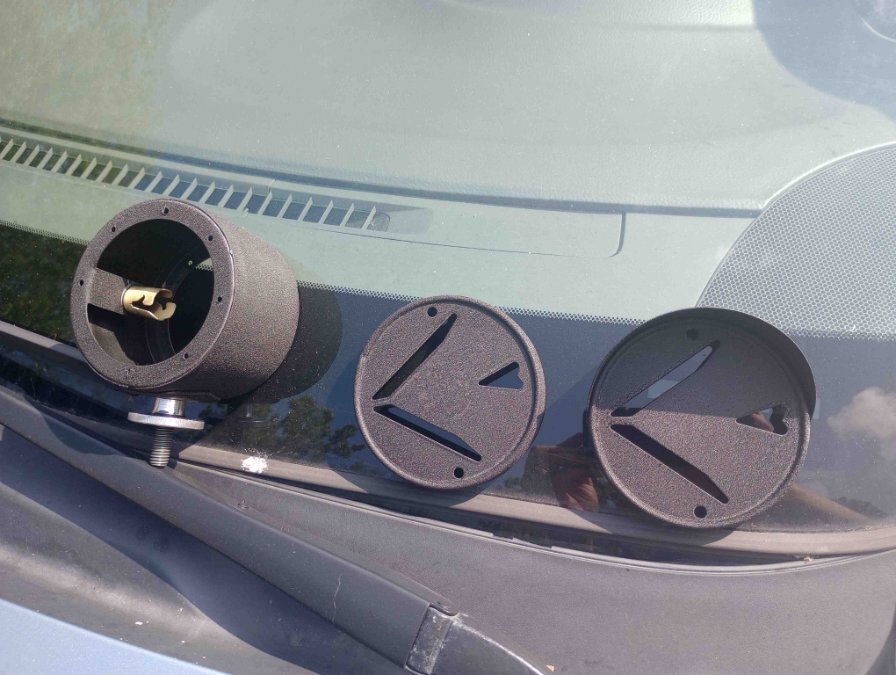
In case you want some ideas, here is a couple shots of the restoration of the Signal-Stat arrow lights I did. Nice link there ggdad1951. That is a good selection.
.jpg.6691a645cb4d1f7667233755a25d8d77.jpg)
.jpg.ab459a6b2eeb66532784dbe1547ae382.jpg)
-
Nice work! A beast to say the least. We are all spoiled with these aluminum cased transmissions now. The cast iron 4 speed and 5 speed truck transmissions are more than a minor challenge.
-
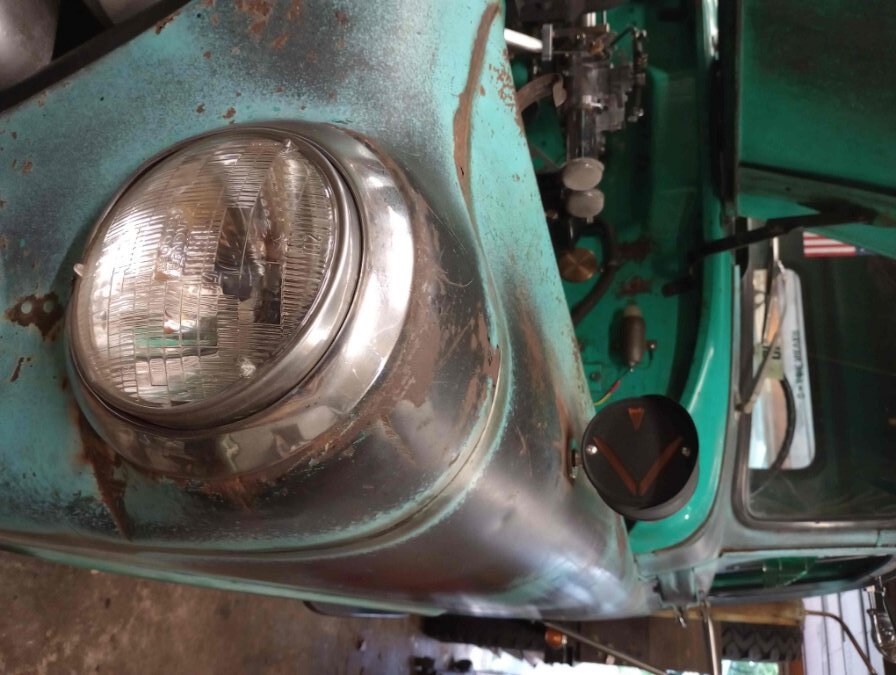
I absolutely love vintage truck lighting. True, these vehicles did not come with turn signals installed. They were not required by law at that time for Trucks and got added on afterwards as the laws changed. The older ones only had one taillight on the left hand side and no reverse lights. Parking lights also turned off when the headlights were on. I just recently restored a pair of very old arrow style, double sided lights with visors on the front facing lenses, for my fenders. Previously I had a NOS pair of Peterson amber/red double sided ones that I moved to the old RV instead. I've wanted a pair of these arrow lights for a long time. There are many options for double sided turn signal lights. New stuff: https://petersonlightsandharnesses.com/ https://www.truck-lite.com/ Old stuff: Peterson, DO-RAY, Signal Stat and KD are just a few of the popular old makers of lights. Usually, they have an amber light to the front and a red light to the rear. Farm Tractors used them all the time. I have bought many NOS lights at very good prices over the years. You just have to be patient and search for them. Ebay and swap meets are the best I have found. Hand throttles are also very useful if you have a PTO on your trans. RPM up for the load of whatever you are running off the PTO when it is engaged.
-
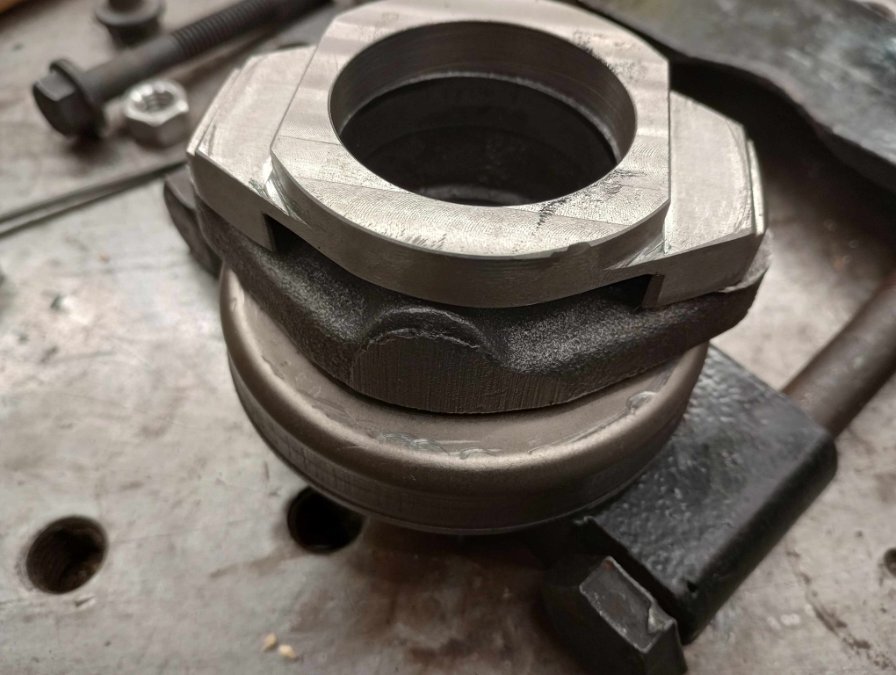
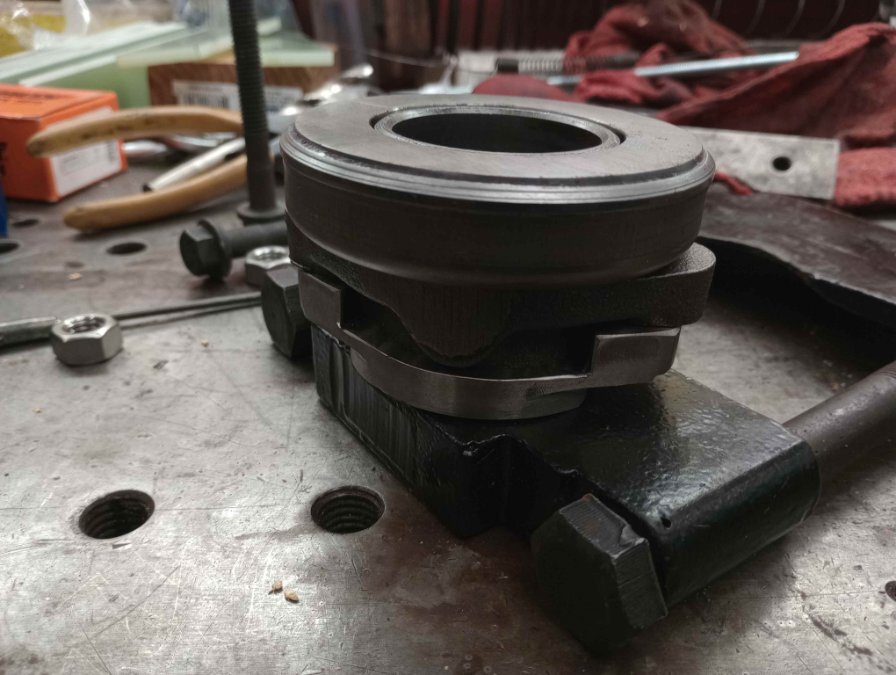
Is that the 11" clutch? Looks identical to mine too.
-
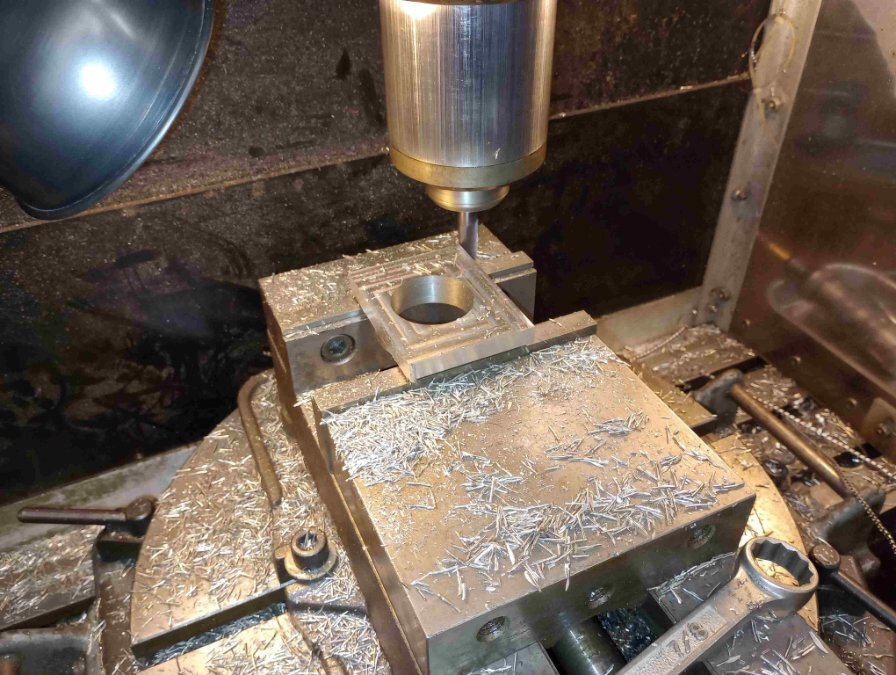
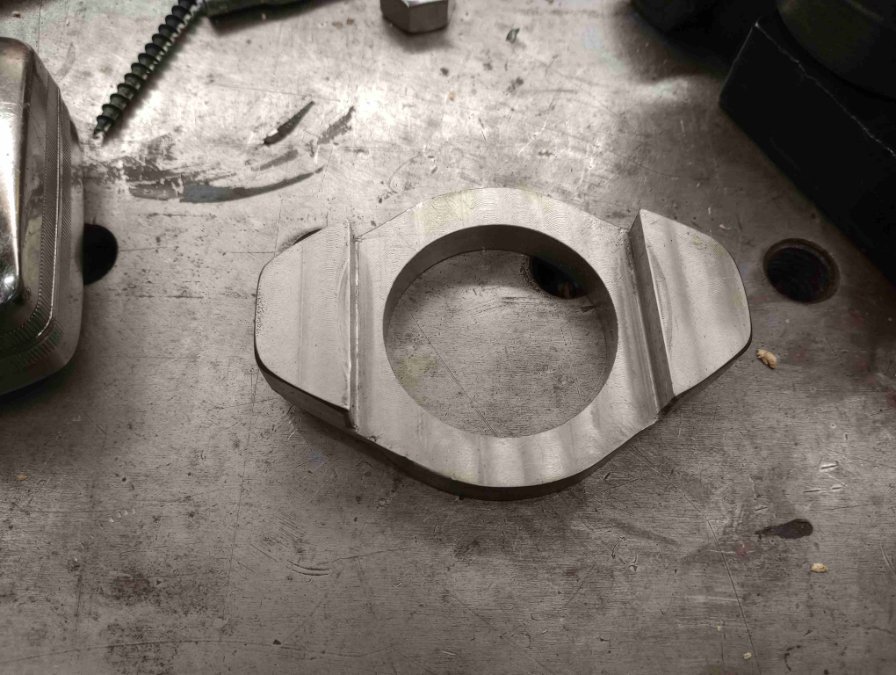
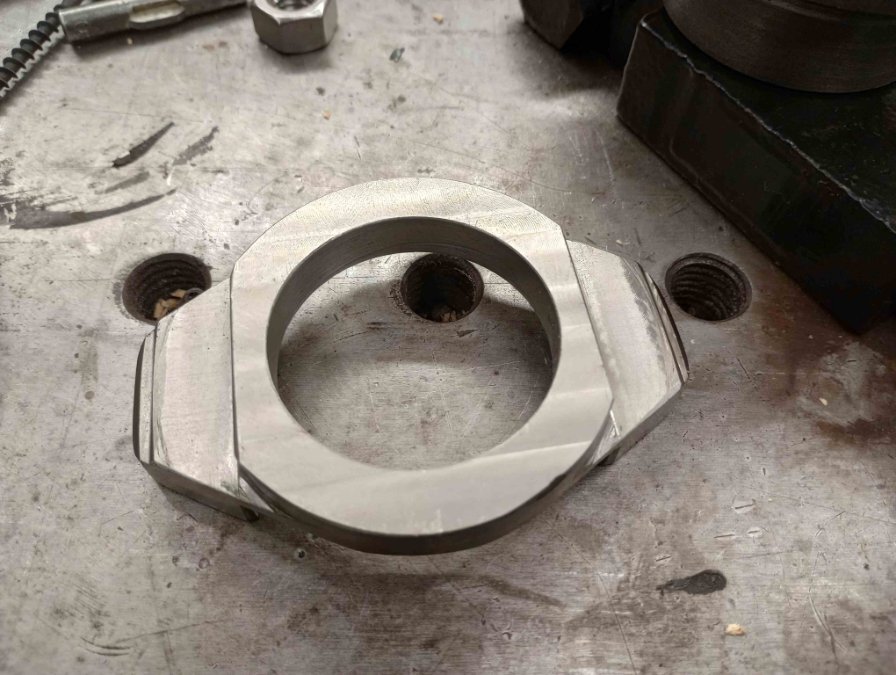
Yeah, it is a challenge for sure. I have done many, many clutches on my back and on lifts and this one was the most challenging. Other smaller 3 speeds from the era are usually a piece of cake, but these bigger ones present some difficulties. I even machined down a new input shaft and made it into a clutch alignment tool, so the alignment of the disc was spot on. Still was a booger. I suspended the throwout bearing in place on the release cross shaft with the return spring and got it aligned on the front bearing retainer through the belly pan area. I also used the genuine SACHS clutch spline grease on the splines and the bearing retainer surface and pivot pads. I used to use that at work with very good success. I used extra long bolts to help draw in the trans and made several thicknesses of sleeves to swap out as the bolts would bottom out. Normally I never draw in a trans with bolts, and get it in place flush by hand first, but this one was not having any of that. I like your allthread idea, it would be a much more practical method. Once I made the throwout bearing release collar spacer, my freeplay adjustment was no longer at the end of the threads of the turnbuckle and the bellcrank was not hitting the frame crossmember. Works nice and smooth now, with good engagement spacing from the floor. Ok, No more of my hijacking your thread! 😁
-
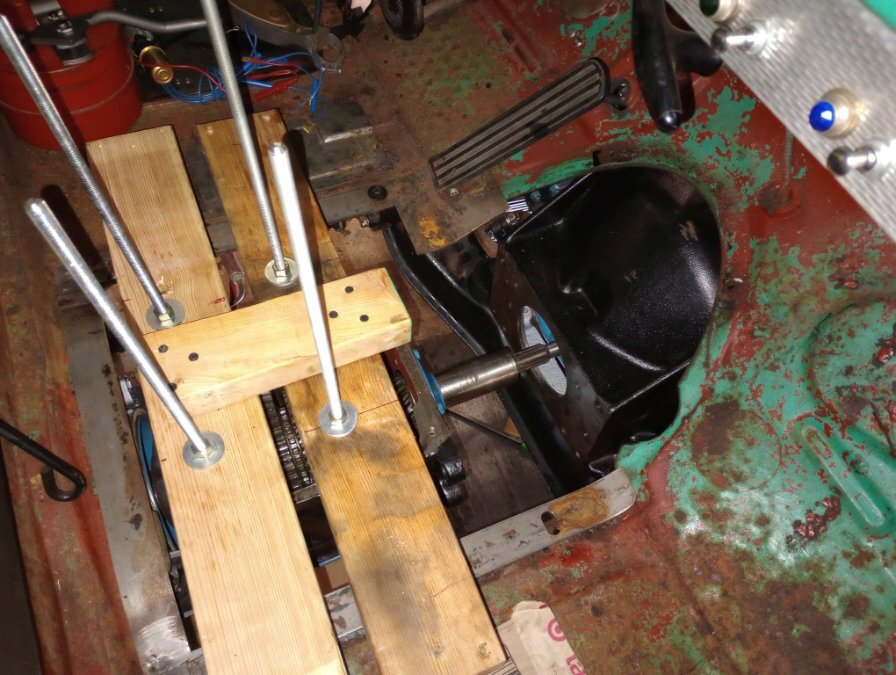
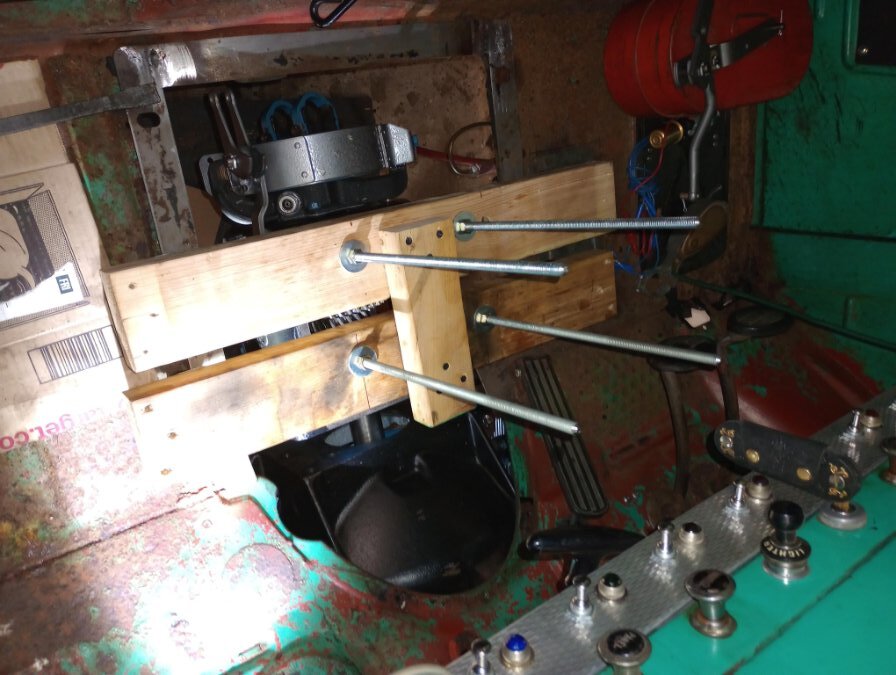
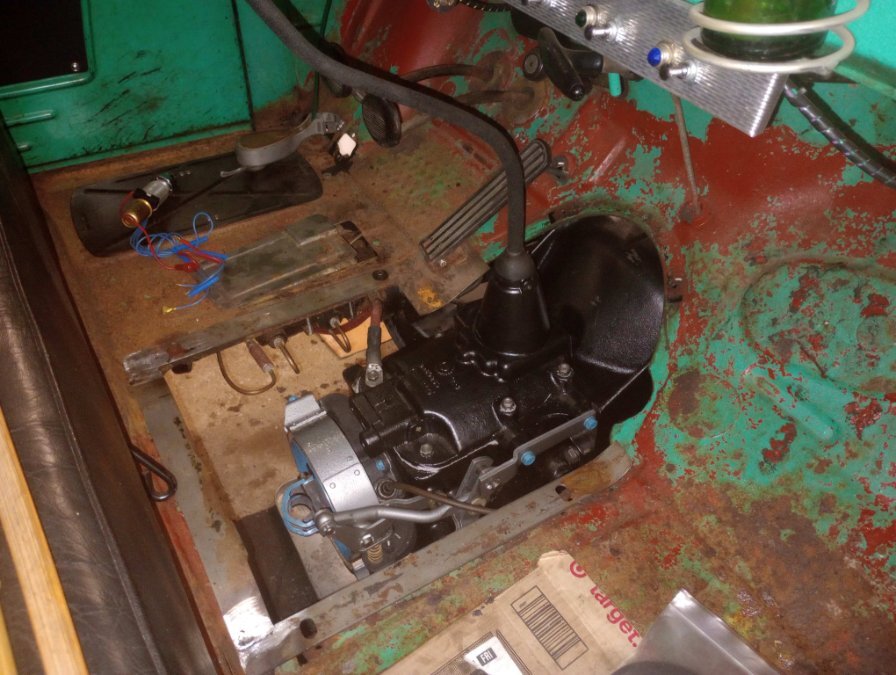
The 4 speed in my C1D was a real booger to get back in. Had to pull it a second time to make a spacer for the throwout bearing sleeve, as I believe someone replaced it with a shorter one back in the past. The NP420 is such an odd shape that it would not stay cleanly in place on the trans jack, so I made a sliding trans lifting/aligning brace that used threaded rods (4) long enough to reach from ground level if needed. Heavy unit too. The brace rode on 4 rigid wheels that ran up the sides of the floor pan opening. Once I got the angle and height correct, I could slide it right in and out of the bellhousing with no issue.
-
Confirm your pressure with an external gauge. If it is indeed zero at that point, shut it down and run no further. Putting anything behind the spring of the relief valve would just increase the total pressure required to unseat the valve just like you said. Normally, you increase this by using the optional higher compression spring, but a "shim" will have sort of a similar effect. If the bolt was long enough, it could stop the valve from unseating at all, jamming it in place. Overall sounds like someone was trying to find a cheap way to fix a bigger problem. Sudden catastrophic loss of oil pressure can come from a number of sources. One common issue is a spun bearing. That will cause lots of bigger issues if it continues. A clogged inlet screen or a broken crossover pipe similarly will cause the same thing to happen. A totally failed pump is possible, but usually I see those lock up and break the drive gear. That kills the engine because the distributor stops rotating too. Happened to me on a new pump. Drop the pan and take a look. You can pull bearing caps too and see what the bearings and journals all look like too. Mine was very damaged on two of the mains. Good oil pressure dead cold, dropping to almost zero warm at idle. Also found out that I had a clogged chain oiler and that the timing chain had absolutely never seen a drop of oil in the 15 years I had owned it and drove it. That was a surprise. Checked it out and found the cam was retarded 9° because of all that chain wear. It explained a LOT of odd issues I was trying to work out. No audible indication at all. Now with my rebuild complete and all issues corrected I am 40psi at idle hot and about 50psi cruising, and that is with the chain oiler open again.
-
Dodge-Chrysler Starters 1940's-1953 and Internal Parts
rustyzman replied to Tomarsha's topic in Mopar Flathead Truck Forum
Agree with ggdad1951. Vintage Power Wagons lists starters for the trucks. I have found a number of the power wagon military parts match up to the 1 ton civilian trucks. Quite a few items do for my '54 C1D. Worth a phone call, they are nice to work with. If you decide to rebuild your own, Rockauto has the brushes for mine and bushings as well. Likely for yours as well. The bendix is the tricky one. I have not yet located a good reliable interchange resource to determine the correct part number to look for in the sea of old stock ebay ones. I have the OEM part number from the parts manual, but every one of the aftermarket rebuilders used their own part numbering system and most of those companies are long out of business. -
In all honesty... a case of the nerves - 49 Plymouth Engine reassembly
rustyzman replied to nbn's topic in P15-D24 Forum
I had one of those new pumps that locked up after about 15 minutes. Very odd failure and no indication that it was going to happen beforehand. Properly primed, spun freely etc. Knocked two teeth off the drive gear and nicked the cam gear a little. Not the best day... The one I got for the full rebuild this time is fine, no issues. That being said... I always check all clearances myself during reassembly regardless of who did the machine work. I check all bearings, gap every ring in it's appropriate cylinder, check valve contact, adjust valves, etc. Be sure your engine stand is secure and preferably has 4 legs. These are heavy buggers especially once the bellhousing is on and stability is key. Make sure the pistons are facing the correct direction and the rods are in the correct spots. Oil hole faces the cam. Make sure all the rod caps are matched to their attendant rods. Put rubber hoses over the rod bolts as you put them in the block so you don't nick the crank and damage it. I dip the full piston assembly into a coffee can of oil before I put it in the block. Clock the piston rings 180° apart when you put the pistons in. I also do a rotation check after each piston is installed individually to see if there are any binding issues. Prime the oil system before startup, I use a syringe plumbed into the gallery until I see oil at the bearings. Good assembly lube on bearings, seals and valvetrain sliding components. I also plumb in a mechanical test oil pressure gauge. Reassurance that everything is good with a good gauge you can trust. Don't forget the oil relief plunger and spring! If it's a new cam, I put Rev Lube on the cam lobes and tappets along with actual break in oil (for flat tappet cams). New flat tappet cam for me also means prep all ignition, fuel and cooling system for immediate fire up and 30 minute break in run on first startup at 2500 rpm. That oil is changed after the 30min break in and a new filter is installed too. fill the cooling system as far as I can before I put in the thermostat and housing. Helps prevent air pockets and overheat on that break in startup. Make sure you put all the oil gallery plugs back in and sealed. Make sure you coin all your freeze plugs in place. I also seat them in 599 grey silicone myself, but do as you see fit. Be sure the coolant petcocks (both) are closed. Make sure you put the timing chain oil tube back in! Don't forget the oil slinger before you bolt on the timing cover. Center the timing cover seal to the crank. Make a tool or use the crank pulley. Make sure you attach the oil pump transfer pipe back in the correct way or the crank will hit it! Disassemble and clean the oil pickup screen thoroughly if that was not done. I always paint the timing pointer and timing marks on the crank pulley with my favorite bright colors before assembly. Makes tune up work much better later on. Don't reuse any hardware that looks suspect. If it feels funny when you tighten it and torque it, stop and find out what is wrong. Paint everything you want painted now. Replace the water distribution tube and reinstall it with the opening slots facing the valves. Remember to install all the seals. Use your favorite version of thread sealant on all headbolts, manifold bolts and timing cover bolts that pass into water jackets. They will leak if you don't. I personally seal all gaskets. I have never trusted paper alone once something has been apart. Your choice on this, but my rebuilds are leak free. Use whatever sealer you prefer. I like 599 grey. Torque the head in sequence and in steps. Remember head studs have a lower torque than the bolts if you have any studs. Torque them all again hot at the end of your first warm up, they will be loose. Spray copper sealant on the head gasket, one side or both according to your feelings on the matter. That covers most things I can think of. I can reassemble and run in a normal day once all the machine work is done, but each person and each engine is different. I would prefer to spend more time and be absolutely sure it is correct if in doubt. It's just careful work, not crazy complex stuff, but missing a nut or bolt in the wrong spot can end the engine. Just go slow and double check your work. Work without distractions and don't entertain anyone while your doing it. You have the wherewithal to be cautious and ask these questions, and that alone makes me feel like you will do a good thorough job on it. Most of all, have fun! -
With my C1D, it turned out to have the optional 11" clutch. The standard truck 10" clutch bolt pattern was in fact different than the optional 11" clutch and would not have fit. Just FYI. If you take an old timey caliper and spread it across the flywheel OD through the inspection cover and measure that caliper off-car, you can then measure the distance from the edge of the flywheel to the clutch disc edge, multiply by two and subtract from the flywheel OD. You'll have the disc diameter then. You could also feed a rope around the pressure plate at the bolts, mark it and measure it off car and divide by Pi. Tape it, rotate the engine until it comes back around. Another quick measurement from the pressure plate edge to the clutch disc edge, times two, subtracted from the diameter you got from the rope would get you the disc diameter again. Not super easy, but still easier than pulling the trans. Also, if they are compatible, Vintage Power Wagons has 10" clutch kits. I also had to machine a spacer for the backside of the throwout bearing sleeve on my truck too. Mine was definitely wrong for the application and was too short. Clutch release lever was bottoming out on the frame and barely releasing. Works great now.
-
Are those cheap, new, aluminum radiators any good?
rustyzman replied to 1949plymouthdeluxe's topic in P15-D24 Forum
I used many of the GM pellets in the shops. Supposedly were intended to lubricate the water pump seal. The one I personally have used exclusively for the last 15+ years is K-Seal. Same stuff that Subaru issued to help with MLS head gasket issues. We always called it Mechanic in a Bottle. It works. https://www.kseal.com/products/k-seal It works well and does not clog up radiators and heater cores. I use it at coolant changes on the '54 Truck and the '73 RV, just as a preventative measure. -
I still recommend the spray on both sides, even with a newer style gasket. My personal preference and experience suggests that with a less than factory perfect surface on either side, this can help with sealing. A tap of the correct class of fit, used properly, will not remove additional material. Chasers are OK as well, but a correct tap is a perfectly fine tool for the job. I am aware that the plug is not above the piston. Perhaps my wording was less than ideal on what I am trying to get across. The issue I am suggesting to avoid is removing so much material from the head, that area of transition area between the plug, which is above the valves, and the top of the piston is not narrowed too much to get a clean, quick burn transition. Again, your opinion on how much is too much to take off may vary, but if that physical transition area between the plug and the piston is narrowed too much, it limits how quickly the ignited air/fuel mixture will propagate into the area above the actual piston. It is one of the reasons that Fire-Slot style high compression heads existed in small racing flathead applications, to attempt to correct a severe narrowing of that area in high compression heads by providing a direct ignition propagation path to the piston. We of course want more compression to improve the overall power of the engine, but there is a physical limit of how much can be removed from the head or block before adverse effects show up. That is what I was trying to say.
-
Spray coat your new head gasket with Permatex Copper Spray, on both sides before you install it. https://www.autozone.com/sealants-glues-adhesives-and-tape/sealant/p/permatex-copper-high-temperature-spray-a-gasket-sealant-9-oz/520940_0_0?cmpid=LIA:US:EN:AD:NL:1000000:PER:19332030449&&CATARGETID=120054150001286384&CADevice=c&gad_source=1&gclid=EAIaIQobChMI4bHmoaauiAMVzEX_AR33oQxPEAQYASABEgJk9vD_BwE&gclsrc=aw.ds I seal the head bolt threads with thread sealer. My personal preference is this one: https://shop.advanceautoparts.com/p/permatex-high-temperature-thread-sealant-1.69-oz.-59235/16160026-p?product_channel=local&store=7134&adtype=pla_with_promotion&product_channel=local&store_code=7134&&&&&gad_source=1&gclid=EAIaIQobChMIpou-tqauiAMVv0H_AR03PwgYEAQYCSABEgKCIfD_BwE&gclsrc=aw.ds Gently clean out all the head bolt threads on the block, as well as any of the mounting bolt threads on the head with a tap. Torque the bolts properly, in steps and in sequence. Retorque them again when the engine is hot. If you have any head studs vs head bolts, realize that they are not the same torque. Perfect time to shave the head a little too. I took .030" off mine. Lots of opinions on how far to go to raise compression vs. retaining some squish area between the plug and piston. Anything will help a little, our engines are very low compression generally. Paint the head if you like, perfect time. Use proper body mechanics lifting it on and off. It is heavier than it looks, but it is totally manageable. Remember to have fun!
-
12bolt tom/ Langdon exhaust manifold heat plate kit install.
rustyzman replied to BayArea48Deluxe's topic in P15-D24 Forum
I have the dual cast iron headers on my truck with a Thickstun intake, but I chose to forgo the heat plate. I don't use it in very cold weather and have not had an issue thus far. So, I can't help with the install other than to say it should be a bolt on plate with coolant hoses running to it from perhaps the heater bypass connection on the head to the water pump bypass connection on the top of the pump.

