Sharps40
-
Posts
759 -
Joined
-
Last visited
-
Days Won
5
Content Type
Links Directory
Profiles
Articles
Forums
Downloads
Store
Gallery
Blogs
Events
Everything posted by Sharps40
-
Dad, Got through the rear brakes today. Ordered the right parts to make it stop. On the way is 2 brake drums, brake shoes, wheel studs, wheel nuts, axle brake lines, rear brake hose, brake hose bracket, and the first of the chrome smoothie wheels with baby moon caps. Hunting tomorrow but will inventory the fuel tank and system. Probably just need straps and tubing for that, an easy job that can be accomplished in concert with the brakes on the rear axle. I think the shop had us stuck in a well, and kept throwing in crap. But in fine fashion, we climbed up the ******* pile and are out of the trap. So far, so good and I see Ol Bessy starting to shine. Lots of work ahead but we will make it. Be ready to work between hunting trips when you get here in a few weeks. A photo of your wheel attached. Should be sexxy with a whitewall. We can't afford Cokers but we'll have nice riding radial tires on it. Once I pop it on, I can double check for fit, but right now the 235/75R15s on the car stick out of the fenders. Measurements indicate a good 15" x 6" wheel with less than 4" backspace should accommodate a tire size like 225/75R15 - Good height, fills the wells, doesn't rub or stick out......I hope.....Measure 75 times, purchase once!

-
Dad, Diving into the rear brakes, back to front as always for this job. New wheel cylinders arrived. Knew I'd need them. First look at the passenger side rear drum brake. Drum is August 72 and 150 thousands oversize. Will replace both drums then. 2 lug studs missing, other three good shape and chased to clean up the thread. With luck I can press the new lug studs onto the axle flange through the hole in the backing plate for the wheel cylinder. If not, its take apart the differential and then decide whether to replace studs or the entire axle assembly. I have all the measurements and so checking the parts availability tonight. After some lunch, on to the drivers side rear drum to see how it looks.

-
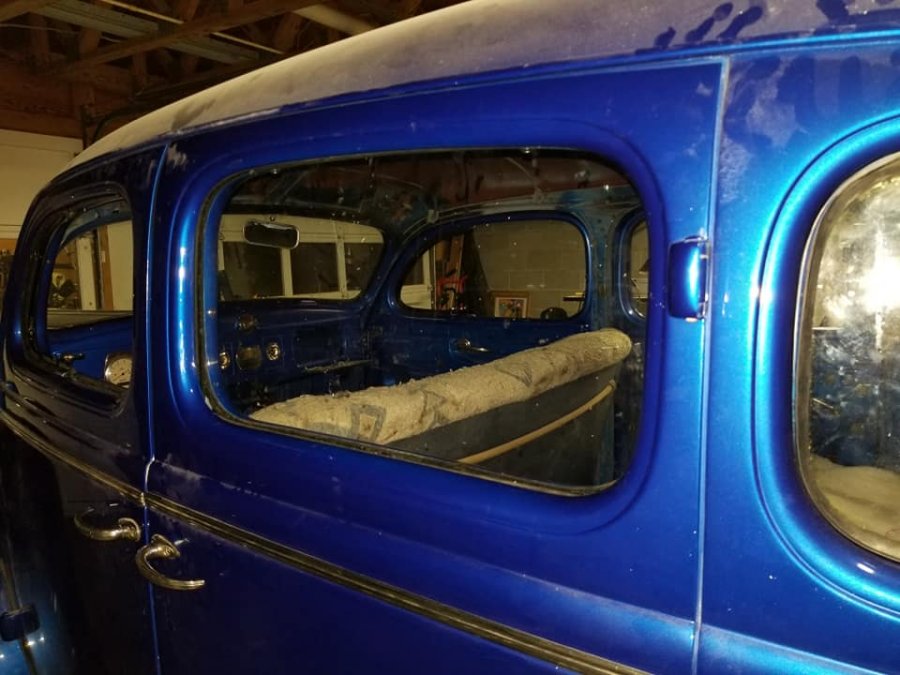
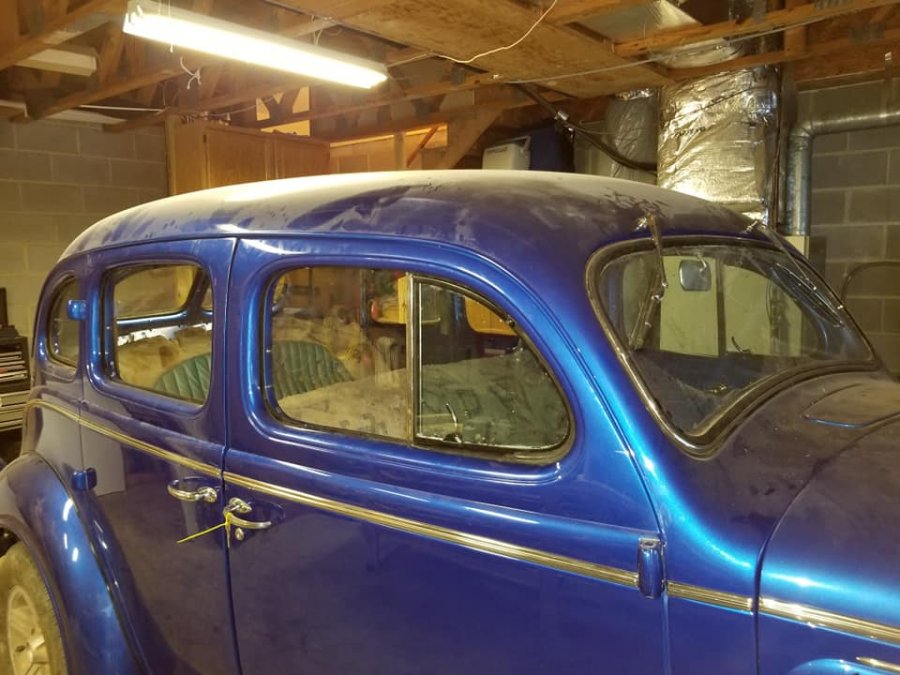
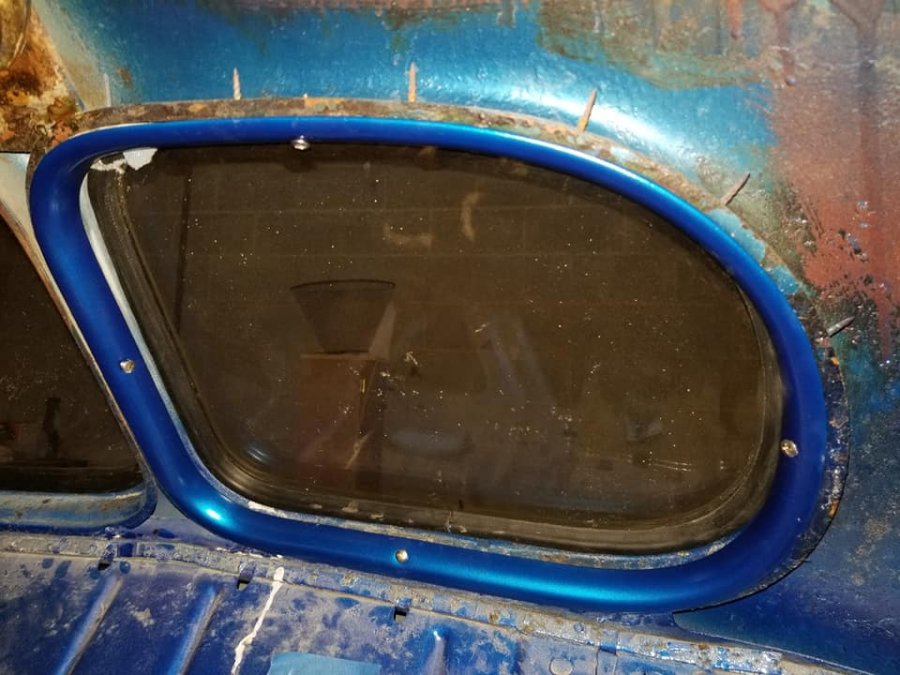
Dad, Glass is finally done. Everything fits and works. The last three pieces are a much darker green tint than the original and replacement glass we used in the past. But, she's buttoned up. As for wiring.....I have just about run out of wiring to do. Firewall to rear bumper is 98% complete. Fire wall forward is not being done yet as I have to pull the sheet metal and engine/trans to swap in the new power plant. But gauges, switches and the back end are all hooked up and ready to work. So.....time to start on the rear brakes tomorrow. Time to clean and paint the underside, clean the fuel tank and plumb fuel and brakes at least as far as the firewall. Probably need to order the stereo and speakers now as well. I'll also measure the wheel spaces and order the first wheel and tire to check fit all around. Will likely also convert the points distributor to electronic (of the two on hand, the HEI unit is worn out, the 71 Chevelle dizzy is in nice shape and the smaller size is prettier under the hood with a big coil beside it). At this pace, and barring any heavy duty deer hunting (that's very likely to happen), it'll be time to find an engine hoist and order the motor and trans by or before the end of October.

-
Dad, Spent most of the day on wiring. Managed to get the dash switch plate wired up, ignition, alternator light, headlight switch and wiper switch. Everything wrapped, soldered and crimped. A huge amount of the day was spent upside down looking up into the dash and separating out those wires that go up over and into the switch plate from those that go down and through the firewall to the engine bay. So far, the wiring part is pretty easy. The hard part is the monkey contortions to get the wires in the right places after reading the itty bitty numbers on the wires and double checking to determine if its going the right place. The big scare today is a misprint in the painless wiring harness guide book. After separating out the wiring by number, wrapping it, fishing it, clamping it all the the inside of the firewall, i had a brown wire in hand and the picture called for green when using a painless ignition switch. Ouch. Back through the harness for an hour, traced the brown wire, its right. Of the 5 or more switches highlighted in the instructions, only one calls out a green wire on the schematic (labeled brown in the instructions and colored brown in the harness). Since it had the right number and went the right places, I hooked it up. Hope it don't explode the tail lights when I put power to it the first time! (I'm sure its right. Misprint in the book) PS....last of the glass arrived. Guess what I'm doing after dinner?
-
Dad. Separated out all the dash switch wiring. Gotta route and wrap it. Then we'll have hook ups for wipers, lights, dimmer, radio. Heat and air. Just gotta fish out the alternator excitor wire for the light bulb.......its in there.....somewhere!

-
Working on dads hotrod today. Brake light switch, fluids, cleaning linkages. Needs run more than it needs tuned. Run the snot out of her Dad....that built 305 wants to holler for ya.

-
After Market (Not stock) Wiring Harnesses
Sharps40 replied to James_Douglas's topic in P15-D24 Forum
I'm currently installing a painless 21 circuit universal key in dash. Just wired up the tail end today. Starting g dash and dolphin gauges next. So far I love it. Very nice quality and plenty of extra circuits like ac, 3rd brake, reverse light or neutral safety, stereo, alternator kit, flashers, turn signals, etc. Lots of extra supplies. $249 -
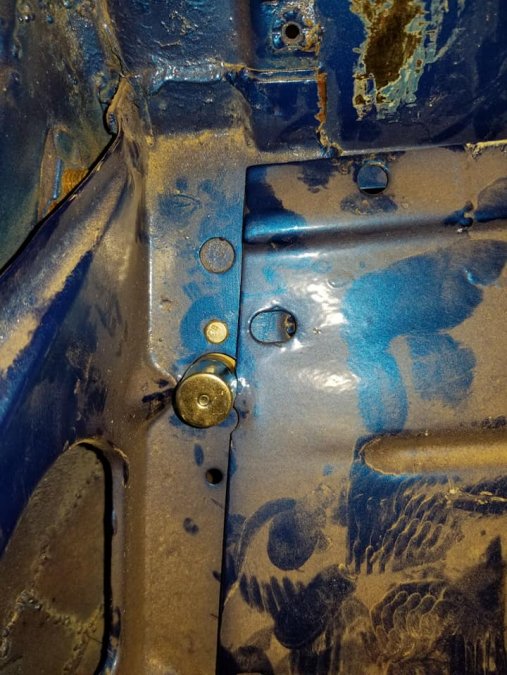
Dad, This is the original wiring hole in the DS side of the trunk. To keep the connections weather free all the rear wiring was routed inside the car, in this case, like factory, up and over the inside of the roof on the drivers side. Everything is wrapped full length front to back. And to allow for easy repairs, addition of tow connections, etc, I did like we did back in the 90s by installing a gang block which provides hook ups from top to bottom as follows: Left turn/Flasher/Brake, Right turn/Flasher/Brake, Left running lamp/license lamp, Right running lamp, Left reverse light (right reverse lamp is left off/not in use), Ground point for all rear lamps and the fuel sender. From the gang block I'll take ground from trunk floor to frame. Probably finish this up tomorrow and that will be all the wiring for the rear end. Only about 80sixteen more wires to go.

-
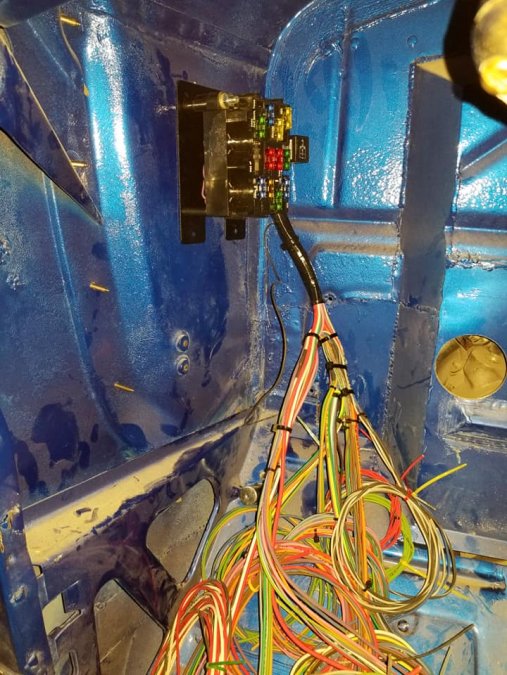
Dad, Picked a spot for the fuse box. Driver side, cowl. The tail section wiring, I'll probably route as original, inside the car, up and over the doors, down and out through the factory hole in the trunk. Looks a mess right now don't it?

-
Dad, 21 circuit wiring harness....that means more than double that in wires cause what comes in the box, has to go out the box and around the circuit. So, started by dividing the harness up. Painless has it rough divided into accessory, engine and tail. I further divided each loop/set of wires in the bundles. A total of 13 loops to handle. First job is to decide where to hang the fuse box. After that, the big loop at 6 oclock is the start point, thats the tail section with dome, turn, brake, fuel sender, etc. Gonna have to make a lowes run, looks like we are going to need a box of wiring loops and about 40eleven feet of cable cover.

-
Dad, Very successful first day of 6 weeks practice to retirement. I exceeded my sleep in goal of 0500 wake up by not waking up until 0600. Among other thing, including sitting on the porch at 0615 with a cup of coffee and watching other folks go to work......I started fun with paint on Ol Bessy. Not knowing what color they shot, and irritated enough with them not to call and ask, I assumed they used what I requested, Dodge, PB5 Electric Pearl Blue. Given all the marks and unpainted interior trim I ordered a can of Patritot Pearl Blue PB7 as its a shade darker than the PB5.....and the aftermarket sprays always seem a shade light. So, I was sent Intense Pearl Blue PB3, a shade lighter. Didn't notice till the first coat was shot on the Opera Window Garnish. So, inside the car, it'll be fine, matches well and the opera windows are not too close to other painted garnish. But, its no match for the PB5 we assume is on the car. So, Ok......we won't tell anybody the rear trim is a different shade of blue and they'll probably never notice anyway. But, I have to try to find PB5 or at least PB7 to work the dash, if not, I'll just repaint all the interior trim in the lighter shade I used today. Also, laid out the Painless Performance wiring harness. Looks good, every wire is labeled. It won't be easy but it won't be too hard. For now i can start wiring everything from the dash to the trunk. Can't wire forward of the firewall because all the sheetmetal has to come off to set the motor and radiator. I'll get you some photos of Ol Bessy Lit up as soon as the wiring starts to go in place this week.

-
Dad, Switches arrived. Got your dash set up from left to right. Lights with dash dimmer, Alternator Charge Lamp, Ignition switch (with accessory position), hole for choke (yep, we'll likely have a real manual choke on those dual Rochester carbs), temporarily upside down wiper switch. Later i'll get a set of dash knobs off a 50s dodge and replace the various knobs so they all look the same. The shop didn't weld the hole in the floor for the headlight dimmer, here roughly in place till I wire it up. Also picked up a self resetting breaker and two relays to put the headlights on full power.....just got to find a place to mount them under the hood, damn its tight in there....more about that in a moment. Rear cover is back on and sealed up, I can fill it in the morning. Still got to clean and paint the rear axle and possibly replace the pinion seal. Rear brake cylinders arrived so I'll soon pull the wheels and see if the drums and hardware need work or replacement. As for the tight under hood space. It was a 23" long 6 cylinder about a foot wide and it kinda filled the engine bay. I have no idea if an AC compressor will fit in there. Certainty not down low and as the real high mounted AC compressor/alternator combinations just look like hell, a high mount is a last resort. A mid mount set up needs 32" across the top of the valve covers. We have 28" with the hood closed. I am thinking that what will work for us is Power steering on the DS side, probably just below mid mount and alternator on the Passenger side just above mid mount. Essentially, there don't appear to be room for an AC compressor, but we'll see when the motor is set in October. Additionally, we have two options for brake master cylinder, under the floor (shop cut out and disposed of all the original under floor bracketry, pedals, pedal mounts and linkage) or up on the firewall. I will have to make a mount in wood (due to the firewall being recessed 4" right in the center line position where a master cylinder would hang) and then copy it in steel for a firewall master cylinder but I think it will fit in with the new engine. Again, we'll see once the engine is in place. Over all, no worries but i can see that the easy jobs are coming to an end and the whiskey and a cigar sitting on a milk crate while thinking and listening to rock and roll challenges are about to commence.


-
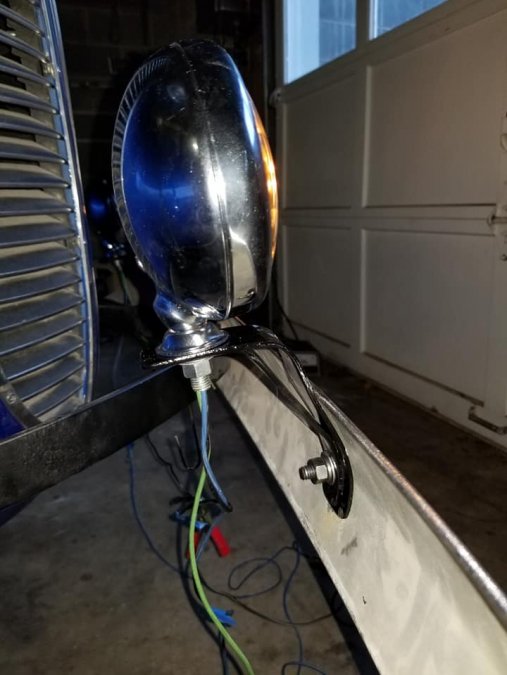
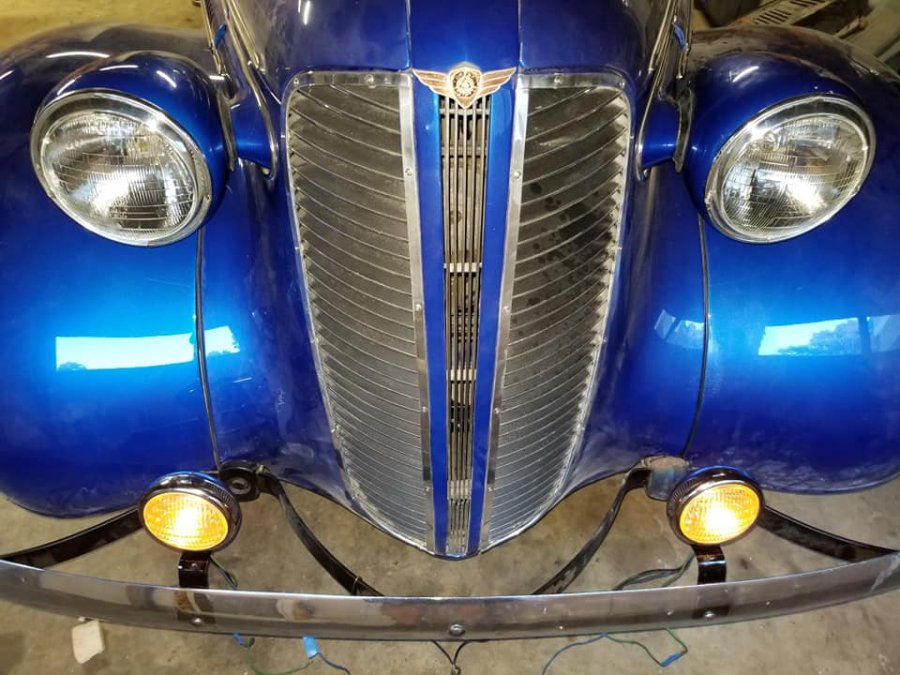
Dad, Still waiting for switches (should arrive tomorrow, my last day at work....forever) and the glass. But making progress. Remember the old Mazda bulbs that were original, and the little tiny second lamp in the lens that served as running light? Remember you replaced them with 6V sealed beams....and forever after burned out the sole 30 amp fuse on the car every hour on the hour that you used headlights? I remember....I was in charge of changing fuses, even hot! My hands fit under the dash better while you were driving. Well, now Ol Bessy has 12V sealed beam halogens. I'll put them on hi and low beam relays. This will remove all the high amperage load under the dash (less fire risk) and assure the headlights get the full 14.8 volts from the alternator. Should by just like the two blazers I put on relays, darn bright at night. The Headwinds sealed beam conversion kit looks good. I'll need to replace the plastic retainer, they'll probably be off once or twice more and are getting a bit beat up with all the fitting. No worries....even Walmart has the retainers. We can get them anywhere. As for the running and turn lamps up front. I made up new steel brackets with a brace against vibration and got them painted and mounted tonight. Even hooked up the battery charger and tested them out. Looking good out front. I also received the red dash lamp which will ensure the alternator is energized on start up. Mounted the red lamp and the wiper switch on the dash plate. I have one more red lamp I need to find a spot for without drilling holes in the dash. This one will be for brake warning.....loose a brake circuit (front or rear) and the red warning lamp will let you know half your brakes are gone. Finally, rear brake cylinders arrived. Time to tear off the wheels and drums and see what needs done for stopping that big 12 bolt out back. See you soon.
-
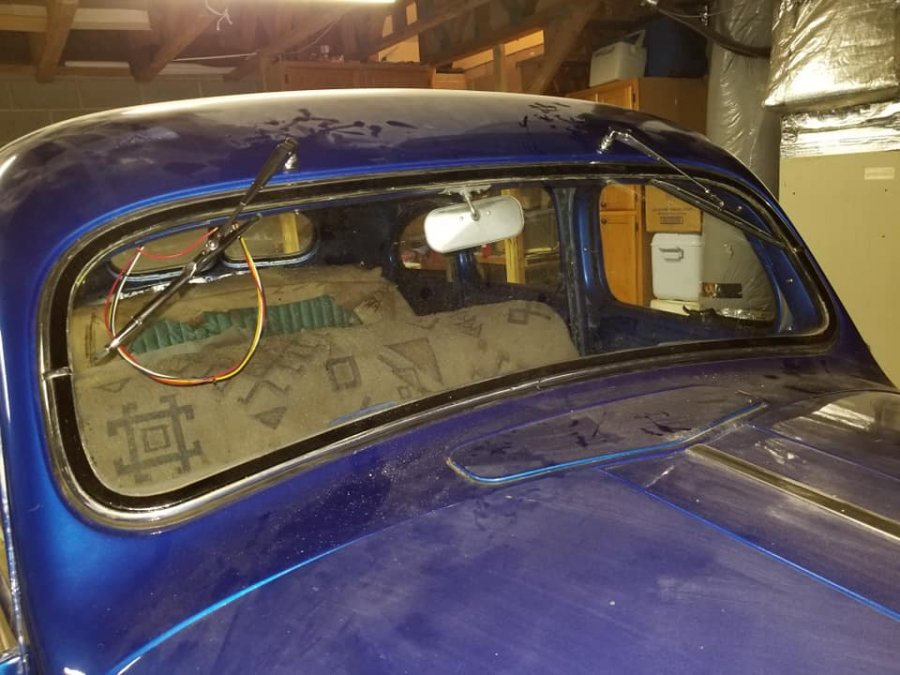
Dad, Video with sound. Your gal has wipers. Running slow on 2amp battery charger but fully functional. Hey Dad, your girl has an AWESOME pair of wipers! https://www.youtube.com/watch?v=XQTQs1YlT_E
-
Dad, Electric Wipers and ground straps arrived. Wipers installed. Not too bad, only had to install the wipers three times. First, the holes in the roof for vacuum motors are under 1/2, the electric shafts are beefier and need 5/8" holes.. ....ticklish job drilling in a painted car. But done and the edges of the wider holes are primed and painted. Second, I fitted it up, it was loose and wobbled and bonked the motor against the roof line and the transmission stuck out quite far which would entail a big ugly bump in the headliner. Third, seems the instructions don't mention the motor mount tab that must go behind the first headliner strut support, instead of in front of it. Once i took it out the third time and put it back in i was able to bow the mounting brace to fit the curvature of the roof, fit the motor mount tab behind the headliner bow support brace, drill one more hole and anchor the motor. Nice fit, and it appears to have the clearance it needs to operate. And the transmission is far enough in that there should only be the slightest bump in the headliner when installed. I'll fish the wiring Sunday, install the new two speed switch and give Ol Bessy's new wipers a run.

-
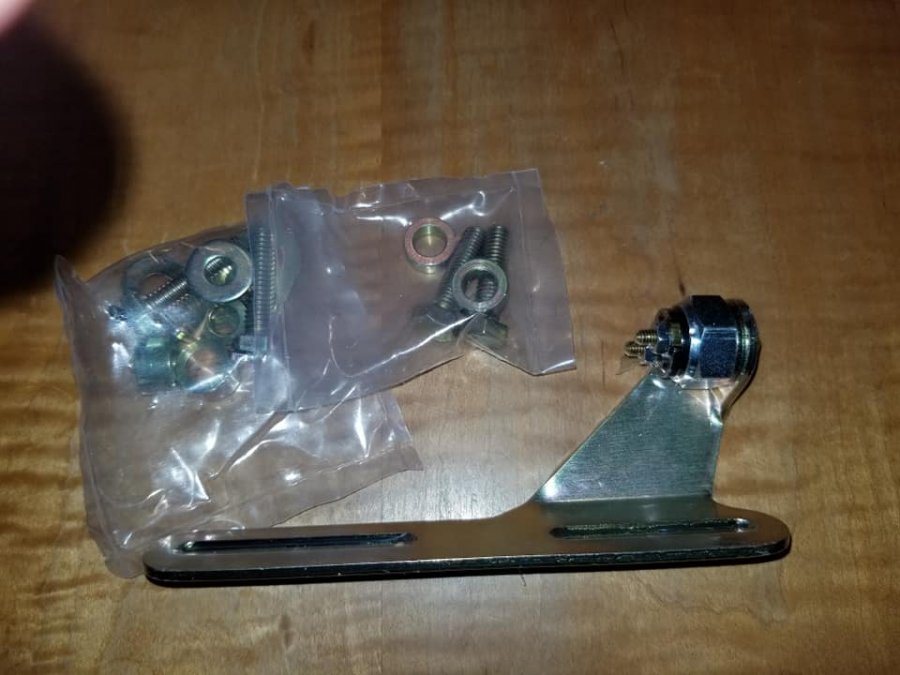
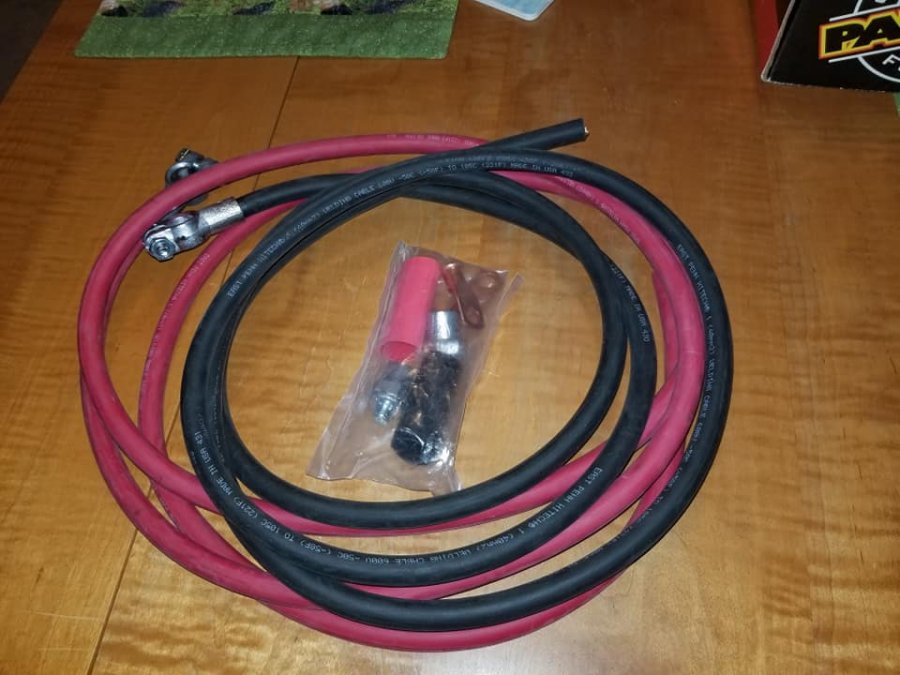
Dad, Main harness arrived. Neat package. Every single wire labeled where it goes. I remember installing another big companies harness back in the 90s,.....nothing labeled. This one should be be more fun and less trouble. Also arrived is the back up switch. It'll fit what ever automatic transmission we select and light up that single white bullet light we acquired and added to Ol Bessy's rear bumper so I can see what i'm running into at night. (I only added one reverse light on the drivers side cause when I'm leaning out the window backing i can't see what i'm hitting on the passenger side anyway, so no need for two lights.) The battery cable kit is good and heavy. We can use it for top or side post battery. I ordered the 8 foot kit in case we decide to stick with the factory battery box location, which is under the drivers seat. If not we can move the battery out board the passenger side frame rail, under the fender, just like your 47 Chevy Truck. Ground straps and switches should be here soon, glass too. Guess i ought to dig out my battery charger so I'll have something to test circuits with as they are installed.

-
Often the resistance coils went in the plenum to keep them from overheating on both 6v and 12v models. But....since the ballast resister on the 60s model mopars (to drop 12v to 6v for the Dizzy once the ballast warms up) ran hot continuously for years without burning out.....maybe try mounting on on the firewall in the wind. Hook up the heater, you'll get 12v for a bit till the resister warms, then it should drop the volts. Or just do it easy and run the 6v motor as is.
-
Dad, We need a lamp to activate the alternator, since I won't use a single wire hot rod alternator. 3 wire with remote sensing back at the bulkhead connection is the best way to set up charging. Found this. Should work nicely in the panel. So, left to right in the factory holes in the panel will likely be headlight switch, alternator lamp, ignition switch, Choke, wipers.

-
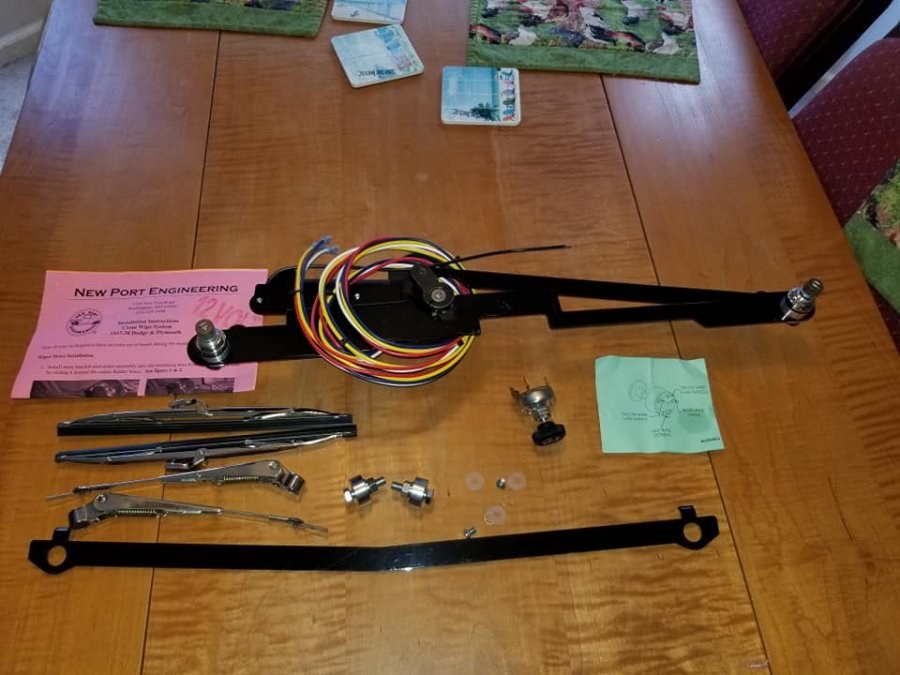
Dad, Doing well here on Ol Bessy. Awaiting the last of the glass, when it arrives, about two hours work to get her buttoned up if all go's well. So, getting her ready for the next phase, electrical. On order from Painless Wiring is 21 circuit universal harness, 4 ground straps, heavy gauge battery cables, dimmer switch, headlight switch, dome light switches, ignition switch, reverse light switch and bracket. From Headwinds is the parts needed to finish the headlights. From Newport Engineering is a set of modern 2 speed electric wipers to replace the old slow unreliable vacuum wipers. I spent so much today that Visa locked my account for safety. No worries, got it unlocked and finished the orders. Expecting to see all the glass and electrical components arriving in the next week or so. So, after our September visit, I'll get rockin on powering your girl......which begs the ultimate question..... How many speakers do you want installed? The rear package panel is already cut out for two 6"x9" speakers. (Back in the good old days we could still get the 6 volt positive ground to 12 volt negative ground converter/inverter for such installations!) Two more up front in the kick panel? Stereo in the glove box? The stereo with blue tooth and usb and the pop up TV? (not the tv, please!)
-
Dad, Good news. On a goof I went down and looked at the gas tank again. Also looked at the Dolphin sender. Believe it or not, the modern sender bolts right up to the ancient gas tank. Life is grand. I can clean the tank and put it right in, no modifications, no drilling, no cutting. Just a nice clean install!
-
Other than no way in hell we are going back to Mohair, the only plans right now are to provide the upholsterer photos of original 37 interiors so he can do the ribbing in factory pattern. Probably cloth. Probably grey....ish. Don't know. Mom and GoodWife will choose when the time comes.
-
Dad, Finished for the day. Gotta do yard work. I'll get back on her this week. Finished setting up the drivers front door for glass. Riser is lubed and working fine, glass channel cut and fitted, exterior window sweep installed. Just waiting on glass. Pulled the fuel sender from the NOS tank I'd put in back in the 90s. Sender is a VDO and still works but we can't use it for the new gauges. I'll have to modify the tank for a 6 bolt sender since the Dolphin gauges come with a modern 6 bolt sender. But I'll check the ohms first, maybe the vdo sender will run the dolphin gauge......... I cleared the gunk from the fuel pipe that connects tank to motor. Inside of the tank is great. No Rust Icicles and I think it'll spray clean. May give it a vinegar or CLR bath right before installation and let it dry inside good with a hot air blower running in it. Pulled the gas tank filler neck to paint, the solder on the old vent line broke off. No worries, I'll get a bulkhead fitting and we'll have a functional vent, while I'm at it, I'll add a roll over valve on the tank. Toying with using the hood welting at the front of the hood too. There are holes there for rubber bumpers but taping the hood welt over them makes the hood sit in place vibration free. Much more so than the rubber bumpers do. I added black chicago screws to the hood corners for now, I want to find some brass or stainless split rivets like it had originally.
-
Dad, Not a positraction but still rear gear gold. Made 1970. Chevy. 12 bolt. Low wear. Ratio is 3.31 to 1. So. Itll be perfectly happy with a small displacement small block engine and 3 speed or a torque making 350 chevy and a 4 speed. I couldn't be happier! Just set the last of the original glass in place, passenger side front door vertical window. All sweeps and felt channel in place too. Got the underside of the new trunk floor primed and painted black. Pulled the cover on the rear end and see its a good Chevy/Chevelle 12 bolt with a 3 series carrier and a 3.31 to 1 gear. No posi but has the bolt in brake cylinders and the gear lets do about any engine and trans we could desire. Very little sludge inside the pumpkin and I believe it'll be a good rear for the car. Getting together a list for all the wiring now, that'll be the next big job. Crawled under the front. Good we are pulling the LS engine. Zero clearance between steering rack and engine/power steering pump. Hoses would be a supreme challenge and with the steering shaft less than 1/4 inch from the power steering pump, hooking up the steering column would likely be impossible.

-
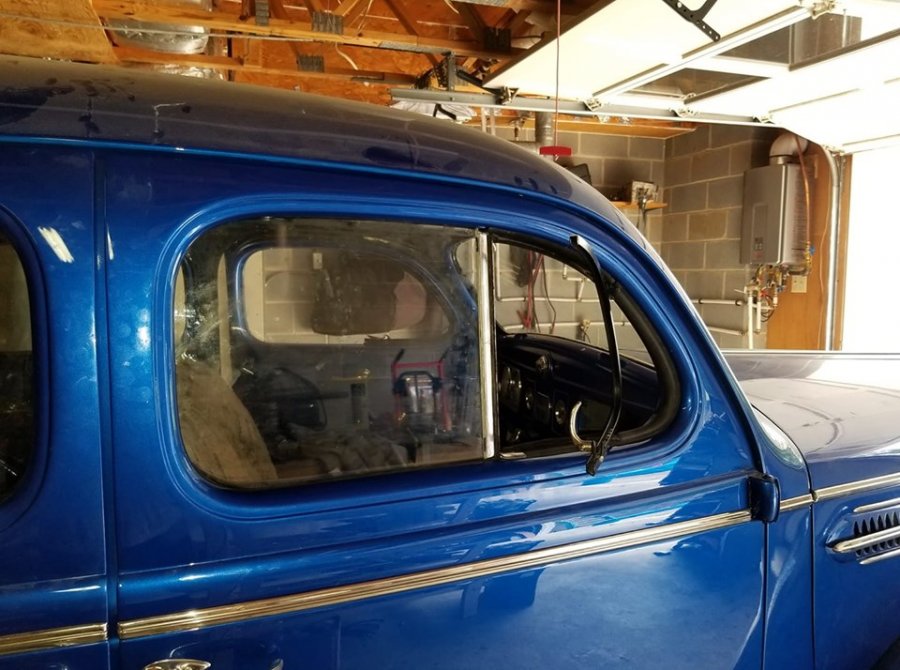
Dad, Glass #8 of 11. 3 pieces to go when they arrive. This is passenger front door. Small strips of electrical tape at 4 locations center the pane. Gorilla adhesive for glass instead of urethane or butyl tape (easier to clean off and edge is paintable to black out the seam.) Clamped lightly to line it up in the bottom of both grooves. Grabs fast so I can pull the clamps and remove the ooze out while soft. I think it'll be fine. Off to inspect the differential now.

-
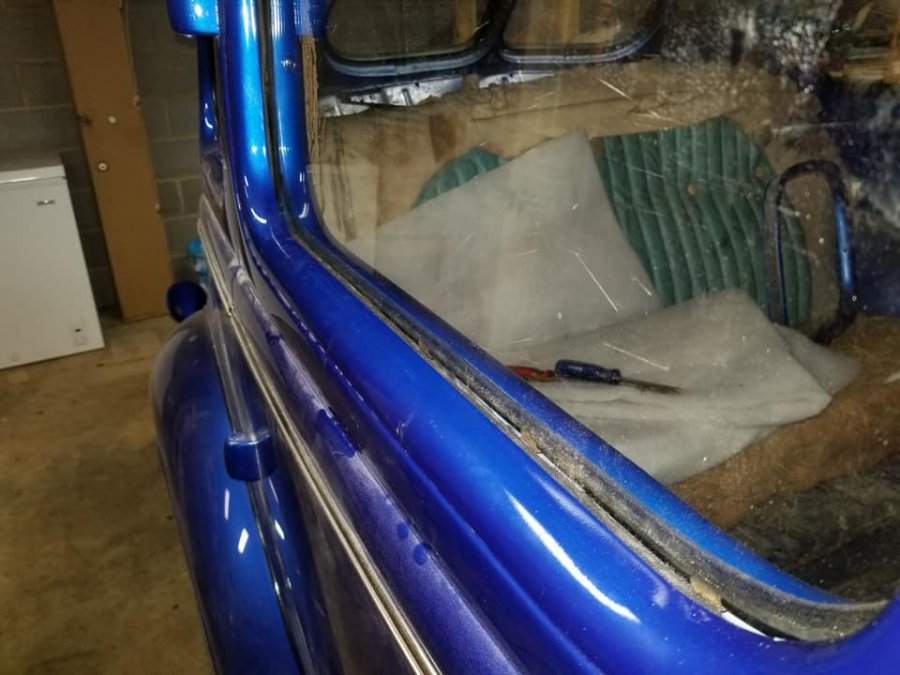
Dad, Rear door glass is in and functioning. All external sweeps riveted on. Seals tight. Nothing busted. Originally there were no exterior window sweeps, dodge had rubber bumpers in the middle of the door pressing on the outer face of the glass. These prevented rattles but are long rotted away. I'd put sweeps in in the 90s, liked it better for sealing up the door and window. So, did it again here, a sweep inside and outside and no rattles. The riser track on the passenger side door was worn. Closed it up as much as i could but the fix to keep the button from jumping out of the track was to bend the riser arm slightly, it pushes the button into the track now rather than pulling it out. Works fine. Just got to let the adhesive holding the track to the glass set for 24 hours and then we should be in business. If needed, after the glass runs have set in for a while, I'll glue the tops in place or set them with small sheet metal screws should they look to be loose. But, the originals and the ones I had put in in the 90s were not glued or screwed and never fell out. I suspect the additional efforts will not be needed. Starting front windows as soon as I get the 3 pieces. Ol Bessy is nearly buttoned up!