Jocko_51_B3B
-
Posts
430 -
Joined
-
Last visited
-
Days Won
3
Content Type
Links Directory
Profiles
Articles
Forums
Downloads
Store
Gallery
Blogs
Events
Everything posted by Jocko_51_B3B
-
Door stays
Jocko_51_B3B replied to Brent B3B's topic in Dodge Truck Purists's Dodge Truck Purists Forum
I found out that heating the spring material from McMaster-Carr until it's red hot makes it possible to bend into tight circles, but the bend has to be done when the steel is red hot. That means that I had about two seconds to form the steel after heating. As I'm sure you know from your experience, the hard part is duplicating the original shape, so I now realize that a jig like the one you made is essential. I'm a little concerned that the .062 thickness of the M-C material I bought is a bit too thick and I might try thinner stock. (I hate to buy another 25 ft roll.) In the meantime I'll keep looking for a shop that can make these clips new. -
Door stays
Jocko_51_B3B replied to Brent B3B's topic in Dodge Truck Purists's Dodge Truck Purists Forum
Brent, I think I found a source for the right size and type of spring steel. I was poking around on the internet looking for a source of spring steel that closely matches the steel strips that Dodge used to make these parts. I got lucky and read something on the Practical Machinist that lead me to McMaster-Carr. Here's the spring steel strip material I found... https://www.mcmaster.com/#catalog/124/3809/=1cw6zul The McMaster-Carr part number is 9075K456. It's the first listing in the .062 section of the chart. Here's their description... "Wear-Resistant 1095 Spring Steel, 0.0620" Thick, 3/16" Wide, 25 Feet Long" First of all, it's spring steel. Second, it's close to perfect in thickness (I measured the thickness of the steel strip material Dodge used. (It's .060 thick as far as I can tell using a caliper). The width is almost perfect too...3/16". It comes in 25 foot lengths, but the cost is not high ($35.73). If my math is correct, there should be enough steel in 25 ft to make about 100 of these door stops if I can find a machine shop to crank them out. I wonder if there is a market for this part among Pilothouse owners. Luckily, I have a McMaster-Carr warehouse close to where I live and I can examine the material before buying it. Jocko -
Door stays
Jocko_51_B3B replied to Brent B3B's topic in Dodge Truck Purists's Dodge Truck Purists Forum
Looks good, especially the end loops! Does it hold the door open OK? Did you have to heat the spring material in order to bend it or was it easy to shape? -
The driver side door on my '51 B3B won't hold itself it the full open position. The problem is inside the door. A small clip has broken off and is missing. Here are pictures of what the clip looks like taken from the passenger side. Are replacement clips available somewhere or has someone figured out a good way of rigging up a replacement piece of some kind? Here is what the piece looks like (on the passenger side) taken from the inside and outside of the door... This is how it looks from outside of the door: This is how it looks from inside the door pointing camera through the access panel:


-
Plymouthy, that explains it. Since the key came with the ignition switch I purchased online and with only five different tumbler possibilities for the door locks, there was a 1 in 5 chance my ignition key would work in the door lock too. That's pretty good odds. When these trucks were new, did they come with one key for both the ignition and door? Or separate keys? In other words, did Dodge match the tumblers?
-
My '51 B3B had the wrong ignition switch when I bought it, but I found the correct switch online. It came with a working key. So far so good. Today I was amazed to discover that the ignition key also operates my passenger door lock. Obviously the ignition switch and door lock did not come off the same truck. Are there any Pilothouse lock experts out there? What are the chances that my key would operate the ignition and the door lock? Did Dodge have so few key combinations that I just got lucky? Also, were Pilothouse truck keys meant to operate both the door lock and the ignition when the trucks were built or did Dodge provide two separate keys? Just curious.


-
Even if the engine is stuck, it can probably be saved. It would be fun to take it apart and see what's going on and if it has been rebuilt before. If it turns out that the block or cylinder surfaces are badly pitted and you don't personally want to invest in fixing it, someone else might still want to buy it from you and take it on as a project. All it takes is having some cash available and a desire not to see an old Mopar flathead scrapped. Who knows how many are left? Good luck if you decide to buy it. If you get it for under $1000, I think you will have done pretty well.
-
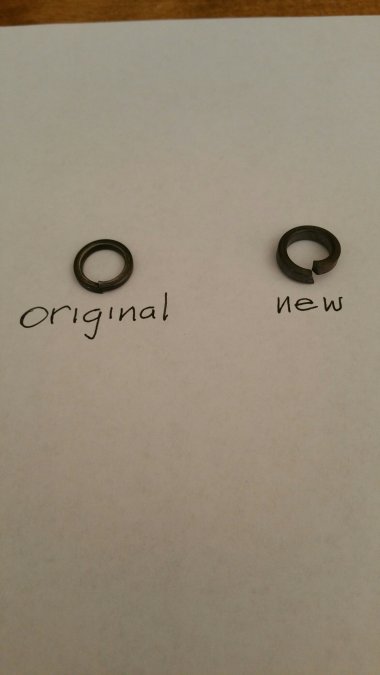
I called around and found that McMaster-Carr has 3/8" High Collar Helical Spring Lock Washers. The I.D. and O.D. of the washers is virtually identical to the original Dodge split lock washers. The only difference is that the McMaster-Carr washers are thicker. The originals are approximately .081" and the McMasters are .132. They are made of mild steel and come in boxes of 100 for a little over $5. The Mc Master-Carr part number for the box of 100 is 90073A231. I just installed the M-C washers and torqued them to 45 ft-lbs and everything looks just fine. They fit the recess perfectly. Although the new washers are thicker, it took very little torque to get the split ends to match up so I'm fairly positive that the additional thickness isn't affecting the bolt stretching or torque spec significantly. If someone sees a problem with these replacements, please post a comment, but it seems straightforward. Hope this helps.


-
I took a second look at the split washers I got from VPW. Sure enough, they are too large. So I called VPW to see if they were aware of the problem. They are aware of it, but they claim that several different styles of Dodge flathead rod caps exist. According to VPW, some rod caps have recesses for the washers and some don't. VPW says they've searched for a washer size that will fit the cap recess but haven't been able to find a suitable replacement. Looks like I'll be re-using the old split washers for now. If anyone finds a source for these washers, please post it. Seems there's a demand for them.
-
My washers seem to fit Ok. Thanks for the nut torque spec. Good information. (Correction!: the split washers do NOT fit. Please see my post below.)
-
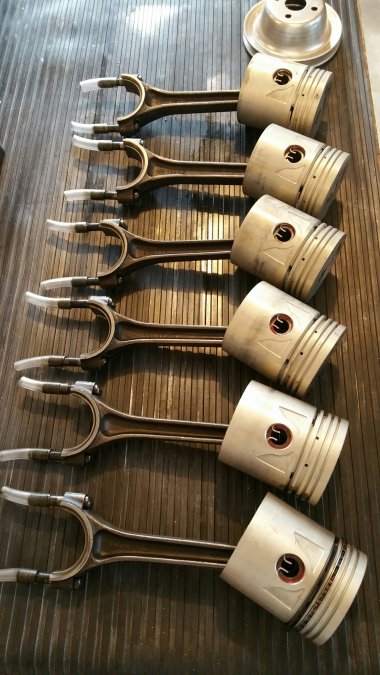
I hadn't checked this thread for a few days and was surprised by all the comments it generated. Of course the rods and caps should be treated as a matched pair. There's no way I would mix them up. In my case, all six rods and caps are stamped 1 through 6 on both the rods and the caps so there was no danger of a mixup. On top of that I placed the parts from each of the six piston assemblies in their own separate sections of a six compartment tray so nothing would get mixed around between assemblies. I'm not saying I haven't made my share of dumb mistakes but let's not pull out the rubber hoses yet! If you'll wait a while, I'm certain an opportunity will pop up! As far as the rod bolts are concerned, they all looked OK to me but just for extra insurance I asked a real mechanic buddy to take a look. He said they looked fine so I'm just going to go with the ones I have. I do have NOS split washers and nuts however from VPW and will be using them. One more thing: the shop manual calls for torquing the rod bolt nuts to 45 to 50 foot lbs but doesn't specify whether they should be torqued dry or with some lubrication on the threads. I've heard opinions about this both ways. (I'm leaning toward the idea of putting some assembly lube on the treads and backing off on the torque about 20%.) Does anyone have the absolutely right answer? I don't want to fool around with this and have the rubber hose police after me again!
-
OK. To the shop we go. Thanks for the warning.
-
Merle, I see no problems with the bolts so I guess they're good to go, but Plymouthy just opened up a new minor can of worms. As far as new upper end bushings are concerned, the answer is no, I did not replace them or even check them. This is my mistake, so I'll be disassembling the rods from the pistons to see what I need to do next. My first thought is to just measure the inside diameter of the rod bushings with a caliper to see if they are in spec (.8592 -.8595 according to the manual). If they are in spec, is it still necessary to replace them? Or is it just a good general practice to replace them? What happens to an engine if the rod bushings are out of spec? Damage to wrist pins, damage to pistons, damage to rods, or noise? Can any machine shop do the bushing replacement if it's necessary?
-
I just finished installing new pistons onto the original connecting rods when a question occurred to me; is it OK to re-use the original rod bolts installed on the rods? I am going to replace the nuts and split washers, but it looks like the rod bolts are press-fitted onto the rods. If it isn't a problem to re-use the bolts, I'd just as soon leave them alone. I don't see anything wrong with them. What's usually done?
-
Just finished lapping the valves and seats. The spec is for a 5/16 valve seat width. I made sure to give that spec to the machine shop. The contact width is almost perfect but the lapping does show that the contact area isn't centered perfectly on the valve seat. I don't think it looks too bad though. Does anyone know if this lack of perfect centering is a problem or am I being too picky? Here are a couple of my new exhaust valves. One pre-lapping and one post-lapping:

-
I hadn't heard of laser cladding before so I had to look it up. It looks like a perfectly fine alternative to spray welding. If I need to do another block I'll see who does laser cladding in the Chicago area and then look at relative pricing. Thanks to all for the compliments on the block. Next step; putting it all together without goofing something up!
-
Great advice from all you guys so a light lapping it will be. I have my block on a stand which will allow me to invert it. After the lapping, I think I will try the "upside down leak test" suggested by Elwood (Smart idea. Never woulda thought of it.)
-
I had checked the valve guide dimensions before taking it in and they measured OK so I didn't have the shop replace them. I think the previous owner replaced them sometime before I bought the truck. The shop I dealt with took quite a while to do the work. The main problem according to them is that the spray welding process is time consuming. The block had to be heated to something like 450 degrees F before the pitted areas could begin to be spray welded. That only gave the welder about three minutes of welding time before the block had to be re-heated. Actually, the cost of the welding, sleeving, valve seat replacement and seat cutting wasn't all that bad - a little over a thou. They also spray welded the corroded water jacket holes on the bottom of the head and then milled a few thousandths off the head as well. Do I like spending money like this, well no, but for it's all about saving a nice piece of automotive history, keeping the original engine, learning some new skills, making friends, learning patience, and hopefully ending up with a cool little truck.
-
I just had new valve seats professionally installed by a machine shop and I have a new set of valves ready to go in. Is lapping necessary with new seats and valves? Or is lapping just an old archaic process usually reserved for well-used / pitted valves and seats?
-
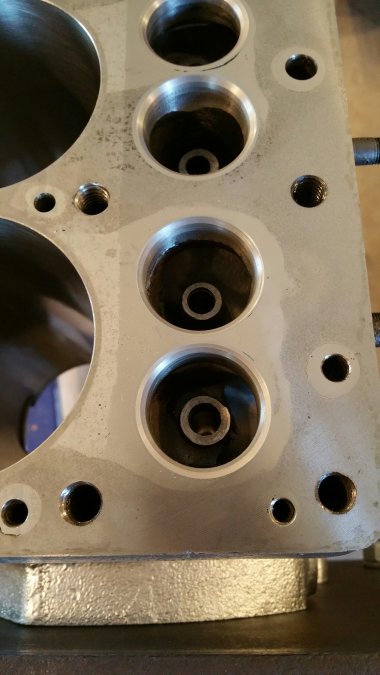
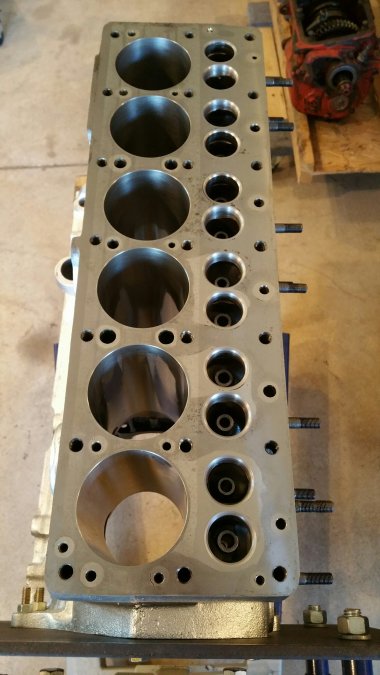
I hated the idea of throwing the block away so here's what I decided to have done by the machine shop: 1. re-sleeve the cylinders 2. replace all valve seats and valves 3. The pitting on top of the block (especially around #6) as well as pitting around water jacket holes were filled in by spray welding. 4. block top surface machined
-
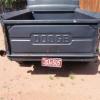
I've been debating about the bed floor in my B3B, but after seeing how well yours turned out I think I'll do the same. All black looks good. Did you paint the skid strips using the same paint as the bed sides?
-
James, Sorry for taking so long to reply. Just got too busy with other things. Welding the nuts to the valves wasn't rocket science. I just grabbed a few 5/8 or so diameter nuts and stick welded them in two or three spots around the nut perimeters. The valve heads and nuts melted together without a problem. I haven't yet replaced the valve guides because I got working on a different engine, but if it were me, I would replace them without a question. I'm sure MIG welding would work just as well. Jocko
-
Bed Frame Cross and Side Structural Members
Jocko_51_B3B replied to Jocko_51_B3B's topic in Mopar Flathead Truck Forum
I took lots of photos but I think the truck bed was modified somewhat by a previous owner, especially the way the bed sides were mounted. I tried to find a breakdown picture in the parts book, but no luck. -
I have a 1951 B3B undergoing a full frame off original restoration. Does anyone know of a structural diagram that shows types and dimensions of all the correct structural members that comprise the bed? I need to find out how the bed sides, bed front panel, bed wood, and all underlying structural members were bolted (or welded) together. I also want to find out what the exact dimensions of the underlying structural cross members and sides members were that hold the floor boards, side panels, and front panel together into one unit. I guess I'm the kind of guy who likes originality and doesn't like to slap things together because it's cheap or easy.
-
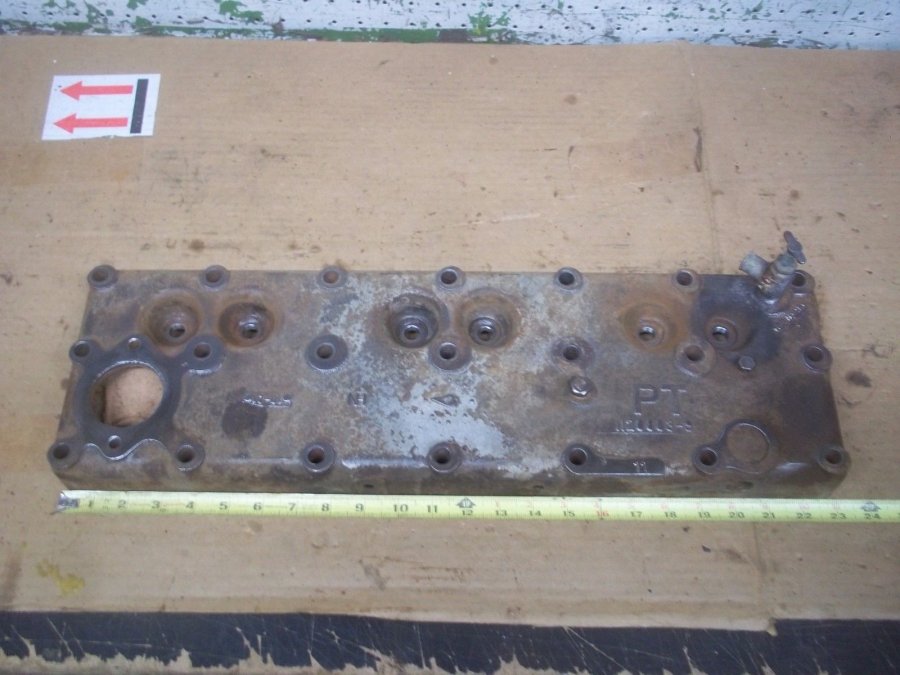
My Dodge B3B also came with a "P" mark on the head. I wonder if anyone has a Plymouth with a "D" on marking on the head. Here's one with the letters "PT" that I saw on eBay. The seller says it came from a 1949 pickup... It's no big deal, but those letters must have some significance. It would be interesting to know what they mean for historical reasons.