-
Posts
1,860 -
Joined
-
Last visited
-
Days Won
10
Content Type
Links Directory
Profiles
Articles
Forums
Downloads
Store
Gallery
Blogs
Events
Everything posted by MarcDeSoto
-
Still working on my oil filter and tightening up the lines, but when I crank the engine oil keeps leaking out of the oil gauge connection. I replaced the line, but the same thing happens. The line can come out of the fitting about 1/8", but I guess that's normal, but that's where the leak is. The pic shows the back of the oil gauge and the new line going in. How do I fix that? Are brake lines not meant to be oil lines?
-
Get the chrome moldings, dash board, seats, trunk lid, hood, fenders if useable. Stuff on the engine block, even the head. Radiator.
-
Wow wild interior. Puts me in the mood for summer picnic!
-
Yes, and didn't live long. And I don't think they included Errol Flynn and David Niven! I got the oil filter installed today. I'm glad I put this thread on here as I don't think many here know much about the oil filter mounting details. No one corrected me when I said the threads were 28 tpi and no one knew about the 27 threads for the block side of the fittings.
-
Thanks. Fittings is right. Just got back from O'Reilly's and when I gave the clerk the right information, they had the fittings I needed. They had the straight fitting that goes into the bottom of the oil filter housing and the elbow that goes into the block to drain the filter. The only part they didn't have was the fitting with the 45 deg. elbow, but I think I can use my original fitting for that. Gook luck on your WWI fighter plane. I have a WWI Edison Army Navy phonograph that saw front line action in 1917-18. It has the Field Hospital number stamped on the sides and the records have the captain's name and the FH number scratched into the dead wax on the records. It was used to entertain wounded troops in south eastern France about a mile from the German border.
-
Just found out something. The brass elbows that screw into the block are 27 threads on the block side and 24 thread on the tube side.m Found this out using my tap and die kit thread measuring gauge. Makes sense since 27 thread is a common pipe thread! Now things are beginning to make sense and the good thing is my new 8" 3/16 brake lines will work.
-
I messed up the threads when I tried to screw in modern brake line which is 24 thread. I tried to unscrew the 45 deg. fitting that screws into the engine block and destroyed it. Maybe th 1/8" pipe thread would work if it's 28 threads per inch. Now where am I going to get some 3/16 brake line with 28 thread nuts?
-
We removed the starter without having to remove the clutch linkage by removing the bell housing support. But I have another problem. I'm using new 3/16 brake line to make new lines for the oil filter. Problem: My brass nuts are 28 tip and the brake line is 24 tip! I think they still make the brass nuts, but do they make them in 28 thread? and do they make 3/16 line with 28 tpi on the nuts? If they don't, I'm going to have to try the used parts market.
-
Ok, thanks. Didn't know about the copper cup crush washers. Now I have new problem. The brass nut that comes out of the engine where the oil filter drains back into the sump is stripped. I tried to unscrew it from the block, but the side caved in. It won't unscrew. So I guess I need to remove the starter to gain access. problem again. I can't remove the starter without removing the clutch linkage. We tried to gain access by removing the engine strut, but it didn't help much. Is there a way to remove the lower bolt on the starter without removing all of the clutch linkage? Thanks.
-
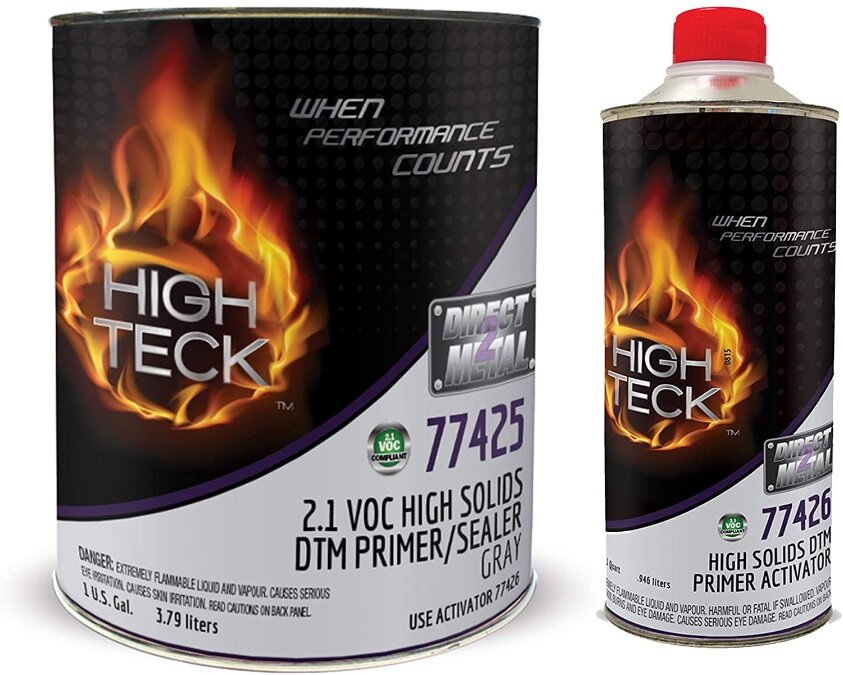
I'm in California. No Acrylic lacquer here anymore. You have to use water base or acetone based. Apparrently acetone doesn't hurt the atmosphere so California says it's OK. The High Teck primer surfacer I used does have isocyanates in it so my helper and I used filtered respirators and left the garage doors open. I put a half cup of reducer in a one quart can to make it come out of my gun without spitting. When my helper was spraying, he noticed that the fumes went right out of the garage and floated down the street in a misty haze. He was concerned that the overspray would get primer on cars in the street, but I don't think that's possible. So he closed the garage doors so that they were only two feet open. I'm trying to use a paint that is similar to the original Dulux oven baked enamel. I'm going to go with an original blue, green, or beige color. I'm going to spray a sealer on it before I spray the top coats. It sure is a lot of work. If I remember correctly, you have to hand wet sand the primer down to about 400 grit before shooting the top coats.
-
Dan, you got original color paint from NAPA just by giving paint codes? Does NAPA make paint? And I thought they could not use the old paint codes because they don't make Dulux enamel anymore. I used a primer surface made by High Tech paints. It came with a activator and has an acetone solvent base. I used the proper reducer to thin it as my gun was spitting without the reducer.
-
Now I need to sand the primer surfacer down. Should I put another primer on after the primer surfacer? Now on to selecting a top coat. Is there a place that has to know how to mix colors like the original? I looked at the modern colors in a thick book at the paint store and none of them are even close to original colors! Paint chips are easy to get, but if I have the paint store try to match a paint chip, the chip might not be accurate to the real color. Does anyone have any experience with a shop matching a color from a paint chip, or is there a better method. I don't have a piece of the car to take in for matching as I'm changing the color.
-
DeSoto did not offer fluid drive with 3 speed manual. Dodge did. Virtually all Chryslers and DeSotos used the semi auto 4 speed transmission in this era, even though the shop manual that also shows a 3 speed manual would make you think otherwise. I would not offer 6K for this as you don't know what's good or bad mechanically and the costs can sky rocket quickly. That's why he's selling it.
-
Cars were not identified by year back then, but by model. So your car would be a Model K. The 1930 just means that was when it was first registered.
-
Hansen, throttle linkage on the side of the block? Never saw that before. The throttle linkage on my 48 DeSoto is on top of the head.
-
Eneto, you are talking about the 41-42 DeSoto Vacumatic transmissions. Mine is a hydraulic transmission. Thanks, Ratbailey!
-
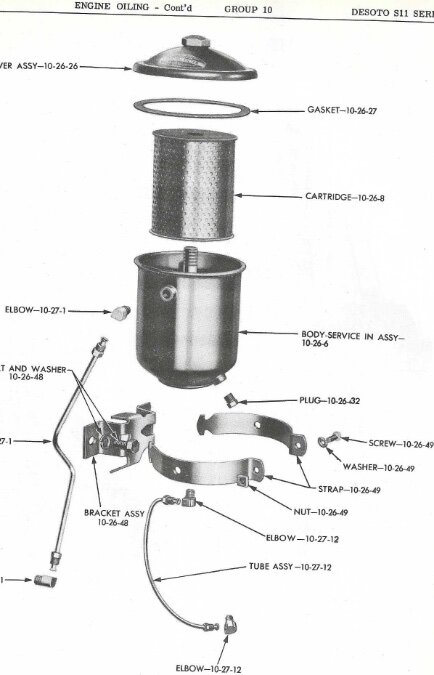
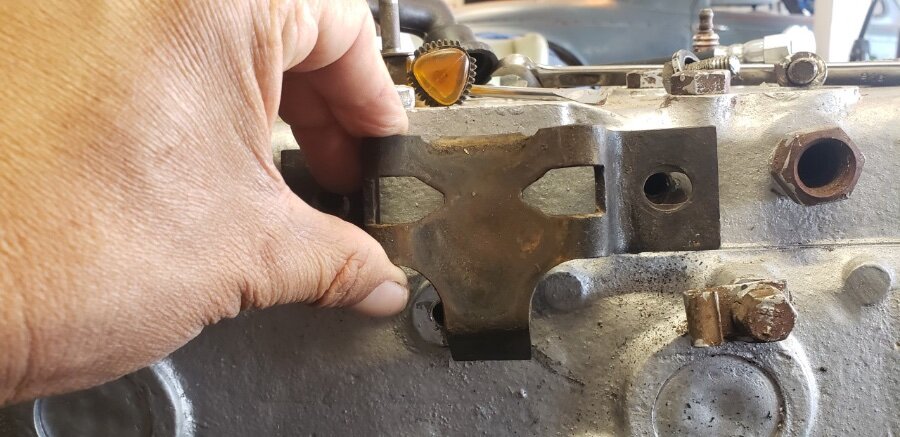
My helper wondered if this is the right way to put on the bracket. If we turned it upside down, it would reveal the raised boss with the bolt hole. But this is the way it shows the bracket in the Parts Manual.
-
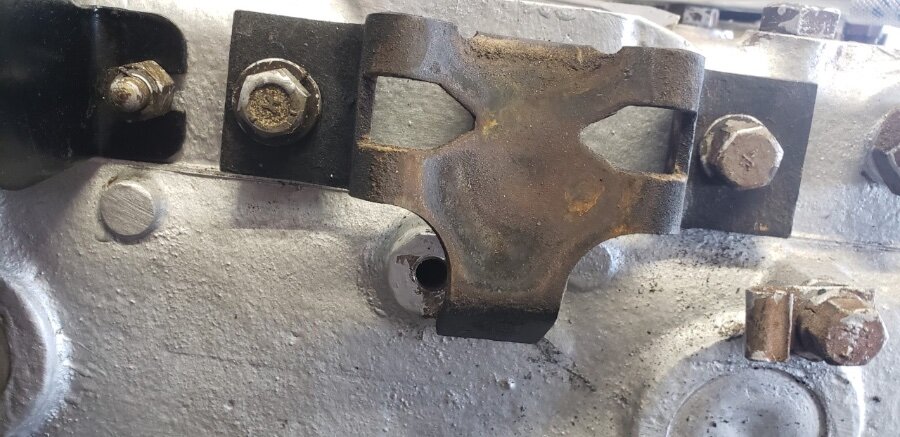
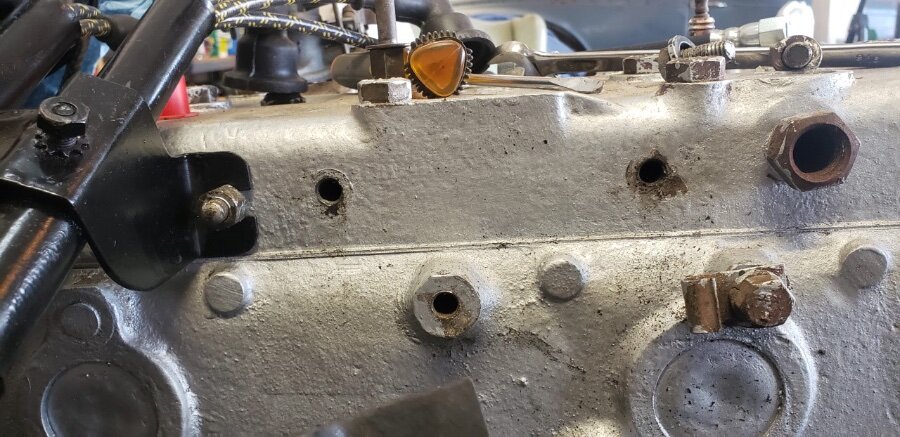
Thanks for the pics but it isn't the spark plug wire holder. Look at my pics. Maybe it's for a wire bracket like the bolt on the right?
-
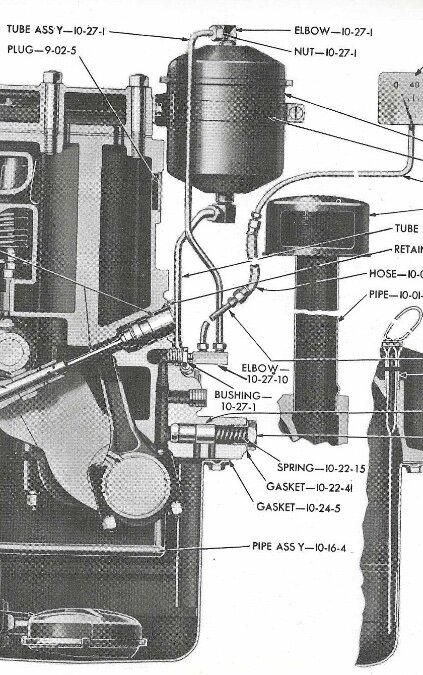
I'm putting my 48 DeSoto engine back together and can't figure out what goes under the oil filter. The second pic shows the oil filter bracket with a bolt hole behind it in the block and there is the first pic with the filter on showing both bolt holes in the side of the block. The two bolt holes are at an angle. No pic exists in the Parts Book showing what goes there. Any idea?


