bkahler
-
Posts
1,936 -
Joined
-
Last visited
-
Days Won
37
Content Type
Links Directory
Profiles
Articles
Forums
Downloads
Store
Gallery
Blogs
Events
Everything posted by bkahler
-
That is probably the 110 freeway heading north. N Figueroa St is not a very long stretch of road. The 110 heads northeast from there to Pasadena passing the Dodger stadium along the way. 15 years ago I drove that stretch of road many times and I never saw any 55-57 Chevy's or Ford's on the road 😁
-
The choice of parts depends on which donor rear axle you choose to go with. I ended up using a Dana 44HD-A rear axle from a 1997 Jeep Grand Cherokee with 3.73 gearing and disc brakes. It was the first one I found that matched my criteria. Changes involved removing all of the old perch mounting hardware and adding new replacements. For the most part, after getting the new perches set up correctly it was a drop-in replacement. You can read about my rear axle conversion here.
-
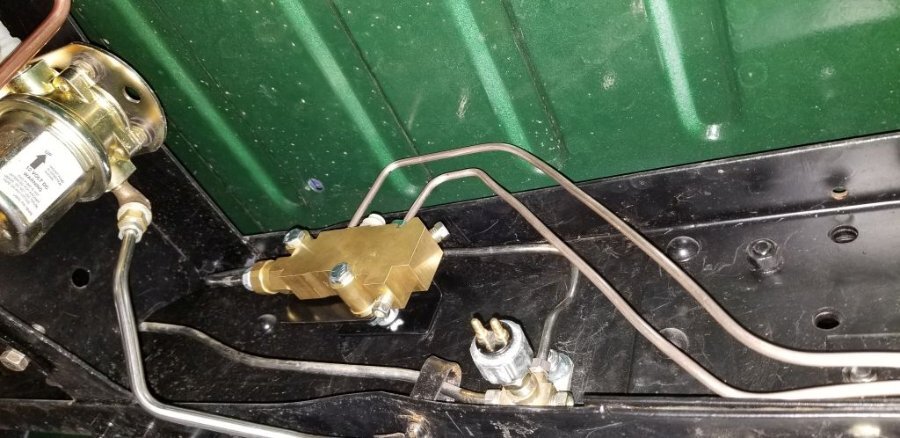
The brake switch is installed in the brake line T under the drivers side frame rail. There originally was a T there but I replaced it with appropriate sized openings for the new brake lines.
-
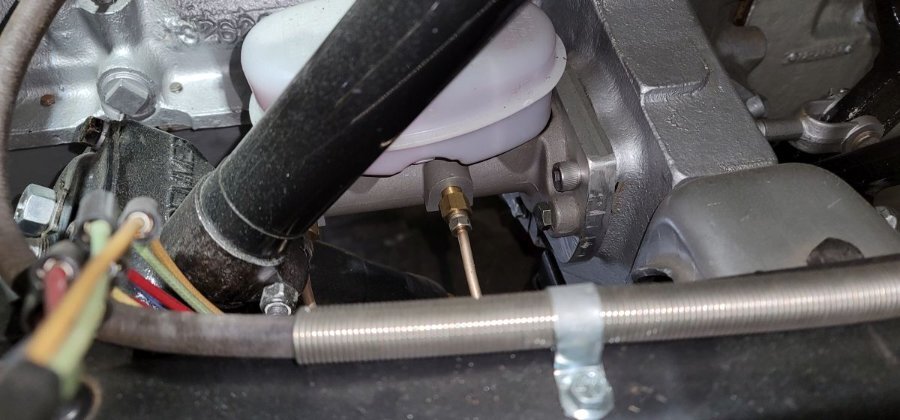
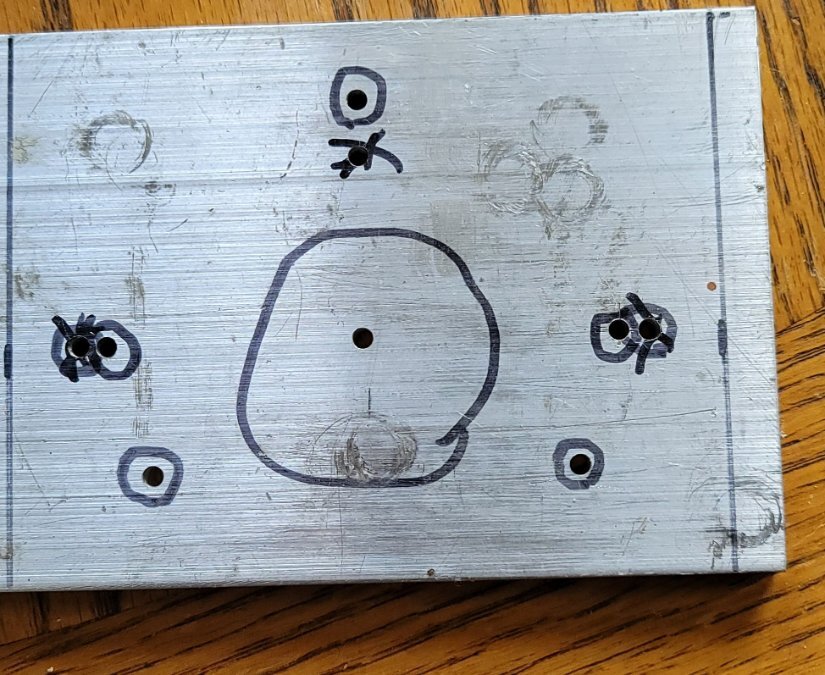
Here's a picture of the MC installed with the adaptor plate and a picture of the plate I used as a pattern. The adaptor itself is 1/2" thick aluminum plate. The plate can't be any thicker as there would be a clearance issue. When bolted in place the backside of the MC is about 3/16" from the steering gearbox.
-
The adapter was to adapt the MC to the bell housing. It's nothing more than a 1/2" (or thicker) aluminum plate with the appropriate bolt patterns for the bell housing and the MC. I may have a copy of it laying around here somewhere.
-
There is no single source kit for disc brakes on the Pilothouse trucks. As for the rear axle, I doubt you will be able to find any direct conversion of the original Mopar rear differential assembly. I only made the rear conversion because my original ring gear was cracked in about 10 places. Sourcing an original type replacement was more effort that it would have been worth. The Jeep Wrangler conversion wasn't all that difficult and I was able to find a 3.73 that matched what was originally in my truck. The bonus is having a truck that stops on a dime with little effort
-
I have front (Rusty Hope) and rear (Jeep Wrangler) disc brakes on my B3 and I used a Dorman MC. Made a custom mounting plate/adaptor and it works just fine.
-
Why can't they build stylish vehicles anymore?
-
Beauty is in the eye of the beholder....
-
That's quite the car hauler. I like it
-
51 B3B build thread - after all these years
bkahler replied to bkahler's topic in Mopar Flathead Truck Forum
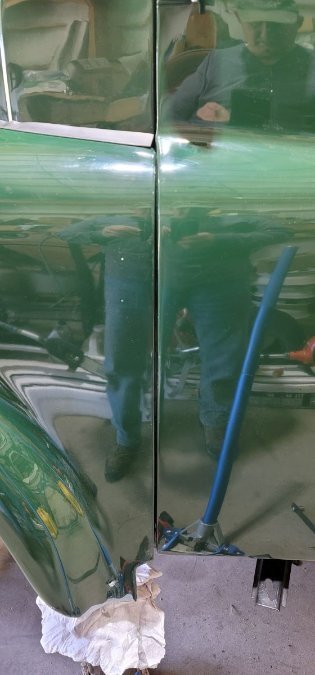
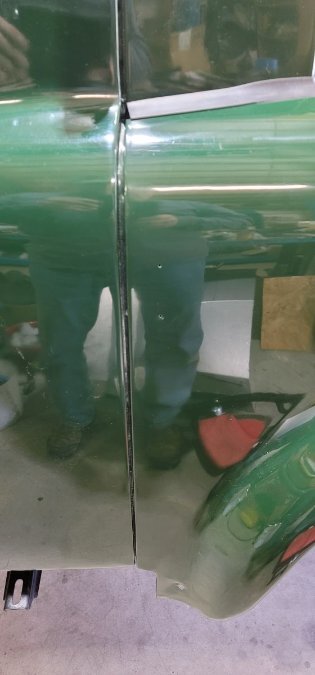
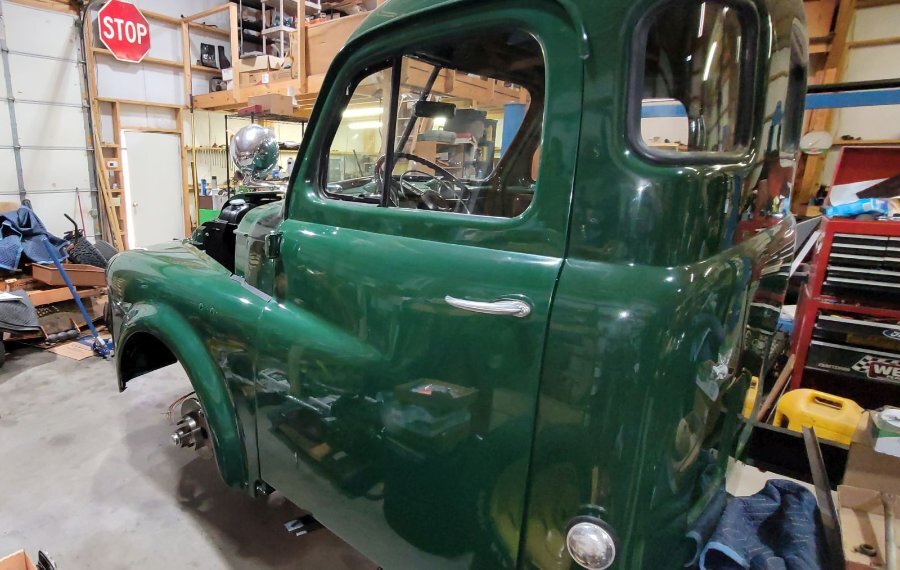
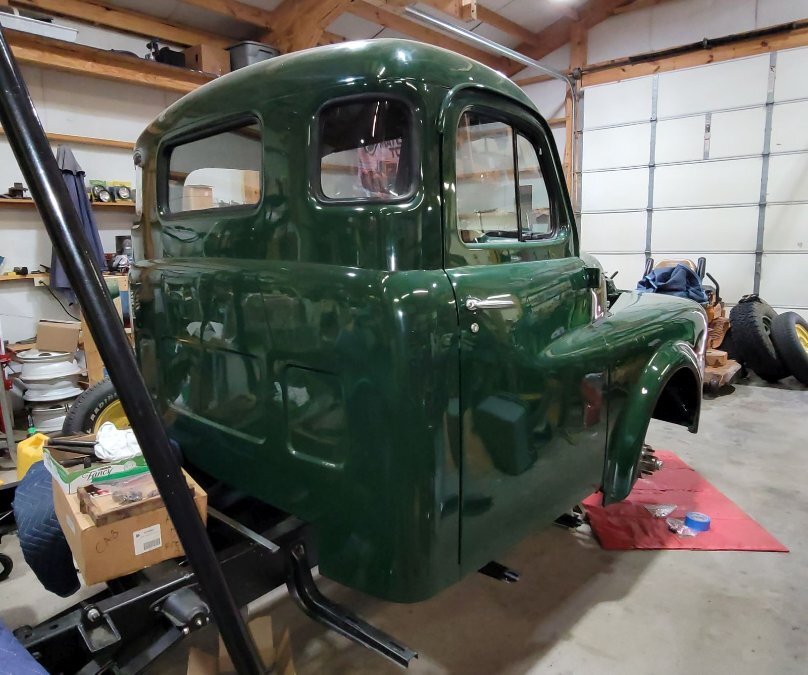
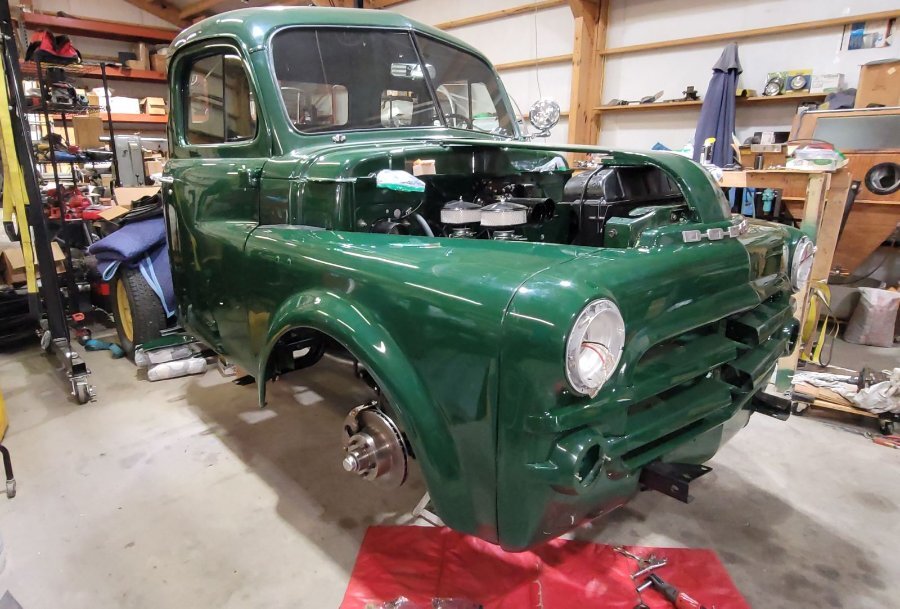
This past weekend I had a few hours to play around with the truck and I didn't really make any progress with the panel alignment problems. I think I can better articulate the issues now so maybe that will help As a preface, all of the bolts that would allow panel movement are loose. In the attached pictures you can see the front nose is not centered on the frame (as mentioned previously), the drivers side door gap is too small and the passenger side is probably a little large but unfortunately it tapers from top to bottom, getting smaller at the bottom. Something not shown in the pictures are the tops of the front fenders where they align with the middle curve of the door. On both fenders, when the L bracket bolts to the side of the cab (accessed from inside the cab) then fenders are not flush with the door skins. The fenders are recessed an 1/8" to 3/16". It's as if the L brackets need spacers installed. This spot is one of the few where there is no real adjustment other than up/down and forward/back. No in/out movement is allowed for. I would think this means the doors need to be moved inward at the top hinge, but if I do this then the doors don't fit the door openings properly. It seems to me that the fit of the fenders where they meet the doors is the key to getting everything else to fall into place. I believe I understand how to align the fenders up/down and forward/backward but the in/out has me baffled. Tips anyone?!
-
I wonder how fast that rig was when it was fully loaded
-
51 B3B build thread - after all these years
bkahler replied to bkahler's topic in Mopar Flathead Truck Forum
I don't have the running boards installed yet but I'm sure using the trolley jack with some wood to spread the load it should work. Thanks, I'll give it a try -
51 B3B build thread - after all these years
bkahler replied to bkahler's topic in Mopar Flathead Truck Forum
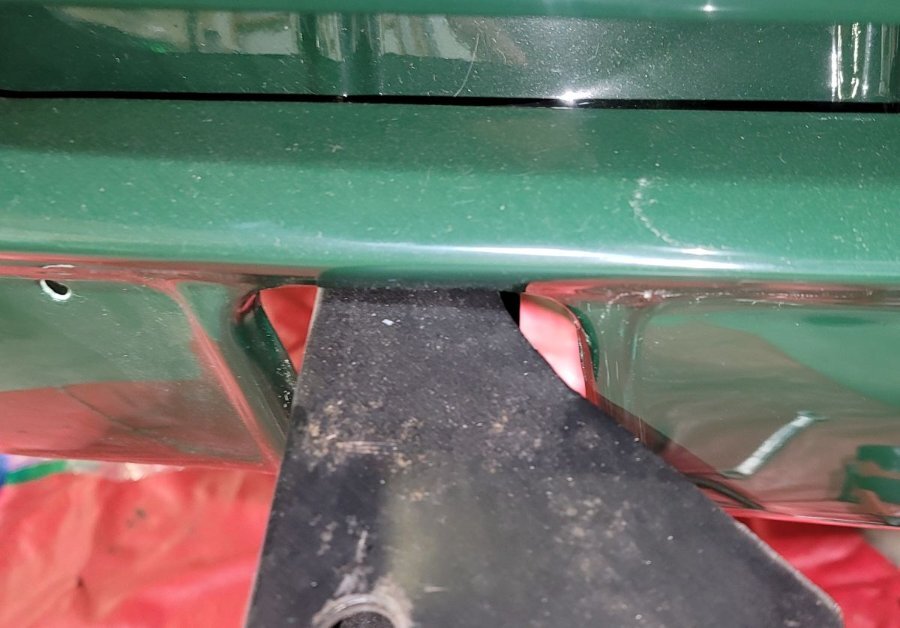
Yeah, PITA pretty much sums it up. Your comment about the radiator support got me thinking, so I went and took a couple of pictures that might explain a lot. The front end does not seem to be centered over the frame supports. I've been stuck on the idea that the radiator support is where it needs to be, but now I'm thinking that's not true. If it get the time, tomorrow I'll loosen the two nuts holding the frame in place and see if that gains me anything. Stay tuned....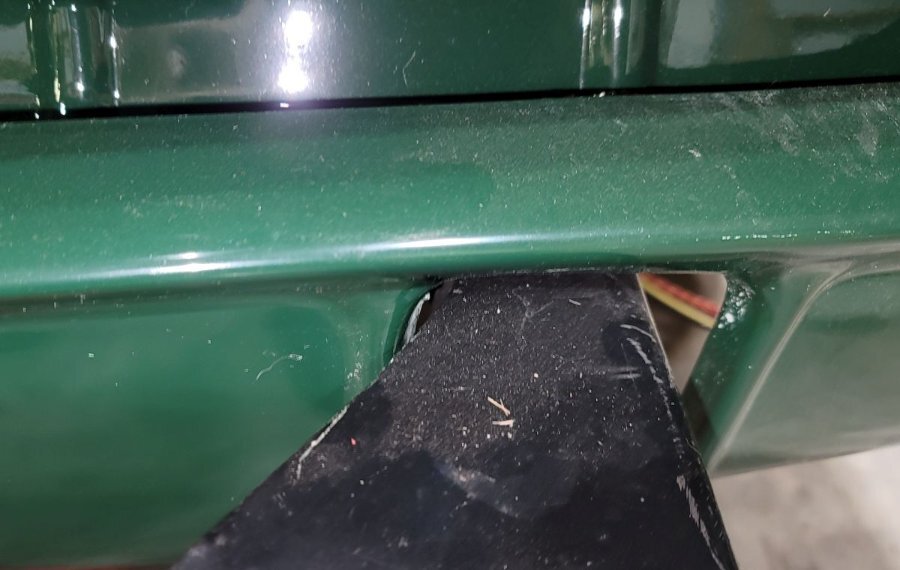
-
51 B3B build thread - after all these years
bkahler replied to bkahler's topic in Mopar Flathead Truck Forum
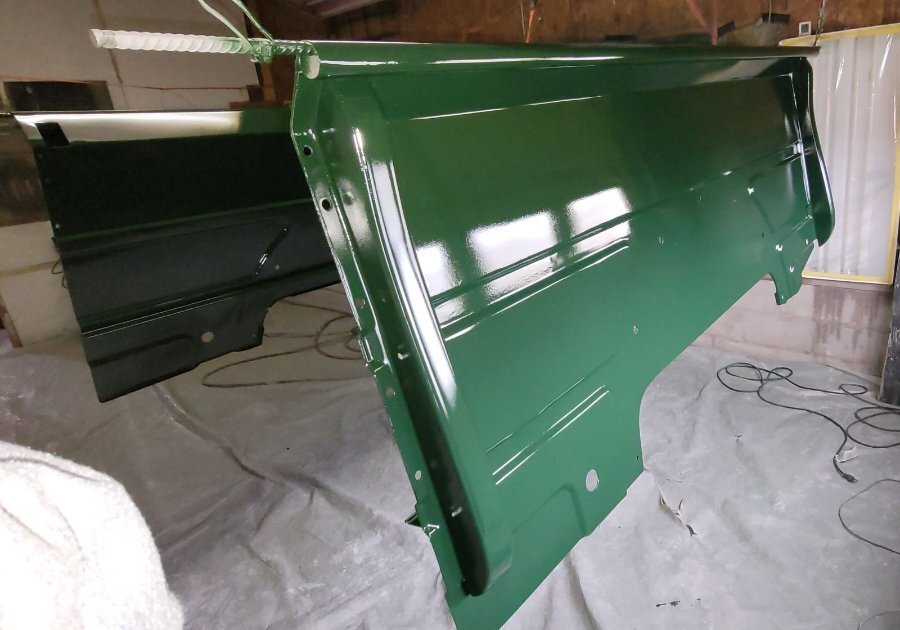
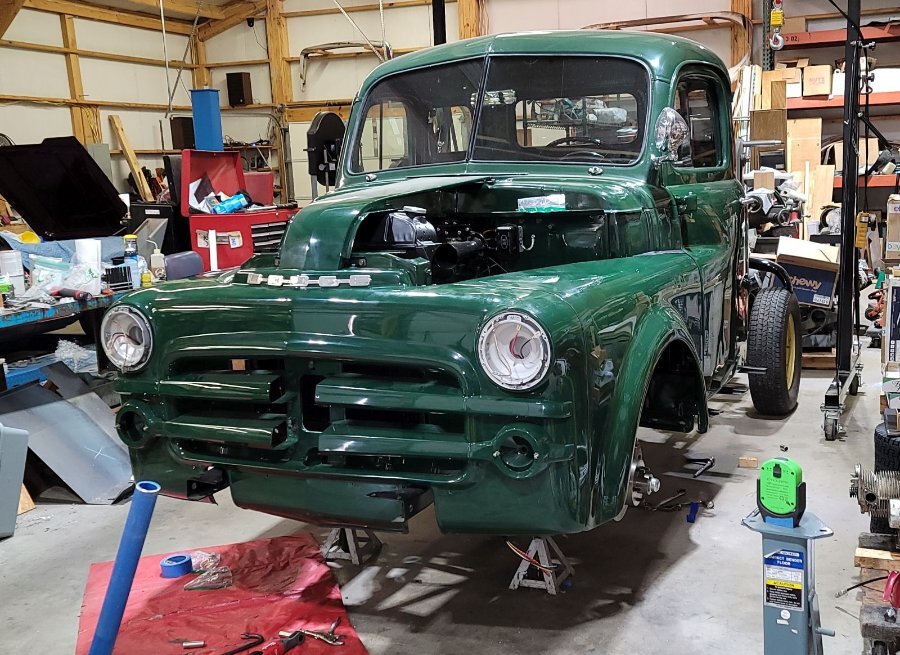
Ok, I've finally got a few things that worth an update. The bed panels are done and the front fenders are mostly installed. I'll be the first to admit the bed panels aren't perfect, but they are good enough for me. The trick is once installed, drive fast enough that people don't get a good look at them The panels are still at the painters, which is good because I currently don't have any room to store them. I've had a lot going on and the shop was packed with stuff so it's been really difficult to work efficiently. I finally managed to make room and once the front sheet metal is all bolted into place then I'll be able to move things around to make an assembly area to build the bed. This morning we worked on fitting the front fenders. Started on the right side and fought it tooth and nail to get the gasket and bolts between the front of the fender and the front nose. The left side we were able to apply lessons learned and it went a lot faster. The bolts holding the fenders to the nose are now tight, but the bolts holding the nose to the radiator frame are still loose. We're having difficulty getting the door gaps to stay put. I can pull the nose on the left side and get a decent gap but after letting off on the pressure it moves back closer to the door. Tightening the bolts on the left side don't seem to help it stay in position, it still springs back somewhat. The passenger side gap is slight larger than it should be so I think the cab needs to rotate slightly. I'm currently struggling with finding a method to pivot the cab (the four bolts are loose). I believe the front left bolt is somewhat of a pivot point and what needs to happen is the passenger side needs to pivot slightly forward. What's the best way to do this? It's been around 28 years since I dismantled the truck and its kinda weird to see fenders on the truck!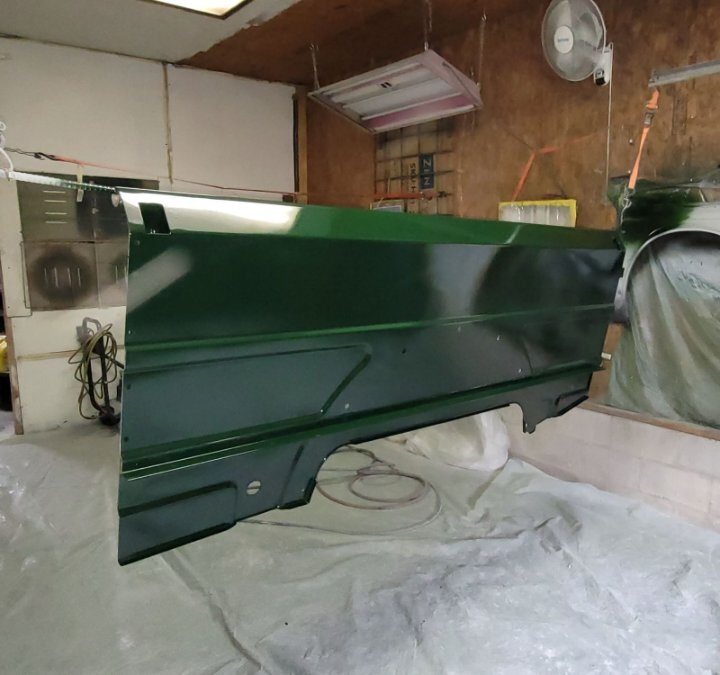
-
51 B3B build thread - after all these years
bkahler replied to bkahler's topic in Mopar Flathead Truck Forum
We'll never know.... -
It does look like a pretty gentle plane crash
-
I don't know which is more interesting, the old Dodge or the plane in the roof....
-
That looks to much like real work to me...
-
51 B3B build thread - after all these years
bkahler replied to bkahler's topic in Mopar Flathead Truck Forum
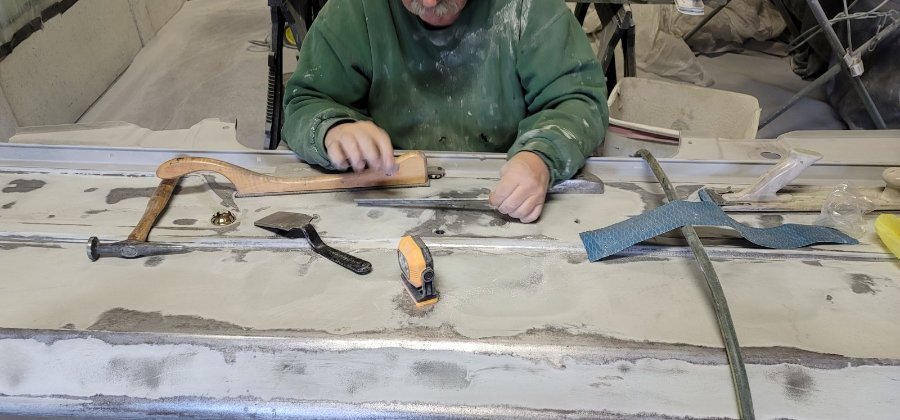
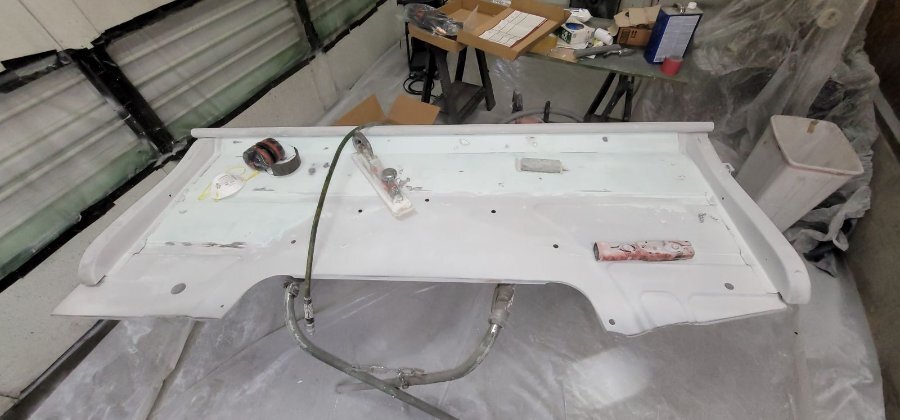
Bed panel repairs are moving slowly but still moving These pictures were taken a couple of weeks ago. He's working on getting the last section flat. I believe the panels are now ready have primer applied. The weather has been on the cold side so he's waiting for slightly warmer weather before doing so. After about 28 years of waiting I just might get to drive the truck on the street this spring!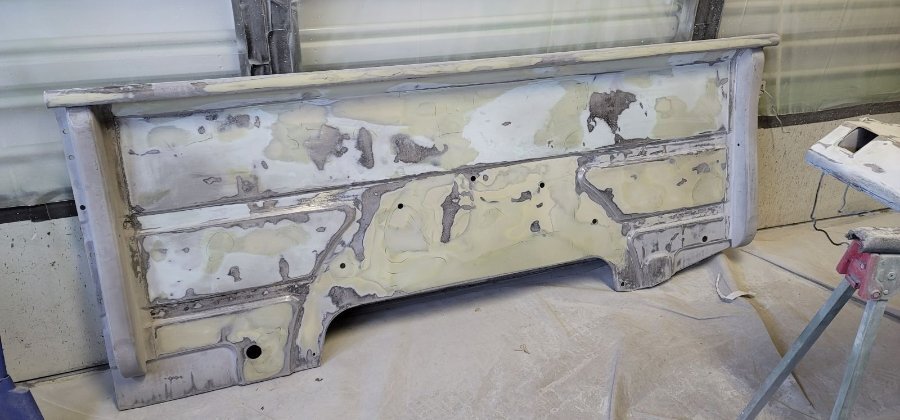
-
51 B3B build thread - after all these years
bkahler replied to bkahler's topic in Mopar Flathead Truck Forum
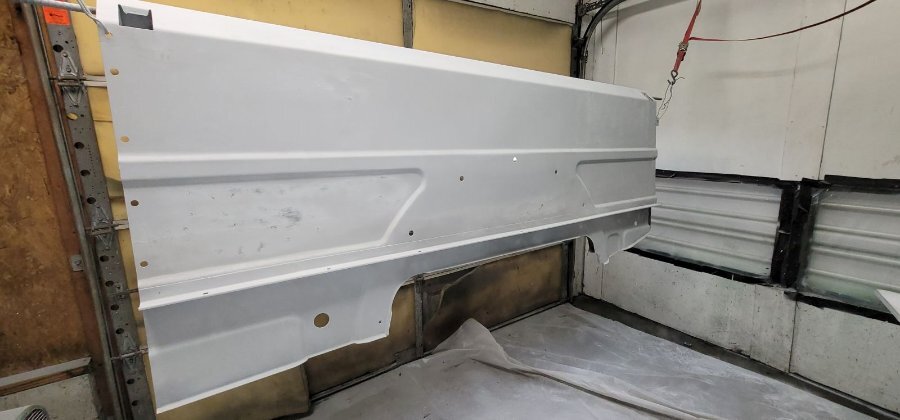
More progress on the bed panels. First coat of primer on both and he's starting to add filler for all of the rust pits.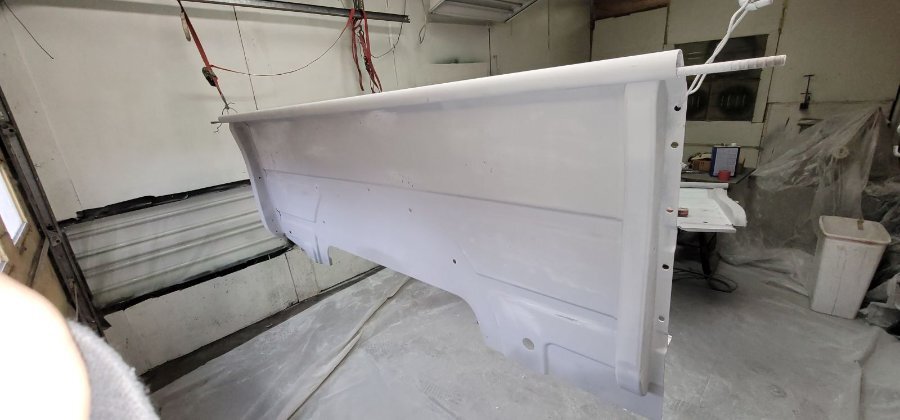
-
51 B3B build thread - after all these years
bkahler replied to bkahler's topic in Mopar Flathead Truck Forum
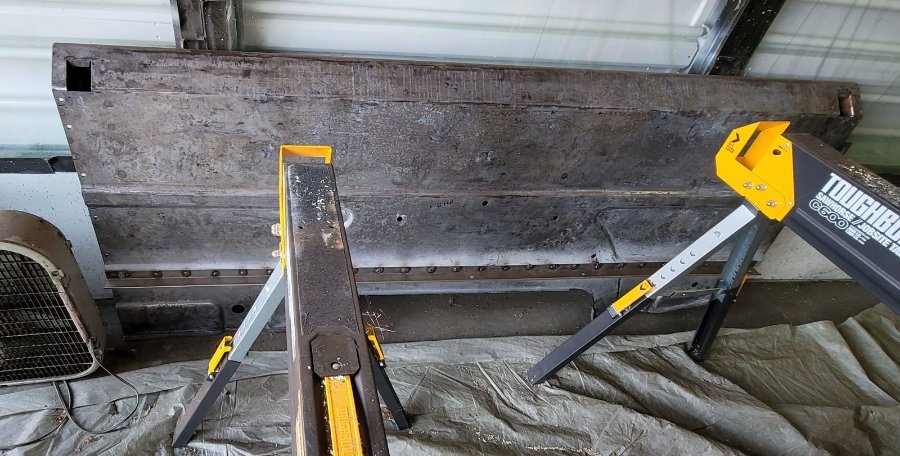
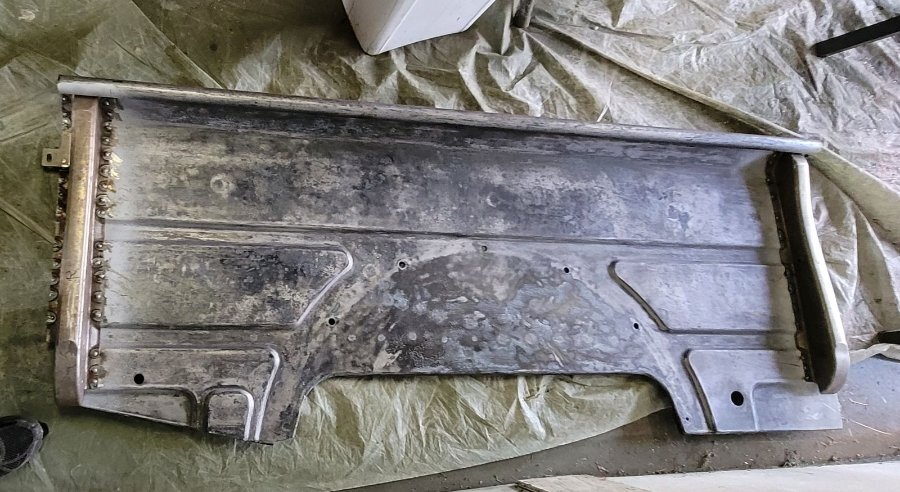
One step closer to getting the bed side panels painted. Last week we welded the stake pockets and bed rail to the passenger side panel. This weekend we welded the pieces to the drivers side panel. It's in surprisingly straight condition now. Both panels are now being prepped for paint. There are a couple of flat spots on the top tube of the panel and we were trying to use one of those harbor freight tubing expanders, unfortunately the smallest one they have is just a bit to large to be able to comfortably slide it down towards the middle of the tube without getting stuck. As an alternative he's considering JB Weld as a build up material and shaping it to match the curve. As long as I own the truck it's not going to be a work truck so that might be the easiest option. Its about time for me to start milling the lumber for the bed floor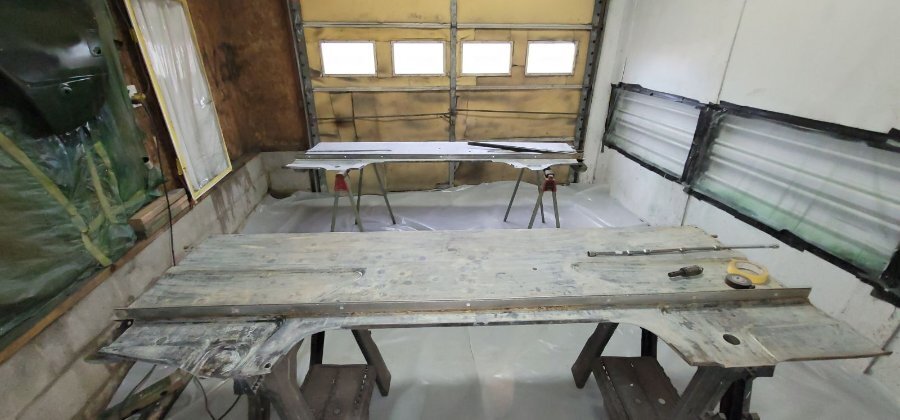
-
51 B3B build thread - after all these years
bkahler replied to bkahler's topic in Mopar Flathead Truck Forum
Beg, borrow or steal one of these drills. They are great for getting into tight spaces.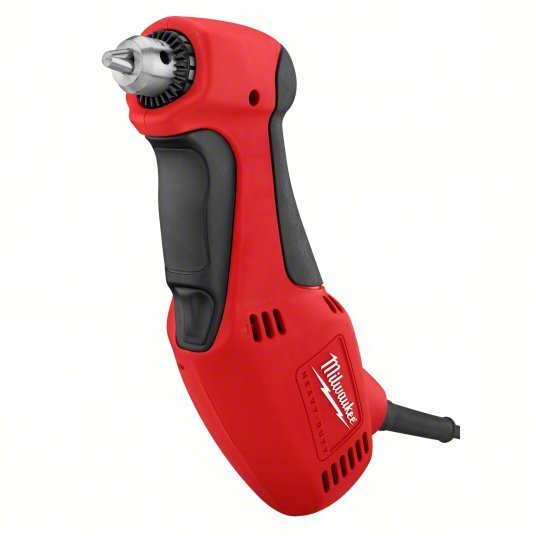
-
ggdad1951 truck project montage: FEF!
bkahler replied to ggdad1951's topic in Mopar Flathead Truck Forum
What's the cardboard for....? -
51 B3B build thread - after all these years
bkahler replied to bkahler's topic in Mopar Flathead Truck Forum
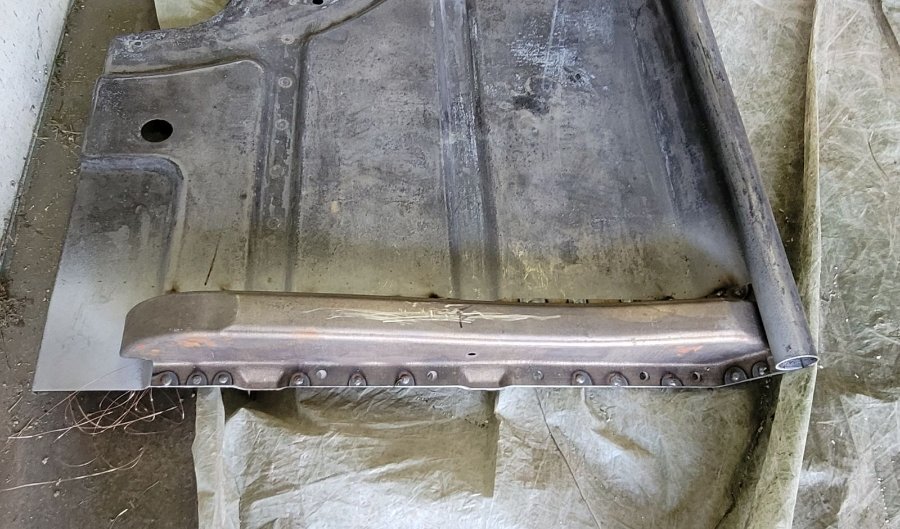
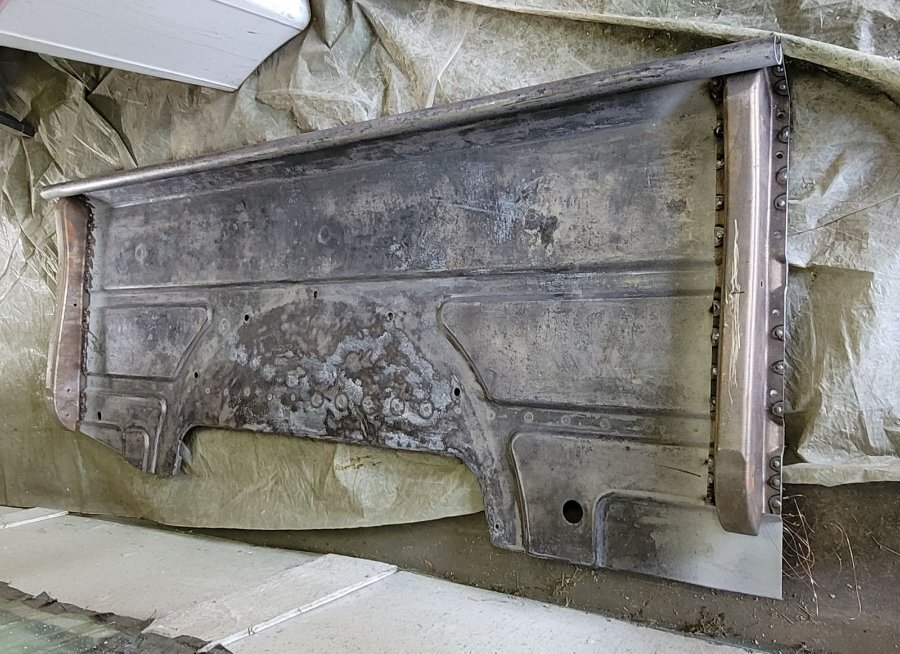
Sorry about the radio silence, I'm slowly figuring out this whole retirement thing I haven't really done much of anything to the truck but progress has been made by the guy doing the body work on the bed. In early October I took a trip back to my home town to visit family for a couple of days and then headed to Minneapolis to pick up a pair of bed side panels (thanks Mark!). I wouldn't call the newly obtained panels "new" but they are in considerably better condition than my originals. Mark had previously removed the rusty stake pockets from the panels but he had new replacements available so that's what you're looking at in these pictures. I will say the Bruce Horkey replacement stake pockets look to be identical to the originals, they are very well made reproductions. This panel is the passenger side, it was the better of the two so we figured to start with the good panel and hopefully learn along the way. The panel did require some straightening and shrinking but I'm happy to say it turned out pretty darn straight. The drivers side panel is pretty much straight along the top tube but the panel itself is somewhat of a banana shape, although we both feel it's workable. Maybe in a week or so I'll be able to post some pictures of the reworked panel. By the way, the reason for me not working on the truck is because my Cushman Truckster engine finally blew up so I'm in the process of replacing the engine. I really need the Cushman running as it's my workhorse for getting things done on my property. Brad