bkahler
-
Posts
1,963 -
Joined
-
Last visited
-
Days Won
39
Content Type
Links Directory
Profiles
Articles
Forums
Downloads
Store
Gallery
Blogs
Events
Everything posted by bkahler
-
51 B3B build thread - after all these years
bkahler replied to bkahler's topic in Mopar Flathead Truck Forum
It sounds like the hole seems to get plugged relatively frequently. Since my manifolds are currently off it would probably be relatively easy to continuously inject compressed air into one of the ports to force any debris back into my face instead of dropping into the cylinder bore. Sounds like a good task for New Years day Using tips found on the forum I got the oil pan installed with a new gasket. I still need to replace all of the bolts but that's a minor task I'll deal with later. Brad

-
51 B3B build thread - after all these years
bkahler replied to bkahler's topic in Mopar Flathead Truck Forum
What is the actual diameter of the hole where it opens into the combustion chamber? What is the probability of junk falling on to of the piston? That worries me more than anything. Brad -
51 B3B build thread - after all these years
bkahler replied to bkahler's topic in Mopar Flathead Truck Forum
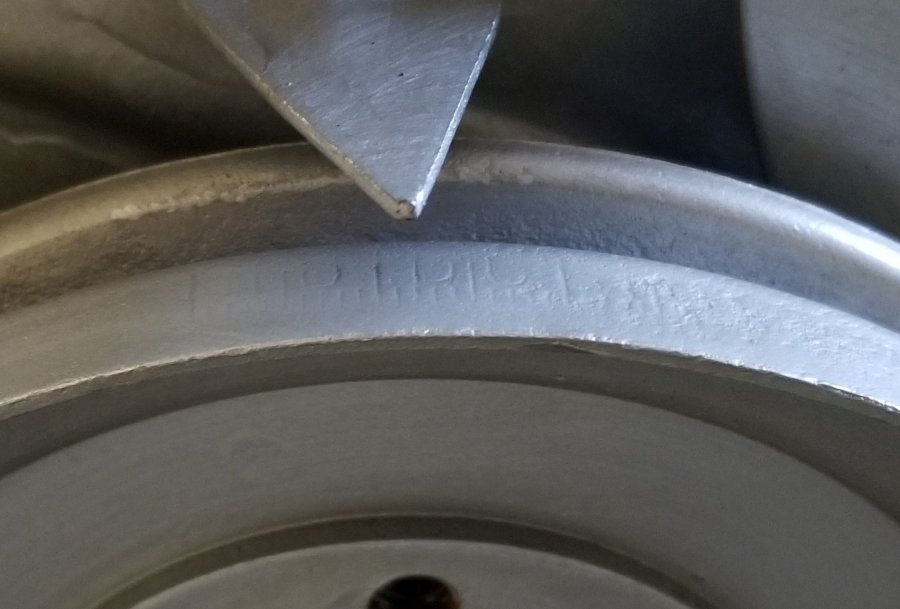
It's steel at the bottom of the hole. I scraped it with an awl and it left a shiney scratch and it sounds like metal. If I get time this week I'll pull the plug again and see if I gave up to soon. Those marks were just with a sharpie so I could see them better while trying to figure them out. I've already wiped them off. Sometime in the next few weeks I'll mark a couple of them with some black paint. -
51 B3B build thread - after all these years
bkahler replied to bkahler's topic in Mopar Flathead Truck Forum
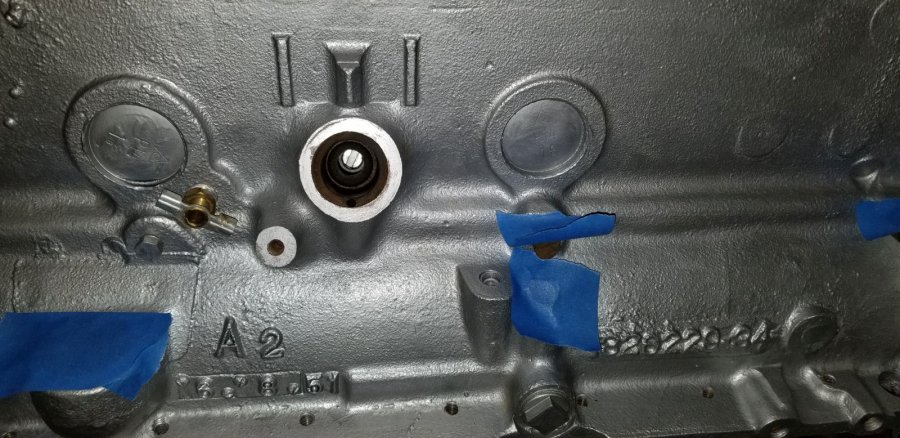
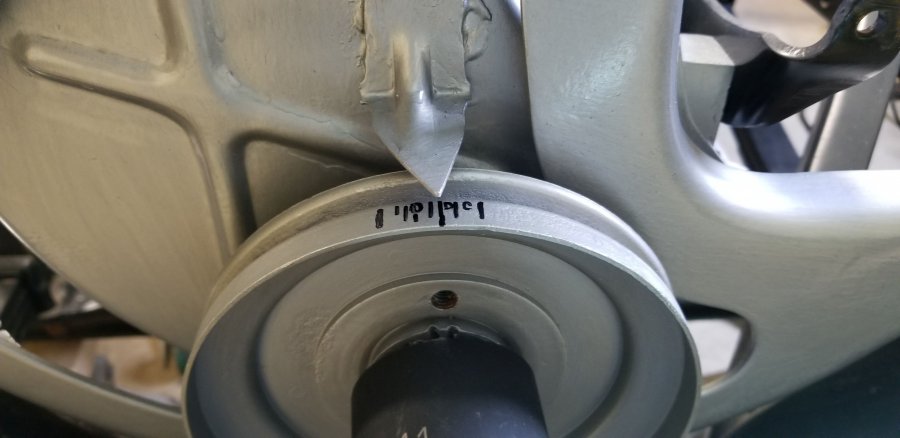
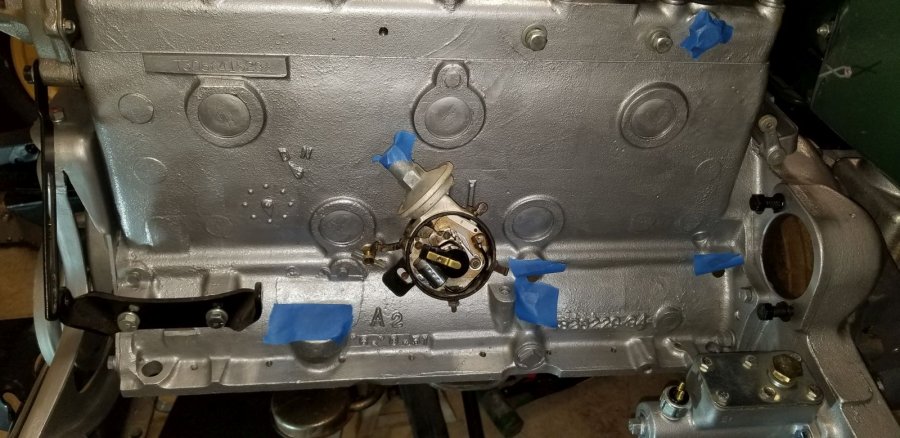
Brian, thanks for the info. Per your advice I pulled the oil pump and after much trial and error I got the oil pump shaft to be what appears to be the 1 & 7 position, or at least really close to it. And the rotor is like this. I zoomed in on the crank pulley and this is what I came up with. Here's the unmarked version. I think before the radiator gets installed I'm going to try and sharpen the marks and then paint them black. As far as the front suspension, if I was back in Nebraska I know exactly where a good suspension shop is. Here in Richmond I don't think there is a shop that could do that but I'll do some asking around. I suppose its possible the springs will drop some once the rest of the engine components are installed and all of the front end sheet metal is installed. Prior to the first drive (whenever that might be!) I'll evaluate the suspension again before I decide what to do. Thanks! Brad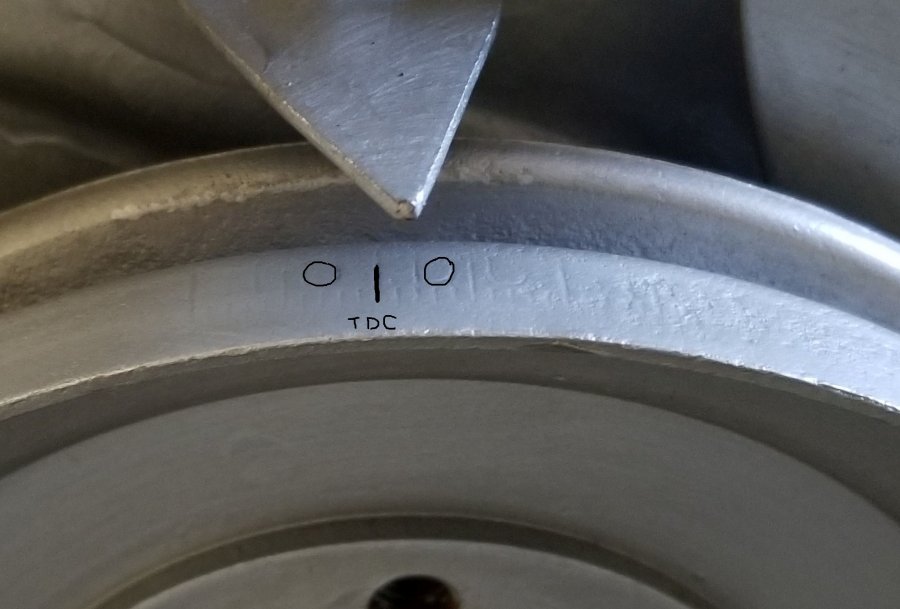
-
51 B3B build thread - after all these years
bkahler replied to bkahler's topic in Mopar Flathead Truck Forum
And finally the oil pan gasket. From what I gather looking at the service manual and searches on the forum this is how the gaskets should look prior to installation. The only exception being I haven't applied sealant as yet to the long side strips. The end strips are protruding between 1/4" and 3/8" which seems to be to spec.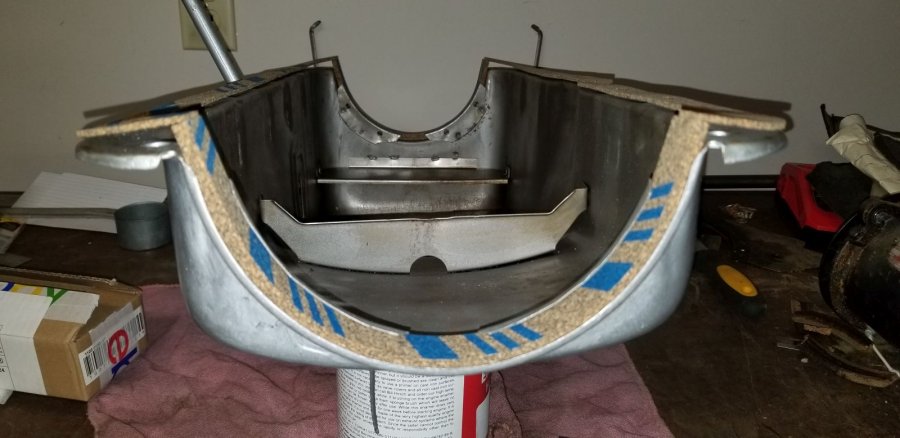

-
51 B3B build thread - after all these years
bkahler replied to bkahler's topic in Mopar Flathead Truck Forum
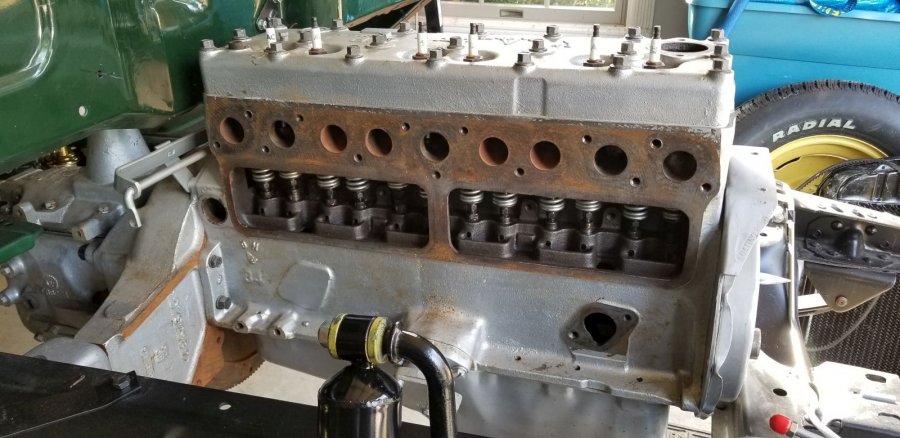
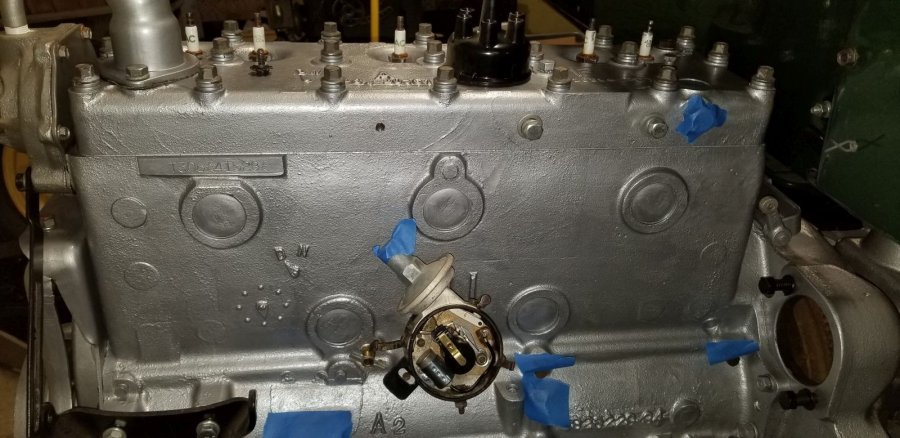
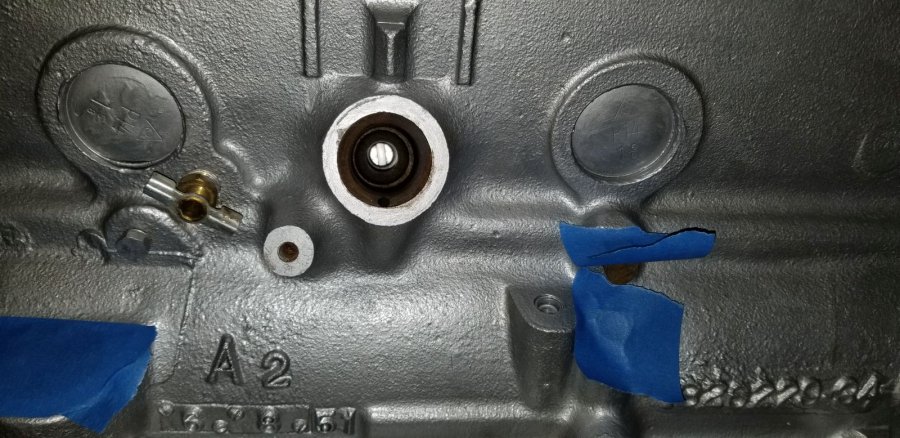
More details. Before you guys suggest I pull the plug above #6 cylinder, I've already done that. Unfortunately it is not a through hole! Either the factory never finished the boring process or my engine builder plugged the hole when he was prepping the head. He is a race engine builder and he may have seen that as a detriment to performance So to find TDC (or close approximation) I verified that the intake and exhaust lifters could be spun indicating I was on the compression stroke and then I gradually bumped the crank until the connecting rod appeared to be centered in the bore. No this is not an exact method but it's the best I could think of. Once I had the rod where I felt it was centered I checked the timing marks on the crank pulley and this is where I ended up. Looking down through the distributor bore the oil pump seems to be at 11 & 5 position. Which leaves the distributor rotor in this position. My guess is the oil pump is off by one tooth, possibly two. Is it worth pulling the oil pump to re-clock it or would it be easier to just live with it like it is? Thanks! Brad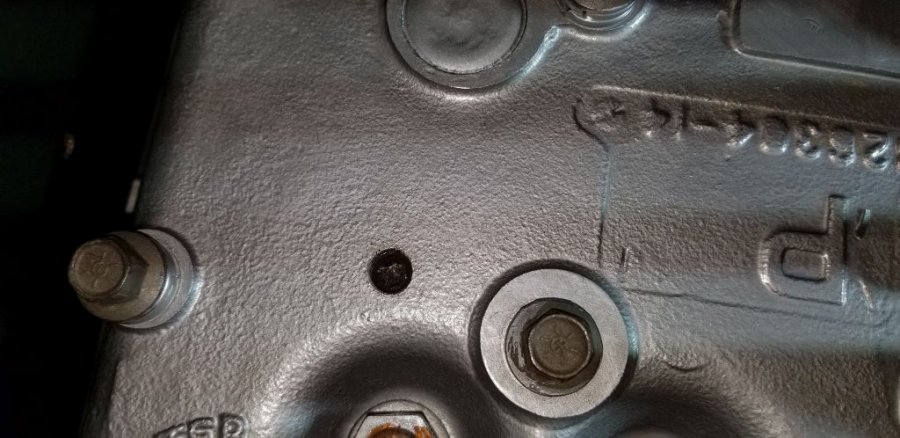
-
51 B3B build thread - after all these years
bkahler replied to bkahler's topic in Mopar Flathead Truck Forum
Which one of these marks is TDC?! I figure it's probably a good idea to verify oil pump timing prior to putting the oil pan back on for the final time. Thanks! Brad
-
51 B3B build thread - after all these years
bkahler replied to bkahler's topic in Mopar Flathead Truck Forum
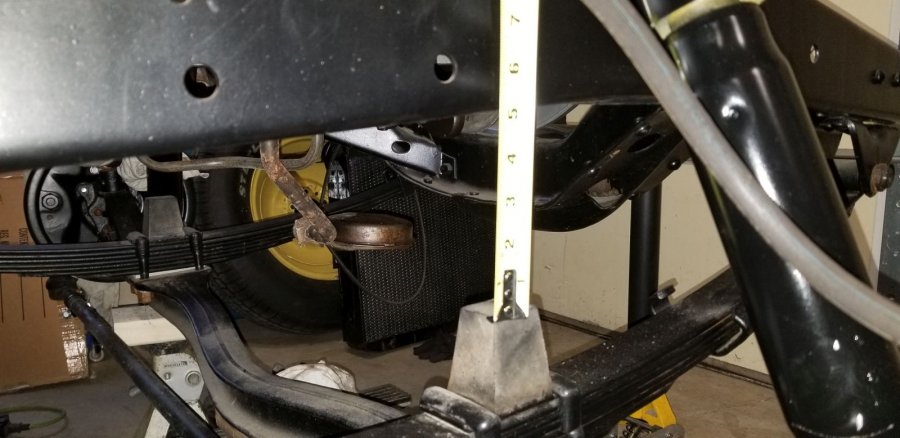
Here's some pictures of the passenger side front spring.

-
51 B3B build thread - after all these years
bkahler replied to bkahler's topic in Mopar Flathead Truck Forum
That's what I've always assumed should be the case. The donor truck that supplied the springs sat nice and level and for lack of better words, high off the ground. I don't really care for trucks that sit low with the wheels tucked up inside the wheel wells. Not my cup of tea -
51 B3B build thread - after all these years
bkahler replied to bkahler's topic in Mopar Flathead Truck Forum
Worked on a bunch of odds and ends today. For the most part the parking brake is now assembled. Just need to add a cotter pin and adjust the brake per the manual. I re-installed the water pump, t-stat and housing, front engine mount, valve covers, crank pulley, generator mount, and the front shock mounts. I'm a little concerned about the front shocks. Right now the front axle is sitting on jack stands which means the front suspension has a slight compression from the weight of the motor and cab. I was just barely able to get the two front shocks installed. I actually had to apply a little downward pressure on the frame to get the shocks installed. I'm assuming once the front sheet metal, radiator and other miscellaneous bits are installed that will compress the front springs more but I'm afraid it won't be very much. That means on an upward rebound of the suspension the front shocks are likely to be the limiting factor in suspension travel. That makes me wonder if the front springs might have a little to much arch in them. My original front springs were badly collapsed on the drivers side so I found a set of front springs on 1952 B3B in a junkyard. I guess time will tell whether or not I need to de-arch them a little. Brad

-
The bakelite is the easy part. There's not much you can do for that pitted chrome. Oh yeah, you should have something in your mailbox Monday.....
-
Spending big bucks on a gas tank renovation may seem difficult to swallow but it's probably one of the better investments you can make in your truck. Especially if you're trying to keep it somewhat stock. I got really lucky in that my gas tank was almost spotless inside. I still had the local radiator shop dip it and then they sealed the inside with a special liquid used for sealing gas tanks. I used Gas Tank Renu on a tank for one of my projects and it came out really nice. Yeah, it was pricey but not deal with making something fit made it easier to stomach Brad
-
Don't get to concerned about your dash knobs..... Post edited by moderator: Please keep offers of parts to PM and off the forum please.
-
51 B3B build thread - after all these years
bkahler replied to bkahler's topic in Mopar Flathead Truck Forum
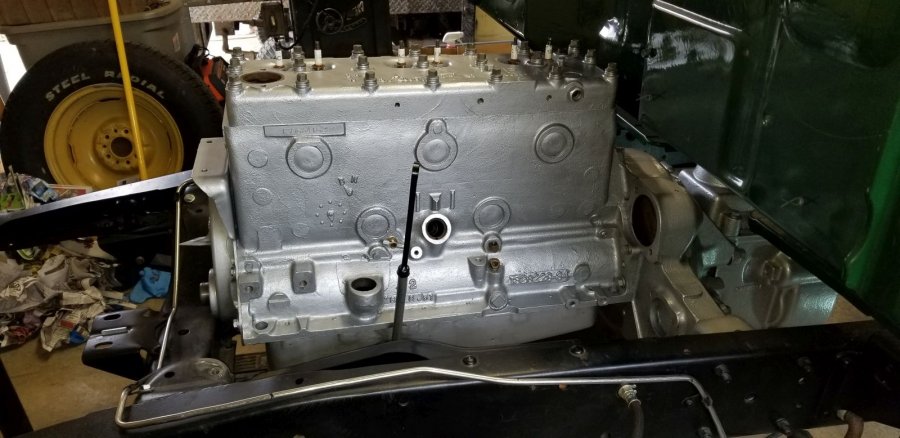
The repaint of the engine and transmission is for the most part done. I still want to repaint the oil pan but will wait on that until after I get the front engine mount re-installed. Now I can finally start the assembly process again. Maybe this time I'll get it all done before I have to paint it all again ? Brad


-
512 cid C series on Dakota chassis- build thread
bkahler replied to Radarsonwheels's topic in Mopar Flathead Truck Forum
Needless to say I'm looking forward to how you work through this rust issue. It takes talent to deal with issues like that, something I do NOT have in this area! Good luck Brad -
512 cid C series on Dakota chassis- build thread
bkahler replied to Radarsonwheels's topic in Mopar Flathead Truck Forum
Wow, you have considerably more work to do that I thought from those first pictures. Do you have a source for replacement sections? -
Transmission to bell housing bolt torque
bkahler replied to bkahler's topic in Mopar Flathead Truck Forum
For the most part I used to torque by feel and never had issues. I had heart surgery a little over a year ago and I still don't have the strength in my right arm that I used to. It's getting better but when it comes to the large bolts I feel more comfortable using a torque wrench. I'm pretty sure when I installed them the first time 20 years ago I didn't use a torque wrench and they were more than tight enough when I tried to remove them the other day! I've had my share of disasters and I certainly don't like watching paint dry! Oh well....... ? -
Transmission to bell housing bolt torque
bkahler replied to bkahler's topic in Mopar Flathead Truck Forum
Not 1/2" either. I just measured the bolt and it's 9/16. The attached picture show a 3/8, 1/2 and my transmission mounting bolt. Assuming grade 5 that would place the torque range at 82 to 91 ft/lbs.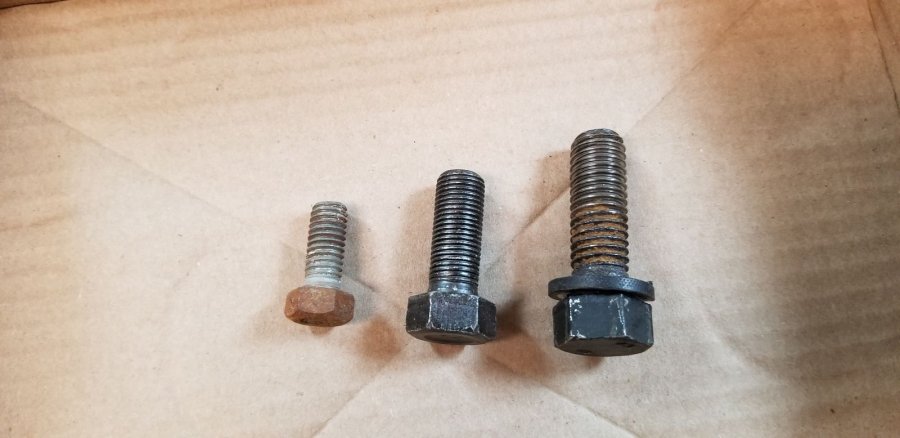
-
Transmission to bell housing bolt torque
bkahler replied to bkahler's topic in Mopar Flathead Truck Forum
Hmm.....any idea where I can meet Destiny? ? Those older mechanics must have had crescent wrenches for hands! For me a 1/4 turn on a 9/16" bolt with a lock washer won't even compress the lock washer! -
Transmission to bell housing bolt torque
bkahler replied to bkahler's topic in Mopar Flathead Truck Forum
Morning Ken, The heads on the bolts are 15/16" (or was it 7/8"?!). Regardless, they are definitely not 3/8". I was thinking the bolts were 5/8" diameter but I found a post that mentioned them being 9/16" which led to my torque search for 9/16" bolts. I will verify size tonight. The bell housing to engine block bolts are 3/8" as I removed a couple of those last night. Brad -
I guess I should close out this thread. I bought a Model 75 off of ebay which is basically identical to the Model 62 that I started with. The only difference I could find was the cover that said 75 instead of 62 and the motor is 12 volt. Fortunately this heater core turned out to be in excellent condition and the motor looks like new. And since I'm converting to 12 volts I now have a nice 12 volt motor to use. Onward...... Brad
-
I searched through the forums and I've looked in the service manual and can't find the number. I believe the bolts are 9/16-12 and searching online I find specs for grade 5 and grade 8. Grade 5 is in the 70s to 80s and grade 8 is over 100 up to 115 or so. I'm guessing the mounting bolts are grade 8 or better but I'd hate to torque a grade 5 to a grade 8 spec! Anyone know the torque number?! Thanks! Brad
-
Terrence, welcome! The wire gauge sizes listed in the B3B wiring diagram will be just fine. Switching to 12 volts you'll find that the current draw is actually less than if you were running a 6 volt system. I'm making this same conversion to my 51 B3b and followed the diagram for wire sizing. You should post pictures of your truck when you get a chance. We would all like to see them. Brad I see Los_control beat me to it!
-
Ordered Permatex #2 yesterday from Amazon and should have it Friday. I really wish I hadn't waited 20 years to restart the restoration but sometimes life just gets in the way. Brad
-
51 B3B build thread - after all these years
bkahler replied to bkahler's topic in Mopar Flathead Truck Forum
We had some awesome weather here today which allowed me to open the garage door and enjoy the warmth while working on the Dodge. After stripping all of the components off the block the other day I was able to proceed to prep the block and transmission for painting. 20 years of sitting caused a lot of surface rust to occur in areas that I hadn't painted previously (I should have painted but didn't!). I read on the forum that someone recommended Corroseal to convert rust so I ordered some and gave it a try. The instructions say to brush it onto the affected area and as the rust is converted it will turn black. Boy did it turn black! I have to wait 24 hours and then I can clean up the residue. I don't have pictures but everything is now masked and prepped for paint so I'm figuring sometime Friday or Saturday I should be done with the painting. It'll be nice to be able to start putting things back together again for a change Brad