bkahler
-
Posts
1,949 -
Joined
-
Last visited
-
Days Won
39
Content Type
Links Directory
Profiles
Articles
Forums
Downloads
Store
Gallery
Blogs
Events
Everything posted by bkahler
-
CHS Ricardo Cavallero S.R.L manual steering boxes
bkahler replied to bkahler's topic in Mopar Flathead Truck Forum
Good deal. You must have a heck of a spare parts bin! -
51 B3B build thread - after all these years
bkahler replied to bkahler's topic in Mopar Flathead Truck Forum
I remember back when there was a pilothouse.com. Not sure why there was a split. I have 1st and 2nd edition copies of the owners manual. The 1st edition has one wire different and the 2nd edition has two. Unfortunately they don't have dates. I would think the 1st edition would be for 1951. The 2nd edition would be for 1952 or 1953. That's my story and I'm sticking to it Brad -
CHS Ricardo Cavallero S.R.L manual steering boxes
bkahler replied to bkahler's topic in Mopar Flathead Truck Forum
I don't really have any suggestions other than take it slow and and easy. I would think that seal would be available at a good bearing supply house. Good luck. -
CHS Ricardo Cavallero S.R.L manual steering boxes
bkahler replied to bkahler's topic in Mopar Flathead Truck Forum
I believe the seal is installed backwards. The lip that touches the shaft should be pointing down into the gearbox. -
51 B3B build thread - after all these years
bkahler replied to bkahler's topic in Mopar Flathead Truck Forum
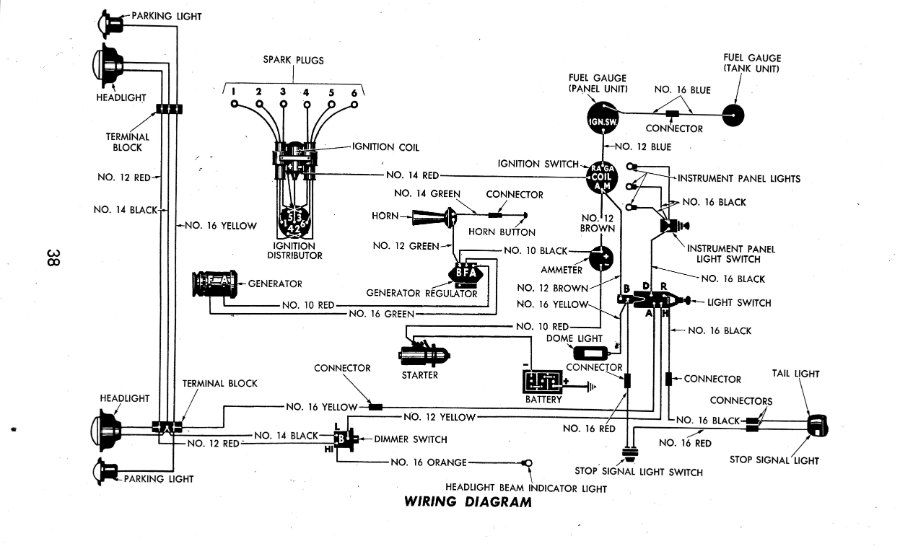
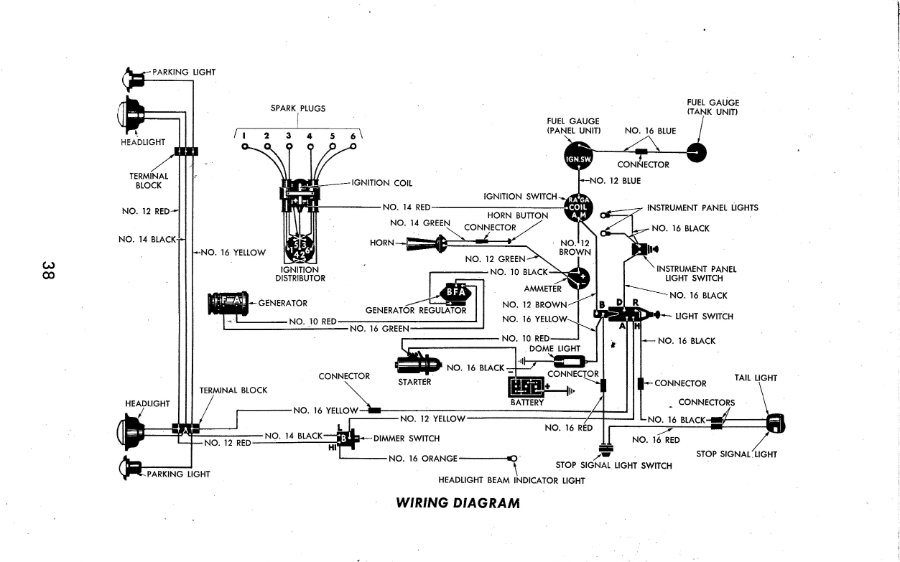
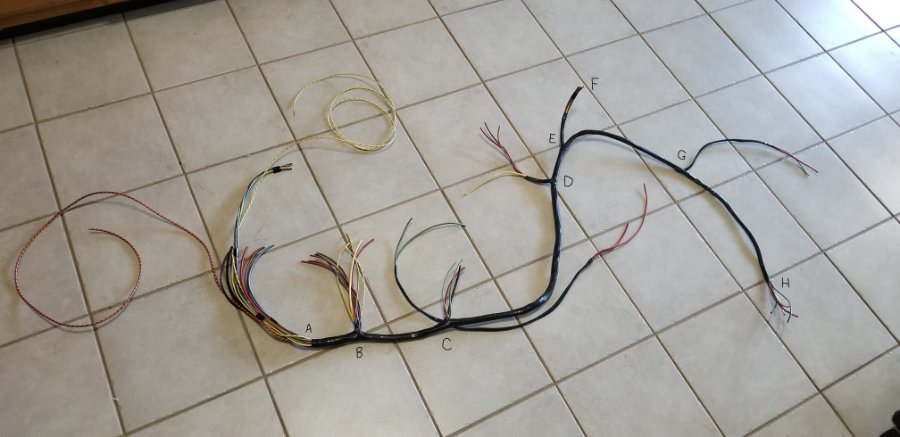
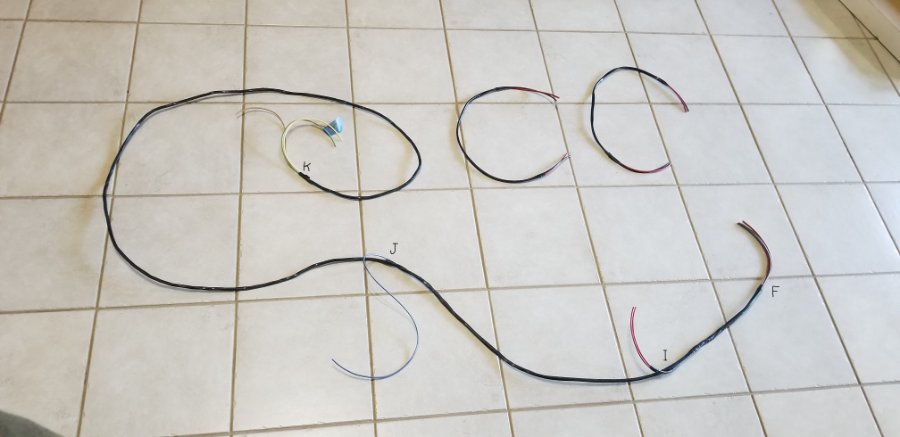
I'm getting closer to the point where I can install the new wiring harness that I've made. There wasn't much left of the original wiring harness when I dismantled the truck so I didn't have a whole lot to work with. Back in 2007 or 2008 I started searching for information and came across the Pilothouse.org site where Dave Erb had uploaded some really good information based on a wiring harness original bought and documented by Allen Parkhurst. So in the spring of 2008 I printed out that information and proceeded to design and build my own harness. Since I was on a work assignment in Pasadena for a year I spent a lot of my spare time scrounging through the junk yards in the area and working on oddball B3B projects. Probably the major one was the fabrication of the wiring harness. When I made the harness in 2008 I was using Dave Erb's diagrams which were for a B2B and I failed to notice that little tidbit of information. Once I realized my wiring harness was not built to work correctly with my gauge and switch locations I started looking into the wiring diagrams for the B3Bs I noticed there are two different versions. The difference between the B2B and what I am calling the early B3B wiring is one wire between the headlight switch and the ammeter (B2B) vs headlight switch and ignition switch (early B3B). The difference between the B2B and what I am calling the late B3B wiring harness are two wires. The first one is the same as the early B3B wiring change and the second one is a wire between the horn and voltage regulator (B2B) vs horn and ammeter (late B3B). Since my truck is a 51, first year for B3Bs I'm calling my truck an early truck and will use the early B3B wiring diagram. What that means for me is I only have to worry about the wire between the headlight switch and ignition switch will will be just a short jumper. The wire from the headlight switch to the ammeter that is currently in the wiring harness will be taped off at both ends and kept as a spare. I guess I got lucky in that the wiring changes between the B2Bs and B3Bs were not major. A simple enough change for me and I'm good to go B2B wiring diagram Early B3B wiring diagram Late B3B wiring diagram Brad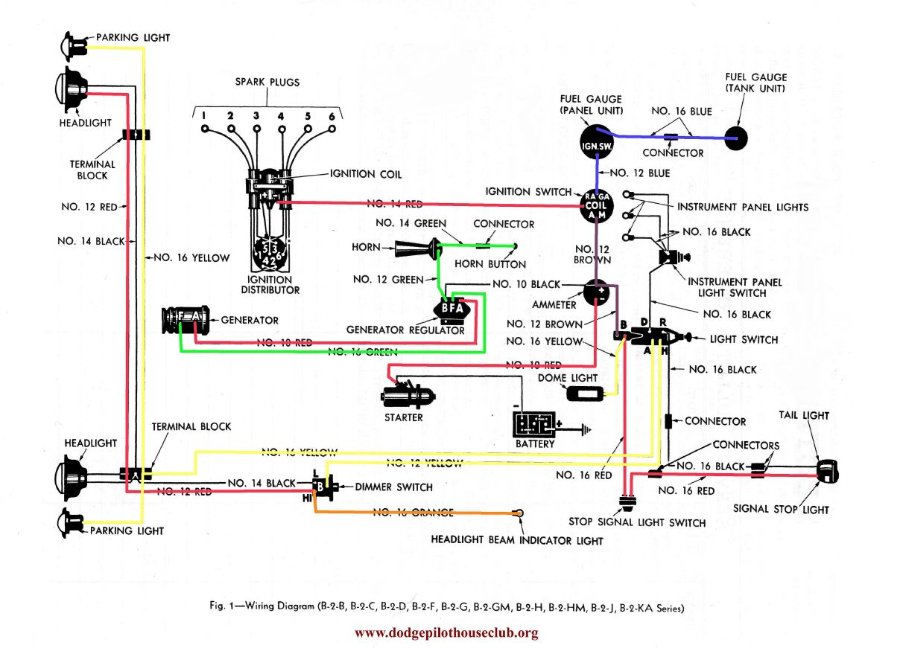
-
51 B3B build thread - after all these years
bkahler replied to bkahler's topic in Mopar Flathead Truck Forum
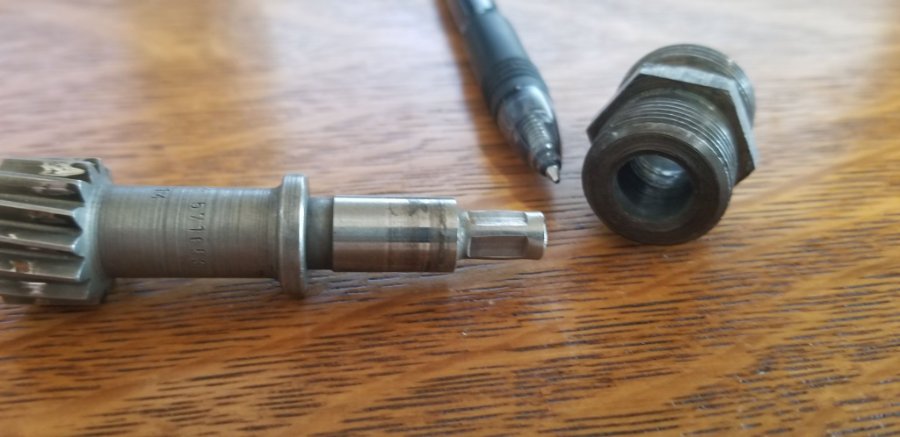
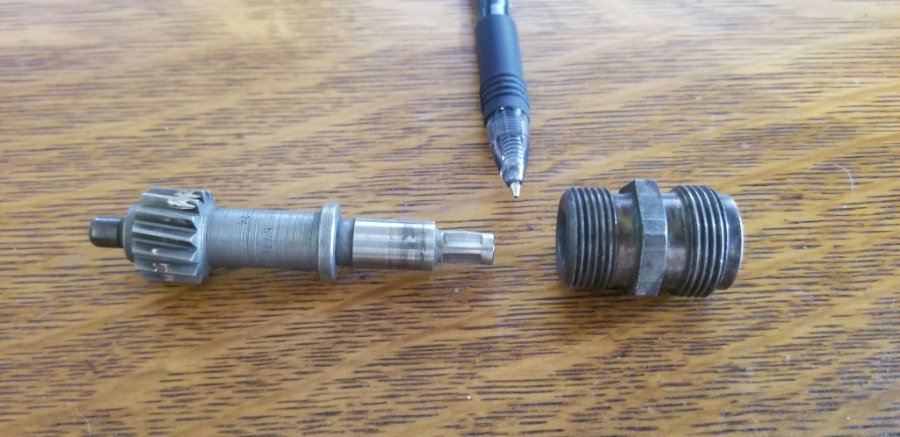
Thank you both for checking. What you describe makes a lot of sense based on what I see with the parts I have. If a seal was supposed to be used I would have expected some sort of recess in the gland nut for the seal to reside in. Mine doesn't have a recess for a seal. In one of the threads I found someone modified their gland nut to accept a seal. I have no desire to do that so I'll leave as is. I will now happily move forward and install the speedo drive gear Thanks! Brad -
51 B3B build thread - after all these years
bkahler replied to bkahler's topic in Mopar Flathead Truck Forum
The one on the right is the one that JB said worked for his truck.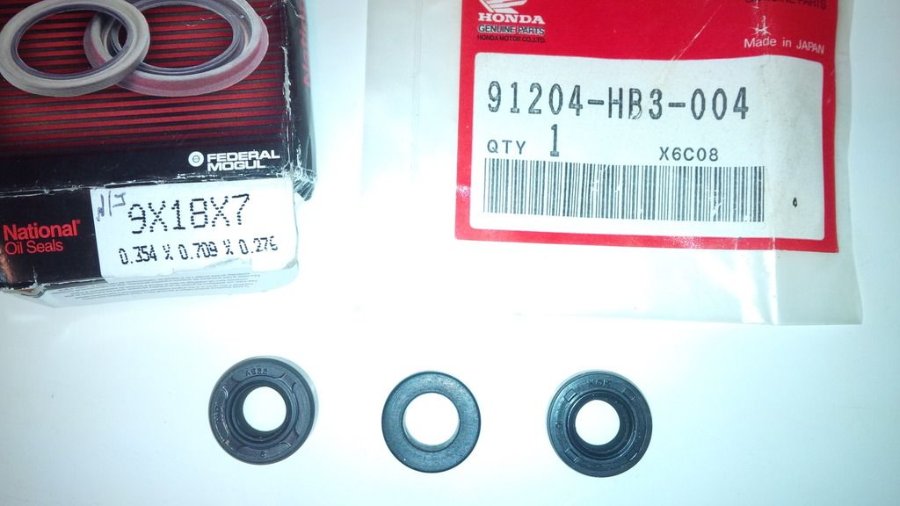
-
51 B3B build thread - after all these years
bkahler replied to bkahler's topic in Mopar Flathead Truck Forum
I'm a little bit stumped about something. I'm ready to install the speedometer drive gear and I have the seal that JB recommends and I assume it is supposed to go between where the pen is pointing in the picture below. The nut on the right has no recess for a seal to reside in so I'm not sure I understand how this is supposed to work. Any help would be appreciated. The transmission is the NP420. Thanks! Brad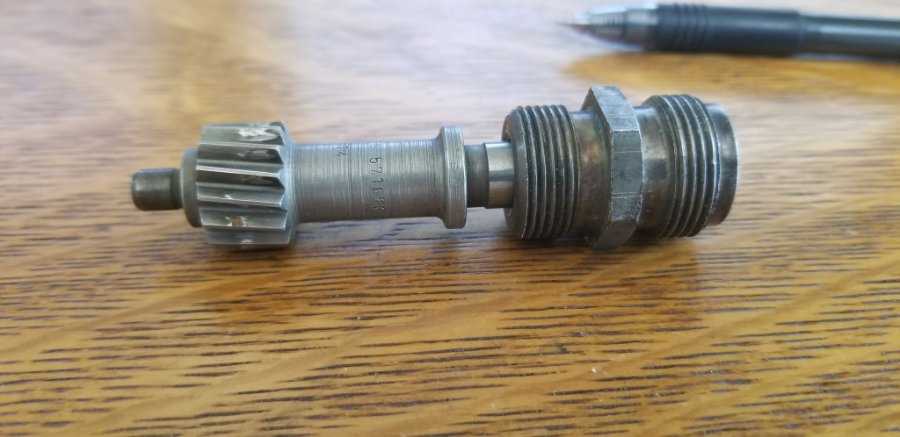
-
Dimension needed-'54 Dodge C1B6 rear differential
bkahler replied to lonejacklarry's topic in Mopar Flathead Truck Forum
I think that applies to 63 (+ or -) as well -
51 B3B build thread - after all these years
bkahler replied to bkahler's topic in Mopar Flathead Truck Forum
Mounted the brake proportioning valve this morning. With the MC and the proportioning valve installed I can now start trying to piece together the rest of the brake system. The rears aren't too hard to figure out. I'm able to reuse the 1/4" line from the brake tee on the frame to the hose at the rear. The rear brake hose will be reused as well as the tee that was mounted on the original diff along with it's breather tube. Note: when I say reuse, I mean I'll be able to use the new components that I bought when I was still planning on using the stock braking system. Every component in the brake system will be brand new with the exception of the two brake tee's. On the diff the brake lines will change from 1/4" at the tee to 3/16" line over to each caliper. For the fronts I still have concerns with the brake hoses that Charlie spec'd for the front calipers. For the moment the hoses seem to be a couple inches to short to work. I suppose when the truck is fully assembled and the suspension compresses a little more the hoses might work but I'm concerned about rebound and/or when the front end is on jack stands and the suspension is hanging down. If I move the mounting holes on the frame down a few inches for the hoses they would probably work. I'll be playing more with the front hoses over the coming days. Brad
-
51 B3B build thread - after all these years
bkahler replied to bkahler's topic in Mopar Flathead Truck Forum
I'm guessing this is the plug you're referring to. No mice for me
-
51 B3B build thread - after all these years
bkahler replied to bkahler's topic in Mopar Flathead Truck Forum
I'll have to look tonight to see if I can find the hole you're referring to, or maybe I haven't noticed it because a plug may already be there. -
51 B3B build thread - after all these years
bkahler replied to bkahler's topic in Mopar Flathead Truck Forum
How are they getting in? On mine it seems that the tolerances are fairly tight. -
51 B3B build thread - after all these years
bkahler replied to bkahler's topic in Mopar Flathead Truck Forum
Another little piece of the puzzle finished yesterday. Thanks JB, the cover cleaned up nicely Brad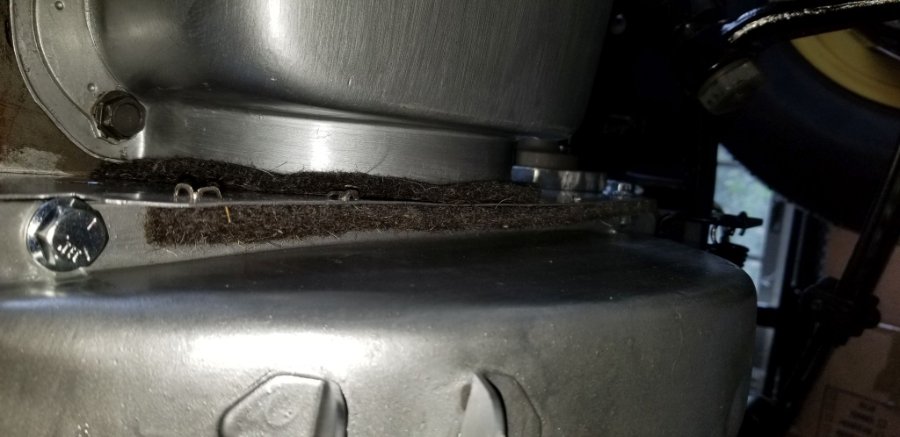
-
51 B3B build thread - after all these years
bkahler replied to bkahler's topic in Mopar Flathead Truck Forum
What you've experienced makes sense. It would be cool if someone had access to the build instructions that the factory workers used when they were building these trucks. That would make for great bedtime reading -
51 B3B build thread - after all these years
bkahler replied to bkahler's topic in Mopar Flathead Truck Forum
That's the same sort of symptoms I had with my motorhome. It was obvious it was coming through the glass to rubber section. The 3M product I mentioned previously is probably what I'll use. It'll give me something to do this winter......! -
51 B3B build thread - after all these years
bkahler replied to bkahler's topic in Mopar Flathead Truck Forum
It would be interesting (to me at least) to know what the factory might have used if anything to help seal the gasket. -
51 B3B build thread - after all these years
bkahler replied to bkahler's topic in Mopar Flathead Truck Forum
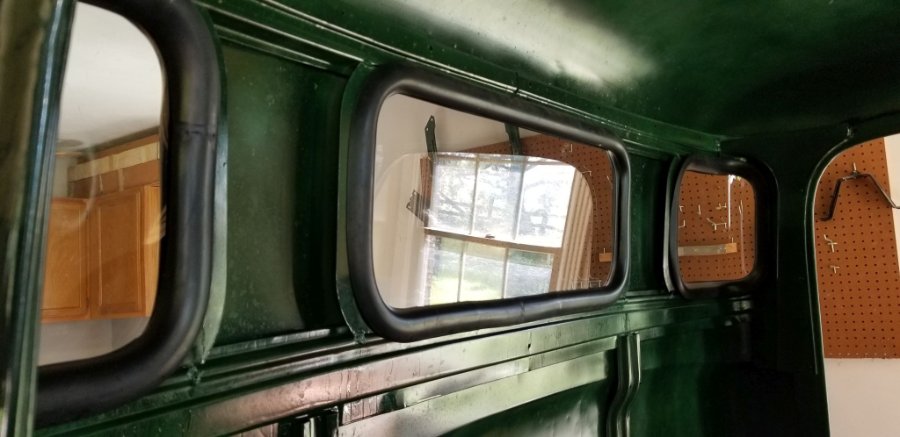
In these old trucks speed is subjective I measured my new glass and it is .246" thick and the old glass seemed to be right at .250" thick. Not sure if .004 would make that much difference but I suppose it could. Steele's instructions say to use 3M Clear Auto Sealer 96-8551-96 between the rubber and the glass on the outer side using a flat applicator. Unfortunately this product is no longer available and I haven't found a recommended substitute anywhere. What I will likely use is 3M Auto Bedding and Glazing Compound, 08509. I used this product on my motorhome windshields with great success. I used it between the rubber and the cab and the rubber and the glass. Back to Brent's comment about the outside division bar I found that the top of mine was sealed and the bottom was left open. Brad
-
51 B3B build thread - after all these years
bkahler replied to bkahler's topic in Mopar Flathead Truck Forum
Thanks It's interesting that you bring up the exterior bar. I was looking at mine this morning and noticed both ends had some kind of soft sealant stuck in the ends and I was wondering why they did it. Now I know! Thanks! Brad -
51 B3B build thread - after all these years
bkahler replied to bkahler's topic in Mopar Flathead Truck Forum
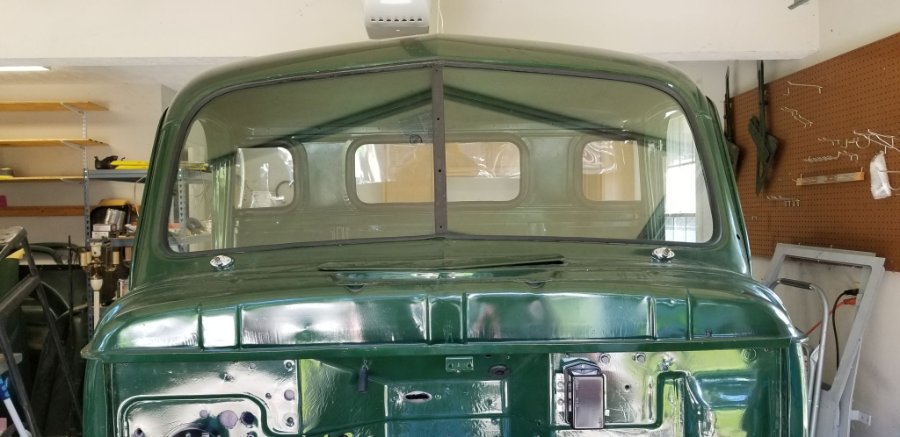
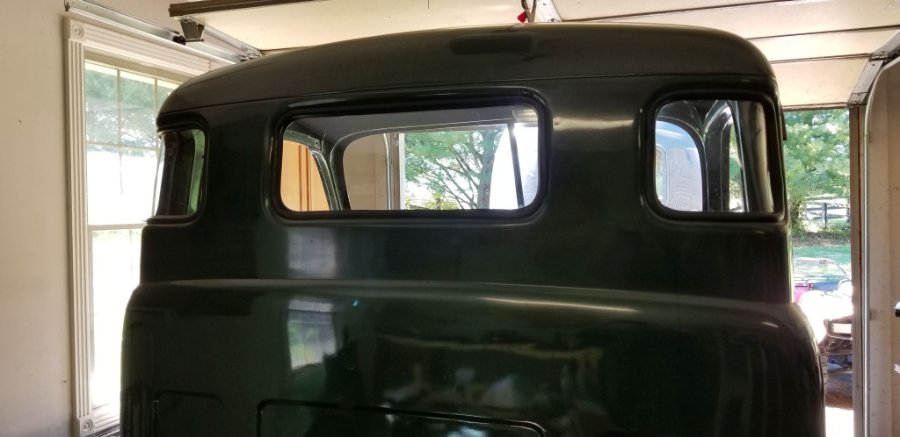
Cab glass is installed and it makes the truck look totally different The good news is he came prepared. Years ago I had replacement windshield panes cut and I've been waiting all this time to get them installed. Well, last night I was washing one of the windshield panes and yep, it slipped out of my hand and chipped a corner ☹️ So I call the installer and he said he would bring some glass and cut a new one. He arrives, sets up and cuts a new piece of glass and we proceed to install the windshield. Unfortunately it seems it's to short on one side so we remove the glass and do some checking. I happened to still have four or five old panes that I'd hoarded for years. Comparing the new ones to the old ones it turns out the one that I gave to the glass company years ago to use as a pattern was 1/4" shorter than the other four. Fortunately he had enough glass to make a second pane to the longer dimension. The second time around the windshield install went just fine. The rear center window went in nicely as well. As we were talking about the corner windows he told me he was concerned with installing them because the last time he did a dodge like mine the rubber gaskets were really poorly made and he spent hours getting them to work which included trimming the rubber itself. My gaskets were from Steele and he was amazed at how easily they fit and how easy they were to put in. I think each corner window took less than 5 minutes to install. He didn't use rope on them, just a pick with me pushing on the glass from the inside and him using the pick to pull the rubber out around the metal lip. He said you get what you pay for and those Steele gaskets were the best he's worked with. The truck already looks totally different with the glass installed. Brad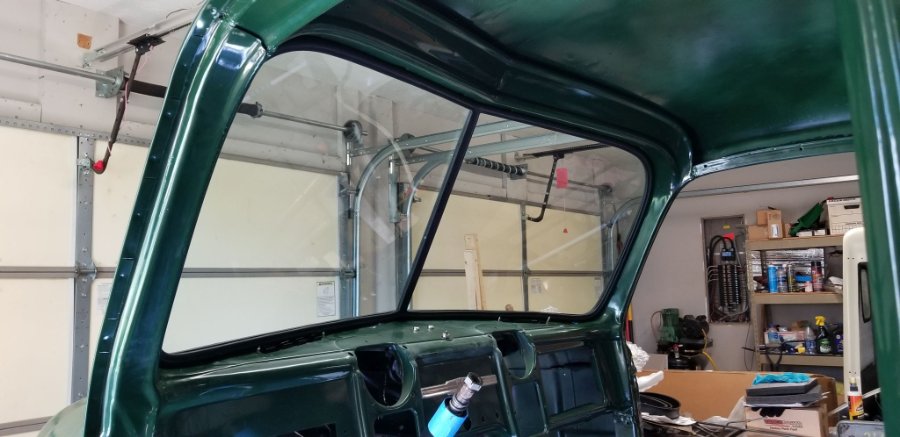
-
Thanks for the pic and info. That's a nice looking truck! Brad
-
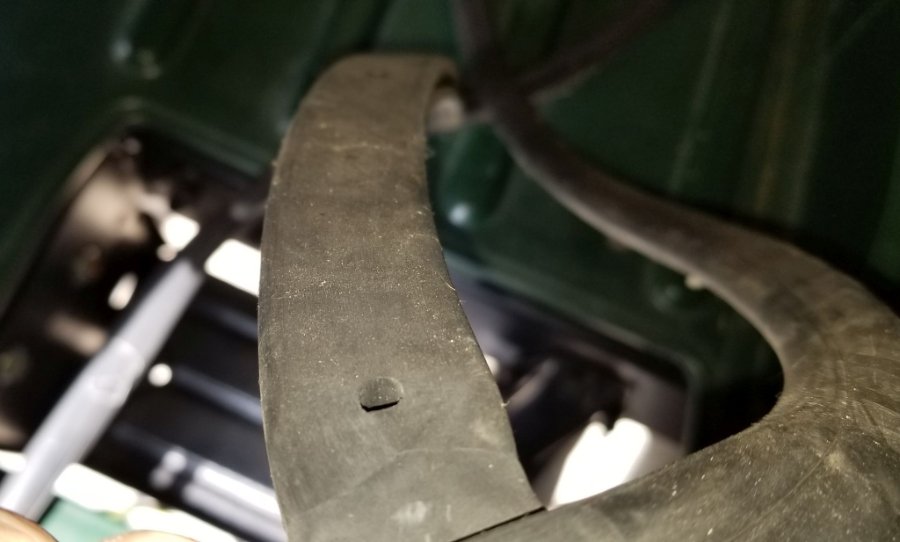
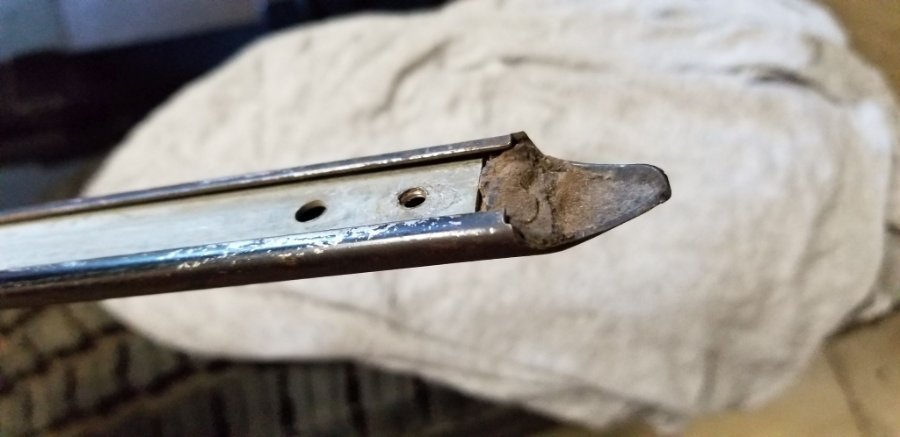
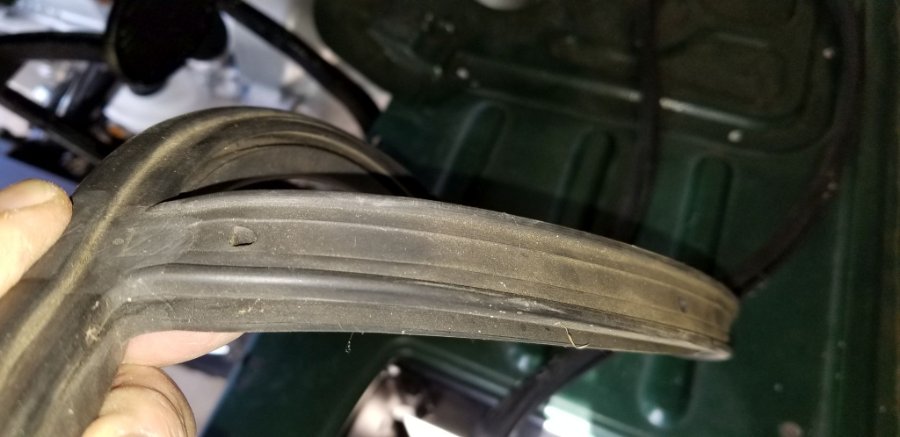
The gasket is a one piece molded design that I got from Roberts a long time ago. I have a hunch it's probably self explanatory once you get the glass in the rubber ready to go. After reading a bunch of posts (including a couple of yours!) It would appear that if the glass is installed from inside the truck there is only one way it could go in. The slit in the gasket that the sheet metal slips into would have to face outwards when installing from inside. I think that means the flat side on the center bar goes out like you mentioned. This is probably another case of me over thinking things Brad
-
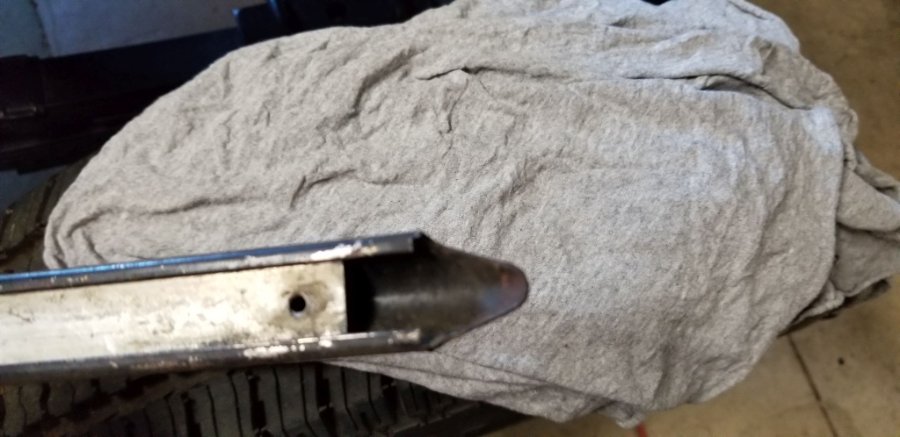
I have a glass installer coming tomorrow morning to install the windshield, corner and rear windows. It's been way to many years since I removed the windshield and I can't remember the orientation of the gasket. Does this side face out (I think it does). Or is this the side that faces out? I'm hoping to get it right the first time Thanks Brad

-
Timely post. I'm just about to this point myself so looking forward to the responses. Brad
-
51 B3B build thread - after all these years
bkahler replied to bkahler's topic in Mopar Flathead Truck Forum
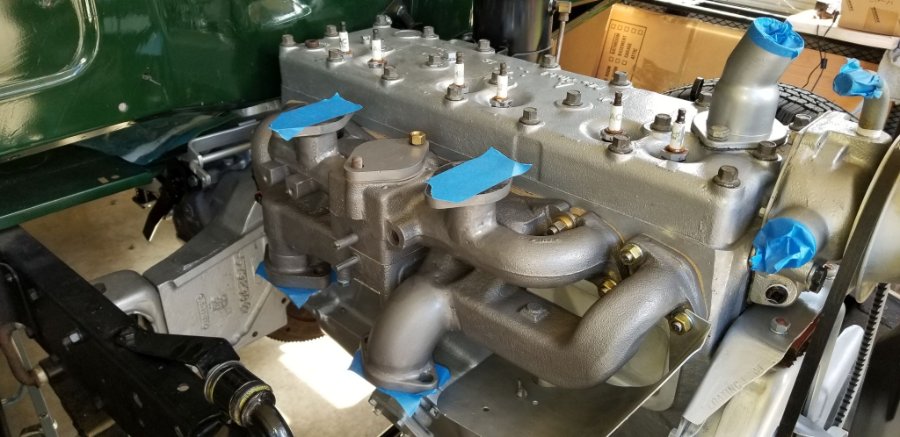
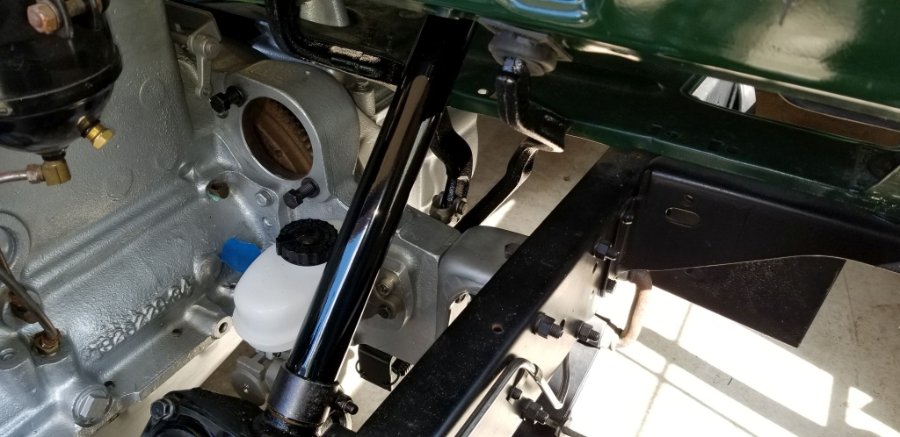
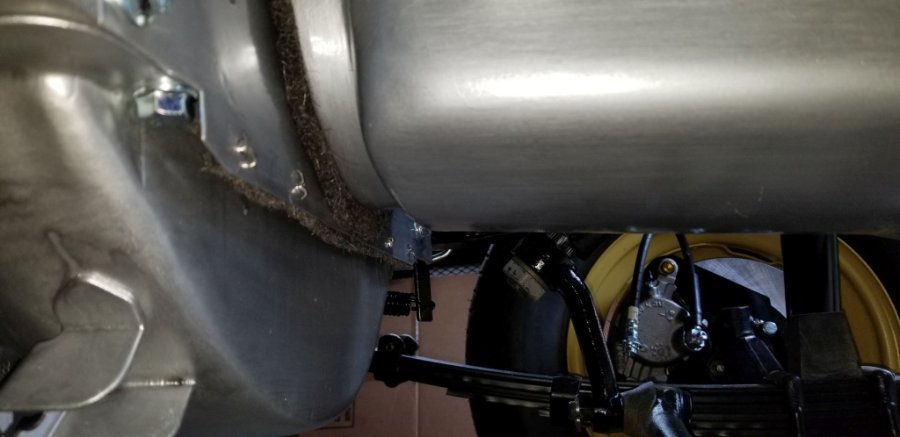
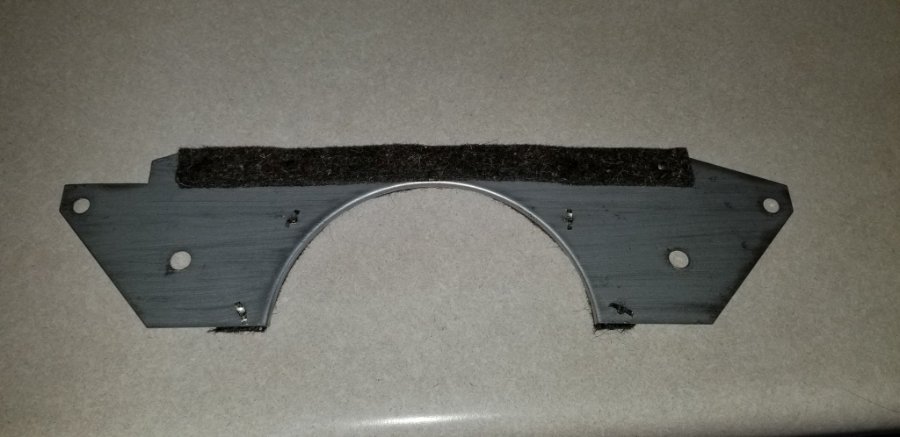
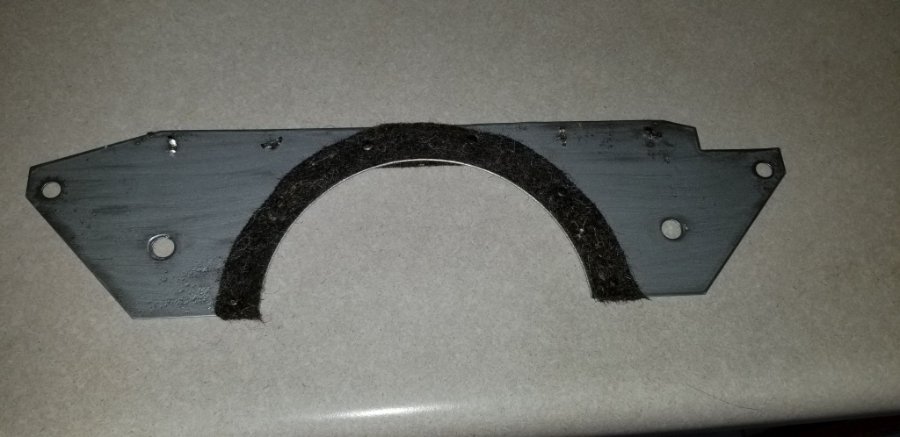
I made a lot of progress since my last post. Other than filling the steering gearbox with corn head grease the steering system and front suspension is totally complete. Installing the support clamp around the steering column was a small chore due to the rubber isolator. I bought it new from DCM Classics and it was a really snug fit. I had to use fully threaded 1/4" bolts to get it drawn up close enough to where I could install the 3/8" bolts. The truck is now back to sitting on it's wheels although I still need to torque the lug nuts to final torque. Rotating the steering wheel from side to side yields maybe an 1" of movement before you feel resistance. That's considerably better than the 1/4 turn of the wheel that was there previously! I painted the intake and exhaust manifolds last week and installed them yesterday. I think it only took me five tries to get everything line up right and the correct studs in the correct holes, but they are installed Now it's time to start thinking about throttle linkage again. I didn't realize it previously so I was somewhat surprised to find the clutch and brake pedals aren't in the same plane. The clutch pedal is something like 1-1/2" or so closer to the firewall. Any idea why Dodge put them that way? Lastly I need help identifying which side of the windshield gasket faces out. I have someone coming Monday to install all of the cab glass (except doors) and I'd like to make sure it's installed properly! One side has a recessed section for the center bar. And the other side is totally flat. Which side is faces out?! Brad