JBNeal
-
Posts
7,221 -
Joined
-
Last visited
-
Days Won
82
Everything posted by JBNeal
-
Build threads are nice
-
Mothballs loosely wrapped in tin foil, sitting atop the starter, in the glove box, and in the back corners of the cab help keep the varmints out...tis cheap, too
-

Help needed-Dipstick Tub on left side of the pan.
JBNeal replied to Fernando Mendes's topic in Mopar Flathead Truck Forum
Originally they were screwed in, repaired ones are normally brazed -
52 B-3-D 116 How to remove rear brake drums
JBNeal replied to motorheadTX's topic in Mopar Flathead Truck Forum
additional information - Rear Wheel Seals -
Just to add my 2¢
-
Verifying the engine casting date, found between the distributor & the oilpan, is important in getting the correct head gasket & rear main seal, as I believe there was a redesign of these parts somewhere around '51. I had ordered a gasket set for my '48, and the rear main rope seals would not fit in the engine, which I found out years later that I actually had a '55 Plymouth 230 and not a '48 Dodge Truck 218. I've been looking through various other sources, and the best I can tell is that the D43 is a 230.
-
Flathead Identification
-
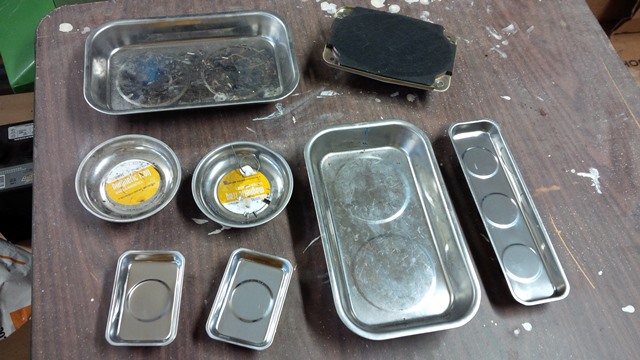
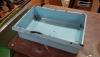
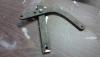
TOOLBOX ARSENAL: During the overhaul of that bleepin' Saturn, these magnetic dishes were a great investment: This metal drawer came out of a refrigerator that was 86'd years ago, the holes had rubber in them to keep from scratching in sides of the lower compartment; up to them holes takes about 13 quarts to fill. During the Saturn overhaul, I drained the auto transmission, that was supposed to only have 7 quarts of ATF, but I collected well over 12 quarts...nobody knows how that happened: I needed a spanner wrench to hold the crankshaft pulley, so I made one from scrap steel, one piece being part of a garage door opener linkage that was junked in the late 90s...that curved piece finally came in handy:
-
additional information - Alternative Wiring Diagram with turn signal & headlight relay
-
My helper finally showed a few weeks ago and she helped me bleed these brakes, getting a nice firm pedal. But a few days later, it took a few pumps to get pressure built up, so I must have a leak somewhere. After spending most of the summer hauling water through the pasture with the floor boards sitting in the garage, on occasion the light would hit just right and I would see a bubble coming out of the left front bleeder screw when pumping up the brakes while barreling down the hill. An equipment inspection was in order, and I found 2 blown front shocks. This is not that big of a deal right now as I rarely break the 15mph threshold. But the back of the brake supports had dust accumulations around the wheel cylinders, with the left front brake support apparently soaked with a thin film of DOT 5. Nothing has been dripping out as there is no staining on the tire sidewalls. I vaguely recall the bleeder screws being slightly pitted when I had the bores sleeved back in '04, but I didn't think anything of it until now. In comparison, the wheel cylinders I had sleeved in '99 for the '48 are not nearly as dusty, and those brakes are just as firm as they were 15 years ago. So it looks like the wheel cylinders will have to be looked at a little closer someday, just another thing to put on the list
-
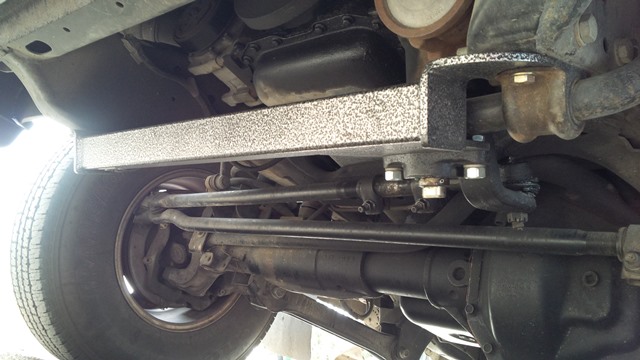
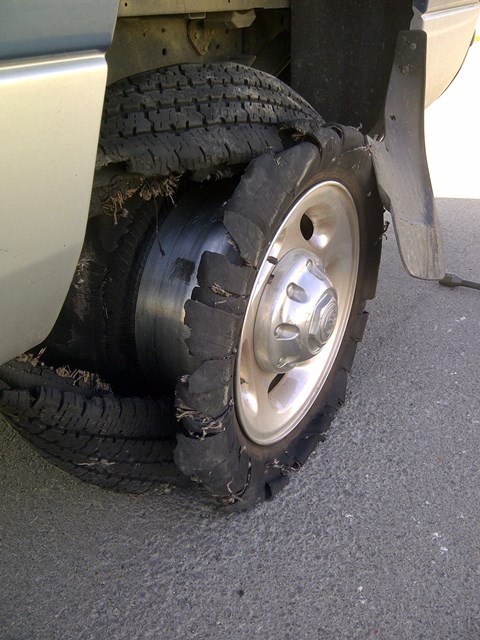
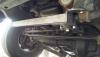
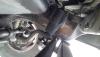
One of my spring projects was to tighten up the steering on The Blue Bomber, as I-35 demolition/construction has constricted passage to what I call "gutter lanes" of minimal width bounded by unforgiving concrete barriers, with rapid lane transitions decorated with skid marks. Worn parts were replaced, steering box was adjusted to specs, and the truck still needed to be jockeyed down the road with a significant pucker factor when passing 18-wheelers. So I bit the bullet & installed a steering stabilizer, and it was like a new truck: steering was precise, and wander was gone. The only problem I've had since was cutting a tire at the start of a 2 mile long gutter lane and limping out, barely avoiding getting smoothed over by a Veracruz Jumbo Bus... The alternative to installing the steering stabilizer was to replace the steering gearbox, and that was gonna take a lot of time & cabbage to complete. Even with the new gearbox, the frame flex may be enough to still induce steering wander at highway speeds. The steering stabilizer is a bolt-on contraption that supports the cantilever steering gearbox output shaft, as well as adding a small crossmember in the steering area. The best adjustments I made on the gearbox put it just barely within tolerance, so the gearbox still worked well at low speeds, but induced white-knuckling above 45mph. The problem with the 2nd gen design is that the Pitman arm magnifies any play in the gearbox, as it is sized so that the gearbox would have a mechanical advantage to overcome any bumpsteer. Compared with the Pilot-House Pitman arm, the 2nd gen Pitman arm is gigantic.

-
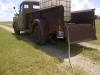
truck picture B-1-D-126: file this under "this is why we can't have nice things", while hauling water with my dog riding in the back, the neighbors' dogs from over the hill would wander through the pasture to say 'howdy' and would get a little rambunctious


-
I had a similar issue with doors on the '49
-
VINTAGEPIC: saw this B-1or2 miscategorized over yonder
-
1948 B-1-B-108 BUILD THREAD Papa's Dodge
JBNeal replied to JBNeal's topic in Mopar Flathead Truck Forum
this does not bode well for the stalled 230 project: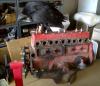
-
Flathead valves rely on lubricant surface tension to maintain a film of lubricant on the valve stem during operation, as the valve guides are not supplied pressurized lubricant. Modern engines have valve stem seals because the valve stems are being fed pressurized lubricant, and the seals reduce contamination from intake & exhaust, vastly reducing the risk of valves sticking. Flathead valves stick not because of contamination in the oil, but from the contamination left behind when the oil succumbs to gravity and flows back to the crankcase. This contamination on a dry surface with a tight tolerance will actually ball up & form a wedge, causing the valve to stick. What MMO can do is saturate & soften that dry contamination so the valves may move more freely in their guides, and possibly rinse off that contamination altogether, leaving behind a thin layer of lubrication.
-
how's that spark a-lookin'?
-
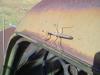
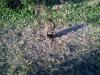
truck picture B-1-D-126: Somebody wanted to hitch a ride:
-
pictured is my neighbor's dog from over the hill, he comes moseying around whenever he hears the 1-ton get fired up. By the time I spotted the approaching hazard & hopped on the brakes, he was almost nose to nose with this varmint, which prompted my dog in the back of the truck to start to scramble to get out. Them two dogs had the thing bracketed and were barking their heads off, so I eased past with the truck and then *POOF* we all got gassed. I've got the truck baking in the 100F sun while I water trees, and the driver side is still considerably more stout than the rest of the truck 7 hours later X[

-
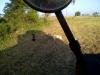
truck picture B-1-D-126: running water to trees this morning, and this li'l stinker stumbled out of the bushes...I knew what was coming next and knew that I wasn't going to be fast enough to escape the cloud, so I thought I'd capture the moment
-
How Many Pilot House Trucks Have Survived?
JBNeal replied to Bradley S.'s topic in Mopar Flathead Truck Forum
additional information - B-1-B-108 survivor -
if your carb has a good spray out of the jet, then the next thing to check is your spark plugs for being fouled. When you pull the plugs to add some engine oil into the combustion chamber to lube the rings, check the plug condition to diagnose your engine performance. If you have sprayed too much fuel into the intake manifold, you may have indeed flooded it. Flooding is easy enough to do on the flatheads I have found, but give it a few minutes and then trying again may clear this out. Usually when I have really flooded the engine, it takes a while to let the excess fuel boil out, then I hit the carb with starting fluid to get a cylinder to fire because the spark plugs have become fuel-fouled. Once a cylinder or two gets fired, the engine will sputter until all of the plugs have burned off the excess carbon, and then the engine speed will smooth out. I reckon there is an art to startup of a carbureted engine that can be lost after years of dealing with automated fuel injected systems. Once ya know exactly what is going on inside the beast, then ya know how to control it
-
These flathead carbs have trouble after being stored for extended periods. Parts & passageways get gummed up, causing the main jet to dribble more than the Globetrotters, and the float needle can get stuck, causing the carb to look like it has a severe leak. I'm guessing you've got this combination, and instead of the fuel being sprayed down the venturi and drawn into the manifold by vacuum at startup, it dribbles out the jet, puddling on the throttle valve and seeping out at the valve shaft. After being in storage, it might be a good idea to disassemble & clean what you have to verify that everything is within specifications. Whenever I've had a truck sit for a season or two, at a minimum I pull the air horn and rinse out the venturi and float chamber with spray brake cleaner, work the accelerator free if it's stuck, then fill the chamber with fresh gasoline and let soak for a few hours after assembly. Most of the time, this leads to a fast re-fire, especially if a little starting fluid is used for some help. Originally this meant getting a new carb kit, but one time I needed the 1-ton in a pinch and was able to carefully re-work the carb without the need of that kit. This meant taking great care in disassembly not to tear any gaskets or lose any small parts into the cracks in the ground. It has been years since I put a new carb kit on, as I have almost perfected the curb-side rebuild with the use of a flat blade screwdriver, a needle-nose pliers, a shop rag and some metered gas Rebuilding the B&B is not too difficult, but as with any carb rebuild, attention to detail & cleanliness are key. YouTube has several videos available, I put "B&B carburetor" in the search field and got several vids, one being part 1 of a rebuild after thorough cleaning, there are others on adjustment, etc. I reckon since the carb was rebuilt fairly recently, the innerds aren't too fouled up, just needs a good rinsing to get the moving parts & the jet to work as they should. Now if you want to change carbs, then you're opening up a can of worms, as a change in induction should be balanced with a change in exhaust. I've heard the 2" tailpipe does wonders, as does the split exhaust, especially if going to a 2bbl setup. But now you are talking a major project, when all ya might need is a few things sitting around the garage
-
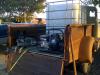
Another 4000 gallons hauled, and shifting into third gear for brief periods as the engine is seemingly generating more power. Just a few more things to do on that Saturn before it's road ready, and then I can get them floorboards put back in the truck, as the dust from the pasture where the water well is located about chokes me cuz I'm going just fast enough to kick up a cloud but too slow for it to blow away. At least the dog I'm lookin' after enjoys the shade underneath and the perch when I'm workin' on this & that
-
truck picture B-1-D-126: Another day of hauling water