Happy 46R
-
Posts
148 -
Joined
-
Last visited
-
Days Won
2
Everything posted by Happy 46R
-
I have a stock 46 Dodge D25C Club Coupe that has had some wheel modifications done somewhere in the past. There are a set of 15" wheels front and rear with nearly new Cocker Classic tires. I am about 12 miles per hour off at highway speed due to the lost circumference and wanted to move back to original 16" wheels. I also noted that the spacing dimples on the back of the 15" wheels allow the wheel to sit flush to the face of the brake drum but the center wheel hub looks proud of the axle hub. This spacing issue is not evident on the 16" rims I sourced. For cost cutting reasons I was thinking of leaving the 15" color matched rims on the front and putting new 600 x 16 on the rear. This should clear up the speedo problem but am wondering if it will create a different problem with different sizes front to back? Any information would be appreciated.
-
Not sure of the best method however after your post Dodgeb4ya I got my White Lithium squirt can out and lubricated both sides of the pivot on the dash support to the fire wall and all three points on the top cross bar. You are correct in that it makes it way easier to operate. Thank you for the tip, I never thought of that.
-
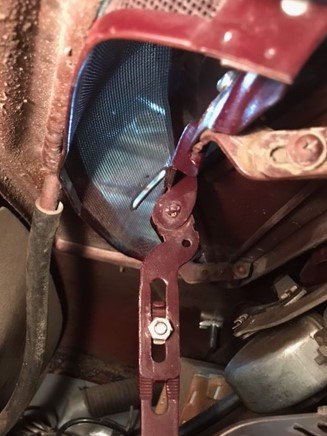
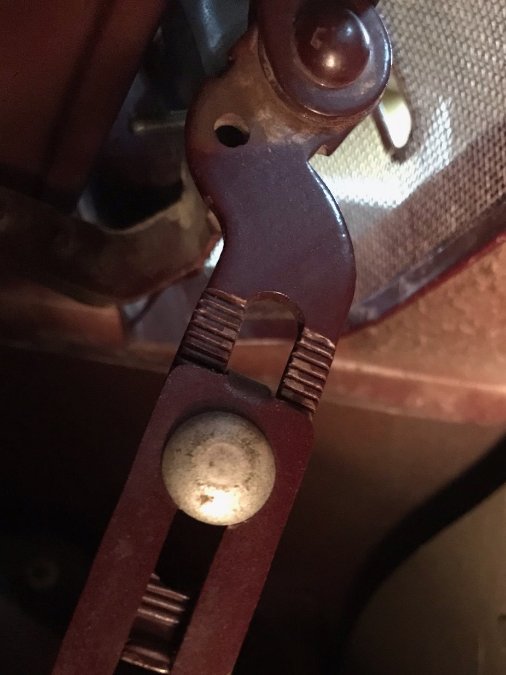
The next photo is the nut side of that same connection. It shows the serrated edge of the bottom piece of the connector. The photo shows the pivot point of the handle as it feeds through the dash brace to the firewall. Looking closely you can see the controller bolt head from the entry above. The last photo is the cross bar that connects the pivot arm to the outside edges of the cowl vent itself. There is a small adjustment available on these edges to help exert even pressure on the cowl gasket by the cowl vent. Hope this helps with your problem.


-
Hello Leo White, thanks for the inquiry. This is on a 46 D25C Club Coupe and no I don't have any photos of the control mechanism. I will certainly try and get a couple tomorrow and post them for you. Ok Leo here are four photos of the control mechanism. The first shows the bolt head side of the two piece connection. The serrated teeth on each piece are adjustable to set the amount of compression the lower edge of the cowl vent exerts on the rubber gasket in the hood tray.
-
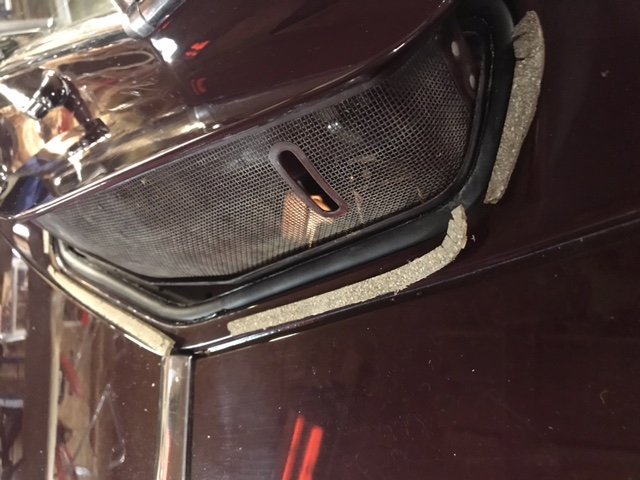
Cowl Vent Gasket was next on my list of to do's so I spent some time reviewing the many posts from the last 10 to 12 years about the gaskets and the fit. I had ordered a gasket from Andy Bernbaum and received the cut to fit type with a flat side and a domed side but nothing that indicated a lip. Someone had installed regular gasket material in the tray around the vent and glued it in with a brittle white colored cement product. When I removed the gasket material and the glue I found that the channel for the gasket was actually flat bottomed and not curved at all. Most of what I have read suggests the alternative so I am thinking that perhaps the cowl had been reworked at some point in time perhaps due to rust? Anyway I used a black GE 100% silicone adhesive sealant in the bottom of the tray and formed the cut to length rubber seal around the tray; domed side up. Like others I used some clamps and some clothes pins to hold it in place and trimmed off any excess silicone. Once the sealant was semi dried I put the cowl vent back on and weighted it down onto the seal before attaching the control arms. Once through the car wash the next day and looks like a winner. Photo shows the old gasket material removed and laying beside where it was and the new rubber material glued in place. Thanks for all the great input to help out us newbies.
-
I am just saying that the tray the air cleaner is soaking in looks like it came out of someone's refrigerator?????? Hope no one gets into trouble for that! I just received my original oil bath air cleaner in the mail today as I am a purist for my Club Coupe and wanted to get away from the pleated paper filter and back to the original. Found one through the classifieds on P15-D24. I am glad I read this thread as the conversion in my car currently doesn't have a gasket and I certainly don't remember if the car I had as a kid had one either but that said off to IGA to buy Pringles! Have a great weekend.
-
Thank you everyone for the input. At least new avenues to try. I also am using my old gasket for now and will continue to look. If anything surfaces I will let you know. Thanks.
-
Sorry posted to the wrong link. As the header says Newbie and not totally familiar with the system yet.
-
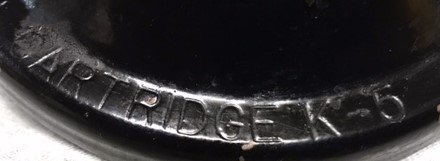
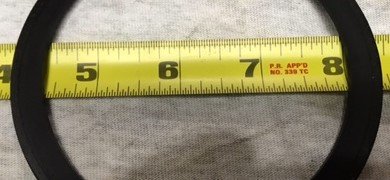
Looking for some current information regarding the gasket for my oil filter system on my 46 Coupe D25C. It has the original long block flat head 6, 231 cu. inch engine and an external filter housing. Most of what I have read online suggests a NAPA 1080 filter however the gasket doesn't fit my canister. The markings on the lid say Use Kralinator Renewal Cartridge K-5 however none of the cross reference guides that I can find online show a K-5 cartridge. The gasket I need is 4 3/8" overall diameter with a 14/32" wide gasket. The inside diameter of the gasket is 3 18/32" across and the inside diameter of the canister is 3 11/32" wide and the side wall is 1/8" thick. Does anyone have a source for these wide flat gaskets as I could not locate anything at Rock Auto or Bernbaum? Also does anyone know if I can just cut a new gasket out of regular gasket material or will whatever pressure is inside the canister blow it apart? Any response is always appreciated.
-
Best I can tell is it collects any oil drips that could come along the outside of the pan from the front seal or even the oil filter cage??? I do not see any mechanical application and there does not appear to be any rotational wear on the old piece. Just my best guess. Dave.
-
So finished the project today. I was able to find some stiff felt but in thinner sheet so used a triple layer as suggested above. I also used the hand riveter as the little split pins that were original were heavy gauge steel and would not open up for removal or reuse. I just ground off the fold over tab and popped the material off of the cover. The remaining holes were correct size for the pop rivets and with the triple layer of felt the 1/2" long rivets were just right. Once in place I used the ball peen hammer on the anvil to flatten them out even though there was lots of room. First picture is what I started with followed by riveted new felt and then finally in place. Thanks for the input everyone, it made the job easier.


-
Thank you for the input. I will chase down some material and do some before and after pictures if it works out. Appreciated.
-
Looking for some expertise on my 46 Dodge D25C Club Coupe. I am in the process of replacing the clutch disc and noticed that the material at the back of the inspection cover is badly worn. My shop manual doesn't identify what the material is or a part number for it. I have checked Bernbaum and Rocket but neither show anything similar. Does anyone know what material this is or perhaps a part number for it? It looks like felt and is semi-circular and held in place by some bend over rivets. It won't hold up the return of my ride to the street but as I have everything apart now might as well replace it if I can. Thank you.
-
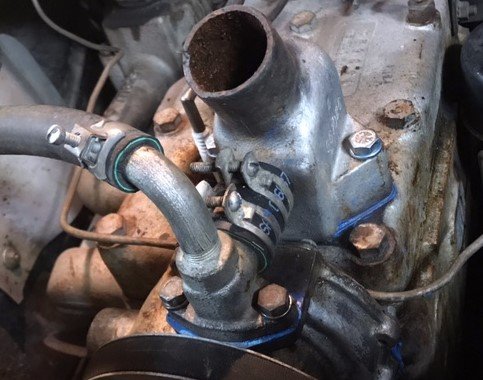
Thanks for the great information in these older posts as they are invaluable to me as a recent owner of a 46 Dodge Coupe (Canadian Model). Today I was replacing the gaskets for the water pump and thermostat housing and as my shop manual has not yet arrived I was working off of memory from when I owned one of these in 1970. Problem was trying to get the housing to sit in place with the thermostat centered as gravity would cause the thermostat to fall out of place every time I flipped the housing into place. Once I did get it in place I realized an easy solution would have been to wire the thermostat into place through the radiator hose opening. Hopefully that isn't in the manual and is a help to someone in the future. Again thanks for all the great information it really helps.
-
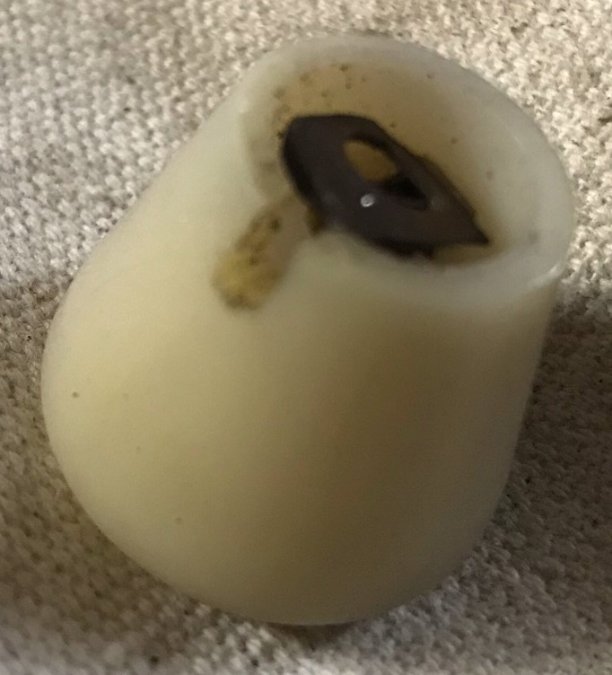
Sorry I am really late to this thread...by about 9 years but wanted to say as a newer owner and member the thread was really helpful to me while doing some work on my car. Thought I would help out by adding a picture or two showing the clip. It is basically a piece of spring steal with a hole in it folded over the shaft of the switch and anchored to the knob. The outward tension of the spring steal bites into the shaft preventing pulling the know off. By pushing gently on the outer skirt of the spring steal the tension is released and the knob comes off. Thank you for all the great information contained in this forum; lots of talented and knowledgeable folks out there.