lostviking
-
Posts
789 -
Joined
-
Last visited
-
Days Won
7
Content Type
Links Directory
Profiles
Articles
Forums
Downloads
Store
Gallery
Blogs
Events
Everything posted by lostviking
-

1946 WD15 rear end swap...and full replumb of brakes
lostviking replied to lostviking's topic in Mopar Flathead Truck Forum
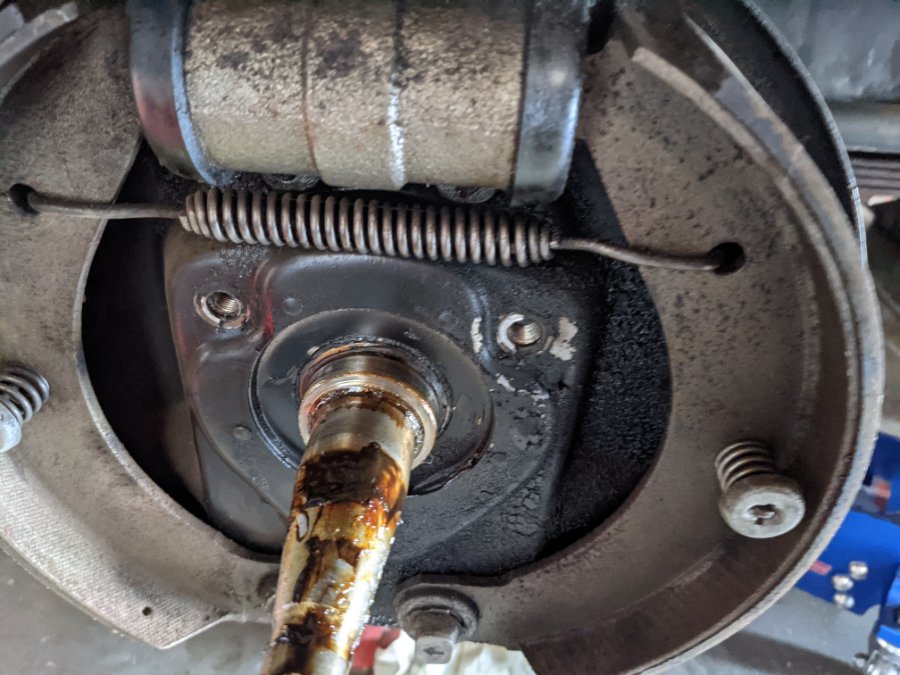
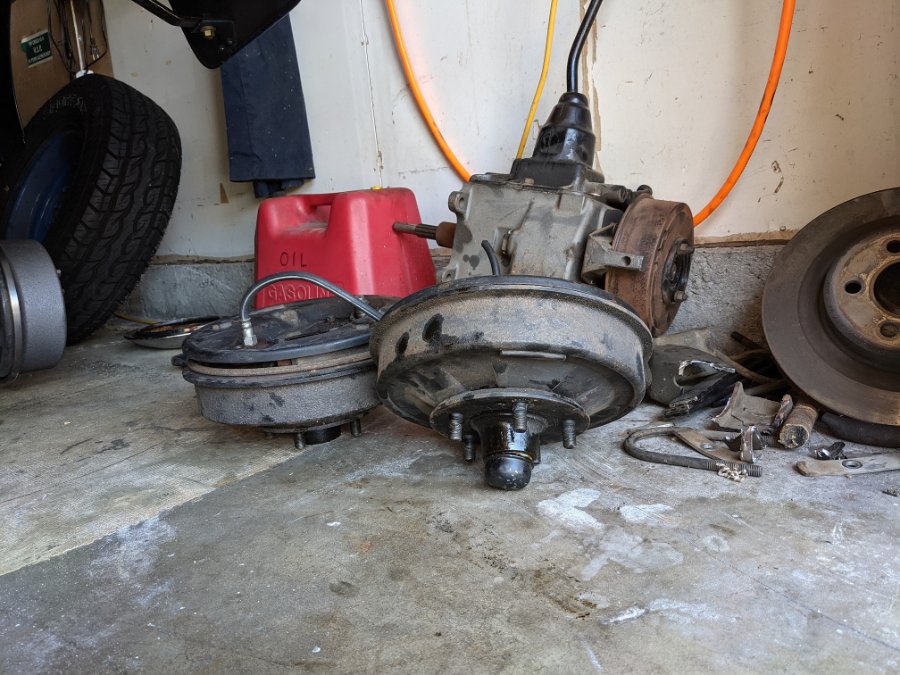
Got out there and pulled the old axle today. Didn't get the new one placed, because I screwed up and bought 2" perches, and the truck needs 1.75". Those will be here tomorrow. Here are some pictures of today...sitting on my motorcycle jack under the truck. I'd like to remove a few leafs, but I'm not entirely sure how. Anyone? The old axle and old front brakes. Be a darn shame if I have to dump them at the wrecking yards, but if nobody wants them that is where they will end up. That rebuilt transmission in the background is also headed that way. Too bad, they are all serviceable.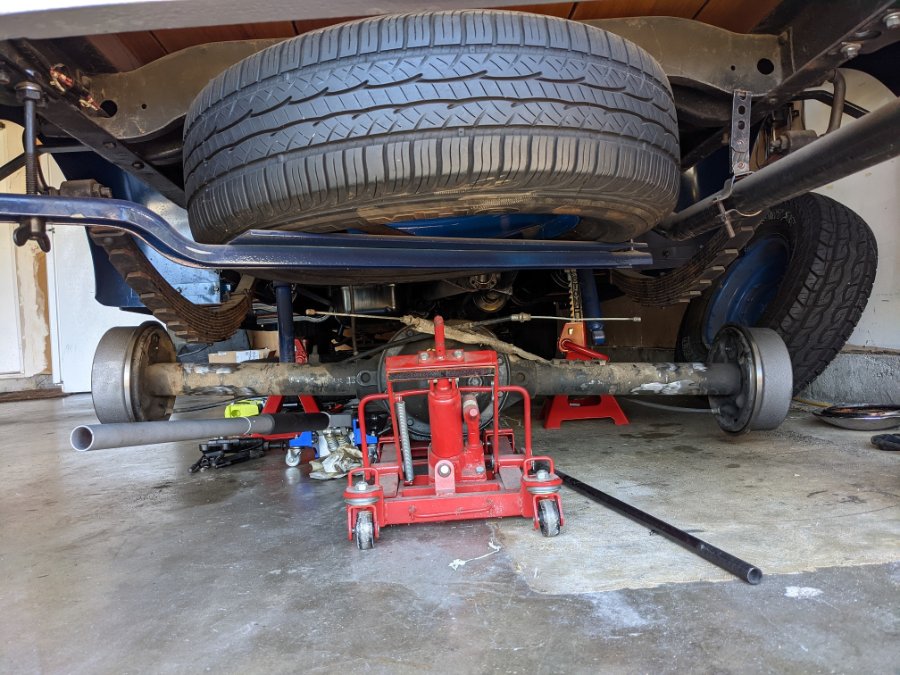

-
Scarebird disk brake conversion
lostviking replied to lostviking's topic in Mopar Flathead Truck Forum
I was asked where I got the wheel adapters in a PM, so I'll share that with everyone. https://www.amazon.com/dp/B078RCTT25?psc=1&ref=ppx_yo2_dt_b_product_details -
Master cylinder upgrade to 2 chamber style
lostviking replied to George Anderson's topic in Mopar Flathead Truck Forum
3/16 tube. The master cylinder has M10x1 fittings on it. That's the only metric. I fixed that with an adapter to 3/8-24 female double flair fittings...and like the OP, I'm using 3/16 Nicop brake line. -
Scarebird disk brake conversion
lostviking replied to lostviking's topic in Mopar Flathead Truck Forum
That is still what it says on the website, but the installation instructions changed it to a Chevy Celebrity caliper. They seemed to fit properly and lined up correctly on centerline with the rotor. -
Master cylinder upgrade to 2 chamber style
lostviking replied to George Anderson's topic in Mopar Flathead Truck Forum
Yes, corrected. -
1946 WD15 rear end swap...and full replumb of brakes
lostviking replied to lostviking's topic in Mopar Flathead Truck Forum
You can see the old front brakes in that first shot. I need to get rid of those. Too bad if they end up at the salvage yard. They were in good working order, just wanted disks. I'm done for this weekend, but next I'll yank the old rear end and get the new one placed. The old one is probably going to end up at the salvage yard also. Too bad. I've been buying some of the Cherokee parking brake brackets, at least the ones I can find. Same with the front cable. I'll use that as a starting point and fabricate what I need to hook the original handle up to the rear axle. When I'm doing the rear, I'll be removing the stock setup on the rear of the transmission. I will keep that so if I get rid of BOTH OF THE 3 SPEED TRANSMISSIONS I HAVE, I'll have it to send along to their new homes. -
1946 WD15 rear end swap...and full replumb of brakes
lostviking replied to lostviking's topic in Mopar Flathead Truck Forum
Fronts are "installed" but not plumbed. I'll be doing that complete from a new master cylinder to both ends of the truck. I have the old mounts removed and the tubes are ready to have something welded to them. The old stuff is serviceable, but I will rebuild it all. I've got new everything, but the wheel cylinders are not leaking and I'm going to put it into the truck with just the new drums installed. Then I can back it into the driveway and have a bit of room to work.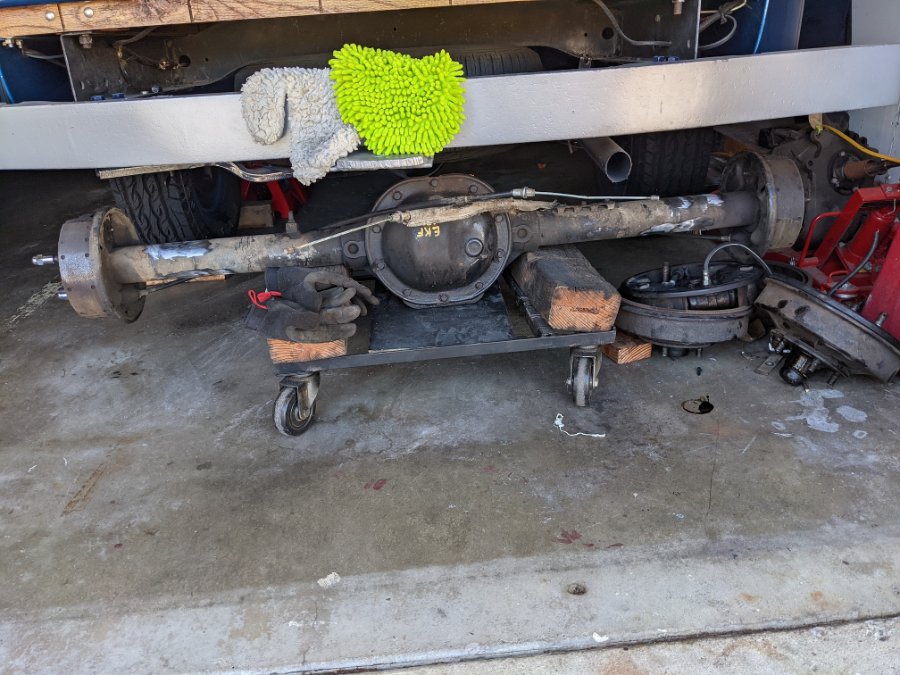

-
Dual single carb linkage, planning stage
lostviking replied to lostviking's topic in Mopar Flathead Truck Forum
Here is my mockup. As you can see, I haven't rebuilt the carbs yet. Just doused them in WD40 to check that everything moves as it should. I removed some linkage that won't be used also.
-
Master cylinder upgrade to 2 chamber style
lostviking replied to George Anderson's topic in Mopar Flathead Truck Forum
Ordered two M10x1 to 3AN fittings to go into the master cylinder. I've also got the 3/16 NiCop line and fittings coming. Thanks for sharing. -
Scarebird disk brake conversion
lostviking replied to lostviking's topic in Mopar Flathead Truck Forum
Finished the basic install on the other side, took a shower too Here is a shot of the truck on it's tires, after the install....I'll edit to add one of before so you can see the relative location of the wheels. Remember, I used a 1-1/4 inch wheel adapter also. This is the only side view I had, I cropped it and messed with the light to make the shadow go away near the wheel. Doesn't really look different to me from these shots, but the wheel is outboard a bit more.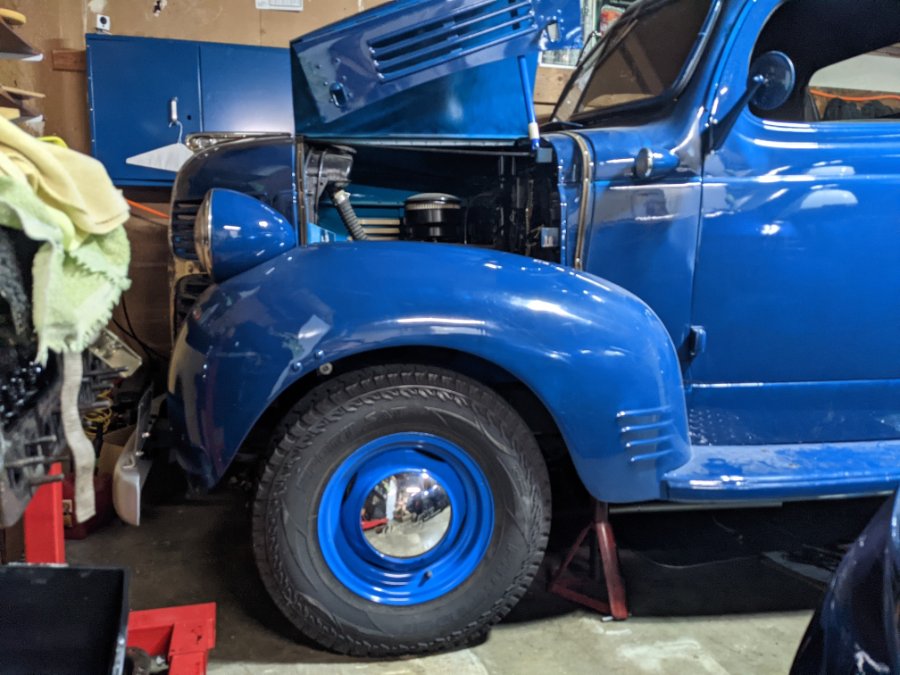

-
Scarebird disk brake conversion
lostviking replied to lostviking's topic in Mopar Flathead Truck Forum
Last for today...the final fender clearance. It looks pretty good to me.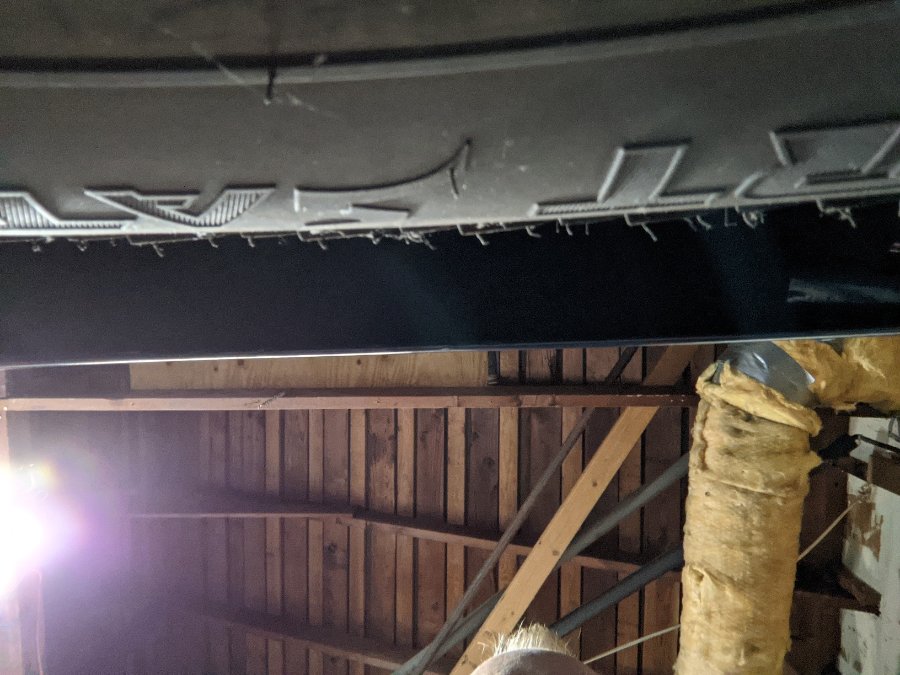
-
Scarebird disk brake conversion
lostviking replied to lostviking's topic in Mopar Flathead Truck Forum
I still need to do the new plumbing, install the new master cylinder and proportioning valve...but I wanted to see how it looked.
-
Scarebird disk brake conversion
lostviking replied to lostviking's topic in Mopar Flathead Truck Forum
Moving on...with the rotors machined, I put them on. Normally you just use a couple nuts to hold the rotor while you get the caliper/pads installed, but in my case I used my wheel adapters. I didn't take a picture until I had the caliper installed...here's the only two bolts you needed to touch on the rear.

-
Scarebird disk brake conversion
lostviking replied to lostviking's topic in Mopar Flathead Truck Forum
As I was preparing the jpg's for today, I noticed I missed a few the first time around. Here are some that belonged at the beginning. The new hubs, bearings and seals. The races are coated to prevent corrosion, so clean them up...pack the bearings and install them and the seals.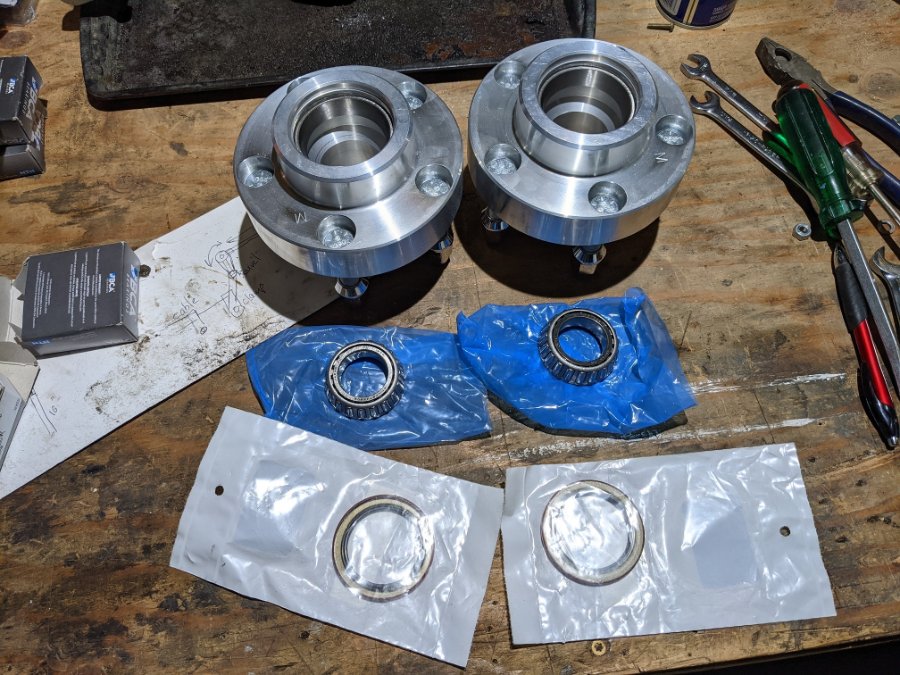

-
Scarebird disk brake conversion
lostviking replied to lostviking's topic in Mopar Flathead Truck Forum
Got the rotors machined and put one on after work today, just to be sure...put the wheel adapter on also. I'll take some more pictures tomorrow (Saturday) and finish the drivers side. I'll post the pictures when I'm done and then get the passenger side done. I've got the new master cylinder to install, and I bought some Nicopp brake line and a proportioning valve that I need to get installed also. Busy day. But the front will be done. The rear end come next, but I can at least bleed the front brakes and check all that out. Nice to get that part done and put the truck back on it's wheels. Especially nice that it will be the stock ones with those nice shinny hub caps I polished to mirrors. Cya tomorrow. -
Master cylinder upgrade to 2 chamber style
lostviking replied to George Anderson's topic in Mopar Flathead Truck Forum
Thanks, do you know the size of the fitting that screwed into the master cylinder? I'm not sure what Toyotomo uses. -
Master cylinder upgrade to 2 chamber style
lostviking replied to George Anderson's topic in Mopar Flathead Truck Forum
Rocket-bob, which size brake line did you use, and what fittings at the master cylinder? The ones that were on my truck looked more like fuel lines than any brake lines I've ever seen. Tim -
Dual single carb linkage, planning stage
lostviking replied to lostviking's topic in Mopar Flathead Truck Forum
I bought the kit from Langdon, knowing full well I wasn't ordering a kit that I was going to use, but rather some of the parts I was going to use. Tom called me several times to discuss things and let me know about the shipping and such. Nice to do business with a person who takes care of and talks with his customers. Once I get the kit here, I'll see how I can use what's there and fab whatever else I need to get things to work. I plan on using the Choke cable and the throttle connected "speed control" cable to run the two carb chokes. Not that I use a choke much in San Diego...or ever. -
Scarebird disk brake conversion
lostviking replied to lostviking's topic in Mopar Flathead Truck Forum
Had some back and forth with Scarebird today about the rotors. They were sure that I had the wrong ones. I checked again (third time), no, they are the right ones. The installation instructions list three specific part numbers, NAPA, Wagner and Raybestos. Being thorough I looked them all up. Not one of them has a inner bore diameter that will fit over the 2.80 inch hub OD. It's an easy mod to toss them in the lathe and open them up. I'll do that tomorrow. I sent a nicely worded email to Scarebird, just letting them know what I had found out. Gave them the measurements for the various ID's and let them know that none would have fit...not without modification. I do like the kit. It has nice parts, and I didn't have to modify anything on my truck...of course I haven't installed the calipers yet. I don't think they would have any problems changing their design a bit. .020 total on the OD isn't much and I'm sure it wouldn't hurt the strength. Maybe they will update, maybe they will tell people they have to modify the rotors. Let's see how civil their response is, or if there even is one. Update: After them asking and me sending my rotor ID, the NAPA, Wagner and Raybestos ID's...their comment was "Yay China". These were the advertised dimensions, not a defective part from China. Talk about blame gaming. -
Scarebird disk brake conversion
lostviking replied to lostviking's topic in Mopar Flathead Truck Forum
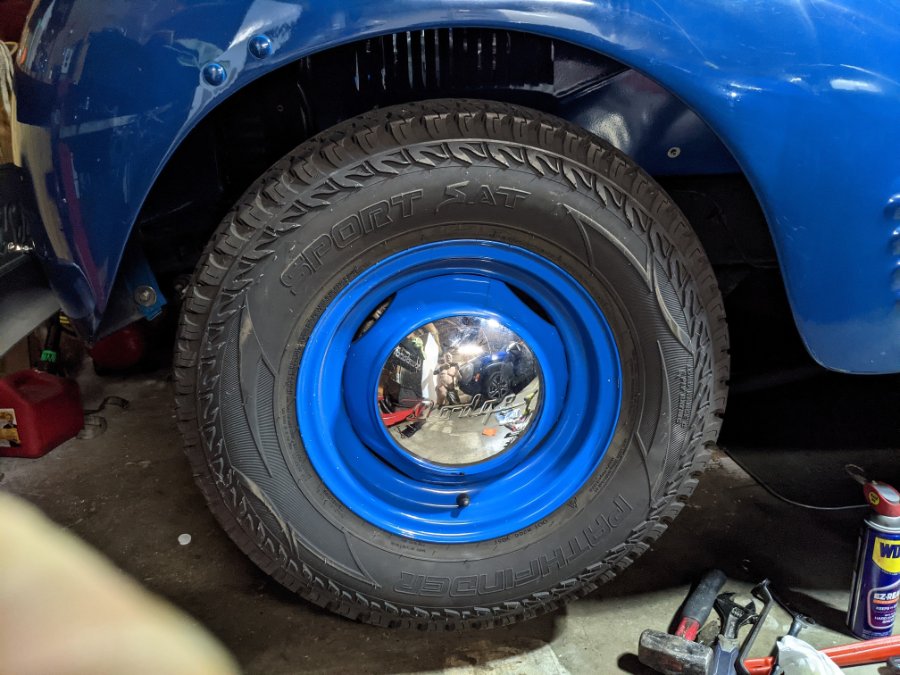
What do you know, something went better than expected today. I got my wheel adapters in. Obviously the rotors are not on, but the thickness they add at the studs is not too much. I just tossed the adapters on, didn't bolt them down, then tossed a wheel back on the front to see what kind of clearance I was going to get. No problem. I've got a lot more room than I was even hoping for, so I get to have all the modern stuff, and my original wheels too. Ya!
-
Dual single carb linkage, planning stage
lostviking replied to lostviking's topic in Mopar Flathead Truck Forum
Thanks everyone for the pictures and comments. At least one of those was almost exactly what I was picturing in my mind. I like the setup in bkahler's post quite a bit though too. I do a lot of mechanical design at my job, and just plain tinkering. This gives me some more angles to work from though. I'm going to look at what Langdon has also, but I don't think I like the idea of a $200 kit I've price various types of rod ends at McMaster and I can get it built for a lot less. Hope you are all enjoying Labor Day! -
Scarebird disk brake conversion
lostviking replied to lostviking's topic in Mopar Flathead Truck Forum
The next step is to put the rotor on, and that's where the day went south. The bore diameter of the rotors is around 2.78, but the hubs are just a bit over 2.80. I can't get in there square with my caliper, and I wasn't that interested enough yet to get out my mic's. Now the obvious answer is to open the rotor bore, but I'm checking with Scarebird first. The website listed one rotor, but the installation instructions they emailed me, and the printed copy I got with the kit both listed another. Inquiring minds don't like conflicting instructions. -
Scarebird disk brake conversion
lostviking replied to lostviking's topic in Mopar Flathead Truck Forum
Next is pretty straight forward. Clean the shipping coating off both of the races, pre-installed in the hub. Pack the bearings. Install the inner and seal. Put it on the spindle and install the outer the washer and the nut. Crank it down as you always do and install the cotter pin. Cover it up.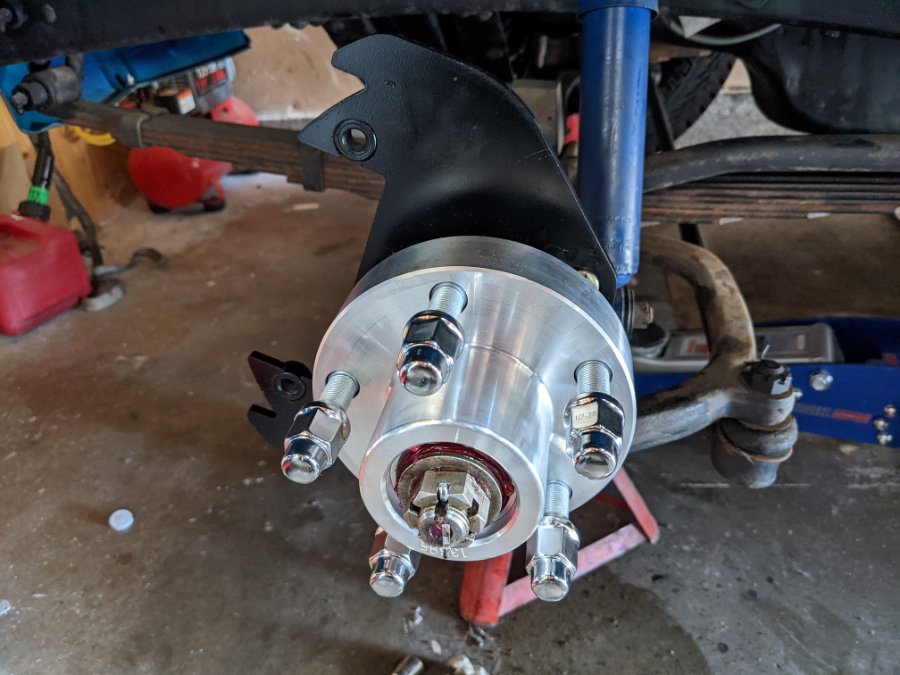
-
Scarebird disk brake conversion
lostviking replied to lostviking's topic in Mopar Flathead Truck Forum
Once you get the backing plate off, clean everything.
-
Scarebird disk brake conversion
lostviking replied to lostviking's topic in Mopar Flathead Truck Forum
OK, started the conversion today. I didn't take pictures of everything during the removal. Basically, take everything off to the spindles. There are two bolts above the spindle from the inside that retain the backing plate, and two large nuts on the end of the bottom swivel point bolts. On mine, one of those was rusted in place...maybe that was causing the front brake problems.