Search the Community
Showing results for tags 'brakes'.
-
Learning a lot as I slowly move through this task. I got a brake total overhaul kit and had to order a set of cylinder/shoe push rods because the old brakes (original, I’m told!) had them riveted to the shoe. The new set came with long and short ones. The vendor told me to put the long ones on the front shoe, short ones to the back shoe. Not only are the pins different lengths, but the end that sits in the cup is shaped differently. The long pin seats firmly all the way down in the cup, but the short one has a shoulder that prevents it from fully seating in the cup. All of the force will be applied to the shoulder. Is this normal, or could the short (shouldered) ones be wrong? (I have some photos but I can’t seem to upload them from my iPhone 😠)
-
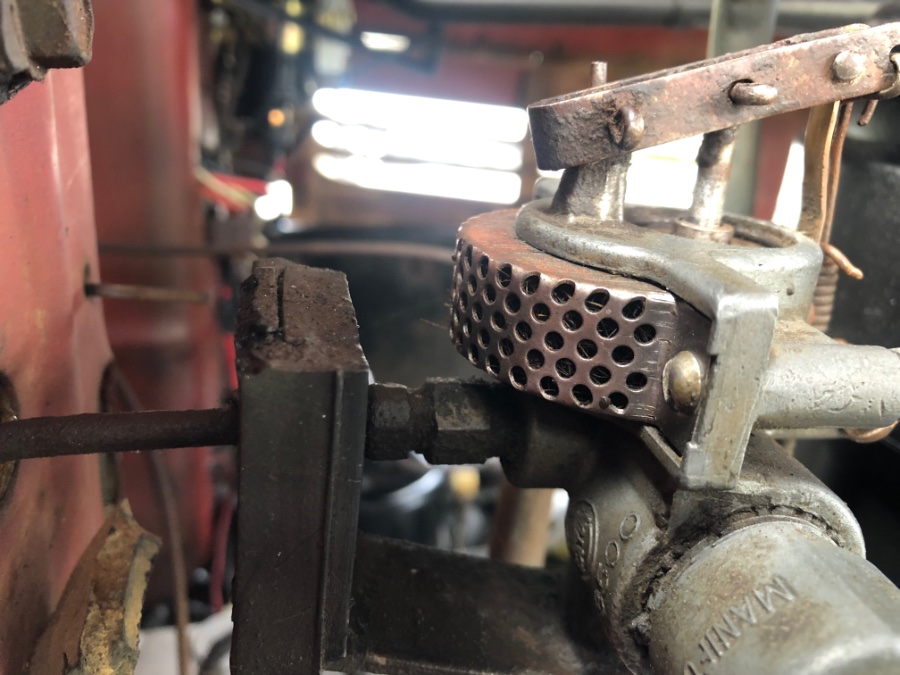
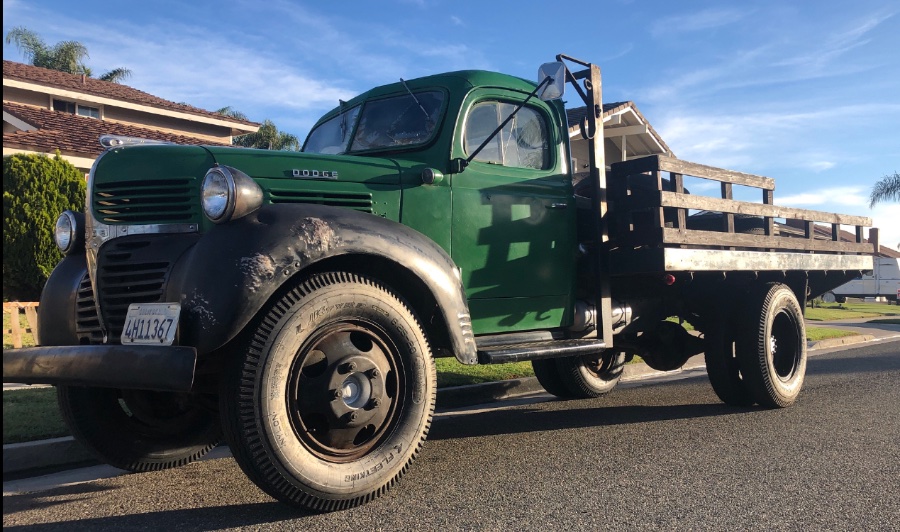
We are close to successfully fully restoring this beautiful 47 dodge 2 ton. Master cylinder restored, wheel cylinders restored, wheel cylinder pistons placed & restored, brake liners replaced, etc. We thought we properly tested our Hydrovac booster initially but brakes work at about a 75% success rate = pressing on the pedal truck comes to a rolling stop but not an immediate stop as necessary. ** We’ve checked the vacuum lines and they seem to be solid (no leaks), but will give it another check. We’ve made a major break adjustment to make sure that the shoes are properly meeting the drums, and completed a minor brake adjustment for the spacing between the brake pads and drums. Questions: 1. What is the proper method to test a Hydrovac booster when still installed? What are telltale signs that it needs a rebuild? 2. When adjusting brakes with wheel lifted off the ground how many rotations if any should the wheel make when brakes are adjusted properly? How much drag is OK. 3. Any resources for a Hydrovac booster rebuild kit, or are we better to purchase a new and donate the booster to our classic treasure chest Collection ?? Many thanks, Jason AutoOwners.org
- 3 replies
-
- hydrovac brake booster
- hydrovac
- (and 6 more)
-
We’re about to start a break restoration of 2 Dodge 47 steakbeds. A 2 ton and a 1.5 ton. Working through the original mechanical user guide is helpful but we’re looking for more direction. Advice on required specialty tools and any tips on what to look out for. 1. Master cylinder leaks = will find new gasket. 2. break lines are in tact and holding fluid but should be replaced. 3. No pressure at all when pushing down on break peddle. 4. Will pull all 6 wheels (duel on rear) to start them see if bleeder valves can be carefully loosened). Opening question: What is most likely the case why we’re not feeling any back peddle pressure when pushing down on break? **Have yet to inspect drums and pads = likely need full cleaning/restoring.
- 8 replies
-
- drum brake adjustment
- brakes
- (and 4 more)
-
Hoping someone can help me out, I have a 49 Wayfarer and would like to rebuild the parking brake. Its a external compressing ring but my problem is how to remove the ring from around the drive shaft hub. Do I need to remove the tail stock and drive shaft or is the support eyelet the adjustment screw goes through removable on its own?
-
1942 Chrysler Brake Adjustment Instructions from Motor Age Dec. 1948 View File B&W scans of December 1948 article in Motor Age magazine re: adjustment of Chrysler brakes (1942) Submitter JonathanC Submitted 08/02/2022 Category Instructions, Manuals & Templates
-
- service
- instructions
-
(and 1 more)
Tagged with:
-
I wanted to share a tool I made today to adjust front drum brakes. Utilizing an extra drum from a 1955??? Dodge truck, I was able to press out the wheel studs and separate the hub from the drum. Then welded a couple nuts to the hub. Drilled a square hole in a piece of steel plate and inserted a ½" carriage bolt and nut to complete the tool. It's so easy to use. 1) lay drum upside down and set the hub tool on top of the drum hub. 2) turn the bolt in or out until the inside edge of the plate is inline with the inside of the drum surface. 3) turn bolt 1/4 turn in and tighten nut to hold plate. 4) place tool on spindle (with bearings and castle nut) 5) adjust lower major adjustment bolts followed by minor adjustments. 6) rotate tool and adjust until desired clearance is achieved 7) remove tool and attach drum, check for drag, and readjust if necessary. Worked for me, hope someone can use this simple tool design to adjust their brakes, enjoy!
- 5 replies
-
- 7
-

-

-
- brake tool
- brakes
-
(and 1 more)
Tagged with:
-
Just picked up a '54 Job rated 1/2 ton truck. Rear wheel cylinder was leaking... Took some serious effort to get the rear drum off the passenger side. (RHT) Switched to the Drivers side (LHT) having issues because I have to use the lug bolts on the puller and they are not quite long enough and pop out.. Priced LHT bolts (1/2-20) AND WOW!! $35/ea if you can find them.. Anybody have any other sources for these LHT bolts that are less money? Anyway, I'm going to try some serious heat on the drum to see if that helps.. If not, I'll have to buy the longer bolts. OK, 'nuff of that... So, I am striking out on the drums.. I THINK mine are OK, but it seems these are very hard to find (11" x2 rear, 10" x 2 front) AND the wheel cylinder for the rear have a few different options.. ALL the pics I see show the uppers with the housing cutaway/recessed for the brake supply line. (I will attempt to post a pic of this) Mine have no recess in this area.. I do not see this being a big problem but would prefer to have the ones without the recess to insure they lay flat and no dirt can enter .. It appears the '52 Plymouth Cranbrook front brakes MAY use the same wheel cylinders as my rears. This is what I am trying to determine.. Will the '52 Cranbrook fronts works for me even with that recess or are there other differences? The pics from those places selling the "correct" uppers also show this recess.. So, I am guessing that they are using the same ones.. I have not been able to find good pics of any of these that do not have this recess. The Centric part numbers are such: Upper (supply):CENTRIC 13463040 and CENTRIC 13463043 and then the lowers are CENTRIC 13463041 and CENTRIC 13463044 Have any of you guys used these parts numbers successfully , if not what are the correct parts numbers? Any help or thoughts on ANY of the novel above would be great!! Thanks in advance
-
Hello! My name is Kristina. I’ve been lurking here a bit and finally decided to jump in and ask a question or two. My dad and I have been restoring a 1953 Plymouth Cambridge together for fun, but neither of us are what you’d call a car person. I’m pretty mechanically inclined (I’ve spent the majority of my career fixing computers), and good at problem-solving though so we’ve been making progress. Slow progress, but progress. I’ve spent a lot of time researching answers to our questions, and this forum has ended up helping a lot. However, now we’ve run up against a problem that requires more than I can just Google. well, two problems, really, and I think they’re connected. We cannot get the clutch to engage and we can’t bleed the front brakes. The backs are fine. The reason I believe these two issues are connected is that we had to remove the floor panel and replace the master cylinder. Now because the back brakes bleed and engage, we know that it’s not the cylinder itself but rather a mistake we made while reassembling the whole area (especially the clutch, bc we tested that before replacing the cylinder and the car went into gear and the wheels spun.). I *think* that the problem with the clutch is improper adjustment of the push rod that engages the transmission when the clutch is pressed, but I’m really not sure. I have a manual from the 1930s-40s, but obviously it’s the wrong decade. We ordered the correct one today. We also had to remove...I’m sorry, I don’t know what it’s called, I’m pretty bad with correct terminology...anyway, we had to remove the drivers side metal brake line that runs from this little connector/splitter thing and up to the drivers side front brake and reinstall it in order to replace the rubber hose that connects it to the brake itself. We managed to twist off the end of the metal tube in the course of removing the old cylinders, but we repaired it with the proper equipment. I don’t think it’s this though because both front brakes are the problem, not just that one. All of the shoes and cylinders were replaced with new ones as well. I'm not sure what other info or pictures would be relevant but I can get them if requested. So do you guys have any ideas? Especially ones that don’t involve taking off the foot well panel and the brake/gas/clutch assembly again because MAN was that a pain in the rear to get back on. Thanks for any help you can provide!
- 12 replies
-
!949 Plymouth Suburban. Refurbishing the service brake system. Pulled all the wheel cylinders and master cylinder from car to refurb at the bench. Happy that all castings and internal parts are "Made in USA". All bores were good requiring only slight honing to bring back brightness to the bore. All bores were 1-1/8 diameter. My 1946 to 1954 Service manual says all bores are 1-3/8 diameter. So the question is: what can I expect from a drivability and performance stand point with this smaller diameter braking system? Also, my parts catalog calls out a"Brake Pedal Pull-Back Spring" and a 'Clip". No picture of these items in the Parts Manual or Service Manual. Can anyone give me a description of these parts, attaching points, etc. or maybe a picture. I also have a 1949 B1B with brake pedal return spring. Are the return springs similar on both vehicles? Regards
-
hi everyone, I recently came into a 1951 B3B Pilothouse. It runs ...sort of... but planning on doing a major overhaul. Also, this is my first restoration project, so taking it as a learning experience too. I apologize in advance for any painfully newbie questions. Anyway, there's a rupture in the brake line somewhere and the pedal has zero pressure. I'm replacing most of the brake system and going with Rustyhope's front disc conversion. So far so good. The question is: what have folks here used as a replacement master cylinder for the disc/drum setup? I know the original MC *can* work, but mine's not in great shape and I figured a new dual cylinder would perform better anyway. What experiences have others had? Is it a pain to run another brake line from the cylinder to the front wheels? thanks Desmond
- 11 replies
-
I am looking to repair or replace rear brakes on my 1949 b1 truck. Does anyone know part numbers or rebuild kits for these brakes.
-
I'm curious as to what others have used part wise to set up their emergency/parking brake? I want to use the original under dash t handle in my 1950 B2B and connect it to my Cherokee differential. I still have the cables that were on the differential and the equalizer plate. I am most interested in what cable to use that would attach to the t handle and intermediate cabling to complete the set-up.
- 13 replies
-
- brakes
- emergency brake
-
(and 1 more)
Tagged with:
-
Hello, Newbie here, I just acquired a 1952 Dodge B-3. I see a bunch of B-3-Bs, but mine is a B-3-C, which I think is a 3/4 ton. It is a 116 wheelbase, so long bed. It is in fair shape for its age and I intend to drive it. Anyway, I have started to change out brake wheel cylinders and ran into a problem with the right rear drum. The drum had not been tight on the axle, so it spun just a little, but didn't shear the key. However, it cracked the hub which allowed moisture to enter and corrosion, I assume is preventing me from pulling it off with my medium duty gear puller. I have applied PB Blaster and heat. Spending several hours so far and it is not off yet. I need a beefier puller. I'll also need a drum. I found a part number on line for Atlas that I think may be correct. 962-047. Does anyone know various applications of this drum? Also a good lead for obtaining one in good shape....Thanks, Keith
-
Hey guys, I am looking to use a Cherokee master cylinder on a 1950 B2B truck. I will have to fabricate the brake rod, as i don't have one. I was looking for pictures or measurements from someone who had already made the conversion and whatever modifications they had to make. It appears like there may be a possible bit of alignment or binding issues ahead. Of course, if there is someone out there who has one to sell, that will work too.
-
When installing a different transmission you lose the original parking brake.. Here is what I just finished doing. I installed a chevy 350 motor and 350 automatic a couple years back in my 46 Plymouth and also a 1999 Ford Explorer rear end. To get a parking brake again I took a NEW Explorer right rear cable housing while retaining the original Explorer brake cable setup, coming from the rear brakes.. removed the cable and replaced it with a NEW 1969 Roadrunner cable which hooked up to the original brake handle assy. .. So now I had the Explorer cable housing with the roadrunner inner cable together.. The trailing end came out with plenty to spare right down on the frame where I placed a bell crank. I cut the cable off and clamped it back together using small cable clamps as needed. ...I made the bell crank out of 5/6 by 1 1/4 flat bar and drilled about 3/16 dia holes where I inserted the cable into the holes via about 1/8 slots from the outer edge to the holes... I welded a piece of the same flatbar perpendicular to the first piece and drilled a 3/8 hole thru for the pivit bolt. ..Drilled a 3/8 clearance hole thru the frame near the top for the pivet bolt and used a brass fitting about one inch long I had as a spacer to get the bell crank away . I used the cut off cable ends with the crimped on ends to insert into the bell crank via the slots and cable clamped those to the other cables making sure there was no slack.. works great !!! Dale
-
I am planning a brake upgrade on a low mileage original business coupe. I have found several options for front disc brake upgrades. I am looking for ideas to upgrade the rear drums either with discs or newer style self adjusting drums. Does anyone know of backing plates and brake assemblies that will work on the original rear end?
-
So I got a 1948 P15 a couple months ago and realized the brakes weren't doing so well. I replaced all the wheel cyliders, the shoes and a drum. Then I thought the master might not be so hot so I tried to take it off the car to rebuild it....which was much harder than I thought. It probably took me about 8 hours to get it off of there and I've probably spent the same trying to get it back on. The issue is I cannot get the pedals back through the holes in the floor and on the mc at the same time. If I put both pedals on the mc, the tops of the pedal arms hit the top part of the hole. If I put both pedals through the holes first and then try to get them on the mc, the angle is too extreme for them to fit. This must be doable, do I need to remove the floor? I believe whoever restored the car replaced the floor there and riveted it down. He also glued the carpet to it so I can't see underneath unless I rip it up. Perhaps are the holes in the floor cut smaller than the originals? Am I missing something? Can I remove the pegs the pedal arms mount to on the mc? Any help would be appreciated. Matt
- 8 replies
-
- brakes
- floor boards
-
(and 2 more)
Tagged with:
-
Just wanted to share a situation with the brakes that was discovered today with the hope of preventing someone else from running into the same issue. We have our '48 Town Sedan for a whole 3 weeks now & it has been a great deal of fun. The previous owner had the brake shoes, flex hoses, wheel cylinders & master cylinder replaced not too long ago. He didn't drive it much (about 1000 miles since 1985). It drove fine for me for about the first 2 weeks & then the left front brake started to intermittently pull & sometime lock up altogether. Backing up a few feet would free it up again. This afternoon I finally pulled the left front wheel to check it over. The upper wheel cylinder dust seal was pushed out toward the backing plate. After pulling the plunger out of the wheel cylinder, I found that the dust seal was dislodged, apparently when the wheel cylinder was put in place. The plunger was out of the hole & off to one side between the edge & the hole. When the brakes were applied, the seal would bulge out instead of flexing inward causing the plunger to bind. After putting the plunger back through the hole it belonged in in the center of the seal & reinstalling it, the brakes worked fine again. The moral of the story is, when you install a new wheel cylinder, rotate the dust seal to make sure it is properly centered & seated before buttoning everything back up.
-
Working on a friends 1954 C1-B6 Job rated Pickup. I need wheel cylinders front and back and am having a hard time coming up with the correct part numbers. Any help is appreciated THANKS Randy L Peterson
-
I have an all original 1949 Plymouth Special Deluxe Convertible. What is the correct type brake fluid to use in my car? I'm about to add fluid and bleed the brake system but I want to make sure I'm using the correct type fluid.
- 5 replies
-
- 1949 plymouth
- special deluxe
-
(and 2 more)
Tagged with:
-
Well the time is now, this 47 Plymouth business coupe SD has stalled for a year, but only for good reason. the original plan was a mild build with a 318 Magnum. But i was able to get my hands on an entire 08 Charger R/T, that's getting turned into a drag runner. Yup that means the 5.7 Hemi, trans, interior, steering column, gauges, seats, and entire electrical system is being installed in the the Plymouth. AND ONLY ABOUT A MONTH TO FINISH!!! Engine: 5.7 Hemi Trans: 5 speed Tiptronic Steering: 89 Chevy caviler Rear end: 01 ford explorer (DSK Brake typ) http://s1268.photobucket.com/user/vethd32/media/IMG_20170326_192443944_zps2oqtkxxj.jpg.html?filters[user]=144930205&filters[recent]=1&sort=1&o=1 http://s1268.photobucket.com/user/vethd32/media/IMG_20170325_112957080_zps742lbbze.jpg.html?filters[user]=144930205&filters[recent]=1&sort=1&o=3 http://s1268.photobucket.com/user/vethd32/media/IMG_20160709_241347219 1_zpsunomkp06.jpg.html?filters[user]=144930205&filters[recent]=1&sort=1&o=4 Ill try to keep this feed updated as best i can!
-
I swapped out the master cylinder and all the wheel cylinders on my 48 Coupe. Bled them in the correct order, no leaks- when I push the brake pedal while moving I have to slam it to get any stopping and then it jerks to the right. Also when I rev too high it chugs and moves like it's my first time on a clutch. It's a barn find and I'm restoring it for the family- my mom was born in 48 and she passed recently. Anyway any help would be great thanks
-
-
Concerning brake shoe adjustment – can anyone tell me where one can obtain a tool like the red one shown here? I’ve not been able to track one down, and I think it’d greatly simplify the adjustment of the brake shoes Thx.


