tanda62
-
Posts
252 -
Joined
-
Last visited
-
Days Won
4
Content Type
Links Directory
Profiles
Articles
Forums
Downloads
Store
Gallery
Blogs
Events
Classifieds
Everything posted by tanda62
-
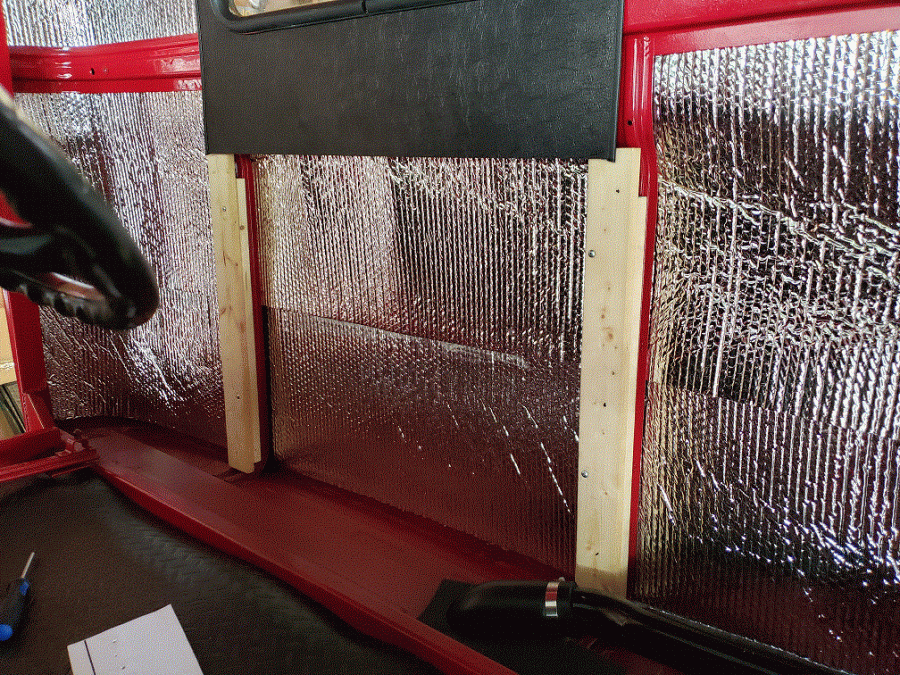
Another update. Got the dome light installed. Not an original, the prices are way to high, it is from NAPA part number G6151. I think it looks okay and somewhat period even if it is LED. It will certianly light up the cab when needed. I put a simply push button switch mounted under the dash to turn it on and off. Also got the headliner put up and it is a little bit of a pain. Had to trim the back and cut some of the stitching to get it to fit. The back corners will be covered by the upper corner pieces so the cuts will not be visible. Would have been much easier with another person but...I was able to get it in using some colorful language which I am sure made all the difference. Put in the center wood supports for the lower back piece as well. Used 2inch sheet metal screws to secure the wood to the braces and was kinda nervous about the first one. But I measured right and did not go out the back of cab.


-
Got my seat back from the upholster and I think it looks pretty Fifties. ? Also got some more information from QuietRide. The headliner needs to be installed before the corner pieces and the way I slotted it in is the way it will go. We will see how this works... I do have to say Kudos to QuietRide for their response and helpfulness. I have had a good experience with them via email.

-
Got an email from Quietride with directions for the lower pieces and it clears up some of the issues. I have attached the PDF file they sent. However, the directions show a five window installation and I am doing a three window. I have asked for help with the three window so hopefully they will get back with me and provide further help. Dodge 4853 Truck Rear Cab Cover Install[7804].pdf
-
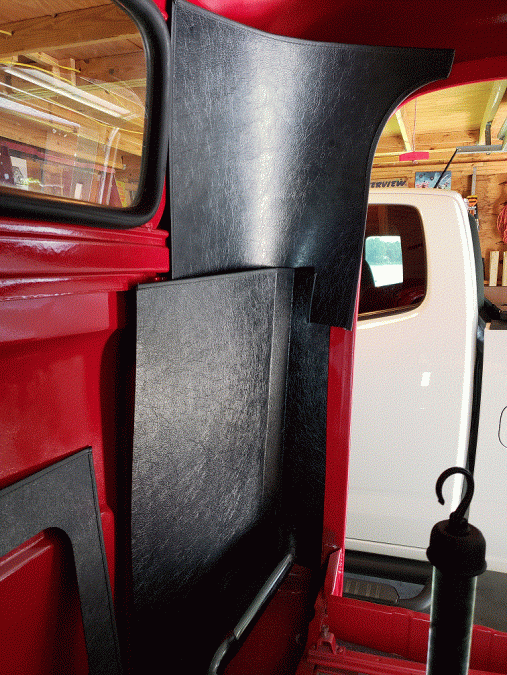
Here are some shots of what I am talking about with the notch in the lower piece and the upper piece fitting into it. Not sure if this is the way it should be done and if anyone has any ideas I am listening - thanks. I have also put in mats and some insulation.


-
Yes it is for the lower panel below the windows. Thanks for the pictures stylesadamson. Do you happen to have one where the corner pieces meet at the back of the door jam? Specifically there is a slot in the lower piece that looks like the upper piece could fit into but I am not sure. Thanks
-
Has anyone installed Quietride"s Rear cab cover kit ( DODGE 4853-TRCC)? I am getting ready to install this and the headliner and window surrounds for my 3 window cab and it looks like there could be a couple of ways for all of it to fit together. Quietride sent along directions for the headliner and the window surrounds but not for the rear cab cover kit. I have contacted them and hope to hear but sometimes another persons experience installing is more valuable. Thanks, Tom
-
While I don't have any direct experience with these people, here are a couple of places to check out for performance parts. http://www.langdonsstovebolt.com/ http://www.moparmontana.com/
-
B3B Replacement Master Cylinder
tanda62 replied to desmondmonster's topic in Mopar Flathead Truck Forum
I used Nickel copper lines and found them easy to use with one word of caution...bend them slowly and carefully as they love to kink if you even look away for a moment. They bend without complaint but if you move to fast they will kink. Also be careful when doing the flares as they are soft and again slow wins the day. Good Luck! Here are some pics of mine: ( note I routed the front behind the transmission and then up the frame rail rather than in front of the engine as stock)
-
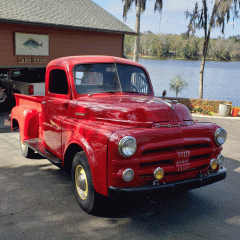
Today I put her up on stands and shifted the gears and tested the brakes. Happy to find that the transmission (New Process 420) shifted smoothly in all four forward gears and into reverse without an issue. The brakes stopped the spin as well as drums can be expected too! One more step towards getting her on the road. Tomorrow going to a local upholstery shop to talk about doing the seat. Looking to do this design with the yellow matching the wheels as close as possible.

-
Got the assembly to the point of engine running for the 53 B4C. Dodge running.mp4
-
Steering column and clutch pedal draft seals
tanda62 replied to tanda62's topic in Mopar Flathead Truck Forum
Well guess that metal plate went the way of the Dodo at some point in the trucks life. Fabrication it is! Thanks to all for the responses!! -
Anyone have this setup for the steering column and clutch pedal draft seals? The brake pedal uses the same seal sold by DCM, Roberts and the like but I don't see any seals which would fit the steering and clutch setup I have on my 53 B4C. It looks like there should be a seal which uses some screws to hold it in place - maybe something I am going to have to fabricate. Thanks for any help.

-
1949 Dodge truck rear brakes replacements
tanda62 replied to bridog57's topic in Mopar Flathead Truck Forum
https://dcmclassics.com/brake-parts/384-br-261-48-wheel-cylinders-half-size.html Used these on my truck and like them. -
Need clutch and brake pedals stop pic.
tanda62 replied to Fernando Mendes's topic in Mopar Flathead Truck Forum
1953 B4C

-
Stock Replacement Gas Tank For 1954 Dodge Truck
tanda62 replied to jboymechanic's topic in Mopar Flathead Truck Forum
So I am piggy backing on the setup from 1949 B-1-C and used the same parts for my 1953 B-4-C. The floor had be cut previously but at least the metal was still left so a simple bend and weld job got the hole back to around the correct shape. A little bit of foam and eventually some floor matting should help cut down on the dust coming from below. Also got a vented gas cap from NAPA with a nice warning message to remove slowly fuel spray may cause injury. ? Thanks for the idea 1949 B-1-C! Tom

-
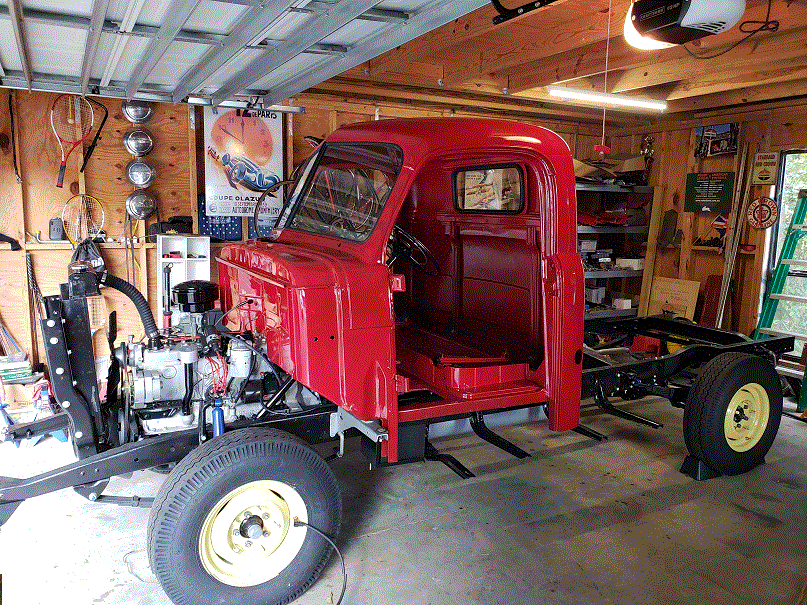
I had someone else sand blast the frame - a friend needed a couple of cars blasted so we went into together and shared the cost. It was a portable unit and really did the trick. It did take quite a bit of tipping and banging on the frame to get the sand out when done. Today was put on the Cab day and several of my nice neighbors came over and we lifted it up and over the stick shift and into place. Went well and the many hands (10) made it a lot easier!
-
I sandblasted my frame and used por-15 and it has bonded well with the metal. No peeling or flaking. On the engine I used por-15 engine enamel and so far it has proved to be good. Just my experience.
-
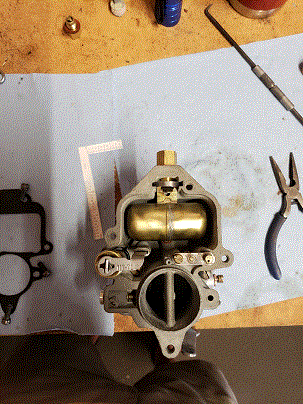
Cleaned the carb using a rebuild kit from the Carburetor Doctor and now it is mounted with the air cleaner - another step closer. Hopefully the cab will go back on this weekend.

-
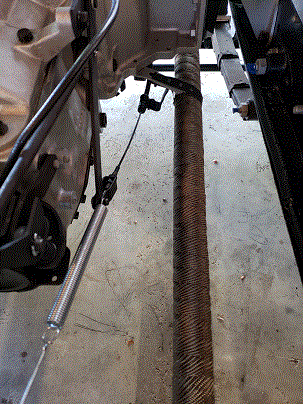
Yes, since I ran the brake line and fuel lines along the cross member in front of the gas tank and then up the passenger side frame rail I wrapped the down pipe to reduce the amount of heat in that area. I used to wrap the pipes on my motorcycles and saw a big drop in the heat they put off so same principle here. You might not notice the nicopp lines as they are also covered in rubber fuel line hose to protect them even more.
-
Without pictures of the area I had forgotten about the cable going on the flywheel bracket. Now thanks to you I can put the cable where it belongs.
-
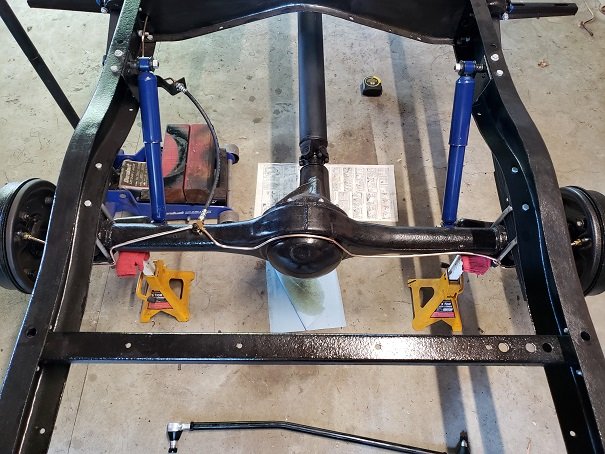
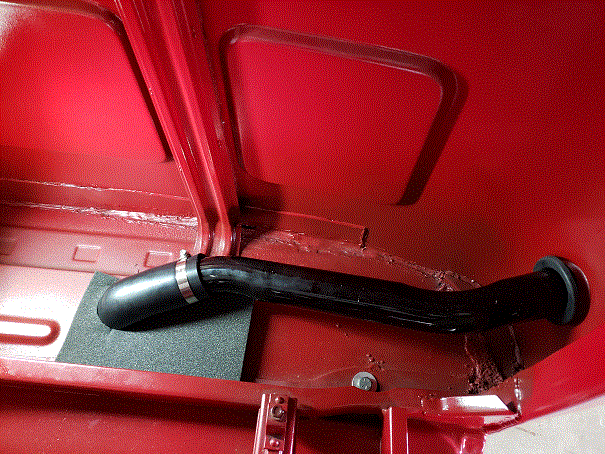
Got the exhaust system installed and made some pieces to hang the emergency brake and exhaust down pipe off the bracket from the bell housing. Now to rebuild the carb.


-
Welcome to the forum! I was once part of a base inspection team many moons ago for Mt. Home AFB - just a tad cold. This is a great place to get good information with very helpful people. Looking forward to seeing pictures! Tom
-
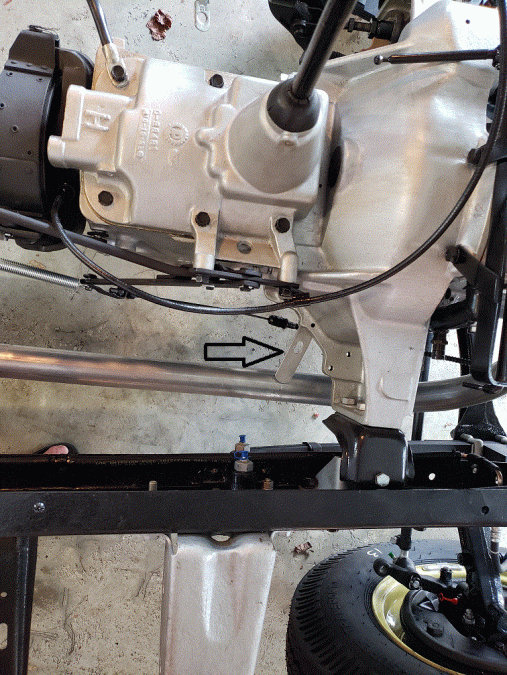
Looks like as with several other things I have found some pieces are missing. I like the idea of it supporting the emergency brake cable and branching off to the down pipe on the exhaust. Have to do some figuring and make some parts to have it hold both. Thanks to all for the help! Tom
-
For the emergency brake?
-
You know when you are taking things apart and think you have taken all the pictures you need? Ya, well I didn't. I am trying to figure out what this bracket (arrow is pointing to it) hanging off the bell housing on my 53 B4C is for and so far have come up empty. The emergency brake doesn't seem to go to it but maybe I am forgetting a piece. Thanks for any help, Tom