


Jocko_51_B3B
-
Posts
430 -
Joined
-
Last visited
-
Days Won
3
Content Type
Links Directory
Profiles
Articles
Forums
Downloads
Store
Gallery
Blogs
Events
Everything posted by Jocko_51_B3B
-
I applied 5 psi air pressure to the coolant system of my 218 and the pressure leaked down to zero after 40 minutes. So OK, I know there's a leak somewhere, but what is considered an acceptable leak down rate? Zero? Is there a rule of thumb about this? Meanwhile I'll keep looking, listening, and spraying soapy water on bolt heads etc. If I still can't find a leak, I'll fill it with water and check for leaks that way. Thanks.
-
Cylinder head torque & sequence for 1951 flathead six
Jocko_51_B3B replied to RedHot71's topic in Mopar Flathead Truck Forum
Should Aviation Gasket Maker be used to seal head bolt threads even though it lacks PTFE? Also, the previous post mentions using head bolt washers under head bolts. But most of the engine photos I've seen don't show washers under the head bolts. Has anyone used them under head bolts? -
They just delivered a new "Best" brand head gasket. So my plan (at the moment) is to use the "Best" head gasket with Permatex Copper Spray-a-Gasket Sealant. I'll torque the head bolts to the high end of spec and then re-torque them with the engine hot. As far as the head bolt threads go, I'll use Aviation Gasket Maker again since the bolts are already smeared up with it. When it's all finished I'll pressure test the block and drain a little oil from the oil pan to make sure no coolant found it way down below. As far as the three bolts that surround the welch plug on the front of the engine are concerned, I'm going to try using Permatex Ultra Black (which hardens up) since these bolts don't need to be re-torqued like the head bolts do. (I also ordered a new set of "Best" timing cover gaskets because I like quality of the "Best" head gasket.) I'm wondering if it's necessary to smear up the timing cover gaskets with grease - just for good measure as I've seen other forum contributors do.
-
Looking for suggestions for a really good head bolt thread sealant. I'm considering the following Permatex products: 1. Aviation Form a Gasket 2. Pipe Joint Compound 3. Indian Head Thread Sealant 4. Ultra Black Gasket Maker Other ideas that might be better?
-
Putting the engine back together
Jocko_51_B3B replied to Vet Doc's topic in Mopar Flathead Truck Forum
It looks like white lithium grease which is good for high temperatures. I'll give that a try. -
Putting the engine back together
Jocko_51_B3B replied to Vet Doc's topic in Mopar Flathead Truck Forum
Don, What type of grease did you use on your timing cover and backing plate gaskets? The grease looks white in color. -
I'm going to order a couple of Best brand head gaskets. I have a couple of related questions which someone might be able to answer: 1. Since flathead 6's have unpressurized coolant systems, is it common practice to pressure test the cooling system after a rebuild? If so, what pressure would be adequate and for how long? The shop manual doesn't say. 2. What is the best sealant for sealing bolt threads? I'm considering red, gray, or black Permatex gasket sealant but I'm really not sure which would be best. I've tried aviation gasket maker on the timing cover bolt threads but when I applied 10 psi to the cooling system the ones that penetrate the water jacket leaked.
-
Installing Original Dome Light Into New Interior
Jocko_51_B3B replied to Ralph Pearce's topic in Mopar Flathead Truck Forum
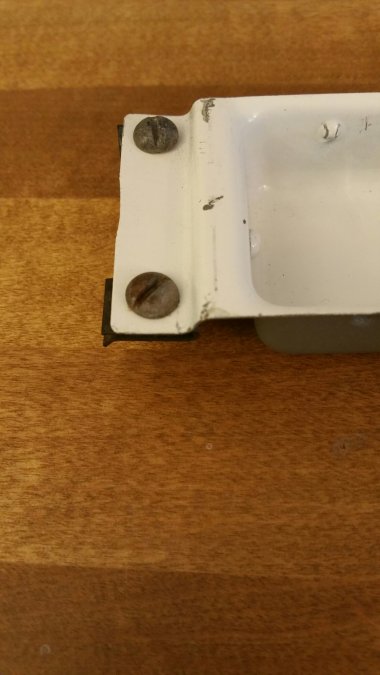
Here are what mine look like. From their appearance, I think they are original.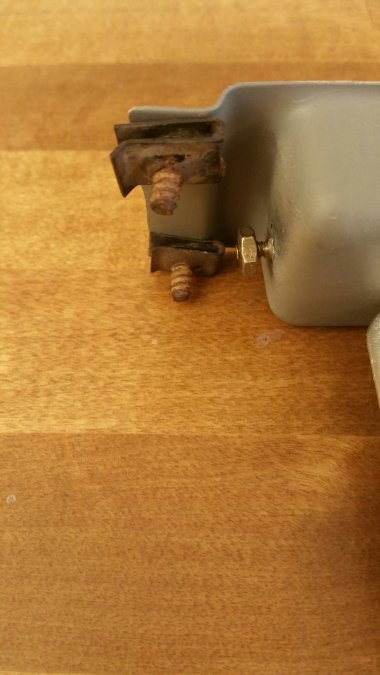
-
I had my frame blasted to bare metal with Dupont's staurolite product and then spray painted with an Akzo Nobel semi-gloss epoxy. Looks great.
-
Jeff, I had never heard of Best head gaskets until I started this thread, but I will definitely give them a try based on your recommendation. I checked the Best website and I like their emphasis on "Made in the USA". For now I'm not sure who made my current head gasket, but I do have a question regarding head gaskets in general. Suppose a head gasket blows. I haven't seen that happen in my own experience but I imagine that a blowout in a flathead six head gasket can only open a path for coolant to flow into a combustion chamber. Since there are no oil passages between the block and the head, I see no other possibility except for coolant to get into a combustion chamber. So how does coolant get from a combustion chamber into the oil pan? If the engine is running wouldn't any leaked coolant be expelled in the exhaust? Or can it slowly seep into a combustion chamber and somehow leak past the rings when the engine is turned off? Thanks for the advice about Best. Jocko
-
The brass and steel versions of the expansion plugs are made here in the US (I believe) by Dorman. Dorman is a well known and reputable company. On the other hand, I'm careful about buying parts and tools made in China. I'll gladly pay two or three times (or even more) for a quality part made in the USA that won't fail. So, as usual, Caveat Emptor. If anyone knows another source for the brass expansion plugs, pleas let the forum know.
- 27 replies
-
- 1
-

-
- welch plugs
- coolant
- (and 6 more)
-
I checked with a local O'reilly's and they still have two brass plugs in stock so I told them to save them for me. I also asked them to check the quantity in their warehouse and they came back with a big zero so I guess it's going to be limited to steel plugs in the future. As far as the head gasket goes, I bought it in a kit so I don't know who made it. It has is a part number, V-1066-C, stamped on it so I checked the Feldpro website but it's not a Feldpro number.
-
I don't think it's the head gasket. I had only run the engine for at most one hour before tearing it down. When I put it back together I replaced the head gasket with another brand new one. What are the chances of blowing two brand new head gaskets with less than an hour's use for each one? Also, the first head gasket looks to be in perfect condition.
-
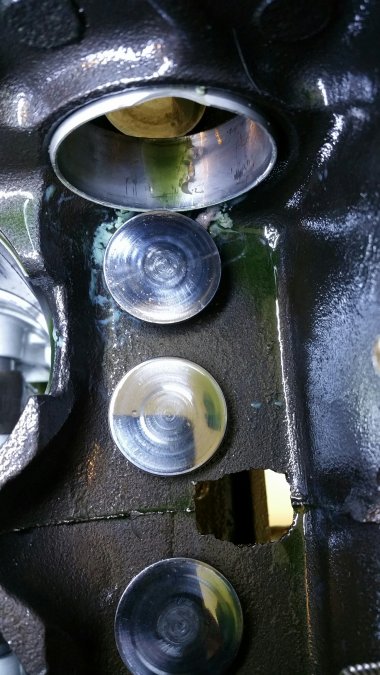
I just checked around for a replacement welch plug. Dorman used to make brass ones (old pn 560-023), but now apparently they only make them from steel (pn 550-023). I hope the steel plugs deform properly for a tight seal. Who knows, maybe the steel's better.
-
I tore the engine down after running it for a short time to investigate. The bearings and journals are all perfectly fine and well lubricated. I have good oil pressure at 44psi. Hopefully the small amount of coolant that got into the crankcase migrated to the bottom of the pan and the oil pickup float stayed well above it. I doubt I have a blown head gasket since the gasket is brand new, but a compression test is a good idea.
-
I'm going to replace the welsh plug. But just in case the plug has to be replaced again for some reason, will JB Weld let go? JB Weld is pretty strong stuff. I'm sure it will seal though.
-
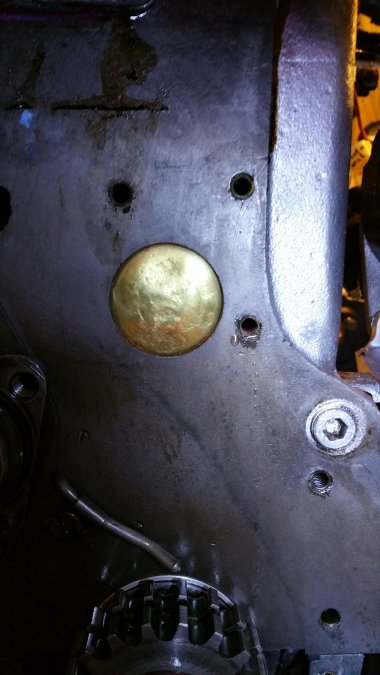
I'm completing a total rebuild of the engine, but my problem has been coolant leaks. The two longer manifold studs leaked. One of the water pump bolts leaked. And one head bolt leaked. I've solved all those problems using aviation gasket maker but I have one more leak that has me more concerned than the others. I'm somehow getting coolant in the oil. When I cracked open the drain plug I got a stream of coolant, maybe an ounce or two, before I saw any oil drain out. So now I've taken the front of the engine apart again. I gave the welch plug another good smack with a 13/16 socket for good measure. From what I can tell the real problem is water getting past one of the timing cover bolts and soaking through the backing plate gasket. Initially I used aviation gasket maker on the timing cover bolts, but I did not smear it on the gasket. When I reassemble everything I WILL generously coat the gasket and smear the female bolt holes with AGM before I coat the bolts and insert them. Other than timing cover bolts and the front welch plug, is there any other way for coolant to get into the oil? Is Aviation Gasket Maker the best way to seal the threads or is there a better sealant? I think the hole next to the welch plug leaked.
-
I'm putting together another 218 flathead now for my B3B. Royal Purple 10W-30 sounds like a fine way to go for the break-in process. After that I'm planning to use Valvoline VR-1 20W-50 for daily use. Since both of these products are high ZDDP oils, why can't either one be used for break-in or for daily driving. Is there some extra-special ingredient other than high zinc in break-in oil?
-
Noise and Oil Pressure Fluctuation - New Rebuild
Jocko_51_B3B replied to Jocko_51_B3B's topic in Technical Archives
The cam bearing lubrication hole is on the correct side. I made sure of that. The bearing needs to be flipped upside down, not turned around. My focus was on the hole and not enough on tappet interference. I didn't realize that tappet interference was a possibility. The good news is that my mistake caused me to disassemble the engine from which I was able to see that oil was getting everywhere it needed to go. All main, rod, and cam bearings and journals were in good shape and had plenty of oil. -
Noise and Oil Pressure Fluctuation - New Rebuild
Jocko_51_B3B replied to Jocko_51_B3B's topic in Technical Archives
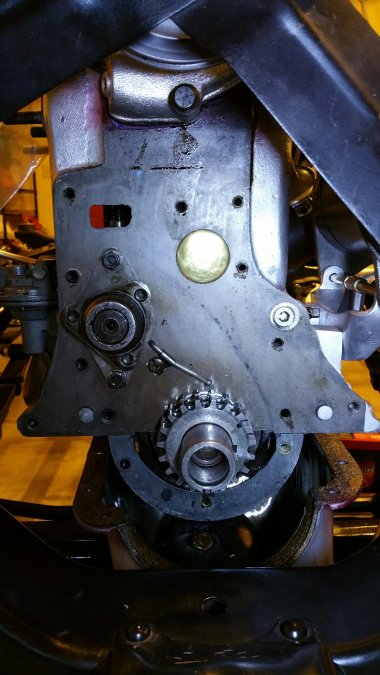
Well, it looks like part of the problem is my fault. I incorrectly installed the #2 cam bearing upside down causing it to interfere with the #2 cylinder exhaust tappet. This could very well have caused the the chirping noise. Also, the bearing should have been inserted a little further into the block. Fortunately I installed the identical #3 cam bearing correctly. My oil pump looks, feels, and pumps oil fine so I don't know why I have a small fluctuation in oil pressure. The #2 cyl exhaust tappet interferes slightly with the cam bearing. The curved notch in the bearing should be next to the tappet for clearance.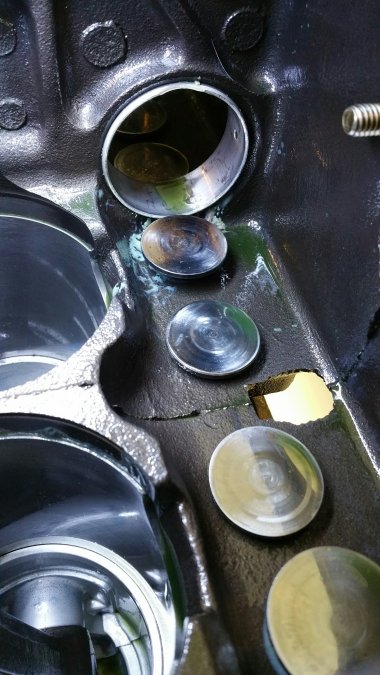
-
Engine is finally complete. Engine bored and sleeved. New pistons standard size. New main and rod bearings. New valves. New valve seats. New valve springs New cam bearings. Polished crank journals. Kept the old valve guides, tappets, keepers, cam, crank, etc. Added five quarts of 30W break-in oil. As soon as fuel made it to the carburetor, it started right up and sounded pretty good. Ran it several times for a total of probably 45 minutes to an hour and started to hear a periodic squeak/rubbing/chirping noise along with about a 1-2psi fluctuation in oil pressure. The oil pressure fluctuation was not present during the first few start-ups. Pulled the engine. Completely disassembled the engine. All main bearings, cam bearings, piston walls, tappets, were well lubricated. No spun bearings. No dry spots or damage that I can see. Should I have ignored the noise and oil pressure fluctuation in hopes it would "work it's way out"? I'm scratching my head after a lot of work.
-
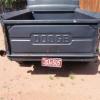
Very nice old Plymouth! Good pa(ul)tina too. (But keep your eyes open when you're at the lake.)
-
Jan, No problem at all! You were helping me out! Your solution caused me to go back and review the engine oiling system. Later today I'll test the filter again and post the results. Do us a favor and post a photo of your '39 Plymouth truck. Jocko
-
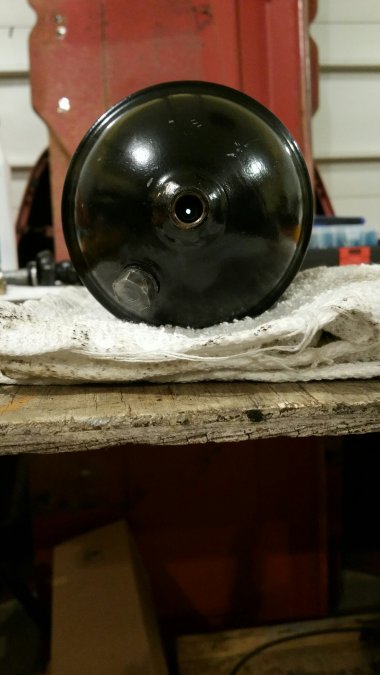
I removed the relief valve, but it is free and well lubricated. I have good oil pressure and my lines are new so I thought I better check the filter housing itself. Sure enough, there is a tiny hole inside the bottom fitting boss about 1/16 in in diameter. It was clogged solid. I couldn't blow through it. I used a safety pin to clear the clog followed by a good rinsing of the internal tube with lacquer thinner. I'll test oil flow through the filter tomorrow and post the results. Flash light shining through the hole: The hole is actually a little less than 1/16 inch. I could not poke a 1/16 inch drill bit through it.
-
After three years I finally fired up my rebuilt 218 for the first time yesterday and it ran like a top (except for a couple of minor coolant leaks and a fuel leak). My oil pressure is 45psi (a big relief). So far I've only run the engine for five or ten minutes at idle just to check things out. This morning I pulled out the sock type oil filter to see if I have oil flow up to the filter. But no! The sock filter is totally clean just like new! No oil has gone through the filter at all. I don't see how that's possible with 45 psi on the gauge. So, I removed the whole oil filter assembly as well as the supply and return lines to check for obstructions. Everything is free and clear. So I left the oil port in the main oil gallery disconnected and wide open. Then I cranked the engine. A considerable amount of oil came out of the port. So, as far as I can tell, lack of oil pressure and flow in the main gallery is not the problem. Here's my question: Do 218 engines need to be running at highway speed before they are able to build up enough pressure (and flow) for oil to flow up through the oil filter?

