-
Posts
2,404 -
Joined
-
Last visited
-
Days Won
11
Content Type
Links Directory
Profiles
Articles
Forums
Downloads
Store
Gallery
Blogs
Events
Everything posted by Ulu
-
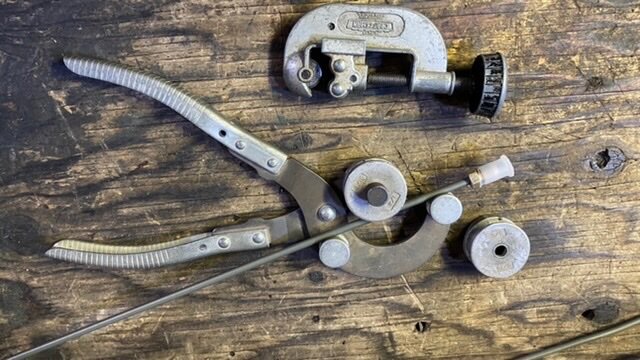
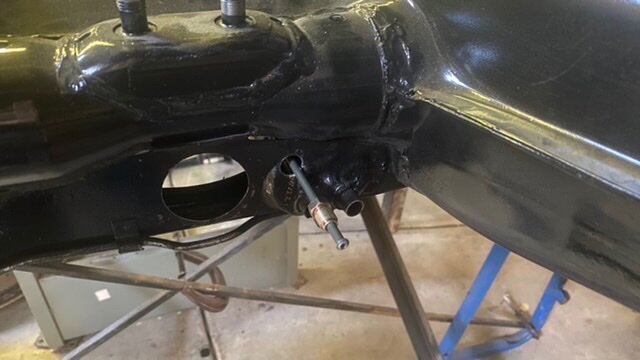
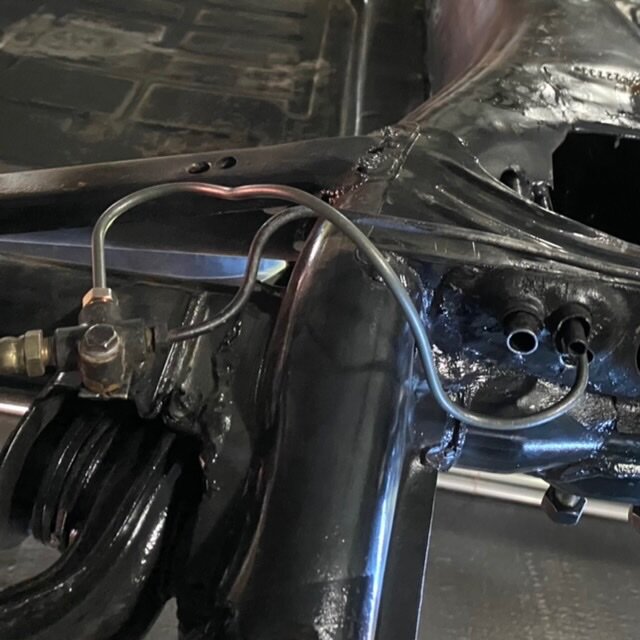
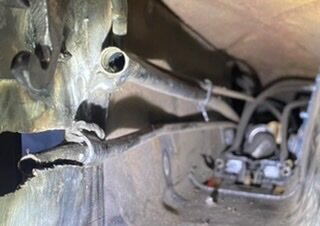
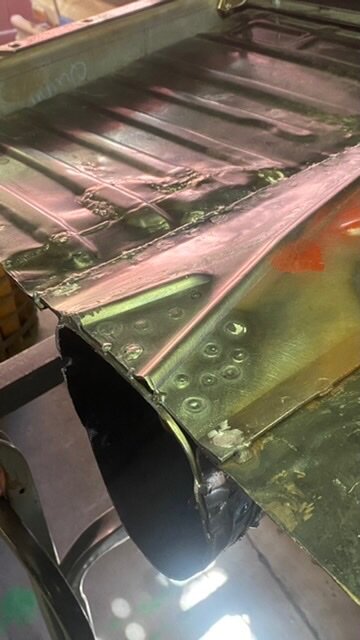
I got the shifter rod back in the tunnel, and the coupler on. Then I put in the new rear brake line. This pre-made line fits a stock Volkswagen bug but it will also fit my car. It comes straight. I have to bend it myself. My dad bought these tubing tools when we body-swapped the Scout in 1974. They do come in handy. I drilled a 1/2” hole through the frame closure, just below the throttle cable housing. That tube has to make a literal corkscrew. And there it is. I first made a bent wire model of this, then one from scrap tubing. Finally the full tube was installed and bent. I panicked when I first looked at this (inverted) photo, because it appears that I have kinked the tubing (!) but this is not true at all. I just happened to shoot it from a funny angle. Bends on the other end will have to wait until the master cylinder is installed. Next I have to put in the new fuel line.
-
I never actually met him. He was just one of the guys on the Kawasaki Nomad forum. Or maybe the Vulcan Baggers forum? Delphi? I don’t remember… It’s been almost 20 years. Also, my wife made me take her to Hollywood once, but I don’t give a crap about movie stars. I’m sure some of them are very nice people, but as an engineer I have very little in common with actors and singers and dancers. I used to hang out with people like that when I was a kid back in the 70s. There was a theater group and I worked with some of them that had “day jobs”. I was a roadie for a semi-famous country rock band. Okay they did release one LP, but you wouldn’t know it. Those guys all want their privacy now and we don’t socialize, so I don’t talk about it much. Theater people and show people are very different from me. It was like freaking Peyton Place all the time around those people. I never wanted a intimate relationship with any of them. I’d prefer people who know how to plug a tire or find a faulty ground wire or design a sound system, or a computer, or a stylish roadster. Why do I take the time to rant about this nonsense? I think it’s because my wife is just the opposite. She is gaga over celebrities and spends a lot of time watching their antics on the television. So what happened to all the people from the band? One by one they: One died of a heroin overdose. One smashed into a truck and died, drunk driving. Gave up music and went to work for a supermarket. One’s car ran off the road in the snow and he smashed up his face. He gave up any public appearances. One went back to college and became the curriculum director of a small local college. Our female singer retired from music and married a certified public accountant. One became a Xerox machine repair man. He was the guy I used to hang out with. And one of them (the last time I heard) was still playing guitar professionally, as a hired studio musician in SoCal.
-
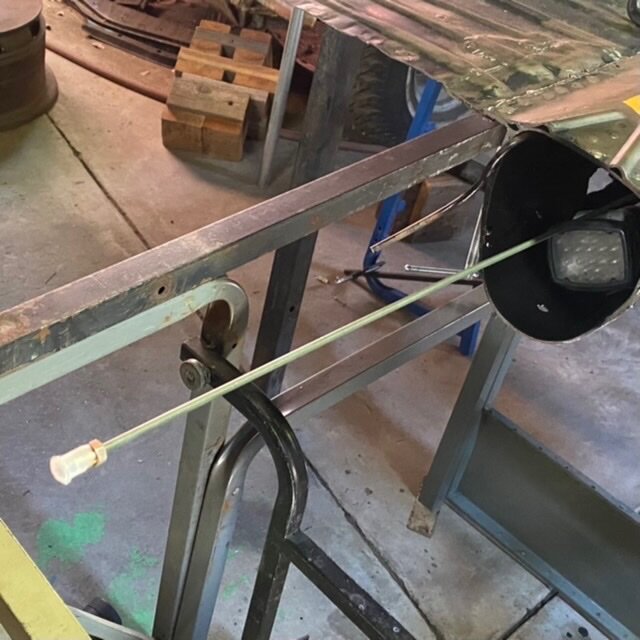
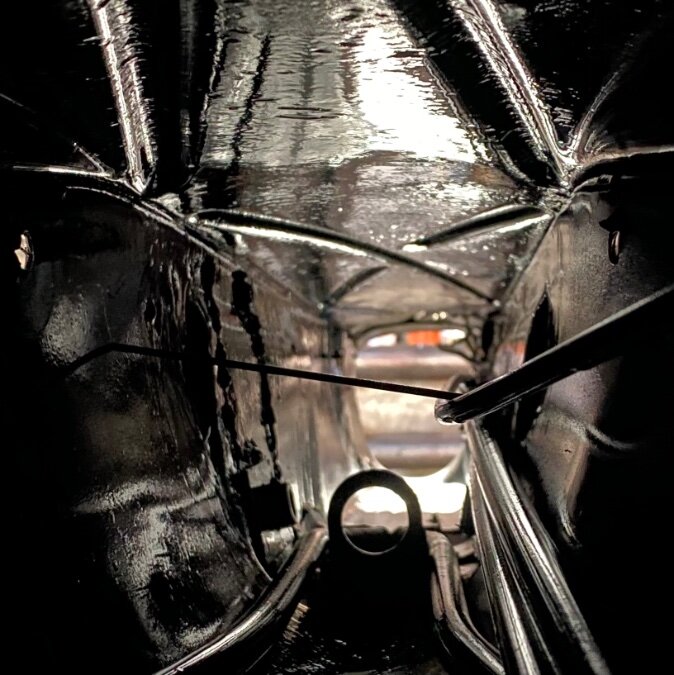
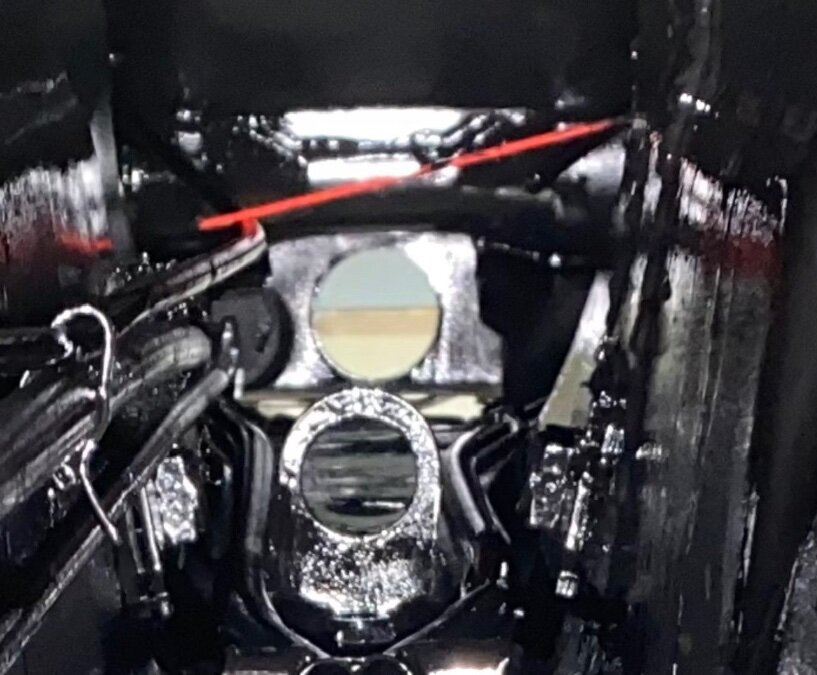
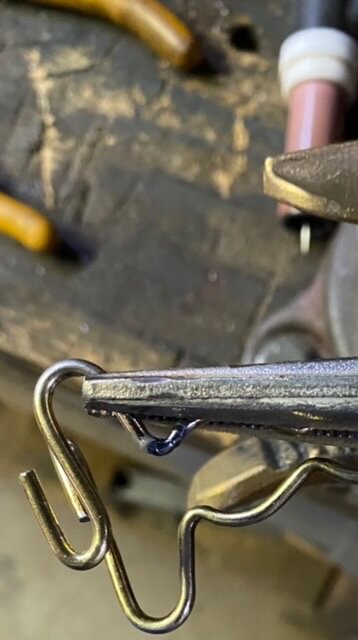
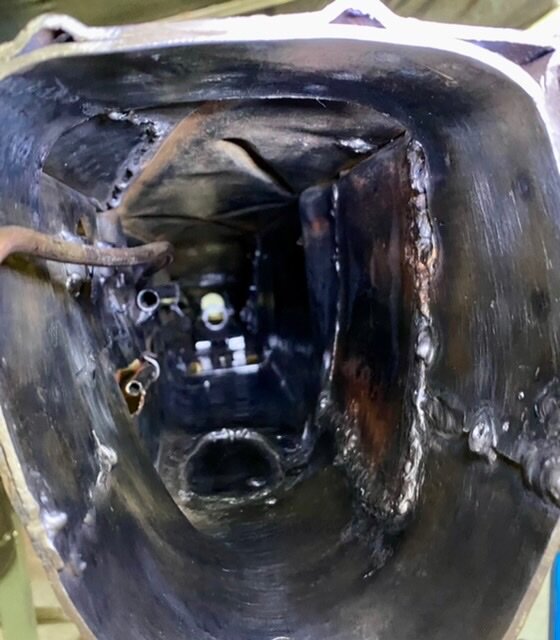
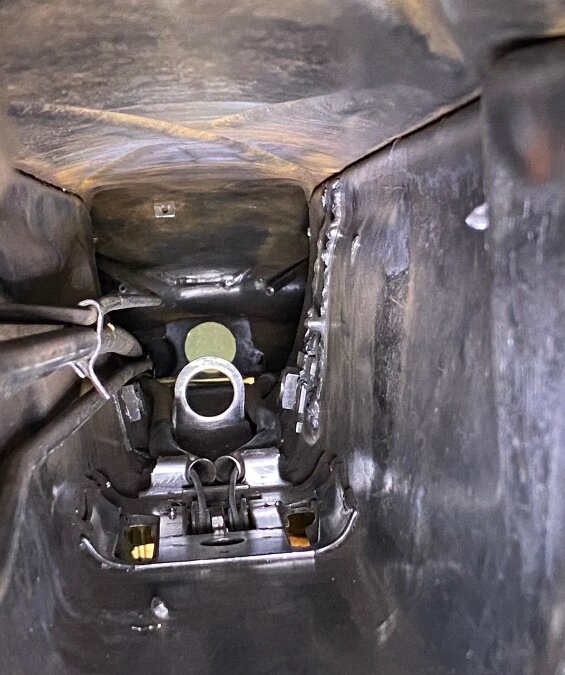
Today I waited for prime painting temperatures, after 9:00 am, then shot a quart of rust-converting paint inside the tunnel, from these magnum spray cans. Small cans might have been easier. By noon it was 100f so that paint is curing desert-style. From the rear: I was putting a lot of rust-converting paint into the pinch weld seam, with the nozzle & the red tube from a can of WD-40. There were strategic holes for seat belts etc that I used to work that in the middle of the tunnel. Also I taped a can of paint to a long tube, with a trigger rigged using welding wire. I stuck this into the tunnel to get half the paint on. I was finishing up the last can and I shot that red tube right thru a hole in to the tunnel. I decided to let it all dry in there before I try to stick my arm inside the tunnel. From the front: I got 3 heavy coats of black paint in that tunnel, but it looks grey in some photos. A fellow in our motorcycle forum shot the WD-40 red tube into the cylinder of his motorcycle. He recovered it with gum and wire, but his nickname foreverafter was Redtube. So . . . Please do not even think of it. It’s already been taken.
-
Years ago I gave up on the idea of a modern V-8 in the ‘47 because of the mopar parts situation. Someday I will put the Dodge 230 in it with the OD 3-speed. I let 3 V-8 donor cars** go back in the 00’s, because of social problems. Sic transit gloria. ** A Lincoln, a Plymouth, and a Cadillac.
-
It helps to be cheap too. There was a big window cut in the tunnel by the shifter, and I finally dressed off the lumps. I used a worn disk from the angle grinder, on a 30” long 5/16” rod, chucked in a high speed pneumatic die grinder. It was a bear to control, but at 10,000 rpm it snagged off the weld in record time. I got it all blown out, vacuumed out, and wiped out with solvent. This AM, I finally shot some rust treatment inside the tunnel. I’m finally done with sanding and brushing in there. I started spraying a rust-etching satin black, but it got too hot to spray. It still needs 2 good coats of paint.
-
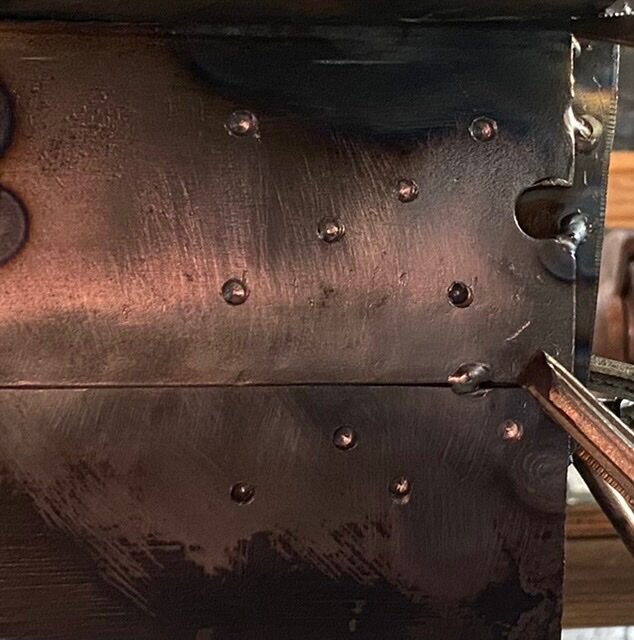
I can’t believe I plugged in the welder and turned it on and set it up for this. Zit-zit and it was done! That little dot is about the smallest weld I have ever made, and it’s a good one.
-
We censored the word ****? What is this kindergarten?
-
“TDY to the middle east. Can't win them all...!” Yeah, you got zonked. I never volunteered for any of that 3rd world fiasco. Anyhow, we have a lot of idiots with money, who will toss it at anything labeled antique or vintage. You should see what $$$ someone recently paid for a fossilized t u r d. You could feed a Zoo!
-
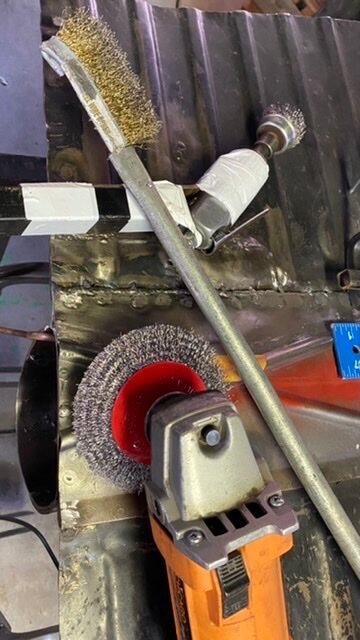
BTW kids, don’t ever use an angle-head grinder or die grinder with wire brushes, like that, in the open! The 4.5” wire wheel and no guards will pepper you with sharp wires and rust. I was working with one arm up the tunnel, so the tunnel was my guard. I was wearing a leather gauntlet, but still took one in the bicep. Shoulda worn the leather sleeves too! Also, I did NOT try to look at this process! I was essentially working blind, so I wouldn’t go blind.
-
Nope. No paint yet. I had other chores, but I did get 99% of the tunnel brushed out in another round of rusty fun today. It’s pretty good save a few rusty corners. The back end is pretty good too. This device was essential. And before you ask, Yes, I have seen at least 200 episodes of Red Green. Death Wheel 10,000 and the Implements of Destruction.
-
No heaters are needed. No defrosters. This is a sunny day car. By dumping the heaters I trimmed 35 lbs of the tail of a tailwagger. It has a heavy VW multi-speed wiper motor. It weighs more than a Toyota starter. I may dump that too. Today I made some longer rods & scrubbed rust from both ends of the tunnel, plus up from the shifter hole. I got farther than this, but it still needs work. Maybe by Wednesday it will be ready to paint.
-
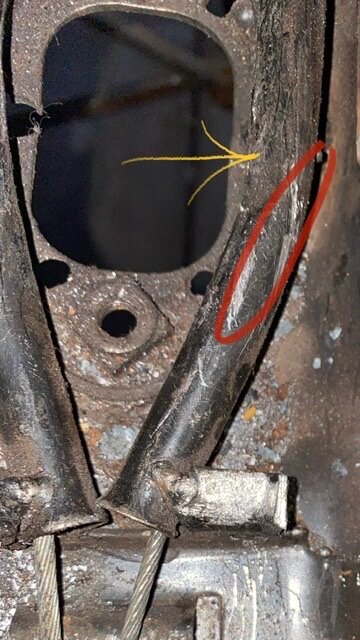
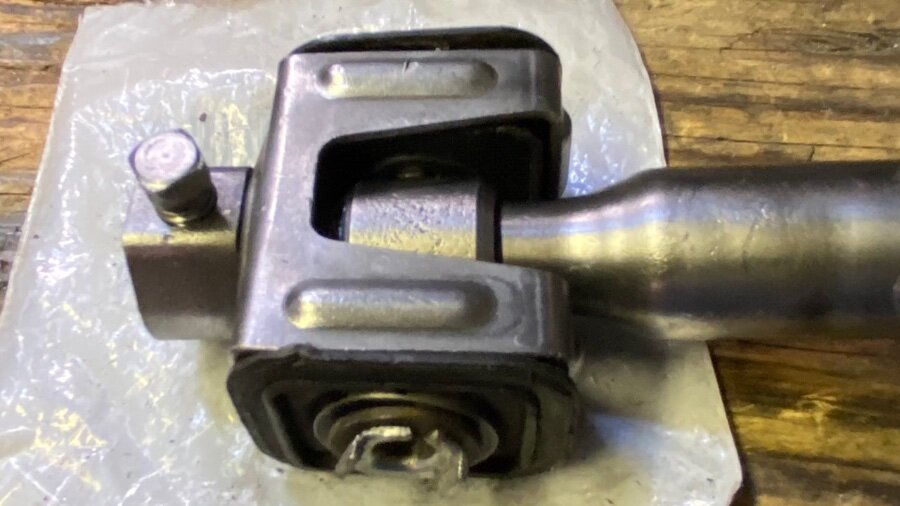
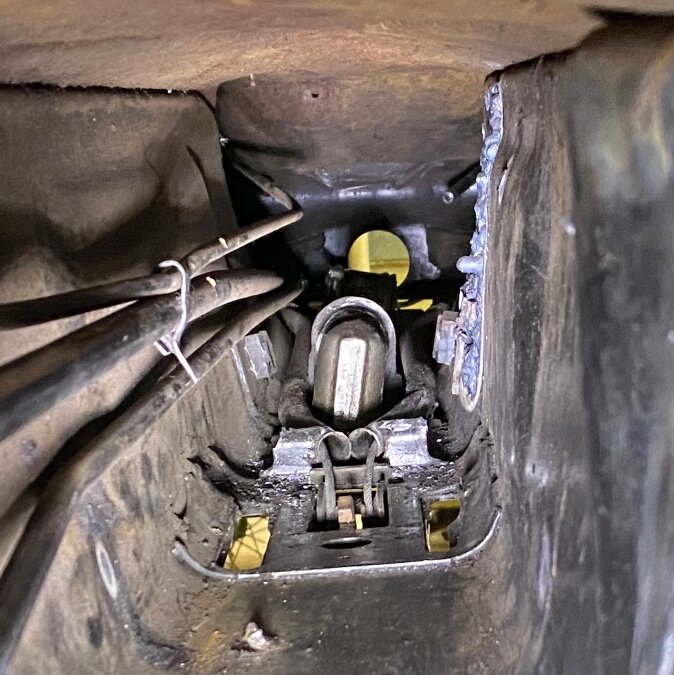
I got the coupler all burnished up, and the rubbers and screws are still nice. I also found my new shift rod bushing & it fits. I spent some time cleaning inside the tunnel, and it is looking better. I could not remove the parking brake cables though. I wanted to patch out the guide tubes with Gumout, but they were modified crudely. They are both bent sharply enough to clear the relocated shifter (at the yellow arrow) that these cannot come apart unless I cut the cable ends off. Then I will have to straighten them out and buy new cables. These cables came from two different cars and do not appear rusty, frayed, or damaged. I thus declare they will last the life of the car, and do not need repair. I will flush them with solvent and cable lube, then seal them up with tape before I continue sanding and brushing the rusty tunnel.
-
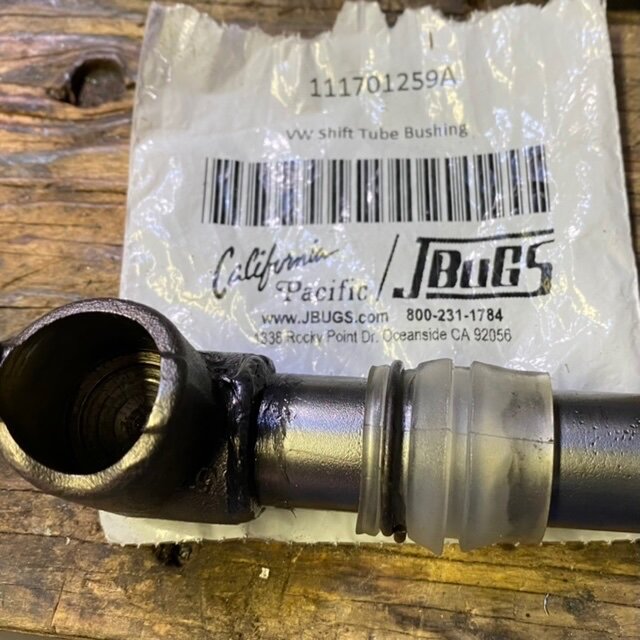
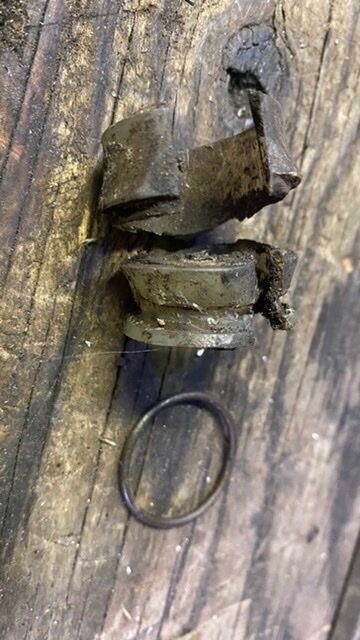
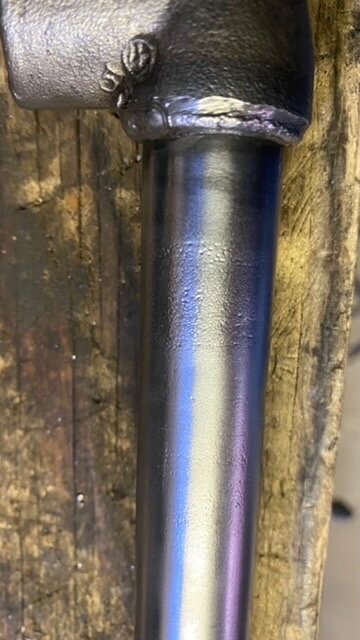
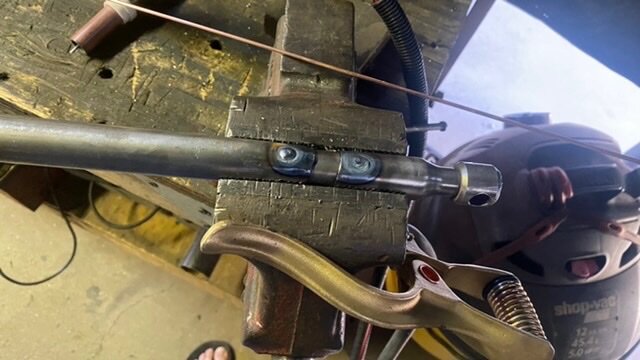
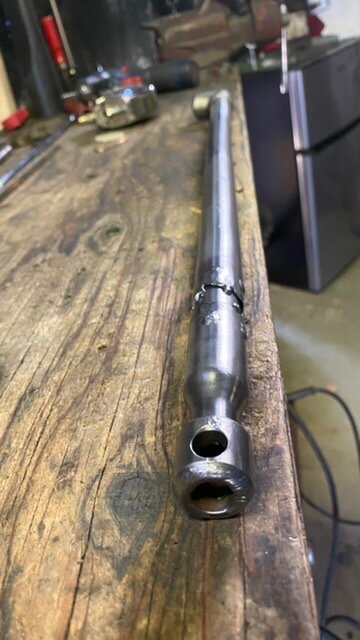
I had to fix that horrible shift rod. The plastic rod bushing is like a grommet with a wire clip. About $3 each. I bought a new one last year. This clip was too tight & the plastic was split long years ago. The area under the bushing was pretty rough. I have burnished it mercilessly. It will be OK with some grease. Not only was this old welding awful, it didn’t make the rod strong. It was quite crooked here and yet it straightened up way too easily. That’s what happens when you put all the welding on one side. I ground off the blob neatly, straightened it in the vise, and drilled for 8 plug welds into the slug. Much straighter now and 20x stronger.
-
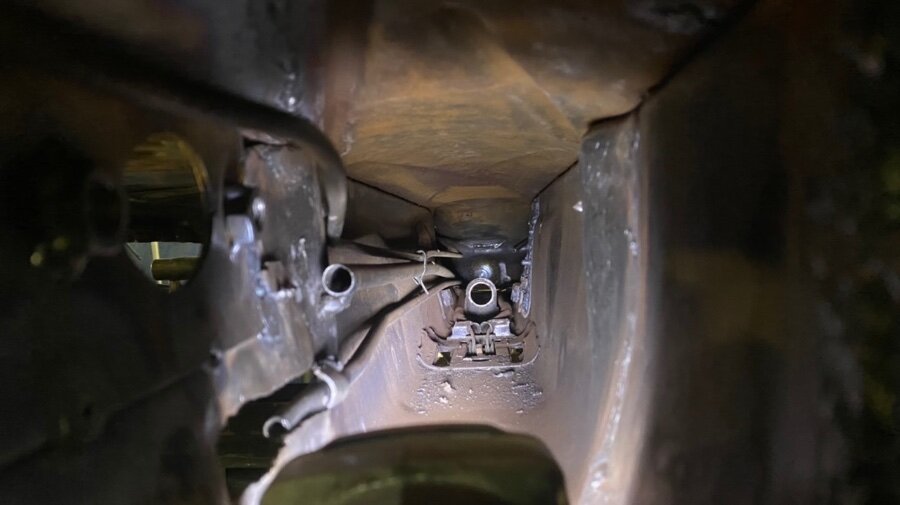
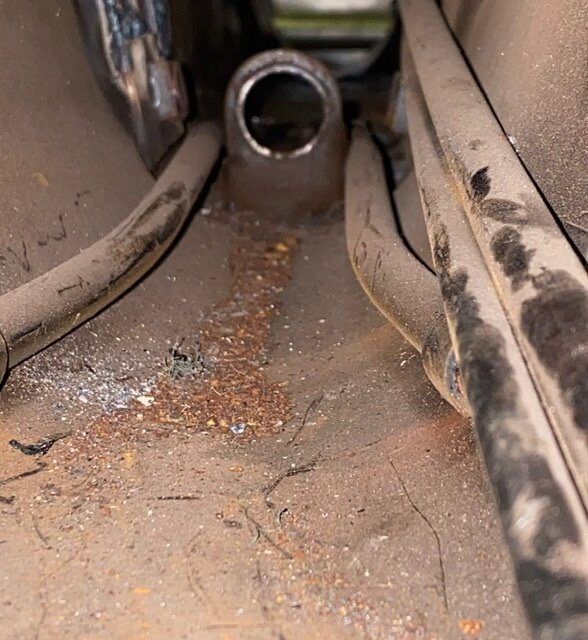
Today I finally got the accursed shifter rod out of the VW tunnel. The rod was shortened with a steel slug welded in. A bit. On one side only. ;( Clearly this was done while the rod was inside the car, perhaps because they had already assembled it all too far. The whole front suspension suspension adapter would have had to come off to get to the access port on the front of the VW frame. Or maybe they made it too long and had to mod it so the car would shift correctly. Who knows? The good news is that I have a new bushing and this good German rubber coupler assembly. Once the shift rod has been removed you can see even more clearance inside the tunnel. Also you see this little gun site which is where the plastic shifter bushing is supposed to remain. Because of the lumpy welding arrangement it simply could not happen and that was that. Looking inside from the back of the chassis I can see that there really is very little rust on the bottom of the tunnel floor. It is only superficial rust because of this drain hole that let the water run out back here. This is looking really good. After all of the vacuuming and hose washing and air hose blowing and more vacuuming and turning this thing practically on its head, I was very surprised to see that there are still some remains of mice nests inside the car. This is probably stuff that was caught in the seams and I vibrated it loose when I took a pneumatic muffler chisel to the steel.
-
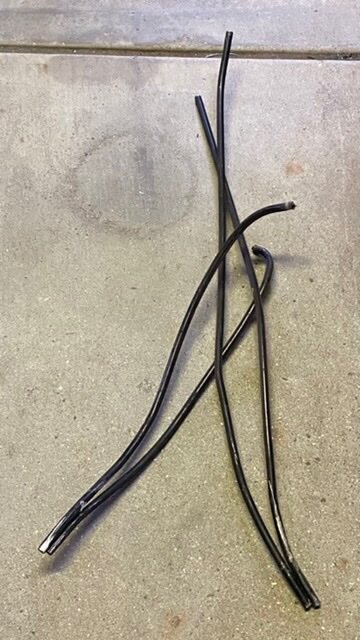
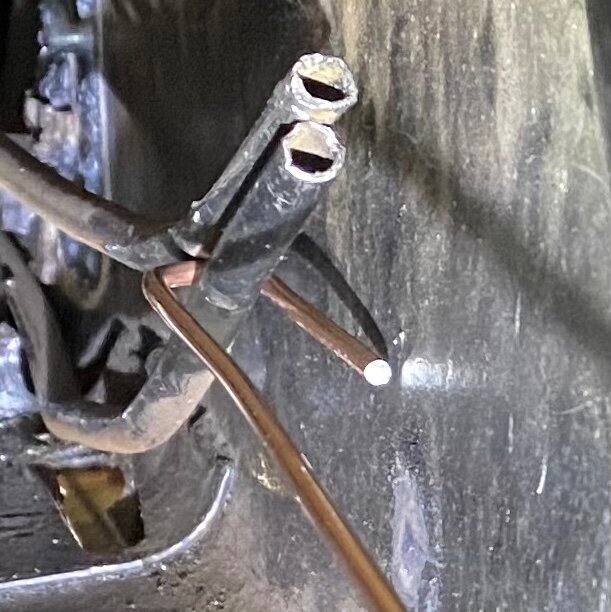
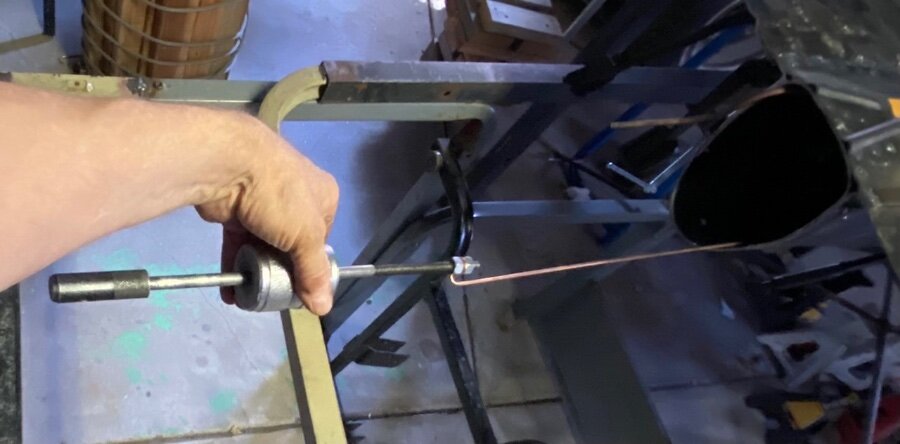
Today I got all 4 remaining heater control tubes out of the tunnel. I was glad to see them go. They didn’t leave willingly. The welds were larger on the 2nd set. I made an improved Polish sawzall, which eased the cutting somewhat. Once I broke them loose, I had to hook them with a heavy wire. Then I drew the pairs out with a small slide hammer. It took a little knocking, because they had to straighten up somewhat to clear the tunnel. Wow…..look at that room! Now I can finally clean this mess up. Eventually I must get the brake line and new fuel line in here, but first some serious rust abatement.
-
“It’s a dry heat . . . .” I have large aquariums, pumping 425 gallons of water around 24/7/365. The humidity here is so low, that even with all that going, static electricity is an issue.
-
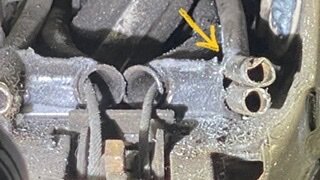
Well that didn’t work. I had to saw. I really had to back off from my chassis setup, to address several minor chores, which I have foolishly neglected. I dressed off the ragged end of my clutch cable guide tube & patched it out with solvent and paper patches. It took about 3doz times before it was clean enough. There you can see the raggedness around the accelerator cable guide, which still needs dressing. The VW tunnel has a rat nest of shift rod, fuel line, and 10 control cable guides. I only need the parking brake, clutch, gas & fuel. The six heater cable guides needed to go. In the photos, two are already cut out. There is a notch at the arrow, where I have nearly cut these 2 tubes loose at the welds. The same bracket holds the parking brake cables you see, so I had to to go carefully. I used my Pakistani Sawzall to reach in and cut these 4 tubes loose. By hand. This was tedious, but accurate. The genuine Milwaukee blade made it happen. The other tube ends were welded thru the tunnel & I have one drilled free. One I have cut loose from the other end of the tunnel, by reaching inside, with a mini tubing cutter. It was about 112F in the boatyard, and I had to quit before those 4 tubes were all removed.
-
I took all the frame rails down again, to trim some more floor. In the process I decided to do more work in the tunnel, now, before all the welding. I want to remove 4 more heater cable guide tubes, and they will just be harder to access later. One end of each tube is welded thru the tunnel, and all are now plugged with sealant. I can drill those out. The forward ends all terminate on a small doubler, below the parking brake lever. I will make a tool to reach in the tunnel, twist, and snap the spotwelds. Then I can really clean the tunnel out. It will all be harder than it sounds.
-
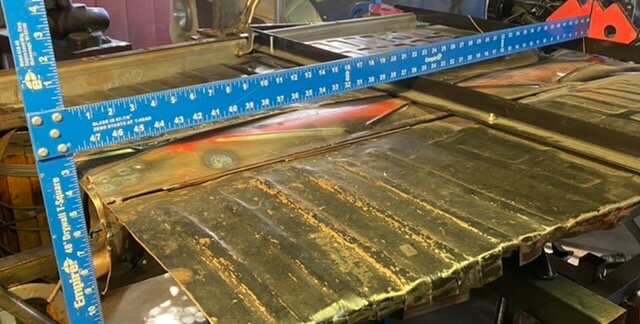
I built the trammel, and I find that I’m off over 1/2” from corner to corner. (I thought it would be much worse!) I need to take some more diagonal measurements, but everything thing else is pretty much possible with a tape measure. Then, Back to the marking and trimming.
-
I am having great difficulty making the cross corner measurements I need, accurately, to get this car square. So I have decided I could build a trammel. Over 12 feet long. Fortunately it doesn’t have to be industrial and last forever. I have some lovely light gage painted tubing I can use. Lots of junk.
-
I am going rather slowly, as I can’t make a racket before 8am and before noon it is 100F out in the boatyard. Not unexpected. This heat happens every year in the desert. But also, I’m not facing some artificial schedule. If I survive long enough to finish it, well, that’s the basic schedule.
-
Today I am down to the part of my chassis mods that I have dreaded. In order to trim the floor I have to assemble the weldment and then mark the interference points and then disassemble it and then trim. Then I have to do the whole thing again and again: disassembling and trimming, and assembling and marking, until I get the whole thing to fit. The good news is that after several rounds of this it is almost in alignment. Just a few more trims and it will be ok.
-
I tried to square up the tunnel enough for a test fit of the crossmember. I quickly trimmed off the collar, over 1/4” at the top, and then spent some long hours shaping the lumpy seam weld and spot welds.
-
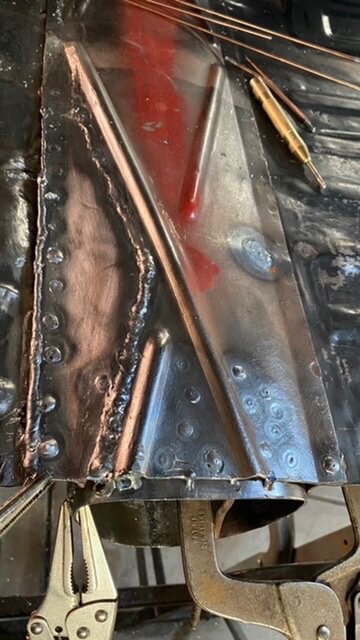
I got the long seams on “top” welded, but there was still contamination in that old steel. I drilled out a dozen spots that “popped” because of oil and rust specks coming out of the pores. Anyhow there’s a lot of stops snd starts snd it looks like crap. We will see what I really have once I grind it. I did this without backup bars, except at the collar, and the exposed backside looks better than the top. I did all the top plug welds to the collar, and patch-to-patch plug welds. I drilled for all the side plug welds, then didn’t do them. I realize I should have bought that harbor freight spot welder so I wouldn’t have to make “hanging” plug welds. Not overhead welds, but still past vertical. It might be a challenge. So the sides of the collar only got one plug weld each from the inside, and a few tacks. Those and the long side seam weld might have to wait until I can roll the frame again. There’s no sense doing out-of-position welds if I can put them off without danger.
-
Here it would be black widows slowing you down, but our new house is slab-on-grade, so no crawling under.


