-
Posts
130 -
Joined
-
Last visited
-
Days Won
1
Content Type
Links Directory
Profiles
Articles
Forums
Downloads
Store
Gallery
Blogs
Events
Everything posted by Kai-by-Vecona
-

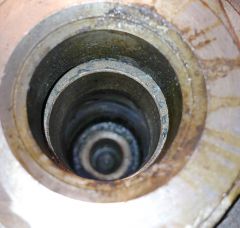
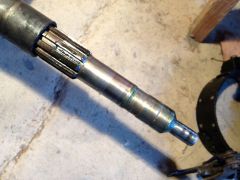
Fluid Drive Runner Bushing Rear
Kai-by-Vecona posted a gallery image in Individual Member Photo Albums
From the album: Clutch
-
From the album: Clutch
-
Hello Shel, I compared your picture with mine and it gives me right what I guess about the degrees. I was not sure if I read the marks correct 'cause the only number I could read was the 10 BTD. This should help. Thanks
-
Hello Greg, thanks for that advice. That's a good idea. I never heard that the pulley could slip but to find TDC on this way and mark the damper by myself could help. The engine runs pretty good so I would keep it in the car. I never saw a pulley with vibration damper anywhere for sale. Think this could be difficult to repair. Sending the damper to the US and back sounds like I should do it as fast as possible if I want to drive with the car next spring :-) I go and have a look ad the company you told me. Thanks again Greg Kai
-
Hi all, in my 42 Dodge is a 1950 230 Engine. Now I tried to have a look at my ignition but I have some problems with the marks on my damper. Because I didn't see anything I tried to get the marks better with a little bit of chalk but besides some marks I only found one number what seems to me like a "10". If this is right the other marks might be these degrees. Am I right or am I completely wrong? Thank you in advance Kai
-

Rainy Sunday and 20,- $ clock face rebuild
Kai-by-Vecona replied to Kai-by-Vecona's topic in P15-D24 Forum
Sorry! ASR is a german shortcut for "Antischlupfregelung" what means the car isn't able to make any burn outs. (WTF) When I look at any car sale page there are only three letter shortcuts which I think non of it is really neccessary to drive a car. By the time, I think they try to make these cars as safe as possible what only lets to the fact that everybody drives like hell because the GMG (get my guardian angel) will automaticly be achtivatet when the car has an extencive LOT (Loss of traction) because all of the ESPs ASR, TCS and ABSs won't help if you take a turn with too much speed. I would say, if everybody would take a ride in our cars, everybody would know, what 60 mph really feels like. My son has a BMW 325. When you drive the car with 140mph on the autobahn it's like sitting in a sofa and wach a DVD of a road movie. You totally get loss of a feeling for speed and mass inertia. HGE Kai (Have a great evening)- 16 replies
-
- clock
- speedometer
- (and 5 more)
-

Rainy Sunday and 20,- $ clock face rebuild
Kai-by-Vecona replied to Kai-by-Vecona's topic in P15-D24 Forum
Hello Hendo, :-) If nobody sees that it's self made the job was fine. More confusing were the words of my sons girl friend (17 years old) "How is it possible to drive a car without ASR and ESP?" If you have to answer these questions I don't know if they could appreciate the work at the clock :-)- 16 replies
-
- clock
- speedometer
- (and 5 more)
-
Hello James, yes I tried, but it had no effect. The needle turns very easy.
- 26 replies
-
- Speedometer
- odometer
-
(and 2 more)
Tagged with:
-
Hello Marty, wow! You had lots of luck. I could imagine what surprise this was. When I pull out the transmission I will be wiser. If I do so, I will change all the clutch parts. As far as I know there was never done anything to it, so it's good possible that it's worn or maybe parts from the clutch are loose and make contact.
-
I did that when I adjusted the spring. The mechanic looks great. I can't explain. I thought about making a new speedometer face that suits to the needle. Seems to be easier ;-)
- 26 replies
-
- Speedometer
- odometer
-
(and 2 more)
Tagged with:
-
Hello Don, I tried this several times and did it the way you describe and it is grinding in first and reverse. I adjusted the free play and nothing happend. It's still the same. I can't explain it to me just that something must drag between clutch and plate. I think I only could solve that problem, having a look at the clutch.
-
Good point. I think clutch parts and the bearing are not a problem to get...
-
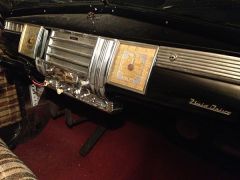
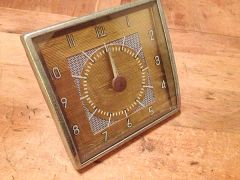
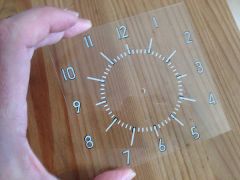
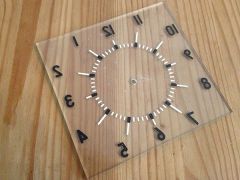
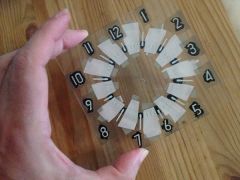
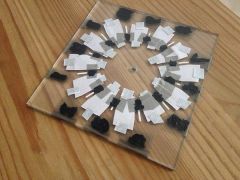
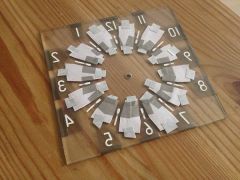
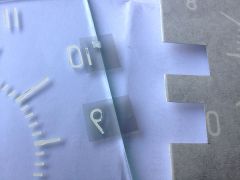
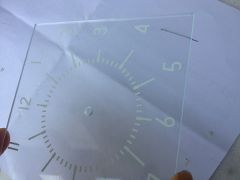
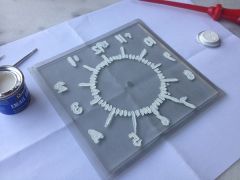
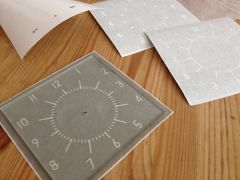
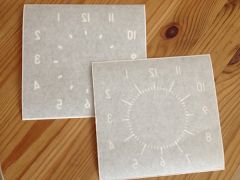
Hello all, as I got here lot's of great tips I maybe have one for you. When I bought my Dodge, the speedometer and clock were really destroyed. The printed surface was deteriorated and also the printed letter of the clock and speedometr face dropped off. When I decide to restore it I tried several ways like screen printing, or find somebody who does this professional but it would all be too complicated or to expancive. As a result I will show the way I did it maybe it helps somebody. At first, I took the old clock face and layed it on the scanner of PC. After scanning I reconstructet the letters in Adobe Illustrator to create vector grafics. I made two layers, one for the white print and one for the black. I gave both files to a printing shop to plot too masking films. Better make two or three of each, you will use them propably. At first pull of release paper and stick foil to the glass. I let the glass cut in a local shop. Markings on the foil help to find the exact position Now pull off transfer foil and paint the letters and stripes. After a few tests I use color for scale models. It adheres better as glass paint, but don't ask me why. Because of the flat surface paint doesn't stick very good to glass, you have to pull of the masking film before color ist completely dry. Sometimes, if the color was too dry or it doesn't stick well to the glass, the edges of some letters are not straight. If you have a second masking film cut out the letters and stick it to the exact position to repaint the edges. If the first color is done, you have to make the black outline. That is even harder because the line is smaller then one Millimeter (sorry for the metric system :-) I found out, that you can't use the complete masking foil to stick over the white because of two reasons. 1. If you pull of the release paper, the masking foil seems to stretch a little bit. It's not much but it's enough that the tin lines won't fit 2. The masking film will rip of the thin white lines. To avoid that I took small pieces of masking film and normal paper and stick it over the thin white lines. Then I took the whole glass and glued it against a window with masking tape. This helps you to position the masking foil for the numbers because when the numbers are still on the transfer foil you really cant't look though it and it's difficult to find the right place. If you're finished, it lookes like that: Now I took black enamel paint for the outlines. Check from the other side if the lines look good and pull off masking foil quick befor color gets too dry. The finished clock face looks pretty nice. On the first look, you can't differ from the original. When I had a closer look to my old one, it wasn't sooooo exact either. Hope this will help others who have the same problem. The background I also made on Illustrator. I printed the pattern on a foil and the golden foil is aluminium foil to make christmas stars from a hobby shop. I layed it on a ripped plastic surface that I found on an old plastic casing and pressed the foil on the plastic with a rubber roll. Then I took glue and sticked it to the foil with the pattern. This really is just a compromise, because the ribbed structure ist not so fine as original and also not so exact, but it's doing it's job. Also the car istn't perfect the clock might ot be perfect too. Here in Germany we have to show Kilometers on speedometer. Normaly you have to glue stickers on the screen. When I was rebuliding the speedometer face I changed the letters into Kilometers :-) I did this to my 42 Dodge an still have the files. If anyone ist interested I could send them the EPS-Files. Hope this helps Kai
- 16 replies
-
- 4
-

-
- clock
- speedometer
- (and 5 more)
-
From the album: Clock Face
Finished! -
From the album: Clock Face
Put it all together -
From the album: Clock Face
Look if everything is ok if not correct bad edges -
From the album: Clock Face
Remove foil securly -
From the album: Clock Face
Have a look if all edges are colored -
From the album: Clock Face
Pull off transfer foil and paint black -
From the album: Clock Face
To prevent white color to rip of with masking foil make masks from paper and stick to glass -
From the album: Clock Face
If nessesary take masking foil and corrct white paint when color went off together with masking foil -
From the album: Clock Face
Pull off masking foil -
From the album: Clock Face
Remove transfer foil and paint with white paint -
From the album: Clock Face
Step 2: Put masking foil on glas. -
From the album: Clock Face
Step 1: Go to a print ship and plot the files on masking foil


