-
Posts
533 -
Joined
-
Last visited
Content Type
Links Directory
Profiles
Articles
Forums
Downloads
Store
Gallery
Blogs
Events
Everything posted by Lloyd
-
Ive had blown head gaskets that acted just like that. I know you replaced the gasket but has the head been checked? May be uneven, cracked or even a crack in the block. Few things to check, color of exhaust smoke will be white, oil may be contaminated with water making it a milky looking color, water on a spark plug, oily mixture on bottom of radiater cap. Since the engine ran well cold then idled rough at 200 a compression check before and after the engine has warmed up can help as well.
-
I put all new brakes only 39. Granted it was a stock master cylinder but had the same problem. Looking into the reservoir I saw a small hole I believe was the fill hole for the piston cavity. Noticed that the piston rubber was blocking the hole. I loosened the brake pedal rod adjustment so the piston retracted past the hole and brakes started working.
-
Says no returns Rich. You buy it you own it. Heres a a good story. I was rebuilding a E7T2 carb. May have misquoted the number but it’s the bigger bore carb. Had everything but the correct main metering jet. Asked a guy on eBay trying to sell some NOS carb kits if he might have one. Got back to me said he did have it. When I inquired as to the price he said don’t worry about it. About 4 days later I got it in the mail. Sad thing is probably be someone just getting into his first restore just don’t know any better. Unless it’s deep pockets and just don’t care like Tim mentioned.
-
I always thought mine was running a little hot at about 190 but found out from other members on this forum these engines run like that. I haven't really driven it yet so that will be the test. But if you are still considering an electric fan make certain your generator can handle the extra amps needed. The fan will be running full speed at an idle. I don't know what amps these fans pull but it’s an added load for sure. If your thinking of adding a sensing sensing unit I would suggest somewhere on the thermostat housing. Perhaps inline with the heater hose that connects to it. It’s been a while but something I toyed with was adding/fabricating a shroud and swapping out the fan with something like this: https://www.summitracing.com/parts/aaf-all30103/
-
My 39 has the humped back and the cable shifter.
-
Hey Andy. How you been? car looks great! Using lacquer never even occurred to me. I used urethane. Base then clear. And yep I had a mask, gloves and paint suit. Ventilation in my garage was a problem. I got two doors so first time I closed the opposite door on two box fans blowing in and cracked the bottom door on my ‘paint booth’. Used a mini gun on the door jambs so they weren’t bad at all but first full spray with a HVLP full size gun it was OK with the base but lot of overspray during the clear. Second time I just opened both the doors all the way no fans at all. Glad you brought this up because that’s something else needed for the DIY using urethane is a decent paint booth and ventilation. If I decide to do it again I’ll take a look at lacquer. Be another year or so I think. Like I said, this has surely been a learning experience. Thanks for the tip.
-
I work on a boat. That’s an old saying but every time someone says it the next thing said is “what color is the engineer?”!!
-
Thats probably the safest - and maybe in the long run - even cheaper bet.
-
Thanks Casper. I'll check that out.
-
The vacuum advance is usually ported below the throttle plates. I think later models moved them above for emissions but the BB carb is below. At idle you have high vacuum but a lean mixture which takes longer to burn so the spark needs to be advanced to insure a complete combustion. I know that later model cars tried moving the vacuum port from below the throttle plates to above the throttle plates. This was for emission reasons. What they were trying to do was get the exhaust temp up so it would burn the combustibles from the exhaust gases better. What it did was increase the exhaust temp and the vacuum advance no longer worked at an idle which meant hotter exhaust train components and a worse idle.
-
Dont know if the 39 will do the same speed. The 39 came out with a 201 original motor. You have a 50's dodge truck 230 in your 36? I got my 39 with the original 201 engine but I never drove it. Had a rod knocking. I got a 1950 218 and stroked it with a 230 crank.
-
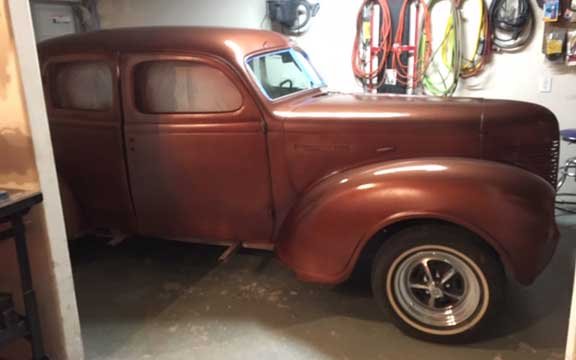
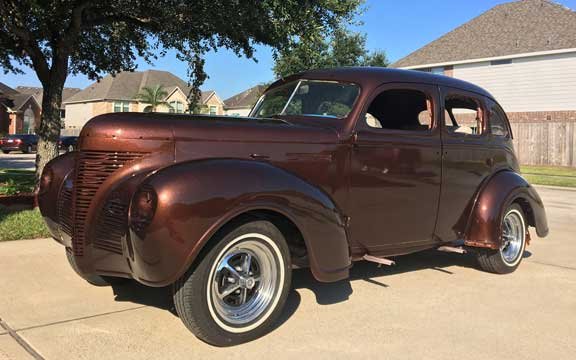
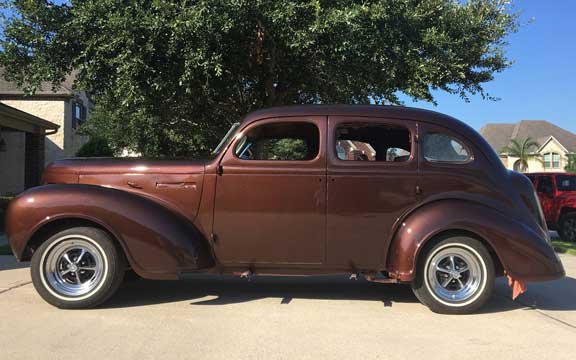
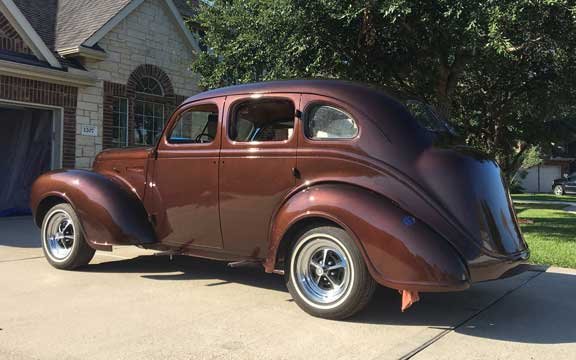
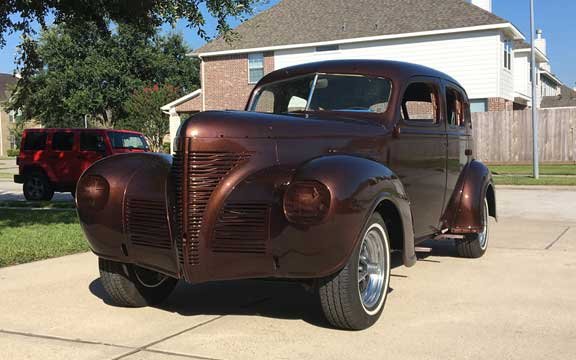
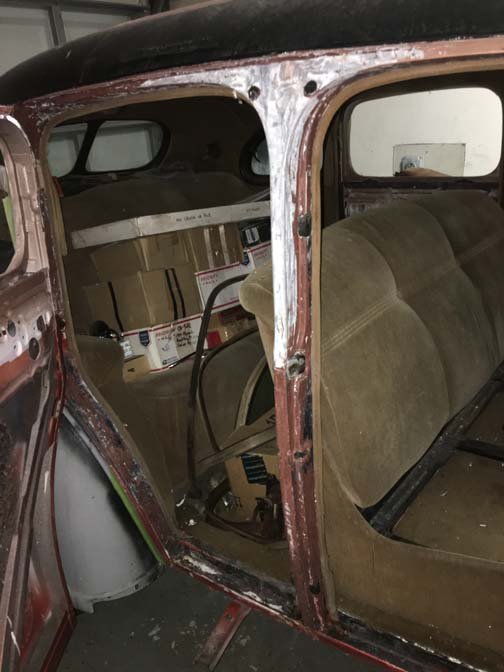
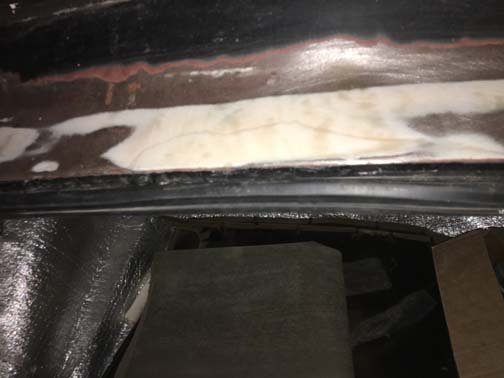
Been gone for awhile, Ive had my head stuck into this paint job on my 39 and its has been a hand full. I started this paint job months ago and it has been a learning experience from the beginning. Mostly about how much I don't know. I think if using just a solid color it probably would not be to hard but if your talking candy, pearl or even metallic its a whole new ballgame. My first plan was two tone, light tan on top and a burnt orange on the bottom both metallic paints. Then I was going to cover both with a candy tint. Started with the door jambs, painted top, taped off and sprayed the bottom, looked pretty good although the edge was harder then I wanted, then I sprayed the candy over both. This is when I found out candy has to be applied really even and consistently. Its a tinted clear and anywhere its applied heavier then its darker in those areas. In another words it needs to be applied by someone that has a lot of experience. Figured out there was no way I could spray the entire car using this plan. So I decided to stay with the two tone and then cover both colors with pearl mixed into the clear coat. Sanded the door jambs back down then repainted the two tone, then cleared with the pearl. Once again, pearl has to be applied very evenly, I cant do that either. Plus I'm having trouble getting the soft edge between the two colors and on my 39 where the chrome ends behind the rear door I need the colors to meet at a soft edge. Thats going to be a problem as well keeping that consistent. So enter the new plan, a solid color metallic. I wanted a dark copper color but could not find one I liked except House Of Color and that was to expensive. I've been using Kirker paint products from Auto Body Toolmart. During my paint research I came across a forum where they were saying that Eastwood paint is Kirker but rebrands it. Looking at Eastwood I did notice the MSDS and application/mixing directions were identical to the Kirker paints. What I decided was to get a dark brown metallic (Bourbon Brown) and then mix some of the burnt orange (Atomic Orange) into it - 2 parts brown, one part orange. Worked pretty well and I had a great looking copper. Sprayed the whole car with two coats base and clear each. Looked great in the garage but when I pulled it out into the sun, nothing but splotches, tiger stripes and orange peel. It looked terrible.. Metallic is hard to paint to.. So I sanded the door jambs, DA'd the entire car with 800 grit. Did not take it all the way down, just removed the gloss. Then I tried it again. This time I was about out of the orange so I used what I had left and bought another full gallon of the Bourbon Brown - it measured out to be 1-1/4 cups of orange. Didn't lighten it to much but I could see it in there. Two base coats and two coats clear. Darker brown then what I wanted but the real problem this time was orange peel, real heavy and a lot of it and I still had a couple light spots. I did not use a reducer because the directions said it wasn't needed. I used a medium activator and the clear is high solids 4/1. So I sanded it back down, resprayed the lights spots then went over it with 3 coats of clear this time using a slow reducer and slow activator. It laid down a LOT better except for some dirt nibs and a couple runs. I'm done painting.. Not really the color I was shooting for and its a bit more pearly then I thought it would be but thats it.. Gotta get back to my real job but next time home I'm going to color sand and buff - never done either one of those before either - then put it back together. If your thinking of painting your own car and like me never done it then I might suggest not jumping straight away to some of the more exotic effects like candy, pearl or even metallic. It takes some practice to get those on and look decent. Its a lot of work to get it all painted then sand it all back down. If you don't want to turn it into a major project then it might be better off paying someone to do it for you. I learned a lot about painting a car, mostly its not all that easy. But I wanted to paint it myself and I'm glad I did. Maybe later on I might try it again but right now I'm moving on. Color sand and buff, then put it back together. Ive got the headlights, tail lights and some fog lights to install and get working plus a turn signal. The brakes are a little tight and transmission linkage needs adjusting. Then I'm going to try and get some tags for it. Also got a cracked window on the front passenger door. I'm hoping I can find a place to get just one window and not have to buy a whole set. Posted a few pics, first one is the original copper. Thats 2 parts Bourbon Brown, 1 part Atomic Orange. Other pics is the color I was left with, 1 gal Bourbon Brown and 1-1/4 cups of Atomic Orange. .
-
You can swap it to a floor shift but will have to change the top plate on the transmission. I wouldn't expect it to be necessary unless you would rather a floor shift. The cable shift works fine and adjustment isn't hard at all. The real problem is if you decide to put an overdrive trans in it. 39 was the only year that I'm aware of that used the cable shift. Most overdrives are set up for linkage shifters, except for the elusive R6 OD. So if you decide to go to an OD you will have to swap to a floor shift or -- change steering columns if you want to keep it on the tree.
-
Ordered a water pump and got this. Says I can give it to whoever I know works on cars. Seems they always give you this stuff after you made your order. Discount on RockAuto Parts! Thank you for being a customer! To show our appreciation, we have a special discount for you. Your discount code is: 9574129891194046 How to Use Your Discount Code Enter the code above in the "How did you hear about us" box without any other numbers or characters. Please note: Discount cannot be applied once an order is marked as shipped. The discount takes 5% off our reliably low prices. There is no limit on order size or the number of orders. Use the code for your next order, and share the code with anyone you know who works on cars or trucks. This discount code expires on January 6, 2019 so do not wait!
-
How did you check the alternator? a simple test is with a volt meter on the battery. Check battery voltage before starting. Should be 12-13v. Start the engine voltage should increase to 13-15 volts. If not turn some stuff on, headlights, radio, heater and increase rpm’s. Should see the increase in voltage. I don’t know if a short would cause your charging system to do what you are describing but a charged battery when you park it and a dead battery next morning will. Plus you did smoke the harness. So, I would check for a short. Remove a battery cable and connect your volt meter between the cable and terminal. Make sure everything is turned off and doors are shut so the interior lights are not on. With an alternator you may show a volt or two. This would be the diodes in the alternator letting voltage through. It’s normal. To verify disconnect the alternator and recheck. If you still show voltage you can pull fuses one at time to isolate the circuit and point you in the right direction. If that doesn’t work start unplugging stuff. Switches, relays anything connected to the wiring harness until the voltage goes to zero or drops. Just a drop may show one short but if you still see voltage then probably got another one. One other thing, since the voltage output from the alternator seems to drop after a few minutes I would perform the alternator test and test for shorts at that time. Not while everything is working.
-
I have a banjo wheel in mine, heres a couple pics. Get a chance post the pics of your weatherstripping. Thanks.
-
That sounds interesting. What did you use to install it? If you can post a pic when you get it in.
-
No need for discuss ken. You are right the idle circuit is a metered air and fuel mixture. It’s almost like a little carburetor in a carburetor. I think the suggestion I was offering is that if your throttle plates are open then the idle circuit don’t work so that’s something to look for.
-
The only thing I see on my doors that could come close to being a weather seal is just on the forward portion of the forward doors where the jamb is at. It has what looks like tar or black hardened goo. I dont think its actual road tar because it looks like it was laid in there, I left it there thinking maybe it needs it. Heres a pic of it. This is only on the forward doors, not the rear. You can see it on the inside of the door covered with orange paint. The only other seals I have are part of the interior where that fabric roll stuff goes around and the doors meet up against it when they shut, you can see that as well as the tan vertical material just to the left of center. That stuff goes all the way around both sides and top of every door.
-
All the idle mixture screw does is allow air to bypass the throttle plates when they are closed. I've found when adjusting carburetors and assuming I have no vacuum leaks if the adjustment screw does not change the idle then my throttle plates are usually open to far. Which is usually the idle speed set to high although a remote possibility could be the fast idle cam on the choke as well. If the idle screw is holding the throttle plates to far open then the mixture screw will have little or no effect. Although one time when I had removed the butterfly plates during a rebuild and had not centered them in the bore before tightening them on the throttle shaft. Another thing I found on these B&B's is the rebuild diagram actually tells you which side is up and which side is down when installing the throttle plates on the shaft. As I recall it states looks for the engraving on the plate. You can check either one by removing the carb and while holding the throttle plates closed shine a flashlight at the bottom and look through the top of the carb. One other thing to check while you have it off is make sure the idle port is just above the throttle plates when the plates are closed.
-
mmmm. My 39 does not have any weather stripping on the doors themselves. Only on the body around the perimeter where the doors make contact. This weatherstripping is like a rolled fabric or canvas that goes around the edges and tucks into the inside panels.
-
Hey Dennis. Not sure if we are looking at the same weatherstripping but 39 P8 has the original and it goes all around except for the bottom on every door. The trunk lid gasket I'm not 100% on. My P8 did not have a trunk lid gasket so I ordered some from Bernbaums and figured it out best I could. Got all kinds of channels and seems like it can fit either way. I took my best guess then flipped a coin. Added some pics if they might help.
-
Happy birthday Paul. May you have many more. Thanks for your help with my OD. BTW- I saw the post octogenarian the other day but I didn’t know what that was till now.
-
Well so much for this eBay mirror. https://www.ebay.com/itm/172855156996 Store Name: cencaldistributors Moved it a little yesterday and the glass fell out. I could glue it back in but still ticks me off. Taiwan stuff. I'm not using them. $20 bucks down the drain. Looking at these now: http://www.westcoastmetric.com/c-1173800-vw-bug-sedan-1960-vw-bug-sedan-exterior-mirrors-hardware.html Says made in USA. Little more expensive but I don't mind if they last more than a couple days without falling apart. I was thinking of something else with welding the screw portion onto the hinge pin. Rather than cutting the VW pin and leaving a portion of the shank then welding that onto the head of the original pin, I was thinking cutting right at the base of the threads then drilling a hole all the way thru it. Grind the protruding cap portion off the original pin and inserting it into the threaded portion then reaching inside and putting a little spot weld inside there. That should put the threaded portion right on top of the door hinge.


