

denmopar
-
Posts
40 -
Joined
-
Last visited
Content Type
Links Directory
Profiles
Articles
Forums
Downloads
Store
Gallery
Blogs
Events
Everything posted by denmopar
-
"That said old systems tend to have dirty connections which increase the load." With due respect, dirty connections from a power source to the load provides _increased resistance_ which causes a lesser load on the circuit. That's why lights glow dimmer than they should, or starters turn slower than designed.
-
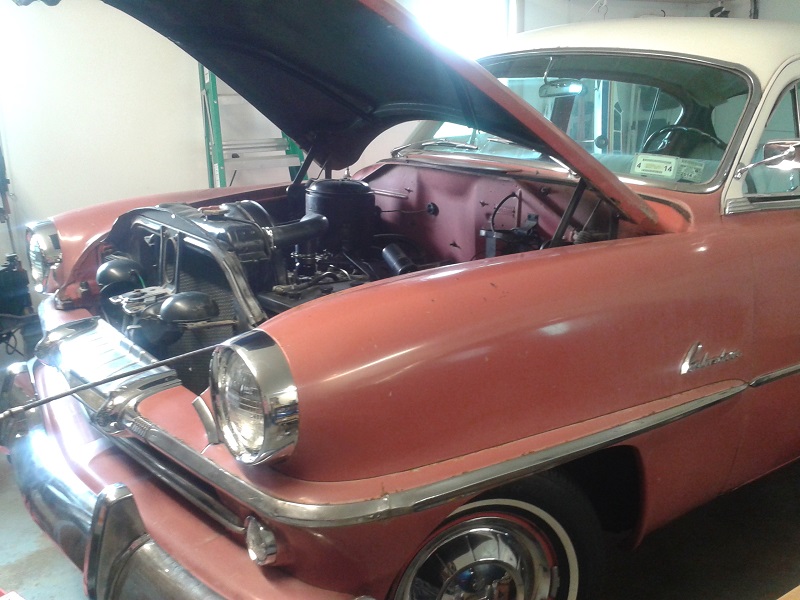
I'm the guy who bought those "E-Z" power brake add-on cylinders that were on eBay. I didn't pay full price, as the units were not on my list of priorities for my two 1954 Belvederes. I agree with" Plymouthy Adams" regarding hydraulic staging...The units fit onto the master cylinder with a special adapter. They were produced by an outfit called "Pyritz Manufacturing Co." in Indianapolis, indiana in 1954. Will I ever install one to see if they actually work? - Maybe, only after I finish the body/paint work on my yellow car and overhaul the 10G overdrive transmission for the Coral car and install it. Simple curiousity made me buy them.
-
May I suggest....If there is a desire to switch to DOT 5 fluid after a brake hydraulics rebuild (especially a partial one,)- flush the system with de-natured alcohol. This will remove any traces of moisture and wash out any traces of DOT 3 (hydrocarbon,) brake fluid. Then flush through the DOT 5. This has worked for me on a '54 Buick, a '50 Pontiac, a '61 Chevy and lastly, a '54 Plymouth.
-
Did you check for leakage (arcing) from the secondary (high-voltage) portion of your ignition? Digital meters can be very sensitive to having HV arcs nearby. Look for arc tracks in your distributor cap or meter leads in proximity to coil/sparkplug wires. Worth the look?- Good luck with it.
-
As a follow-up to my (and another's) '54 Plymouth windshield gasket questions: I finally completed the body and paint work. Using the OEM windshield, (National Auto Glass Association number W-277,) that came off the car, coupled with the Clester's not-so-perfect gasket, I had to have my local glass shop grind 3/16" from the top- and the same 3/16" from the bottom of the windshield for the gasket to fit over the "fence." (Pinch-weld flange, to you younger folks.) It is simply due to the fact that the "Clester's" gasket has a wider rubber area between the glass slot and the mounting (fence) slot, compared to an OEM gasket. So- yes, - the replacement gasket will provide a satisfactory seal and appearance, with some work. Tip: Use strips of duck tape to hold the gasket onto the glass until you wrestle all sides onto the windshield. If not- it _will- slip off. I've done a lot of research, but I still haven't found a proper-fitting gasket- at any price. P.S. I found a replacement gasket extrusion for the rear vision. You have to cut "V" notches into the gasket for both left and right angles at the bottom of the glass and opening. Fit it to the glass to locate the points to notch each side of the gasket, then cut them out -check fit- then bond them closed. _Then,_ you can re-fit the gasket onto the glass to cut to length at the bottom center and bond the ends. A quality, medium-thickness Cyanoacrylate (Super Glue,) applied to one side only, is what I use to perform a strong bond for these. An aerosol spray instant hardener is helpful with this task. Den-
-
A bunch of specialty Mopar parts providers sell a '53-'54 sedan windshield gaskets. The ones I mention are produced by an outfit called "Clesters" https://clestersauto.com/page/mopar/ I guarantee it is _NOT_ an exact match for 1954 Plymouth 4 door sedans.....Will it/ can it be made to work? I can't say yet--My windshield is removed for body work. Upon receiving my Clester gasket, I attempted to dry-fit it on the windshield.....Not easy the extrusion isn't angled at the bottom as the original...I know of no other source or brand, (including Steele.) I see expending some finesse and modifications to that new gasket in my future... If anyone has info of a source for a gasket that is actually produced to fit as OEM, I would appreciate being told- immensely.
-
A small drift pin makes it easier to push the pin out the opposite side...Yes- SMS...The stories, (directly involving former purchases,)- I could tell. The last time was a complaint to the Oregon Attorney General.....That produced results.
-
P15 Motor Serial Used for VIN vs Body Number - DMV Screw Up?
denmopar replied to fedoragent's topic in P15-D24 Forum
A few years back, I was going to buy a nice '54 Savoy from a TV personality in Mass. (Steve Magnante.) Came to find out the Mass. title had the body number (from the cowl,) not the VIN (from the left-front door jam.) Not Steve's error...Previous owner's. That gave me the jitters and I backed out of the deal....Too bad, as that Savoy was a clean original. I wasn't about to get in a possible quandry with NY DMV to get it straightened out.... May have been simple to fix, but after doing some similar battles with New Jersey's DMV years before, I chickened out. -
54 Plymouth Windshield Gasket Installation Question...
denmopar replied to denmopar's topic in P15-D24 Forum
Returned my gasket to Bernbaum for a 60% refund, minus close to $20 to mail it..... Waiting for another from Collectors Auto Supply that should be here next Monday.....Wish me luck, please....At least "Collectors" (Jim) stated their gasket IS molded with radii. (Hope-hope-hope...) -
54 Plymouth Windshield Gasket Installation Question...
denmopar replied to denmopar's topic in P15-D24 Forum
No. I never did get my windshield installed... The Bernbaum gasket is some attempt to replicate the original but it it _does not_ fit properly. The gasket barely holds onto the glass edges when trying to install it.The areas near the corners don't follow the contours at all. I now believe this gasket is made from some generic extrusion and bonded together to (appear) as a copy (of sorts) of an OEM gasket. Oh, well.....Just another $125 bucks wasted....Still looking to find a source I can trust to provide more than an excuse to empty my wallet. Den- -
I can't speak for other model years, but for 1954---the frames ARE different regarding the cross-members between the standard 3 speed and Powerflite automatic. If someone has the parts book, they could verify the part numbers for the frames for the two different transmissions . The Powerflite install used the 230 cu in. engine - not the 217.8 (or as others call the 218) engine. More horses to compensate for the losses of the automatic. I have both a Powerflite and a 3 speed manual' 54 sedans. I like each for different reasons. Oh- If deciding on using a period Powerflite, I think the 1955 is the newest to consider, considering the '56 and later used the pushbutton drive mechanism. Anything can be adapted, but that is depending on the installer's imagination and capability, of course. Den-
-
Here ya go.... http://www.secondchancegarage.com/public/433.cfm Den-
-
Can I "shave" the top half of my carb to get it to seal
denmopar replied to Tatback's topic in P15-D24 Forum
So, unless i'm totally missing the point of the thread, I think the poster is asking about sealing the air horn to the bowl assy. I had to do this for a later Carter BBS for one of my '54 Plymouths. I used the large (9" X 11") sandpaper sheets (red in color,) found in many stores including WalMarts. 80 grit works well. 100 grit would work also. Lay the paper on a known flat smooth hard surface -face-up- and set the airhorn on it and start the sanding process with circular movements. Perhaps taping the paper at its edges to the underlying surface will make the task easier for you. This worked for me. Good luck with it! Den- -
54 Plymouth Windshield Gasket Installation Question...
denmopar replied to denmopar's topic in P15-D24 Forum
I couldn't discern squared or rounded corners on this repro gasket I'll look again.. Yes, the filler does indeed go towards the inside. I used the term "rear," but in retrospect "inner" does fit the description better. Thanks for your post! Den- -
A few general tips: If you decide to refurbish your radio, there are some important items to be sure to do: ALWAYS replace the "buffer" condenser (modern wording = capacitor) This type is NOT supplied by all the boutique radio specialty stores. The buffer MUST be properly rated at its design voltage (typically 1600 volts D.C.) and is made to withstand the extremely large spikes that it must handle. AND it MUST be of the same capacity- not just "close enough"- as the original design calls for- or trouble is surely ahead. ALL the old paper capacitors are likely to be bad (DC leakage) by now. As has been noted above, these are relatively cheap to replace. If you're lucky enough to resurrect the vibrator by "zapping" it with 120 volts AC with a 40 watt bulb in series, you are all set for a while. If not, here is a supplier of solid state classic car radio vibrators: http://www.radiosforoldcars.com/vibrators.htm Buying a NOS mechanical vibrator from other sources is not a guarantee it will work out of the box.....Years of laying on a shelf can just as well cloud the contact points even if never used. Seldom that it is just a tube that is causing the radio not to play.....Not that it can't happen, but if the radio has been sitting unused for years,the tubes usually don't go bad just from that. If you got the vibrator to function, replaced the buffer capacitor with proper value and voltage ratings, replaced all paper capacitors and electrolytic capacitors and the radio still doesn't make a sound, there is one easy test that will point to either the audio section or the radio frequency section: Turn the volume fully up...With a finger touching the metal shank of a screwdriver, place the tip on the CENTER terminal of the three in-line terminals on the volume control. (Not the terminals at the rear of the power switch...) . If the audio section is working, a loud HUM will be heard from the speaker. That would place the trouble in the "RF" section of the radio...From the antenna to that point at the volume control. This will eliminate a lot of searching. Don't forget to "peak" the antenna trimmer after reinstalling back in your vehicle. This isn't all there is to it, but it is a start....Good luck with yours! Den- an old radio guy.
-
I recently purchased a reproduction windshield gasket from Bernbaum's to replace the dry-rotted (petrified) one in my car. The repro gasket has a groove and supplied rubber filler cord located on the rear side to lock it in place.....OK.....However, my OEM gasket wasn't equipped with that groove and filler cord AND the new gasket has an additional lip that runs along one edge (TOP or BOTTOM?) and about half way( DOWN or UP?) on each of the side edges My question is, does this additional lip go on the TOP side or the BOTTOM side???? (Definitely on the interior side.) A couple of calls to Bernbaums didn't yield an answer....."Our supplier/ manufacturer just copies an original" and "maybe there were two styles?" and the final famous last words of "I'll get back to you" ...(Didn't happen in a month or more...). Hopefully someone is willing to educate me about this.....I really would rather install this only once and not by trial or error. Thanks in advance! Den-
-
Let us not confuse a part labeled merely "USA" ( likely a crooked selling tool only) to a statement "MADE IN USA." Brand names these days mean nothing.....So many brands have outsourced..."SK" may well be made in China- to specs from SK.....If it didn't state "Made in USA" on the item or packaging- it likely isn't. As I mentioned, the Gates pump I purchased is clearly marked on the pump and packaging as "MADE IN USA" Perhaps there are pumps from different sources sold by NAPA. I'm skilled and equipped to rebuild a simple pump...I chose to go the quicker route with all I had (still have) to do on this project and the need then to move the car under power. Hindsight being what it is, I could've rebuilt a couple of them in the time spent bolting on and off water pumps....Like I wrote...."and what I learned..."
-
I had my '54 front and rear bumpers - with guards- rechromed by "Sandy's Bumper Mart" in Syracuse NY.....Winters mean a $20% off over $200 of work. I'm fussy- my bumpers are beautiful.....Both bumpers and four guards cost me $900 last year. (Shipping not included.) Their "street quality" work rivals "show quality." Just my opinion.
-
Last Summer, while I had the water pump off my '54 to install a new timing chain set, I noticed the bushing was quite worn. I decided to obtain either a rebuild kit or rebuilt pump. The kits from the boutique sources aren't cheap. I spotted (on the auction site) what was supposed to be a genuine Mopar-rebuilt pump for a bit more. I bought it. Bad buy.....Whoever had rebuilt it should not have. Long story short- it was cobbled more than I think would ever have made for a proper rebuild. Busy with body and paint work and wanting to button up the engine, I decided to buy one of the new pumps offered on that auction site..... It was a "GMB" brand (read Chinese new manufacture) pump. Initially, I was quite impressed with the casting and machine work. I installed it..... I'm one of those guys who tune my engine to factory specs....That included factory idle speed (450-500 rpm.) I started the engine, added antifreeze to full (t/stat opened) and let it idle for some 5-10 minutes.....That's when trouble started..... The temp gauge started to climb to the top of the "normal" range and edging higher...Not good-not normal-- I know my temp gauge and my engine..I stepped on the gas and held the engine at fast idle around 1000 rpm steady....The temp gauge indication began to fall.......Let off the gas and the gauge began to climb up again......Verified full level and no air pockets.... So, I took off the new Chinese pump and opened it up.....I opened up the original OEM pump and discovered a number of things: The volute in the Chinese pump was not fully cast, (Truncated.) The impeller was smaller than OEM, therefore leaving a wider gap between it and the volute..... I ordered a mad- in-USA Gates brand pump from NAPA opened it to find it was exactly as OEM....Installed it and all is well. .....Only now do I discover rebuilt pumps at PartsGeek at lower cost than the NAPA job. (But I have a solid warranty with the NAPA pump). Hopefully, my story will warn others of the pitfalls of unknown brand pumps. Cheers- Den-
-
...and to add some more to the mix, George Asche told me to use Amsoil 15W-40 Diesel oil in either my run-o'-the-mill 3 speed or the O/D/ trans R-10. I have NAPA GL-1 in there now. ...BTW- I checked the Amsoil site and they offer more than one Diesel-spec 15W-40 oil.....Hmmm?? I'm going to change to the 15W-40 oil per George and see if it helps reduce/eliminate the remaining little 'grunt' only up-shifting into 2nd at speeds above 15-20 mph.(Stop ring / 2nd gear taper clearance OK.) Den-
-
The later Carter BB series used the "Sisson" external electric choke. The early BBS series (beginning in 1954???) used the internal choke mechanism. The later-- (maybe 1960 with the advent of the "slant 6"???)-- BBS series went back to an external choke but with an integral unloading system. It is a bit difficult to determine the exact model carb without the data tag that, unfortunately, is often found missing from the air horn attaching screw. One hint can be the linkage that exists on the carb. (OD or Powerflite linkage) Another is careful measurement of the main jet I.D. Good thought re: carb/ manifold leaks, but I've done that....Also verified with propane and aerosol external enrichment.
-
Hi guys- Been a while. My '54 Plymouth had suffered under the "golden hammer" before I got it. The idle stop screw boss was broken off the bowl casting along with other bent and missing parts, necessitating a replacement. Since my '54 Belvedere has the earlier 217 engine with integral "Climatic" choke, the Carter BBS model was the 920S. Not many (three speed manual) Plymouths were equipped with that model since the mid-year change to the 230 c.i. engine. The OEM carb is "made of unobtainum" in these parts.. So, I found a new-in-box model 2604S. which is a universal replacement carb for 1957 flathead engines. I mixed parts to create a "Frankencarb" due to the original throttle plate and bore being 1/8" smaller diameter than the new carb's throttle plate dimension. It works quite well except for a mid-throttle, no-load erratic miss/ stuttering when warmed up. (Opened choke.) Almost behaves like erratic ignition issue, but a slight fuel enrichment clears this right up. All other modes/ phases of operation are as they should be. I used the adjustments / settings specs for the OEM 920S carb. Along with the original throttle plate, I decided to use the replacement main jet......The reason for using the newer main jet was that even though it is larger for the bigger engine with higher compression ratio, it still measured smaller than the well-worn main jet I pulled from the original carb. (This according to Carter specs for both models.) I've a couple of questions: There is a two-piece stainless steel diffuser in the intake just below the carb mounting boss. As found, it was placed in the manifold on a 45 degree angle to fuel path. I'm not too sure this is correct. No info in that universal 1946-54 shop book..... I placed it with the two tines in the path to the two center cylinders with no change to the operation of the engine. Can someone tell me for certain the proper orientation of this diffuser? Should I also be looking at the calibration of the "Step-up" piston / circuit for the no-load erratic miss? Any insights appreciated. Dennis
-
54 Plymouth Manual Transmission And Clutch Questions
denmopar replied to denmopar's topic in P15-D24 Forum
Just a note to thank Randall of Tennessee Clutch and Supply for the great job of rebuilding my clutch parts, to George Asche for the transmission parts and advice regarding my manual transmission issue (still ongoing,)- Don C. and all the others who shared their wisdom and experience on ancient Mopar. -
Hi- The item is a "shield" -not a positive "oil seal." I think it _limits_ the amount of lube getting to the front, since there is no positive "seal" to prevent any excess lube from spilling out the retainer. I'm inclined to agree with the consensus of sage advice offered above.
-
Thanks so much, guys! I feel much better about it now and I'll proceed to assemble with glee......It just seems a bit odd to my perceptions, but that only means I still have more to learn.
