timkingsbury
-
Posts
824 -
Joined
-
Last visited
-
Days Won
44
Content Type
Links Directory
Profiles
Articles
Forums
Downloads
Store
Gallery
Blogs
Events
Everything posted by timkingsbury
-


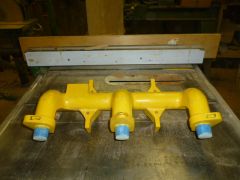
From the album: 0123 - Flathead Intake & head pictures
-
Update - "AoK - New Dual Carb intake for the USA flathead 6"
timkingsbury commented on timkingsbury's blog entry in Keeping Up with the AoK boys
I will add you both to the list to let you know when we are ready to ship ! In terms of pricing I will drop you a note. I will put pictures on this blog entry (above) of our big block AoK triple with the headers. Obviously these would be for the small block (23 1/2" Plymouth/Dodge engine) but would have a similar look. Tim -
Part 3 - 1st car I purchased! .. Out comes the engine and the rebuild begins! We left off in my story with Mom knowing and surprisingly wasn’t quite ready to kill me. Of course my Mom is about 5 foot 2 and 120 pounds, and at 16 I was 6 feet and 220 pounds, but then, even I knew if she had it in for us Dad and I would be dead, lol figuratively speaking of course. In any case, the week after Mom found out about the car and we had the little family show and tell, Dad and I started on the motor. Off came the hood, and off came the intake. Dad shock his head, and soon off came the passenger side head. Not happy with what he saw, off came the other head. I remember Dad saying, well we have a project here alright, and off he went to get a engine tree as Grandpa called it. It was and adjustable frame that went over the car and that you could put a chain fall from a mounted hook and pull and engine. It was something Grandpa had made and it really was a heavy duty piece of equipment that could be taken apart and moved by 1 person, however assembled had no problem to pull a big motor out of a tractor or bulldozer. Up went the engine tree and before he left the hemi was out of the car and sitting on the barn floor, with its 4 speed transmission coming with it. The heads went into the back of Mom’s Fargo pickup that we had driven to the farm and home for supper we went. Mom of course wanted to know if it was back running yet, and Dad with a straight face said, nope, we need to freshen it up a bit. Lol.. yah freshen it up a bit was one way to put it. After supper Dad and I were in his shop attached to the house, and disassemble of the head took place. What we saw wasn’t pretty. Numerous valves were burnt, there were seats cracked and it was pretty clear, the engine had been driven hard. The next day Dad took the head to work and when he got home, the report wasn’t good. Both heads had cracks, the one with the blown head gasket and the most burnt valves was warped, cracked and pretty much not repairable. Next thing to move up from the farm to the shop was the short block. We knew there was antifreeze in the pan, so the question was, how long had it run with antifreeze in the pan and what there the bearings like.. Lol..well pan off and a couple of caps off, and it wasn’t pretty. Bearings were ruined,crank was damaged, rods were marginal, 3 pistons were damaged, and things were not looking well. Everything got checked for cracks, damage,and in the end Dad would say – well son, at least the block isnt cracked.. So much for this hemi needing a head gasket and away we go. This went from that to a rebuild, to a major rebuild, to the need for a lot of new parts. The truth is the list of parts was extensive. New crank, rods, pistons, rings, cam, heads, valves and on and on.. So with my part time, after school and summer time job at Rockwood hardware on the go I was literally saving nickel I could for parts. A couple more part time jobs and I was certainly putting in the hours. I think both Grandfathers, a couple of uncles, and heck even my Mom was feeling sorry for me. When people asked what I wanted for my birthday or Christmas, out came the parts list.. lol Dad help me find a good crank courtesy of his Chrysler contacts, and I sure lots about modifying a perfectly good crank to make it better. In Grampas shop we bored out the block and Grampa pulled some stings to get me a set of top fuel h-beam rods that actually were likely worth more than I paid for the car. I quickly learned there are balanced rods, and well there are rods my Dad and Grampa were willing to accept as balanced. Out came a rod balancing tool Grampa first built in the 1930s and that had undergone a few modifications and I got to watch the master at work. A so called balanced set of rods, under went about 30 more hours of work Partly it took so long as I was undergoing training Grampa and Dad style and partly because it started to become the pursuit of a perfect set of parts. At one point in time, Dad went into his parts room in the shop and out he came with a set of heads. These were no normal Hemi Heads and they had already undergone extensive modifications. Dad said to me, “well if were going to do this, then lets really do it”.. and it was really game on. I remember one Saturday morning, it wasn’t even light and Dad was waking me up to head to his shop. Assembly was about to start. It was more than a little father-son time, as Grampa Kingsbury was already in the shop with everything lined up ready to roll.We started assembly and after lunch Grampa Bolton arrived with the “mystery cam”. I say mystery because he and Dad were back and forth of cam specs, and Grampa had cut and parkerized 3 or 4 cams, had them put in the block checked things and out they came again. So he had mystery cam #7 as it was known because he had it wrapped in an old hockey practice jersey of mine, and you guessed it, it had a #7 on it. I figured I was there to make coffee, run for stuff, but oh no.. I most certainly was under heavy supervision, but the expectation was I was to by the chief assembly guy. By Sunday afternoon, the engine was complete and hooked up to a test bed Dad had for testing engines. I figured ok, lets fire this puppy up…. But oh no.. It seems I was the only one that didn’t know this was going to be a command performance. So we cleaned up,went home, got ready and headed to Grama and Grampa Kingsbury’s for Sunday night dinner. It was darn near a family reunion with aunts and uncles and cousins. After supper was over the two Grama’s standing at the head of the table asked if anyone wanted to go see what ‘Tim, and the cast of automotive tinkerers were up to”. I am sure I blushed a bit and my Grampa Kingsbury burst out laughing as my Grampa Bolton rolled his eyes and my Dad just shook his head. So everyone loaded up, and off to Dad’s shop we went. I thought it a little odd for about 20 people to have interest in test firing my engine, but what the heck.. So we all arrived in the shop and fired up the monster. With open headers dumping into hoses going outside,2 huge 4 barrel carbs on top, it definitely barked as it was 1st fired. The heads we were using had 2 spark plugs per cylinder so when my cousin said- “no wonder this thing is so loud. A v16 is so cool”… Of course that lead to my mom commenting that “no wonder it is so expensive” … and so the misinformation continued. Thanks Mom! Then came the real reason everyone was there. It wasn’t really to hear the engine start up, it was because my aunts and uncles had got together and had the interior redone, had it put into the rolling chassis, and they had brought it up from the farm and rolled it into Dad’s shop after we had left for home. It was a few days before my birthday and well “Happy Birthday!” was the theme as my Uncle got me over as he pretended to look in the car for the 1st time. So there it was, the engine done, the car done, it was just a case of getting the engine bolted back up to the transmission, and sliding the “big elephant” back into place! In the next chapter: Its locked down, who knows and who cares how much HP it has, its time to take this puppy to Toronto International Dragway ! Lol.. the NHRA 1/4 mile track, not the now Toronto International Airport !
-
1) In this case, no sir, I got that right from the Chrysler engineering manual 2) your comment " I also have never seen a 3/4" Welch plug anywhere on the car".. and 18,625 posts which is better than 1/2 of the total topics on the entire board, umm I apologize, maybe I drew the wrong conclusion. 3) In this case we would be "mopar enthusiasts" and after that while I am far from a grammar major, your attempt to be witty, looses me, but I guess that is my loss, although as on new we are done with this topic... although I am sure you are not.. 4) Point made, I will have no further comments on the topic... night
-
lol.. sorry guys.. I cant help myself... the caption should be. when Detroit goes to war... they call the Canadians, because these engines were built in Windsor Ontario Canada !
-
Lol that is ok Don.. could it be you don't really know everything about these cars ? Lol.. Given we lost you when you changed from Mopar to a Bow-Tie transmission, I guess we will give you a pass, but check the parts you pulled out of at least one of your cars, and that was likely in every 3 speed standard mopar since at least 1936... and you will find a 3/4" plug.. Believe it or Not !
-
That is ok Bob... that is likely good news.. It means you have never had to do a rebuild of a 3 speed standard or overdrive transmission !
-
Now since I posted that, I looked up the other numbers for the pioneer brass part numbers... It was only the 3/4" and the 1 5/8" brass ones I had on the top of my head because we just recently talked to our supplier about getting an order for stock. I am not sure if they will sell less than boxes of 10 which for sizes such as the 3/4" one you may not want to but a box just to have 1 plug. Again glad to help.. sorry my whole message didn't get transferred... my fault and I didn't look close enough after I cut and pasted.. lol But the good news is the person who had the original question got all the information, and the suppliers name and contact details. Tim
-
Unfortunately until someone sent me a note today I didn't realize during my cut and paste job which came from 3 different times I started a note on my phone editor and then took from Microsoft word to the forum, I blew it.. lol sorry.. So here is the edit it should have been. They are known by a lot of different names, frost plugs, freeze plugs, expansion plugs and a number of things.. The copper looking ones is a coating process or plating process that is put on to the metal and there are a number of different coatings used by different manufacturers. If you were using only distilled water (and I am not suggesting you do that) then what the expansion plug is made of would be of less importance than when you use antifreeze if you lived where it never freezes. The reason being is antfreeze is corrosive and a number of types of antifreeze have corroded these plugs in the past. Now yes, if you live in a climate that freezes and if the temperature does not drop below the point that the antifreeze you are using fails then it will not be freezing that is the issue with these plugs. And if it does drop below the temperature that your antifreeze can protect, it may push one of these plugs out and avoid damaging your block, but it may also crack the block elsewhere because there is no guarantee that the freeze up only pushes on these plugs. Personally I use as good a quality engine coolant as I can find (which yes could start another thread) and as I am sure you can see some of the plugs in your engine block are easy to get at and others are an absolute pain in the backside to get at. So for me, like the coolant I use the best plugs I can buy. For me those are brass ! Your engine uses two different sizes.. 3/4" and 1 5/8 That I don’t see in your picture. The 1 5/8" being the big size ones there should be 5 of them on the drivers side of the block. That is on the small block (23 1/3" USA engine) and your 1 3/8" plug at the end by the camshaft and 1 5/8" on the water jacket... where on the big block (25 1/2" Canadian Engine) there is an extra 1 3/8" block on the end for an oil galley, along with the 1 3/8" plug at the camshaft and 1 5/8" on the water jacket. Then there is one on the head which we rarely touch.. There are I believe 3 or 4 different sizes for that one.. When I saw you pile there seemed to be too many 1 3/8" which may be what is required for really old blocks. I would have to go dig around to find out as there are some older engines between my and my buddy’s shop... and there is one 3/4" plug in the 3 speed transmission case that you need to be careful if your replacing it. Of the ones you don’t show in your picture here is what I use: Pioneer automotive EP - 3 - B - 10 On the actual brass plug it says p3 3/4" (they come qty 10 in a box) and & EP-14-B - 10 which are 1 5/8" there used to be tons of places that sold them in solid brass.. If people have other sources I would love to know as I can only find 1 supplier that still carries them. Lots can special order but only 1 seems to stock them. So not to be seen to be violating a policy of pitching product, I wont mention that supplier here. If you want to know drop me a line. Tim ps: I attached a picture of them installed in my Engine
-
They are known by a lot of different names, frost plugs, freeze plugs, expansion plugs and a number of things.. The copper looking ones is a coating process or plating process that is put on to the metal and there are a number of different coatings used by different manufacturers. If you were using only distilled water (and I am not suggesting you do that) then what the expansion plug is made of would be of less importance than when you use antifreeze if you lived where it never freezes. The reason being is antfreeze is corrosive and a number of types of antifreeze have corroded these plugs in the past. Now yes, if you live in a climate that freezes and if the temperature does not drop below the point that the antifreeze you are using fails then it will not be freezing that is the issue with these plugs. And if it does drop below the temperature that your antifreeze can protect, it may push one of these plugs out and avoid damaging your block, but it may also crack the block elsewhere because there is no guarantee that the freeze up only pushes on these plugs. Personally I use as good a quality engine coolant as I can find (which yes could start another thread) and as I am sure you can see some of the plugs in your engine block are easy to get at and others are an absolute pain in the backside to get at. So for me, like the coolant I use the best plugs I can buy. For me those are brass ! Your engine uses two different sizes.. 3/4" and 1 5/8". here is what I use: Pioneer automotive EP - 3 - B - 10 On the actual brass plug it says p3 3/4" (they come qty 10 in a box) and & EP-14-B - 10 which are 1 5/8" there used to be tons of places that sold them in solid brass.. If people have other sources I would love to know as I can only find 1 supplier that still carries them. Lots can special order but only 1 seems to stock them. So not to be seen to be violating a policy of pitching product, I wont mention that supplier here. If you want to know drop me a line. Tim ps: I attached a picture of them installed in my Engine..
-
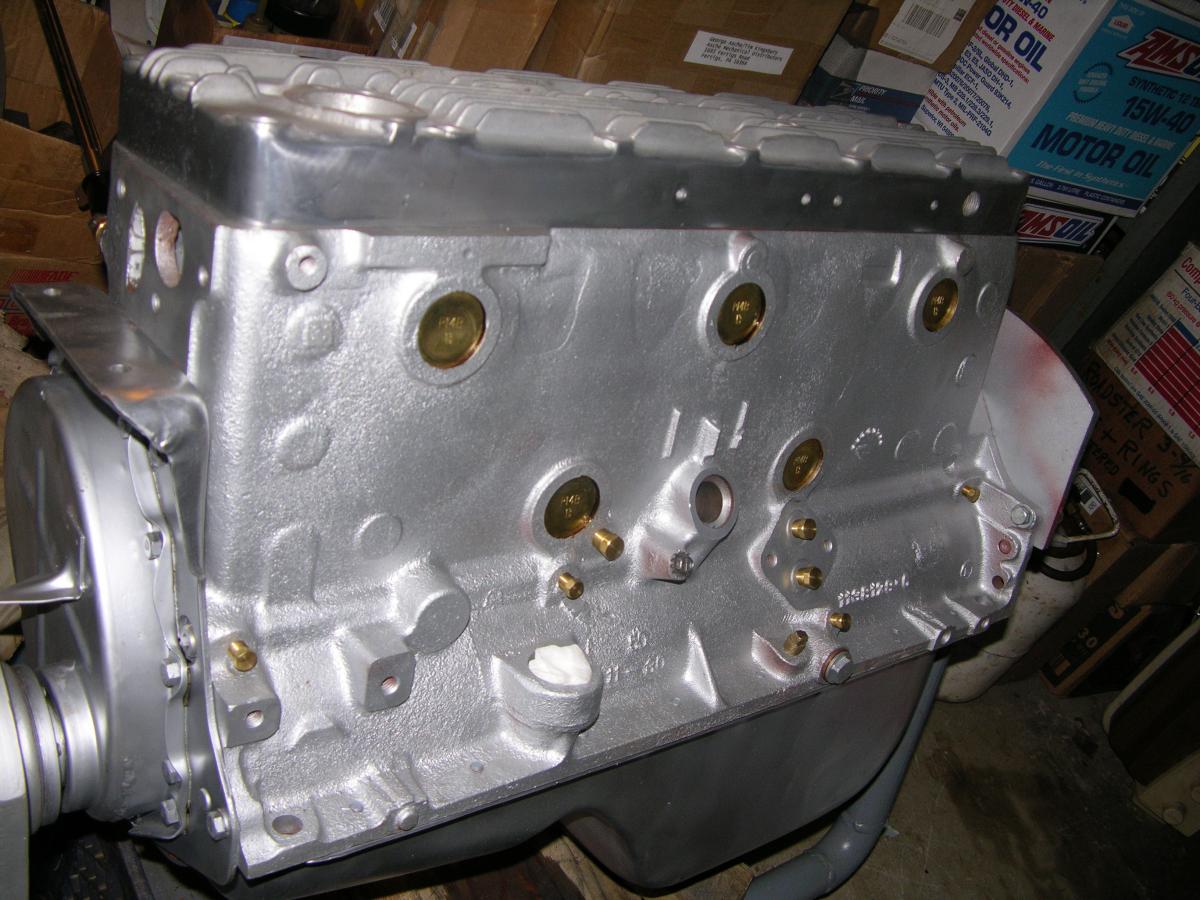
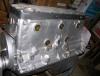
ellis big block for Dodge Flathead 6 - 413 ci
timkingsbury posted a gallery image in Individual Member Photo Albums

From the album: 0123 - Flathead Intake & head pictures
-
ellis big block for Dodge Flathead 6 - 413 ci
timkingsbury posted a gallery image in Individual Member Photo Albums
From the album: 0123 - Flathead Intake & head pictures
-
ellis big block for Dodge Flathead 6 - 413 ci
timkingsbury posted a gallery image in Individual Member Photo Albums
From the album: 0123 - Flathead Intake & head pictures
-
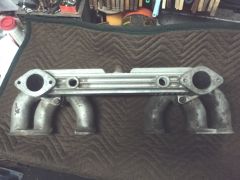
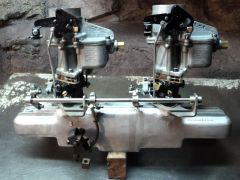
AoK dual carb intake pattern for the Plymouth and Dodge 23 1/2" engine
timkingsbury posted a gallery image in Individual Member Photo Albums
From the album: 0123 - Flathead Intake & head pictures
-
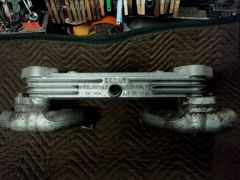
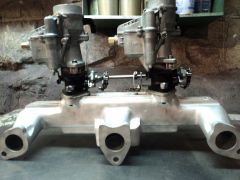
AoK dual carb intake pattern for the Plymouth and Dodge 23 1/2" engine
timkingsbury posted a gallery image in Individual Member Photo Albums
From the album: 0123 - Flathead Intake & head pictures
-
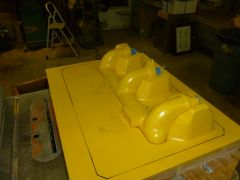
Update - "AoK - New Dual Carb intake for the USA flathead 6"
timkingsbury posted a blog entry in Keeping Up with the AoK boys
Well it has been a while since we last checked in with the progress report on the New AoK intake. As does happen some things just throw a curve ball into a project and the water jacket feature was our curve ball. We have a perfectionist as our pattern maker and while it didn't increase in price, he most certainly put in a ton of extra time trying to come up with a solution to the water jacket "perfect solution". The perfect solution really became comprised of two factors. 1) We asked if it was possible and if so how much of a deal would it be to have 1 set of molds, that allowed for the creation of the intake without and then with the water jacket. We were doing that based on a pretty much split down the middle in response from customers on what they would ideally like to have. 2) Was is there any difference in having the water tube integrated on the outside or the inside. If it is on the inside it would look better as things are a little more hidden and we don't have any issue with the it interfering with linkage required for vehicles needing linkage on the outside of the intake such as trucks. So between #1 and #2 we went from being a couple of weeks ahead when we were ready for a 1st cast early in January, to being a month or so behind. Lol.. welcome to the world of trying to make as perfect a part as you can. Now for the good news: The final molding (not just the prototype molding) is now finished and what we hope is the final intake before going to production with be cast this week. It will be shipped to us to be checked over, then machined to make sure it is 100% in line with the specs. Then assuming its two thumbs up we will go into production casting the intake without the water jacket. No, don't panic, we will then insert the add on mold piece and be able to cast the intake with the water jacket. So we are making progress and the there are some great things coming from the process but it is taking time. Expected shipping of intakes to customers... still shooting for April time frames. ****************************************************************************************************************************** Appendix: This is a picture of our AoK triple for the big block. It has a set of AoK headers made from a stock exhaust manifold. Customer wanted white ! These two pictures are the AoK triple on Tim Kingsbury (my) 1949 Plymouth Business coupe. It gives you a good idea what the headers look like mounted on the car. Personally I prefer the look over other headers as it provides more of a period look and provides the same performance results. -
The Rough Field Spotters Guide for Mopar Overdrives
timkingsbury commented on timkingsbury's blog entry in Keeping Up with the AoK boys
I have emailed the cross reference chart to you (which can also be found on the forum under other threads). You are correct,In the end, I think the work effort exceeds the end result. The t5 conversion is something I first heard of and saw 25 years ago. It has always made me smile when the roots of the idea came from a GM guy who was looking for a 4 speed floor shift for his stovebolt. The 1st one I saw working, the guy would start off in 2nd, shift to 4th, then 5th as the gear splits were terrible. Since then I was given access to a chart showing the various splits or ratios and I can see why there is a wide range of happy and unhappy people. But having said that, since you have everything done, floor cut, bellhousing modified and all the tough stuff done, for you, this makes the most sense to me. If you were starting from "square one" I would not recommend this route. With your budget I think you should be able to salvage your time, effort and investment and with a better split t5 should achieve the over-drive goal that I think your looking for. Best of luck and keep us posted ! -
nope.. and WLS didn't net much, nor WLS interiors so I thought I would ask those who had mentioned them. I have searched WLS headliners now and found http://wlsheadliners.com/ and http://wls-auto-interiors.com/ so thanks for the clue
-
lol.. ok guys who is WLS ?
-
Nicson Intake setup For 1938 Plymouth P6 Coupe
timkingsbury posted a gallery image in Individual Member Photo Albums
From the album: 0123 - Flathead Intake & head pictures
-
Nicson Intake setup For 1938 Plymouth P6 Coupe block side
timkingsbury posted a gallery image in Individual Member Photo Albums
From the album: 0123 - Flathead Intake & head pictures
-
-
-
-
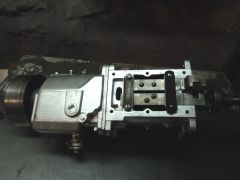
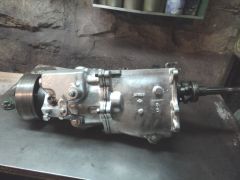
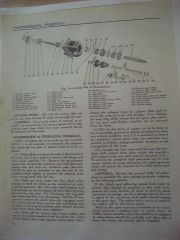
Transmission Overhaul - 1935-1939 page 4 of 4
timkingsbury posted a gallery image in Individual Member Photo Albums