Conn47D24
-
Posts
776 -
Joined
-
Last visited
-
Days Won
10
Content Type
Links Directory
Profiles
Articles
Forums
Downloads
Store
Gallery
Blogs
Events
Everything posted by Conn47D24
-
Thanks. These #s are stamped on the parts. Not sure if each division of mopar stamp their own numbers on identical parts.
-
My research on these parts dead ends at my 46-48 Dodge parts book. Would the Chrysler, DeSoto, Plymouth owners please check your books for these numbers ? 1122666, and 871997 Brake and clutch pedal shafts. I picked up an assembly cheap to used some of the other parts. They all match my D24 set and I wonder about the application of these #'s Thank you for any help you can offer. Clay
-
Great. Thanks for confirmation. Ill set oil pump and dizzy next.
-
Before removing the timing cover I want to ask this. After researching this site and Youtube , I have turned the crank further and now have # 1 top as indicated by BOTH the # 6 inspection hole rod, AND the position of the valves. I have watched as I turned the crank the valves closing with my video camera. That said, # 1 BOTH tappets move freely by hand. # 6 the Exhaust moves freely and intake will not. All 4 of these valves are closed yet this one tappet is never the less firm. Is this condition correct for TDC ? OR, should all 4 tappets be free ? Last call before I open this mother back up again. Thanks ALL Clay
-
This week I took a ride up to Mass. and visited Andy Bernbaum's My daughter and grandkids are not far from there so it was a good day. AB's Owner, Chris Paquin was very helpful as usual , but after our business he gave me a tour of the warehouse. OMG ! Huge building packed with NOS parts that Andy picked over the many many years. What a treat to see this stuff. It's been years since he bought the business from AB, and he still hasn't gone through it all. Room full of bumpers, stacks of stainless, room with just bearings, another Auto-lite. Shelves of steering wheels ! Kid in a candy store sums it up. Needless to say if you are looking for something check with Chris.
-
- 4
-

-
Hi PA, I did the assembly. Still haven't had time and weather to get out and investigate further. I'll try to turn it over and feel for compression at # 1. If this works out perhaps my doubts about the valves being fully closed is moot. then I'll get it back around to # 1 and set the oil pump and dizzy as per the manual and info here. The it's up to the Gods ! ?
-
Thank you PA. Saw that and understand. My ? Was a little different. Next warm day i will rotate it further and evaluate. Hoping the chain is not off.
-
Yes The end that the hub is pressed on. Size changed about 1951?? Hollander interchange indicates that the cams are the same for some models if you just change hubs. Wonder why the change came about.
-
Curious about this. Why did L6 mopar cams change from 1" to 1 1/8 " ?
-
Think its too late for that. Engine was demantled completely for rebuild. Pump , dizzy both out . I am starting ( no pun) from stractch. If i continue the rotation a bit more from where I am now, does that close both valves in 1 & 6 ? From what I've read on other posts that's the condition I am trying to attain so I can set the oil pump and distributor. Is that correct? Timing marks pictured is current position as I described above.

-
Think its too late for that. Engine was demantled completely for rebuild. Pump , dizzy both out . I am starting ( no pun) from stractch. If i continue the rotation a bit more from where I am now, does that close both valves in 1 & 6 ? From what I've read on other posts that's the condition I am trying to attain so I can set the oil pump and distributor. Is that corect?
-
PA I have the dizzy out and trying to get it set after rebuild. I am having tough time rotating the engine by hand and was wondering how close i may be to #1 being at TDC. plugs are all out but the 1 &1/8" socket keeps slipping off the crank hub. Do i need another touch off the starter or around again ?
-
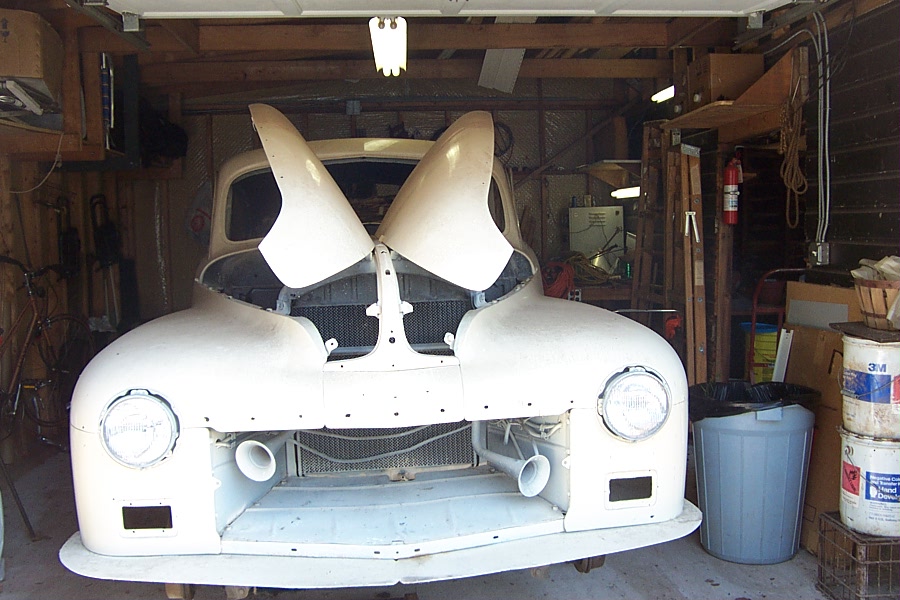
Today I have a question on the cycle of rotation / firing . Lots of threads but just to be clear I need some help please. I have the # 6 inspection plug out and have inserted a screw in rod ( old miller tool ). I rotated the engine with the starter and saw the rod go up and stopped. Using an inspection camera I can see the : # 1 cylinder - Exhaust closed , Intake slightly raised. # 6 cylinder - Exhaust slightly , Intake closed Question: What action is taking place next here ? Am I just BEFORE TDC or just AFTER TDC ?? Thanks all ! Clay
-
D-24 Gauge Cluster GLASS Template View File Hope this comes in handy if your dash gauge GLASS is missing or broken. Submitter Conn47D24 Submitted 02/23/2019 Category Instructions, Manuals & Templates
-
-
Thanks guys ! I did notice that the inside ( clip ) diameter was the same on each. Very interesting, as most of this stuff is.
-
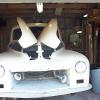
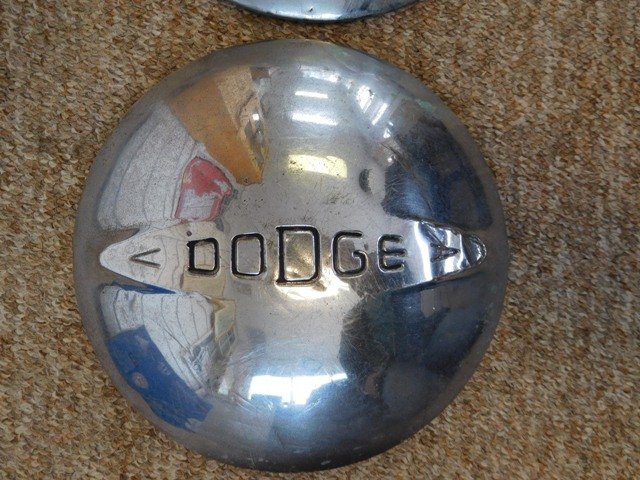
Please assist with some hub cap advice. These all came with my 1947 D24 Custom. They have been in a box for 35+ years and I don't recall if I had them on the car. Questions: 1st photo, three 9 inch and one 10 " Which is correct for my Dodge ( 16 " wheel ) Also, the single cap in the 2nd photo. What would be the correct application fr this one? Thanks ! Clay

-
Royal Purple break in oil: Highly refined Mineral Oil with Zinc , Phosphorous, other additives. Sound like Dino on steroids !
-
41, I have the FD too. Good thought on the fork. Ill check that out.
-
Rich Planning to be at Hershey again in the Fall. Def stopping to see you again. Ive been heating my garage with a propane top mounted heater. 55 60 is fine for 3-4 hours out there. My block is still dry. Havent set the radiator and water plumbing yet. Hoping for a warm day so i can flush first then fill with AF etc. As for break in oil. I have to look at the Royal Purple label. Not sure if it's Dino or test tube.
-
Thanks. Clearer than my parts book but these don't show The turnbuckle orientation with the angles on each end. Still concerned also about the rod so close to the housing. Any photos out there?
-

-
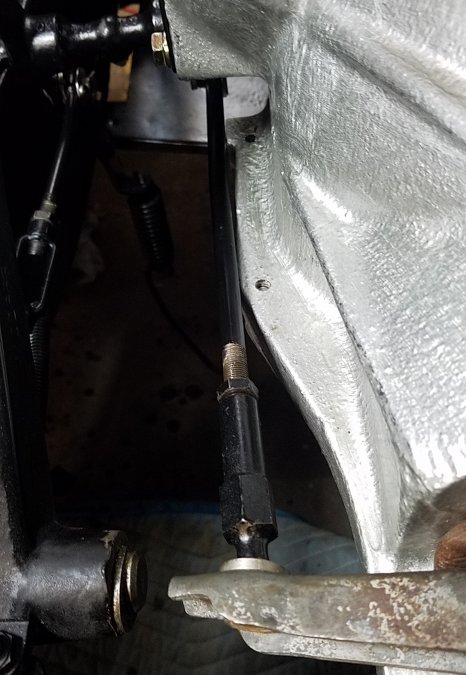
Today I installed the clutch linkage. New clevis pins were in order as originals were badly grooved. Found close to stock size. Slightly larger required washers to keep rods from sliding side to side. I need advice on the position of the rod and turnbuckle. The rod seems too close to the bell housing. Is this correct? Also, do I have the offsets on the turnbuckle installed correctly on the pins? Wasn't sure how these angled offsets were supposed to face. Thanks for and help or photos!
-
Follow up on this post: Today I got to turn this modified oil pump with a drill and cut off screwdriver. First I connected the orginal oil pressure gauge . Its been in a box for over 30 years. Slowly built up to a steady but not too fast speed. The gauge went right up to 45 lbs . Success! No leaks found. Will run it again before setting dizzy.