


MarcDeSoto
-
Posts
1,860 -
Joined
-
Last visited
-
Days Won
10
Content Type
Links Directory
Profiles
Articles
Forums
Downloads
Store
Gallery
Blogs
Events
Everything posted by MarcDeSoto
-
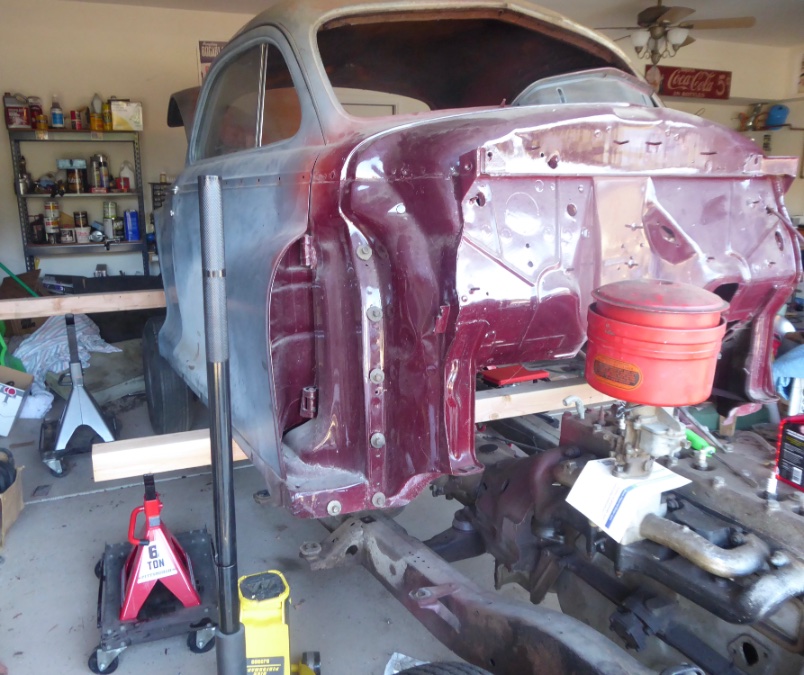
I bought some more 4x4s today to make the body cart. I screwing them together with 6" lag screws. And I bought four swivel casters heavy duty at HF. I will saw notches in the bottom 4x4 so the top 4x4 will not have a tendency to wrack. It will be 6 x 4 feet with some cross boards going from rocker to rocker and I will screw the body to the cart through the body mount holes. It will look something like this.

-
The stuff that looks like rust is mostly a quarter inch of Mojave Desert. This was a Palm Springs car back the first 32 years of its life. The frame and undercarriage as well as fenders, hood, deck lid, floors, inside and out, etc. were undercoated by the factory. I thought about painting it maroon back in the 80s, but changed my mind. Now I'm thinking about Bombardier Blue, Seaplane Blue, or Bermuda Beige.

-
No, they are not the recalled jack stands. I'm not going to move the body with these jack stands. that's why I'm going to build a wood cart. Now, the wood cart will not go back to where the rear 4x4 is, so I can put the cart under the body with it still in place. So I will jack up the body after the chassis is removed and remove the 4x4. Then, I will roll in the body cart. I've been thinking where and how should the body meet the top of the cart. Maybe it should just rest on sturdy cross members going across the body from rocker to rocker? I'm thinking the size should be about six feet long from the cowl to the end of the rocker panel and about 5 feet wide with about three cross members going across? Then, I will secure the body to the cart by screwing in some lag screws through the body bolt holes. How does that sound?
-
Working alone, I got the body off of the frame and held with 4x4s and jack stands on wheel dollies. The rear end will have to have the wheels removed or the rear tires would hit the quarter panel and rockers. So I will remove the rear wheels with the diff. on a floor jack or on a wheel dolly. I still have to unbolt the steering post and remove the steering wheel. I used a ten foot 4x4 in the rear and an eight foot 4x4 in front. I should advise anyone taking the body off of this era Mopar to not forget to remove the two middle carriage bolts that go through the frame's rear cross member at the very back of the car. These bolts caught me unaware as they were covered up with undercoating and they are not pictured in the Parts List. You remove the bolts by removing the two 9/16" nuts below. Since my engine is already rebuilt, and the trans. does not needing a rebuild, I had to put the front 4x4 through just behind the hand brake. As you can see, the two 4x4s are at different heights by necessity. Now before I roll the chassis out from under, I will build a car body dolly out of 4x4 lumber so I can move the body to the other side of my 3 car garage.


-
I was taking the body off today. I thought I got all of the body bolts out, but the rear tires were coming up as I tried to jack the body up. Turns out the rear frame cross member has two more bolts in it besides the ones in the corner. The heads are rounded and were covered up with undercoating. I saw the two nuts when I crawled under the car. They were also 9/16" nuts and now I can jack the body up.
-
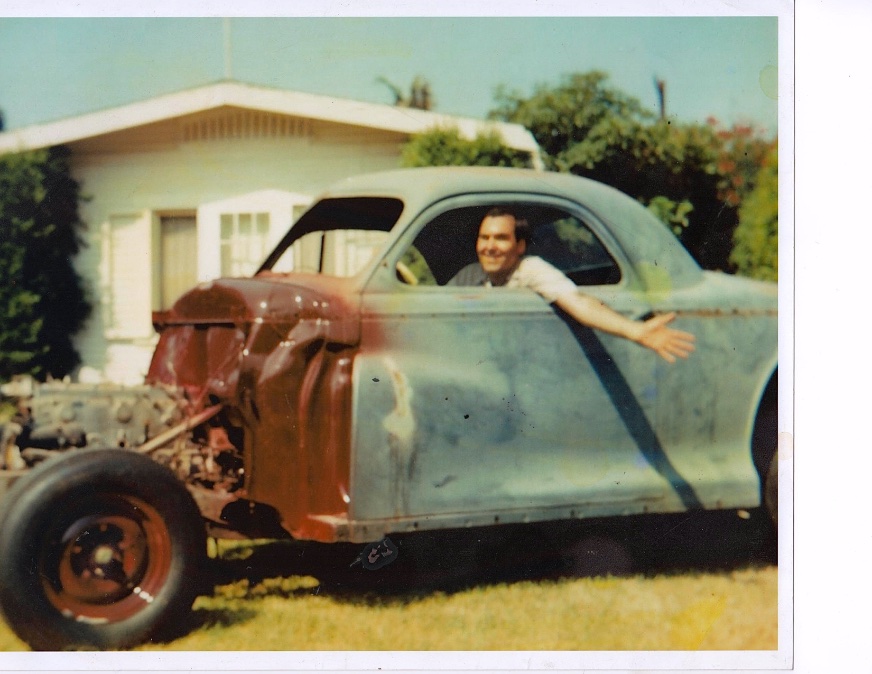
Welcome to the S-11 DeSoto club! I've owned a business coupe since 1980! Right now I'm doing a body off restoration. I'm just about ready to jack the body off of the frame. The outdoor picture was taken in San Diego in 1988! As you see, not much done from then til now. I hope to change that soon.

-
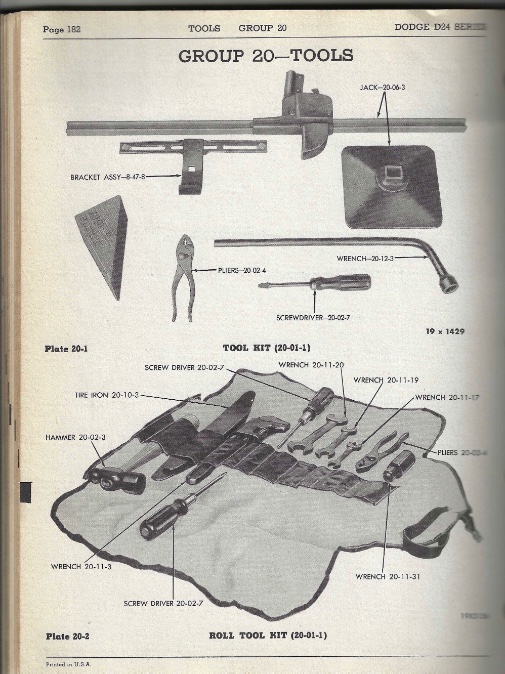
The jack in the middle looks original and the wheel chock looks original. The jack was supposed to be put between two hooks and jacked up until there was no play. I have a 48 DeSoto and mine look the same. The holes are for drainage if any water gets into the trunk. If you are worried about exhaust coming into the trunk area from those holes, don't worry. The tire on your spare covers those holes up well. I know the Dodge D-24 came with a canvas tool kit, which was rolled up and tied with canvas belt. It contained the tools shown in this illustration. This illustrations shows the wheel chock as being a piece of lumber cut into a triangle, but they came made of metal also, like on my 48 DeSoto.
-

Undercoating. Was it ever done at the factory?
MarcDeSoto replied to MarcDeSoto's topic in P15-D24 Forum
Good questions Eneto. Yes, everything under the car is undercoated with a thick asphalt like undercoating including the frame. By undercoating, I'm not talking about a paint like anti rust coating, but thick asphalt or whatever it is. The fenders and hood also were undercoated. So this car rust wise is a restorer's dream! Parts of it, like on the trunk floor got very dry over the years and cracked in chunks allowing some surface rust to form there, but no thick rust. I've already taken care to the trunk floor surface rust. Only the front section of the frame in the engine compartment is not undercoated. -
I've read that undercoating a car back in the 40s and 50s was an extra performed by the dealer. But my 48 DeSoto was so thoroughly undercoated that I believe it was undercoated at the factory. Why? Because I don't think a dealer would have gone to all the trouble of removing the seat and the carpeting and mats to undercoat the floor from the front all the way to the back of the trunk, as well as the entire undercarriage. what are your opinions?
-
Do you know some magic way to remove and or replace door checks? Somebody wrote somewhere on a previous post that the door checks for 60-66 Chevy trucks might work. I checked out the video on this, and it might work, but the door post part is external on the truck and inside the post on the DeSoto, but it might still work.
-
"If you are doing body work, make sure it's 100% titties before you do." This must be some kind of slang I don't know yet. The only body work it needs is a crease on the door when the door check broke and the door was pushed into the front fender. I do plan to paint parts of the car like the cowl when it's off the frame, and I plan to sand it and prime it off the frame. For those people who take the doors off the body, how in heck do you take the door checks off? There's no way that I can see other than to cut them in half!
-
Thanks, Frank and Rich for what I would raise up to $10 comments! Luckily, for me, my car spent its earlier life in Palm Springs. For those who don't know where that is, it's in the Mojave Desert in Southern California. And seeing how dirty the under carriage of my car is, you would think half of the Mojave Desert is under my car! My car was completely, and I mean completely undercoated when it was new, so there are no rusted out rockers or floors anywhere. So, after Rich's and Frank's comment about rigidity and body alignment, I think I'm going to leave the doors on when I remove the body. I crawled around under the car today and saw that making the dolly 8 feet long would be a mistake. As everyone knows, the frame and the body curve steeply upwards after the quarter panel to make room for the gas tank and the large rear axle. So I measured from the cowl to quarter panel and got about 6 feet. As the width of the cart, I measured about 5 feet from rocker to rocker, just inside of the crimped part. So the dolly I will make will be about 5 X 6 feet. My next question is how tall should I make the dolly? It will just be for rolling around because I don't plan to do any major work on it except to steam clean and pressure wash it, and maybe spray it black.
-
Here is a good video on how to make a car body dolly out of wood.
-
I was thinking of making my dolly about 8 feet long and about 6 feet wide. Does that sound good, or is there a better design online somewhere? Here is some advice I got from a friend who has never made one, but it sounds like good advice: Marc, what if you were to roll under the car with a roll of blue tape, a tape measure, and a plumb bob, then locate the body-to-frame mounts and drop the plumb line straight down to the garage floor at each bolt, marking the landing points with tape. Once they are all marked, measure and connect the dots to make your dolly template, so it supports the body at exactly the same points as the frame would. You could even attach extra lumber atop the dolly top rails, so the frame is supported only at those points. In this way, when you lower the body onto the dolly, you will be sure not to squash any vulnerable low hanging sheet metal, or other fragile bits that may not want the full weight of the body upon them. Since those points support the body when it's on the frame, they should be safe on the dolly. Keep in mind that you can make small adjustments to the dolly as you lower the body, iso long as you build it close to the shape indicated by the tape marks on the floor. Buy good quality locking caster wheels, too, just to eliminate frustration.
-
Yes, Frank, the width of the car from tire to tire is 6 feet. 8 feet would only give me 1 foot on each side to move the chassis out. I just went to HD and they do have ten foot 4 X 4's, so that's what I'm going to buy. I don't understand what you are talking about with your last sentence.
-
Sniper, that's an impressive gantry that you built! But I think my HOA would not allow me to have that large equipment outside of my garage. Thanks Frank! I didn't realize the 4X4's needed to be 10 feet. Would 8 ft. work? Another thing about removing the chassis out the front is removing the steering post. I don't think you can remove just the post? I think I would have to remove the steering gear from the frame and maybe also remove the steering gear from the pitman arm? any comments on that???
-
I don't think the dolly is made to put on before you pull out the chassis. I think you put the body on the dolly after you remove the chassis. Otherwise, the dolly would be in the way. My body from cowl to deck lid is about 10 feet long. Should my dolly also be 10 feet long, or should it be shorter? Would 7 or 8 feet long be long enough? Thanks! Marc.
-
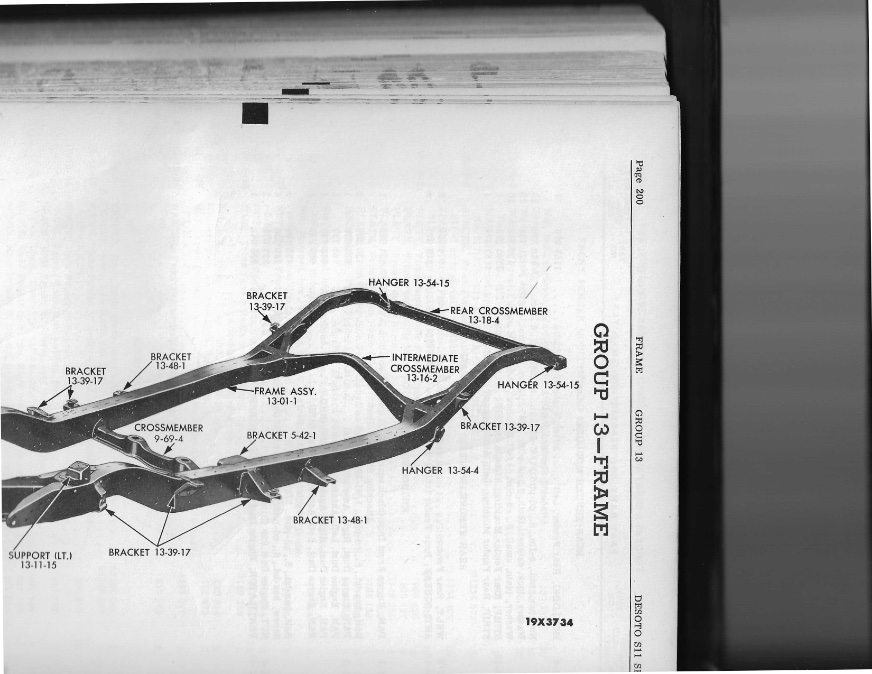
I think I've decided to remove the body from my 48 DeSoto 3 window coupe. I've decided to remove the two doors, and maybe the trunk lid too to reduced the weight. What's the best way to make a dolly for the body? I think I will put the body on a dolly with big casters, so I can easily roll it around. Maybe I could make it out of a 4 X 8 piece of 1" plywood and use 10" tall legs made out of 4 X 4 lumber? Here are some illustrations of the body (4 door), the rubber body to frame insulators, and the frame.


-
Is it really necessary to remove the doors and deck lid to do this? How heavy is a body? I have a 48 DeSoto 3 window coupe.
-
I've been thinking about raising my car with wood stands to height of about four feet, so I can sit under the car while working on the chassis. Now I'm thinking about forgetting all that and just remove the body. I saw a video on how to remove the body from an old restoration video where they remove the body of a 51 Dodge. they did it just by removing the body bolts, gas tank, and anything else that might be connected to the frame. Then they jacked the body up and slid 2X4's through the sides held up on cinder blocks. Then they just rolled the chassis out from under. What do you think?

-
yes, that could be! Maybe the pin was already in my shaft, but there is no way the pin could extend outside of the shaft because it's a tight fit in the MC housing.
-
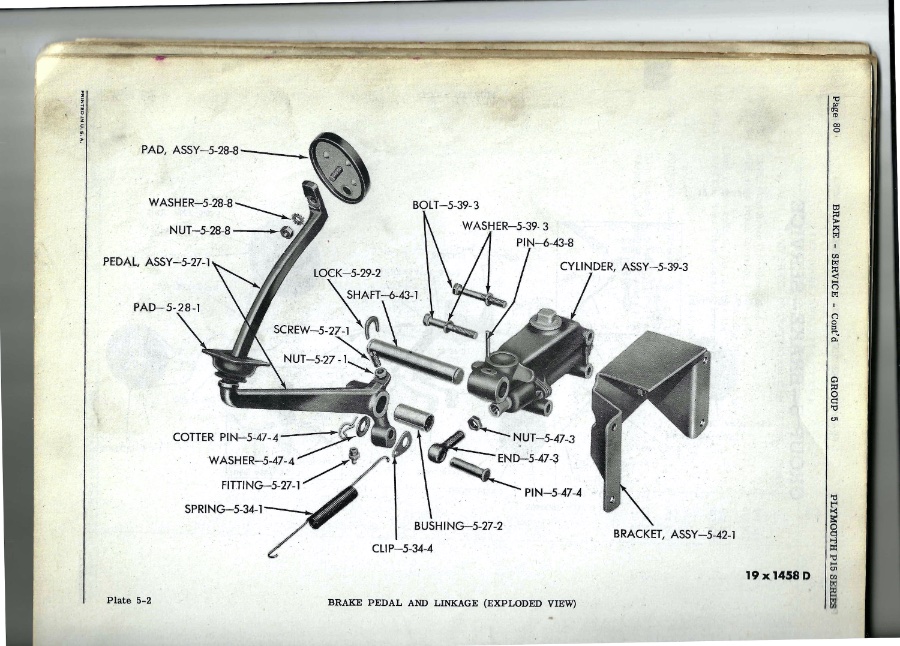
Ok here are the brakes.
-
OH, Does that mean that the pin does not go through the shaft that holds the pedals? It looks like there's a hole in the shaft, but I don't remember seeing that. If that's true, why do they show a cotter pin right below that nut and bolt? (6-50-1)
-
Does anyone know what that pin going through the clutch pedal shaft is for? I installed my shaft on the master cylinder, but I don't recall a pin.
-
Close up view of clutch linkage on 48 DeSoto.


