bkahler
-
Posts
1,958 -
Joined
-
Last visited
-
Days Won
39
Content Type
Links Directory
Profiles
Articles
Forums
Downloads
Store
Gallery
Blogs
Events
Everything posted by bkahler
-
B3B differential rebuild - not as expected
bkahler replied to bkahler's topic in Mopar Flathead Truck Forum
Last night I was browsing through an old Chilton's that I have and found a pretty decent one page write-up for working on the differential.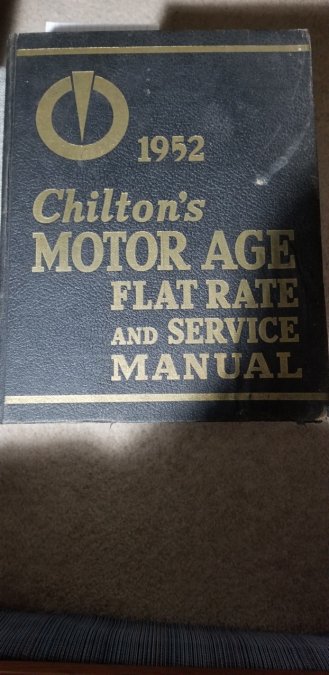

-
B3B differential rebuild - not as expected
bkahler replied to bkahler's topic in Mopar Flathead Truck Forum
Removing the dust/rust/ect has been my first thought as well. How long should it be soaked before flipping over? What is odd is back when I installed the pumpkin in the diff housing I don't remember it being this hard to turn. The point at which it seemed hard to turn was after I re-installed the axles and the backing plates. At that point I figured I needed to possibly add backing plate shims. So when I pulled the axles yesterday and found the pinion still difficult to turn I was somewhat surprised. I know what 20 years has done to me so I can only imagine how the truck must feel ? I'm not holding my breath but I am hopeful -
B3B differential rebuild - not as expected
bkahler replied to bkahler's topic in Mopar Flathead Truck Forum
That's good news about the crush washer, or lack thereof. I feel more comfortable working on it knowing that doesn't exist. I've got all of the tools you describe, except for the crayon Testing pre-load dry would explain why the unit is dry now. The only thing that worries me about using compressed air at this point is all of the powered dust/rust whatever it is that is coating various area. Thinking back to when I picked it up from the shop I don't remember it being as hard to turn as it is now. 20 years of sitting wasn't kind to it. Currently it's a two handed effort to turn the pinion. -
B3B differential rebuild - not as expected
bkahler replied to bkahler's topic in Mopar Flathead Truck Forum
I do have the factory service manual and it assumes you've been trained. Unfortunately I haven't! I wondering if it's not something as simple as the opinion nut being to tight. I'll spend some time tomorrow evening to see if I can see where the tightness is. -
B3B differential rebuild - not as expected
bkahler replied to bkahler's topic in Mopar Flathead Truck Forum
I can check the backlash but will first have to figure out how to do that! I've never worked on a diff before. However, looking closer there is a powdery dusty type substance on some of the castings and parts. My guess is it's the result of condensation buildup over the last 20 years. Aso there doesn't appear to be a lot of lubricant inside at all which concerns me. I'm thinking the best option is likely going to be to tear it down and just put it back together again, by the book. At least that way I will know what shape it's in. With that in mind I guess I'll dig through the service manual to see if it can educate me. Does this diff use a crush collar on the pinion or is the pinion nut torqued to a set value? Thanks, Brad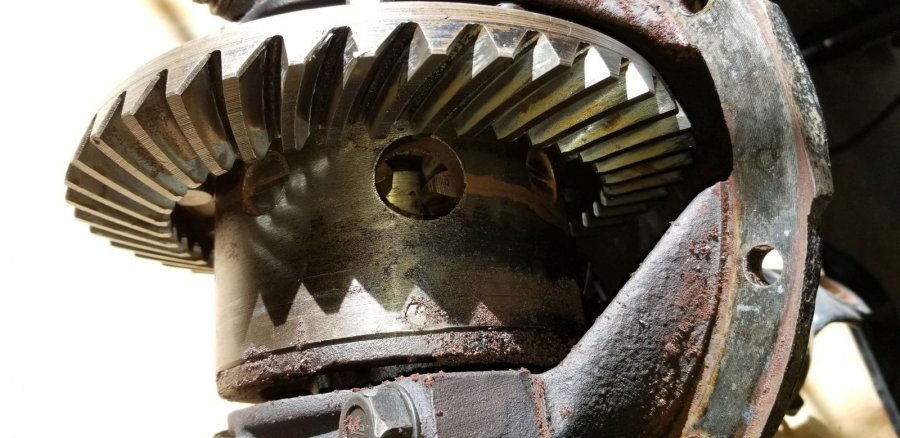
-
Something just came to mind. Is any part of the pin extending below the bottom of the hinge? If so if this is even slightly mushroomed or bent it's not going to willingly be pushed up through the hinge. If it does extend past I would consider cutting the bottom off flush with the bottom of the hinge and then using a small section of 1/4" rod (1/2" long maybe) and us that to press up on the bottom of the hinge using your C-clamp method. I believe the hinge pin diameter is about .3125 or 5/16". Anyway, just a thought.
-
Probably a dumb question but what are you using as a penetrant? Some are definitely better than others. Kroil and PB Blaster are two of the better ones. After spraying you can tray smacking the side of the hinge with a hammer a couple of times, sometimes that little bit of vibration can help the fluid work it's way down inside. It's a slow process but don't give up just yet!
-
51 B3B build thread - after all these years
bkahler replied to bkahler's topic in Mopar Flathead Truck Forum
I used a modified version of Brian's approach. I ended up suspending a framing square from above and inline with the centerline of the pinion shaft. Then I calculated the point where the diff would be when it in the same horizontal plane as the transmission yoke (i.e. shortest driveshaft). At this point the driveshaft ended up being slightly less than 1/2" shorter than if it wasn't compressed. That length still leaves 1/2" of travel before the yoke could bottom out on the driveshaft. I then raised the frame of the truck until the wheels were off ground and took another measurement and it was 3/8" longer than when sitting with the wheels on the ground. In this situation there is still about 2-1/2" of spline engagement between the yoke and the driveshaft. I feel pretty comfortable that the yoke and driveshaft combination that I have will work fine. Time to buy the u-joints! Thanks! Brad -
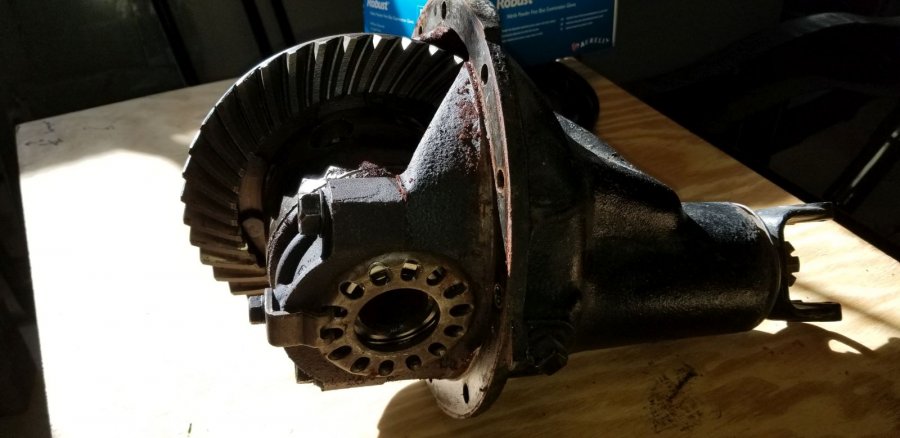
Well it may be a new year but it's not necessarily starting out as a good year ? Back when I started the rebuild I took the pumpkin to a local shop to have them go through it and replace bearings. One thing to keep in mind is a lot of things that happened back in that time frame were taking place while I had just brief periods of time at home so I would rush around taking care of things and then leaving town again. When I picked up the pumpkin from the shop all I did with it was slap it into the diff housing and left town again. Thinking back I vaguely remember that it turned a little stiff but assumed it wasn't an issue, besides, I didn't have time to think of the alternative. Then came the move from Nebraska that ultimately ended up here in Kentucky. Fast forward to today and for what reason I don't know but I had been thinking that I needed to adjust the axle spacing with shims behind the backing plates to fix the problem. I should have known that wasn't the problem. Unfortunately memories don't return until I really start digging back into things! So, after pulling the axles this morning I found that the pumpkin is as hard or harder to turn than I remembered. Basically it's really difficult to turn the output yoke by hand. I've now pulled the pumpkin and need tutoring on what to do next I'd like to tear into it myself but it sure would be nice if someone could point me to an appropriate video or two and or some good advice. Thanks! Brad
-
51 B3B build thread - after all these years
bkahler replied to bkahler's topic in Mopar Flathead Truck Forum
As much as I'd like to try Eric's approach with the straps and my tractor your method does sound somewhat easier and a little less risky to life and limb ? I'll see what results I come up with tomorrow. Thanks, Brad -
If you get a trailer with a winch you have a good chance of getting it loaded even with frozen drums. You can do something like wetting the ground in front of the wheels so they will slide, things usually slide pretty good in mud! You'll just need to get creative. Planning ahead certainly helps. If I was a betting man I'd bet the wheels won't turn Typically you want more weight on the front half of the trailer so loading engine first is usually best. However I've hauled similar vehicles loaded tail first and survived to talk about it. If you get a long enough trailer it won't matter as you can center the load as needed. Yep, plan for the worst case and be pleasantly surprised when things are easier than anticipated. Looking forward to your trip Brad
-
51 B3B build thread - after all these years
bkahler replied to bkahler's topic in Mopar Flathead Truck Forum
I don't have any adults or kids around (unless I qualify as one or the other!) so I'd probably have to make due with my front end loader. The ratchet strap idea might be a good start. If I can find a warm enough day, cause I don't like the cold, I could probably roll the truck outside, use the front end loader on my tractor to apply downward force and then cinch the straps at that point. I'd probably get mighty p'ed off if I scratched the paint at this point ? -
51 B3B build thread - after all these years
bkahler replied to bkahler's topic in Mopar Flathead Truck Forum
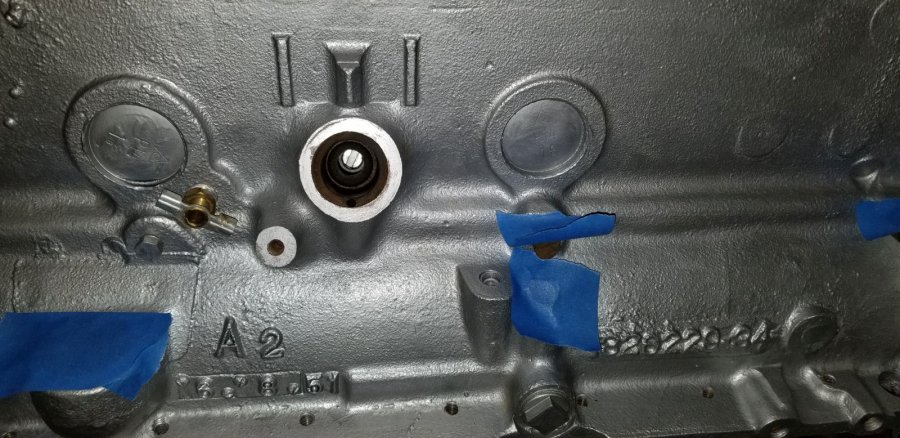
With the plug removed there is a hole about 3/16" in diameter that opens into the combustion chamber right above the piston. When #1 piston is at TDC so is #6 piston. When setting the timing you want the #1 piston to be at TDC with both the intake and exhaust valves closed. This is the firing stroke and TDC is what everything is based on. So what Dodge did is put a hole in #6 that you can stick a rod down into and as you're rotating the crank to bring #1 & #6 to TDC, the rod will tell you when your at TDC as it will stop moving up and then start back down as you pass TDC. The goal is to verify the pointer on your timing cover is pointing at the TDC mark on the crank pulley. Once you've done this you will always know when you're at TDC and by verifying both valves are closed on #1 then you know it's the ignition stroke. Once TDC is established for #1 and both valves closed you install the oil pump such that the slot in the oil pump shaft is in the 1 & 7 o'clock position. If you look at the first picture in post #200 you'll see the 1 & 7 position. This orients the distributor correctly which is when the rotor is pointing towards #1 spark plug. The second picture in post #200 shows the rotor. I hope that didn't muddy the waters to much! Brad -
51 B3B build thread - after all these years
bkahler replied to bkahler's topic in Mopar Flathead Truck Forum
Ok, time to time to figure out what to do about my next delima. I've been working through the issue of my driveshaft and yoke being of mixed heritage. In order to confirm what I have will work I need to check for is the amount of travel in the rear suspension from full compression to full extension. So the plan was to jack the rear of the truck in the air to let the axle hang down and measure full extension, that step is easy to do. Now I'm trying to figure out how to compress the suspension to the point the axle is touching the bump stop. This is where I run into a couple of problems. The first minor one is I don't have any bump stops! I don't think my truck ever had the rebound stops on the frame, at least there were no signs of any when I tore the truck down. I think even if I had bump stops on the frame the axle would never come close to them due to the overload springs that are on the truck. There are bump stops installed that the overload springs contact so I'm guessing they negated the need for the bump stops on the frame. My only thought is to remove the rear shackles which would allow the axle to travel upwards but that entails removing the u-bolts holding the springs to the axle so the axle can be moved sideways to clear the shackle once it's unscrewed. That is a lot of work that I'd rather not have to do if I don't have to! Any suggestions on how to compress the suspension to determine maximum compression? As a side note, there is 7-3/4" from the top of the axle tube to the bottom of the frame. By the way, Happy New Year everyone Brad

-
So they are listed for Dodge trucks. I bought these a LONG time ago and I normally wouldn't have purchased them if they weren't for my truck, however I have a hard time remembering what happened yesterday let alone 20 years ago I've also got some Autolite 303 plugs and will use those first but will have to try the 316 plugs to see if I notice any difference. I do appreciate the info! Brad
-
I don't know that I'd buy new tires just yet, you'd be better off finding some discards and using them until you know more about the truck. The other thing is don't be surprised if it doesn't roll, even with new tires. If it's been sitting long enough it's entirely possible the shoes are stuck to the drums. If that happens you've got a whole different can of worms to deal with. Good luck! I'll be following along on your little adventure Brad
-
Any idea what vehicle might have used Autolite 316 spark plugs? I seem to have a bunch on hand and have no idea why I bought them! I've tried googling with no real success. Thanks, Brad
-
51 B3B build thread - after all these years
bkahler replied to bkahler's topic in Mopar Flathead Truck Forum
Normally I would say yes but in this case the builder was a friend who specialized in building Chevy 454 dirt track race engines. I'd say that was 99% of his business. My guess is he had never see one of these engines before he tackled mine. Having a plug into the combustion chamber is a rather odd feature and I guess it doesn't surprise me to much that he didn't do anything with it. It doesn't really bother me, the rest of the engine build was very nicely done in my opinion. I know he balanced the crank, rods, pistons and flywheel and in that area I'm certain he knew what he was doing! Brad -
51 B3B build thread - after all these years
bkahler replied to bkahler's topic in Mopar Flathead Truck Forum
Well curiosity got the best of me this evening. I removed the plug over #6 cylinder and started poking around. I did use compressed air blowing into the open intake valve and once I had break through I had a small stream of dust blowing back at me. It probably took about 15 to 20 minutes of digging to what you see in the picture. I'll spend a little more time scraping away the carbon tomorrow but after that I'll call it good. Thanks all for the tips! Brad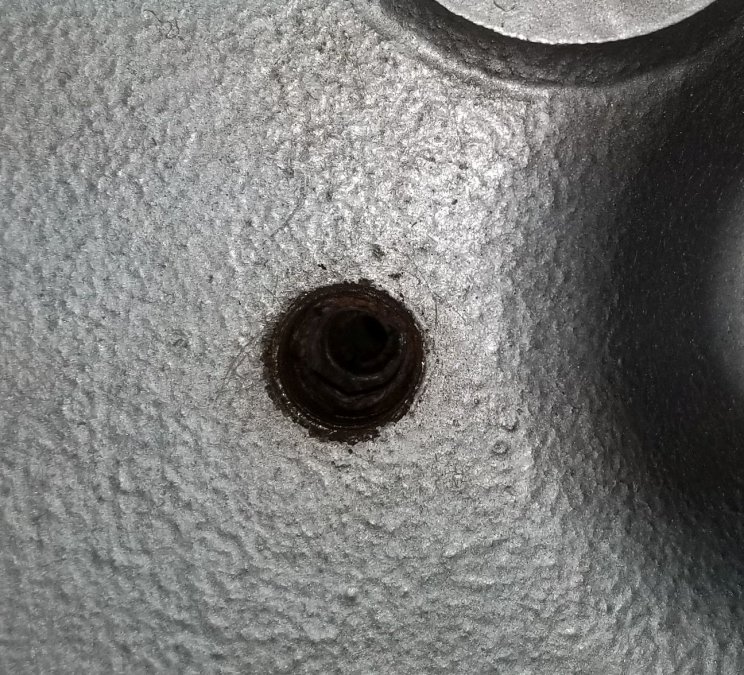
-
Here's hoping you don't find what Radar found......
-
51 B3B build thread - after all these years
bkahler replied to bkahler's topic in Mopar Flathead Truck Forum
It sounds like the hole seems to get plugged relatively frequently. Since my manifolds are currently off it would probably be relatively easy to continuously inject compressed air into one of the ports to force any debris back into my face instead of dropping into the cylinder bore. Sounds like a good task for New Years day Using tips found on the forum I got the oil pan installed with a new gasket. I still need to replace all of the bolts but that's a minor task I'll deal with later. Brad

-
51 B3B build thread - after all these years
bkahler replied to bkahler's topic in Mopar Flathead Truck Forum
What is the actual diameter of the hole where it opens into the combustion chamber? What is the probability of junk falling on to of the piston? That worries me more than anything. Brad -
51 B3B build thread - after all these years
bkahler replied to bkahler's topic in Mopar Flathead Truck Forum
It's steel at the bottom of the hole. I scraped it with an awl and it left a shiney scratch and it sounds like metal. If I get time this week I'll pull the plug again and see if I gave up to soon. Those marks were just with a sharpie so I could see them better while trying to figure them out. I've already wiped them off. Sometime in the next few weeks I'll mark a couple of them with some black paint. -
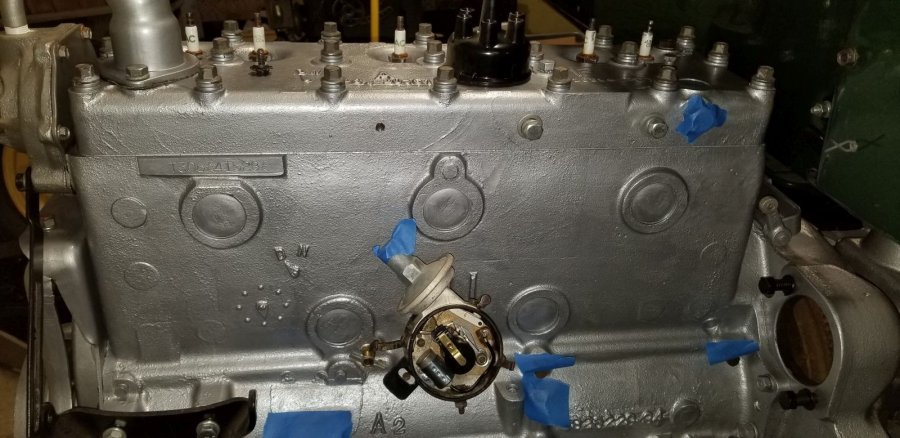
51 B3B build thread - after all these years
bkahler replied to bkahler's topic in Mopar Flathead Truck Forum
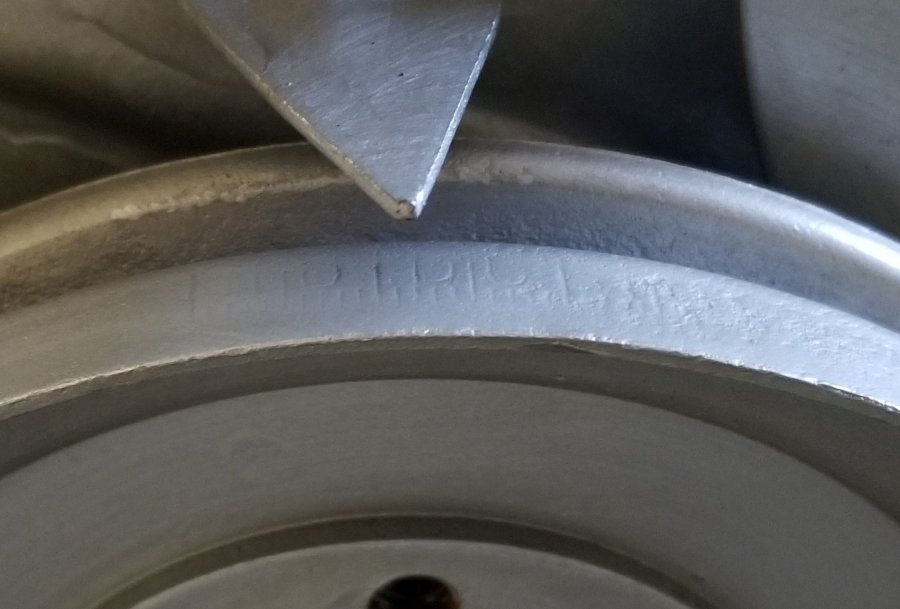
Brian, thanks for the info. Per your advice I pulled the oil pump and after much trial and error I got the oil pump shaft to be what appears to be the 1 & 7 position, or at least really close to it. And the rotor is like this. I zoomed in on the crank pulley and this is what I came up with. Here's the unmarked version. I think before the radiator gets installed I'm going to try and sharpen the marks and then paint them black. As far as the front suspension, if I was back in Nebraska I know exactly where a good suspension shop is. Here in Richmond I don't think there is a shop that could do that but I'll do some asking around. I suppose its possible the springs will drop some once the rest of the engine components are installed and all of the front end sheet metal is installed. Prior to the first drive (whenever that might be!) I'll evaluate the suspension again before I decide what to do. Thanks! Brad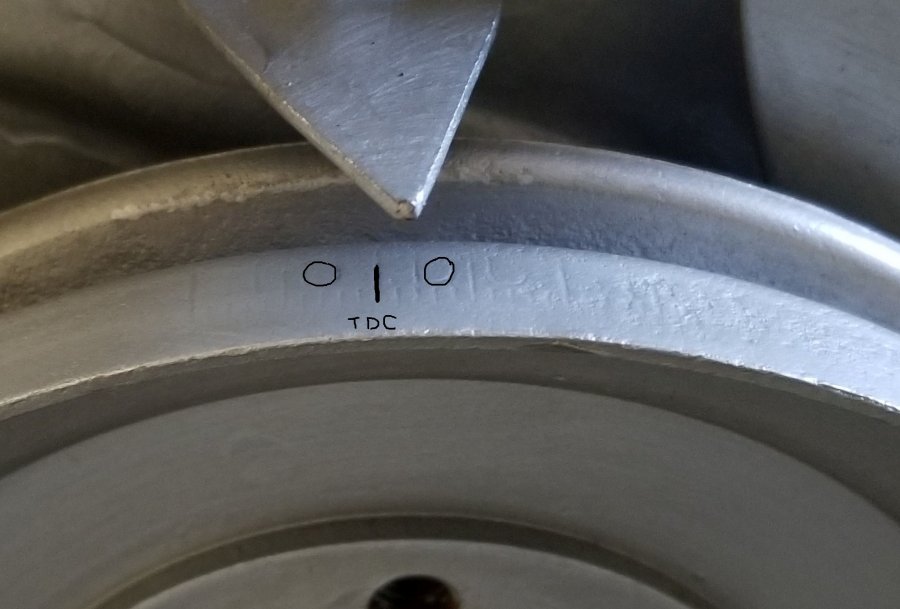
-
51 B3B build thread - after all these years
bkahler replied to bkahler's topic in Mopar Flathead Truck Forum
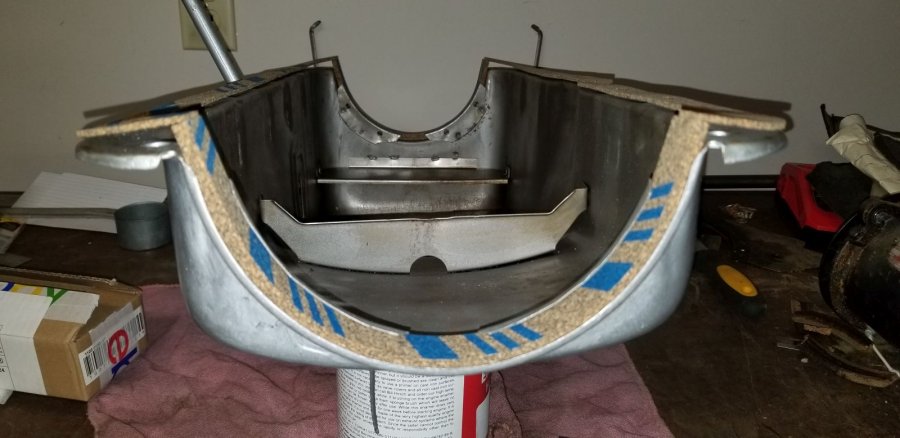
And finally the oil pan gasket. From what I gather looking at the service manual and searches on the forum this is how the gaskets should look prior to installation. The only exception being I haven't applied sealant as yet to the long side strips. The end strips are protruding between 1/4" and 3/8" which seems to be to spec.