bkahler
-
Posts
1,945 -
Joined
-
Last visited
-
Days Won
39
Content Type
Links Directory
Profiles
Articles
Forums
Downloads
Store
Gallery
Blogs
Events
Everything posted by bkahler
-
51 B3B build thread - after all these years
bkahler replied to bkahler's topic in Mopar Flathead Truck Forum
I've seen similar to what you're describing. Tolerances can start staking up also which can be a problem. In this case, it's probably a combination of aftermarket reproduction parts mixed with original parts with a touch of me not knowing what I'm doing -
51 B3B build thread - after all these years
bkahler replied to bkahler's topic in Mopar Flathead Truck Forum
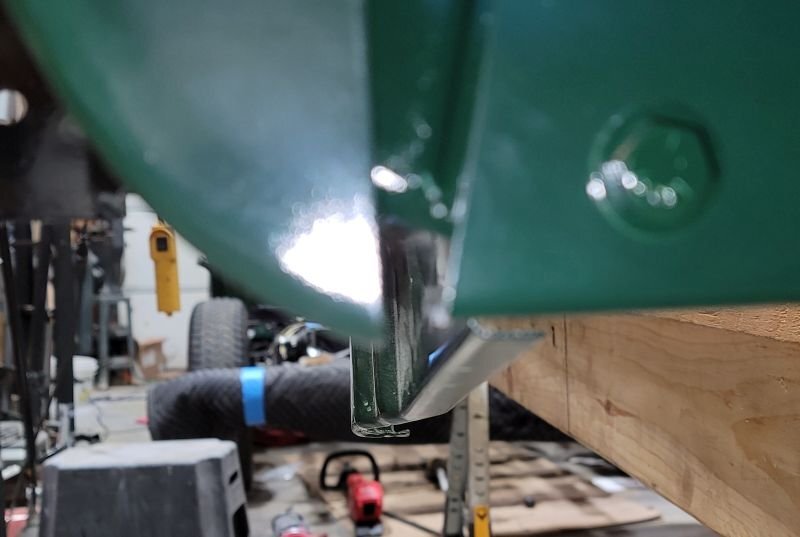
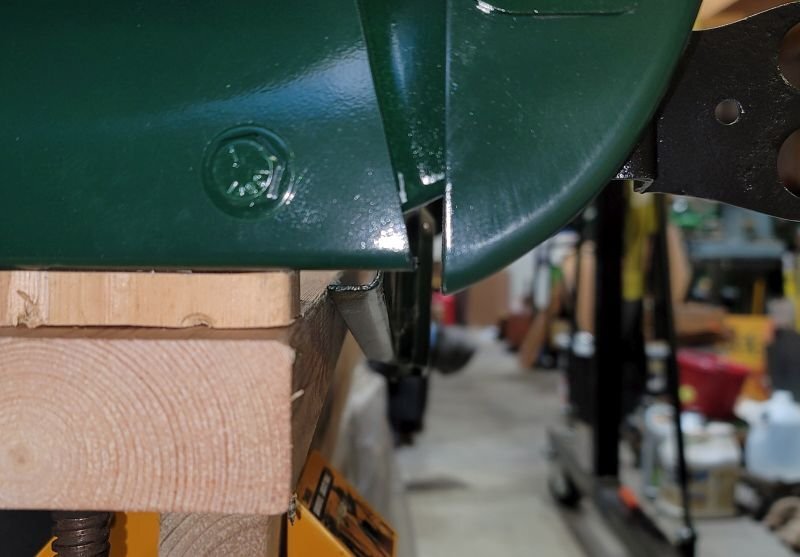
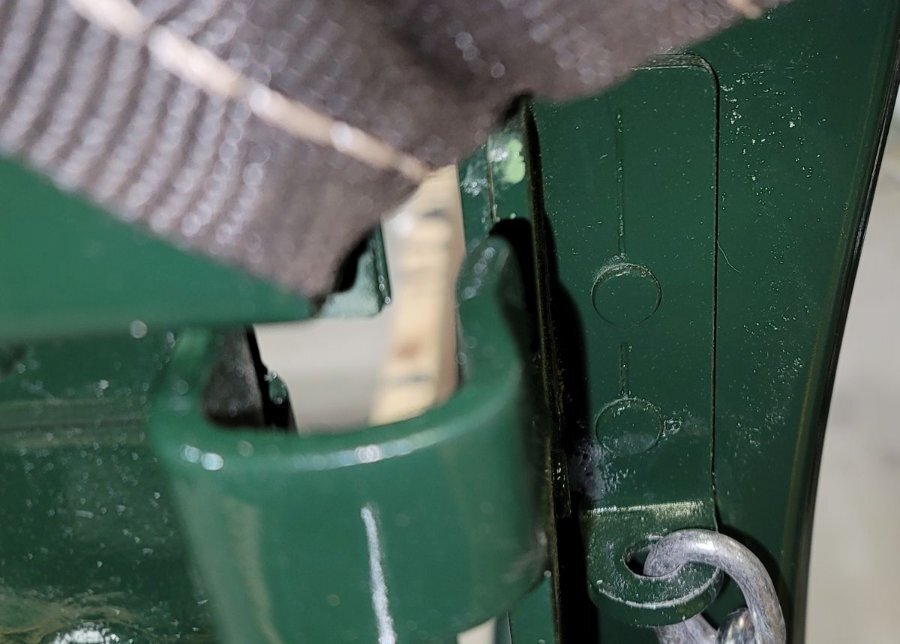
I spent the last couple of days prepping the wood planks for the bed and I've ran across a problem fitting the planks in place. The issue is fitting the plank between the strip welded to the bed and the top of the rear cross member. The first two pictures show what I'm talking about. At the front of the bed (closest to the cab) the 3/4" board fits nicely between the strip and the bottom of the front panel. However, at the rear, the gap between the top of the cross piece and the metal strip is only about 1/2". My first thought was the metal strips didn't get welded properly to the bed sides. However, after looking things over and checking with a tape measure, it looks like the strips are correct. I measured from the top of the strip to the opening in each of the stake pockets and at all four points the dimensions were within 1/32" of each other. To me that means the strips were installed correctly. The other variable was the replacement of the stake pockets themselves. The new stake pockets came from Bruce Horkey and they seem to have been well made. There is only one way the pockets can be fitted due to their shape and there is no way to adjust the stake pockets up or down due to the way they mate to the bed sides. As a recap, both bed sides are used replacements, the L brackets and rear cross piece are replacements from DCM. I compared the hole locations of the new L brackets with the old pieces and they are identical (just not bent like my old ones!). The cross piece measures out the same as my original bent piece. To me that leaves just the vertical hole locations in the stake pockets as the probable issue. If you look at the pictures below you'll see the orientation of the cross piece to the bottoms of the stake pockets. The cross piece is roughly 1/4" higher than the bottom of the stake pockets. To me that means I need to grind the bottom of the vertical holes to drop the cross piece down enough to provide clearance for the wood planks. Currently I see two options, slot the holes in the stake pockets to drop the cross piece the required amount or cut a rabbit in the ends of the planks to allow the plank to slip under the metal strip. My preference is to slot the holes.... Thoughts anyone?

-
51 B3B build thread - after all these years
bkahler replied to bkahler's topic in Mopar Flathead Truck Forum
Got them from DCM and the rubber sleeves are on. The picture he has on his website now, doesn't match with the ones he sent me. They are close but the taper to a point is missing. I bought them in November of 2019. I've seen a few trucks online with the same style hooks as mine. Not sure if they were original or aftermarket. https://www.dcmclassics.com/catalogs/p/all/parts_by_year-1948_1953_b_series-box_parts/654e4b7e093270eb01271032/bp-505-steel-tailgate-chains-pair -
51 B3B build thread - after all these years
bkahler replied to bkahler's topic in Mopar Flathead Truck Forum
Ha! It's only taken me 28 years to get to this point Yep, the older I get, the more I have days like that as well. -
51 B3B build thread - after all these years
bkahler replied to bkahler's topic in Mopar Flathead Truck Forum
It's half time Got the guides tweaked. There was a little bit of collateral damage but a bit of touch up paint and it'll be good to go. Also took three links out of each chain and the tailgate now sits level when open. As far as I'm concerned, the bed is now done so the next task is to get the bed wood milled and cut to size. Hopefully that task will done sometime this week.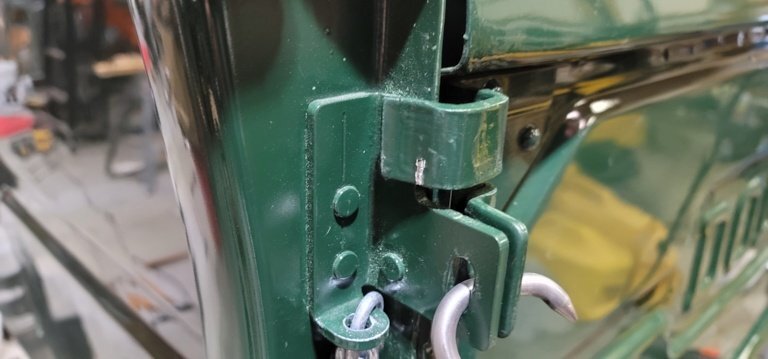

-
51 B3B build thread - after all these years
bkahler replied to bkahler's topic in Mopar Flathead Truck Forum
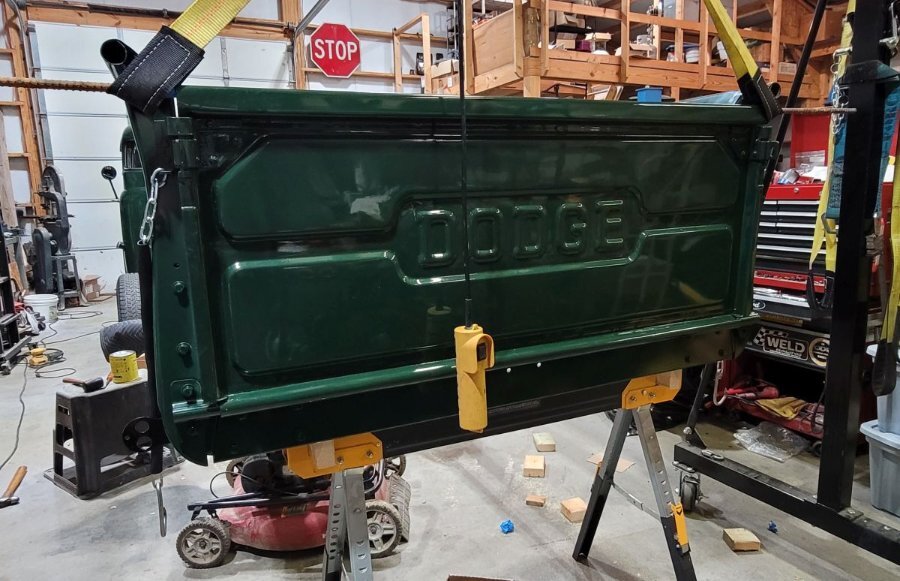
Back to work on the bed today. I got the rear cross member installed with the help of the DCM L brackets and hinges that I bought. For the most part everything lined up perfect, I did have to use a drill bit to open up three holes slightly. The two bed sides are perpendicular to each other within 1/32" of an inch. Close enough for me Next was installing the tailgate. Hanging went without a hitch but I did run into two problems. The first problem is upper guide plates will need to be tweaked in order to get the tailgate to close all the way. The only option I see is to bend or spread the two guides so they can slip past the brackets on the bed sides. Nothing like messing up new paint The other problem is the nice new chains I bought from one of the suppliers is several inches to long. Not a real problem, just frustrating when you buy something listed for B3 high side pickup bed and they don't fit without adjustment. Time to go watch a football game....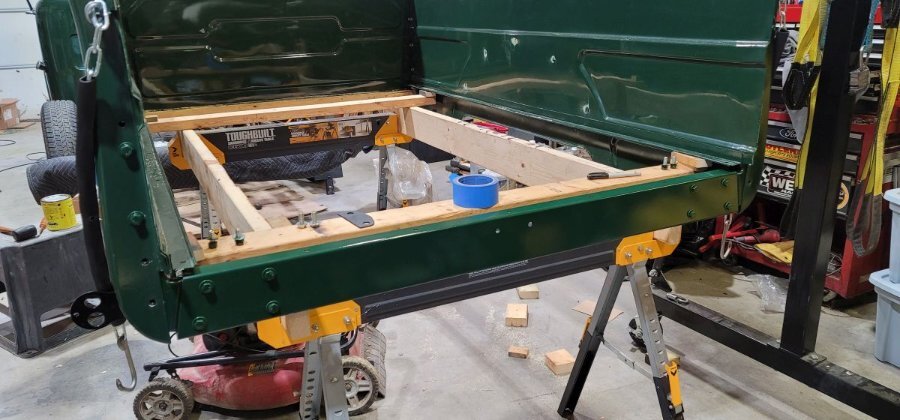
-
License plate bracket - is it bent?
bkahler replied to bkahler's topic in Mopar Flathead Truck Forum
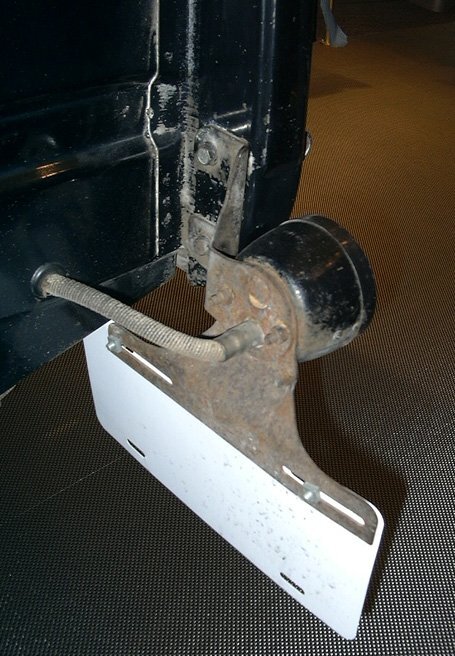
Here's a good picture of what the bracket looks like.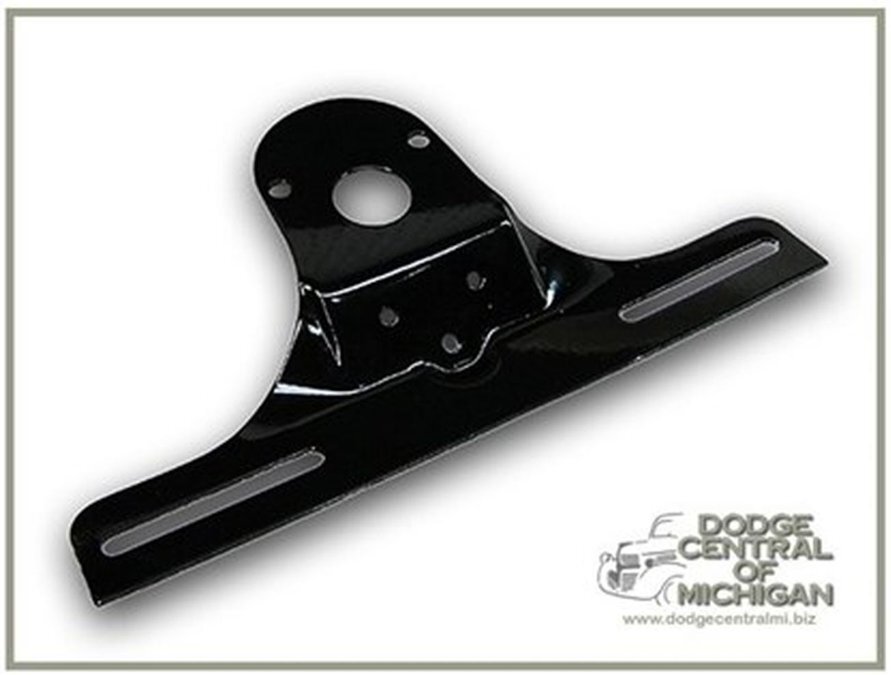
-
51 B3B build thread - after all these years
bkahler replied to bkahler's topic in Mopar Flathead Truck Forum
I installed the weight rating placards today. I'm not sure why but its very satisfying having them installed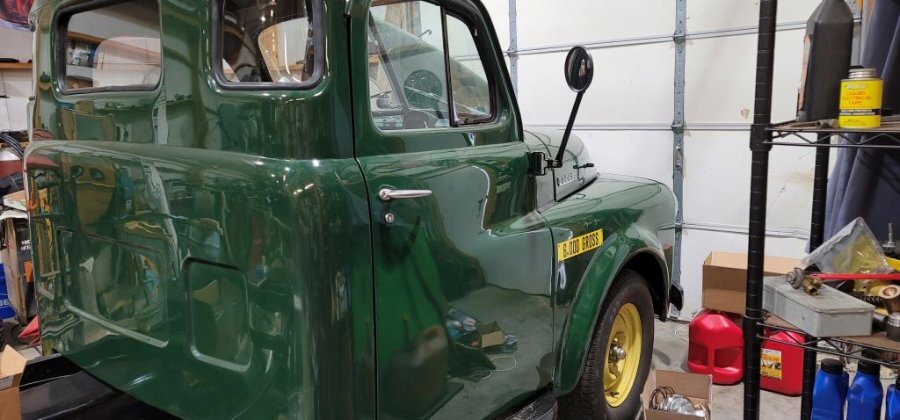
-
License plate bracket - is it bent?
bkahler replied to bkahler's topic in Mopar Flathead Truck Forum
That's sneaky of you to link to my own picture!! 🤣 -
I feel your pain. My original mopar heater core didn't pass muster and the repair shop said they couldn't fix it because it was to far gone. Ended buying two more on ebay to get one good core.
-
License plate bracket - is it bent?
bkahler replied to bkahler's topic in Mopar Flathead Truck Forum
Los, I'l gets some pictures later today and post them. -
License plate bracket - is it bent?
bkahler replied to bkahler's topic in Mopar Flathead Truck Forum
Here's the picture from the factory parts manual.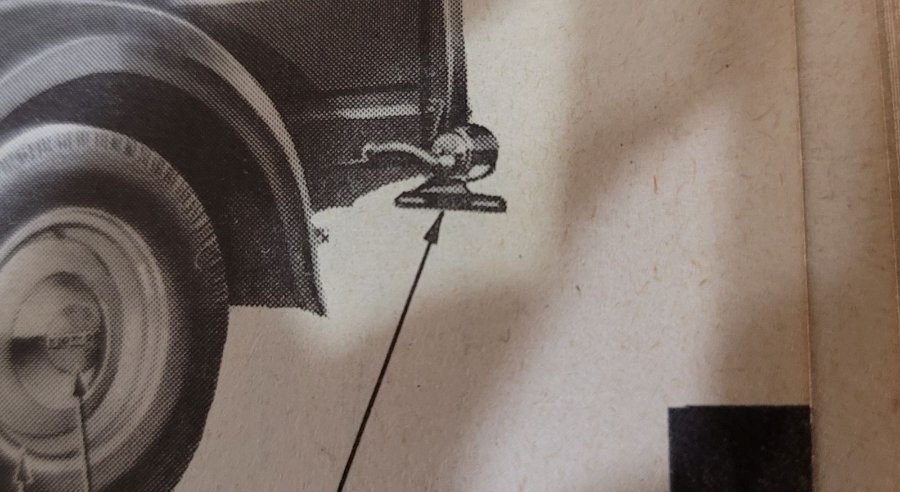
-
License plate bracket - is it bent?
bkahler replied to bkahler's topic in Mopar Flathead Truck Forum
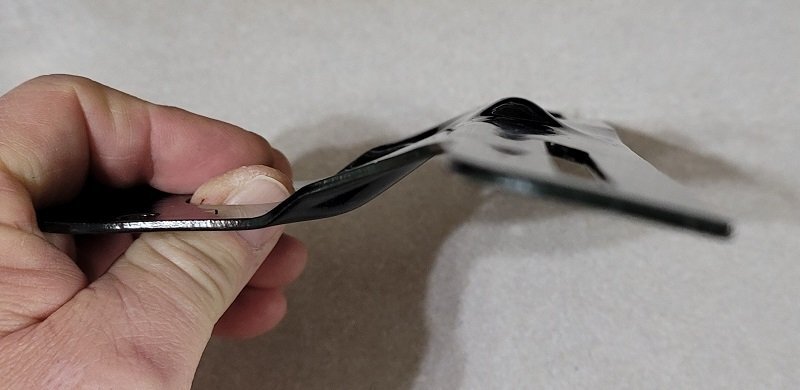
I think you got it right the first time. According to the factory parts manual, in my attached picture, where my thumb is entering the bracket, that face is pointing to the rear of the truck. That orientation would put the angle of the license plate pointed as you originally suggested, slightly upwards towards the tail light. I've seen a few pictures where the bracket was installed as shown in the parts manual. I've also seen some mounted just the opposite and they don't look quite right. -
License plate bracket - is it bent?
bkahler replied to bkahler's topic in Mopar Flathead Truck Forum
Thanks. That makes sense that it would tilt the plate slightly for illumination, I hadn't considered that aspect. -
I was getting ready to install the license plate bracket and noticed that it might be bent. The bracket it used but doesn't really appear to have any real damage to it. When it's mounted on the tail light bracket the license plate has a slight upward tilt so if you're standing at the back of the truck, it would be angled upwards somewhat at the bottom. I'm not sure if this is correct or whether it needs to be straightened.
-
51 B3B build thread - after all these years
bkahler replied to bkahler's topic in Mopar Flathead Truck Forum
Interesting thought on the magnetic decal. I'll have to check with my nephew to see if they can make magnetic decals. -
51 B3B build thread - after all these years
bkahler replied to bkahler's topic in Mopar Flathead Truck Forum
My guess is each state had their on rules and regulations on what you can haul with a pickup. My first thought when I saw the Under 5000 was maybe the bed was allowed 5000 lbs and the cab could hold two people weighing 500 lbs each 😄 -
51 B3B build thread - after all these years
bkahler replied to bkahler's topic in Mopar Flathead Truck Forum
Is this the body caulk you're referring to? If so, I have a box or two on hand. It would certainly be easier to use than the rubber strip.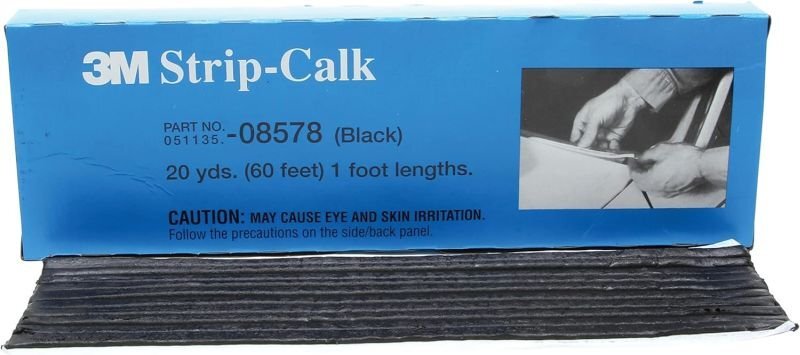
-
I've converted mine to 12 volts. I'm looking forward to how yours runs with the conversion. I got lucky 20 years ago and found a NOS steering wheel on ebay. My original wheel was like yours.
-
51 B3B build thread - after all these years
bkahler replied to bkahler's topic in Mopar Flathead Truck Forum
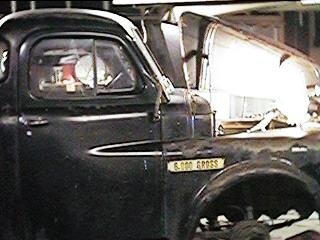
Several years ago we discussed the weight placards on these trucks. At the time I only had this picture available. Yesterday, while looking through a bunch of picture albums I found about 50 pictures of my truck that I took as I was starting to dismantle it. I found the following picture showing another weight placard or decal. What I find interesting is the one on the front fender shows 6,000 Gross, yet this one shows UNDER 5000. I'm now debating whether or not I should have my nephew recreate the UNDER 5000 decal and put it on the truck along with the 6000 Gross decal on the front fenders. If nothing else it should make for some interesting conversations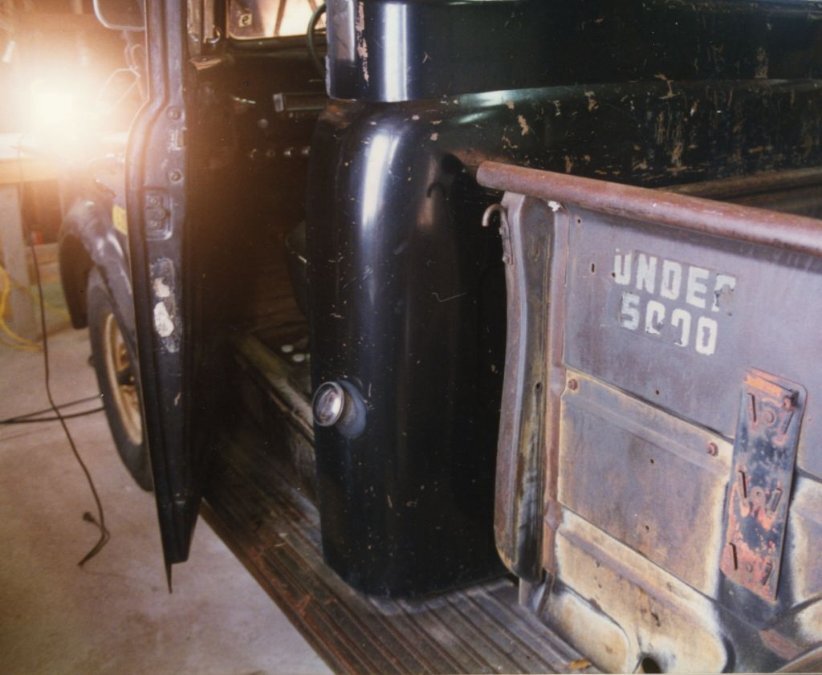
-
51 B3B build thread - after all these years
bkahler replied to bkahler's topic in Mopar Flathead Truck Forum
Due to the USPS inability to deliver a package to me from DCM Classics I've been forced to work on other tasks while waiting for the bed parts. Parts were supposed to be delivered Saturday, but for some strange reason the package has been sitting somewhere between Lexington and Richmond (30 miles) for 3+ days now. I stopped at the local post office and asked if they could tell me what's happening, due to the holidays they are extremely backed up. I assumed as much but what I found strange is they don't sort things based on first in, first out. Instead it's apparently just random. Frustrating to say the least. So with no bed parts to work work with, I decided to wrap up a few details on the tail lights. While doing some research on tail lights for these trucks I came across the following pictures. To me they look like original tail light installations. I decided to try and replicate the setup on my tail lights and came up with this. Close enough for me The day after I ordered the bed parts from DCM I ordered a roll of their rubber fender welting. It arrived right on time. Unfortunately it has a bead on it that wasn't in their description. Their picture was to small to make out any detail so I figured it was probably correct. I'm a little bummed out about it. My first thought is to just use a straight edge and cut the bead off. The rubber quality seems to be good so I might as well use it. The last thing I started working on was the headliner. I won't bore you with the details, but I now have a new interior kit with headliner on order from DCM. Unbeknownst to me, the order of installation is supposed to be the headliner and then the rear panels around the windows. That's not how I approached it. The ABS interior kit wasn't cheap but I'd just as soon do it right and be done with it. Pictures of the interior kit installation will be posted sometime in January. Brad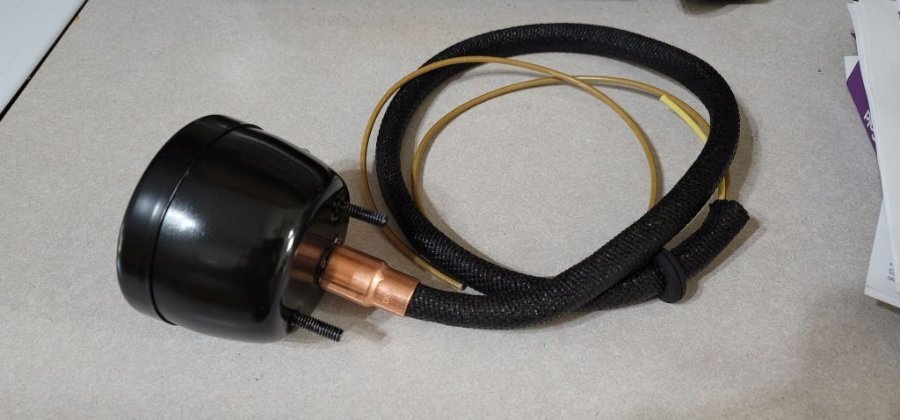

-
51 B3B build thread - after all these years
bkahler replied to bkahler's topic in Mopar Flathead Truck Forum
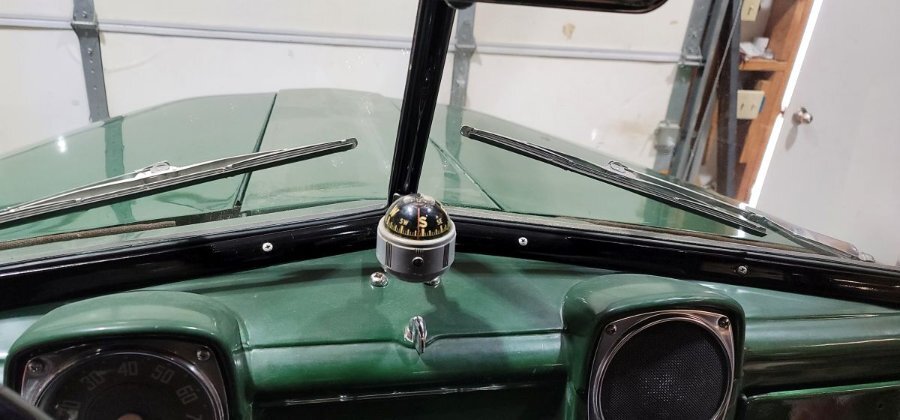
I got the GPS installed today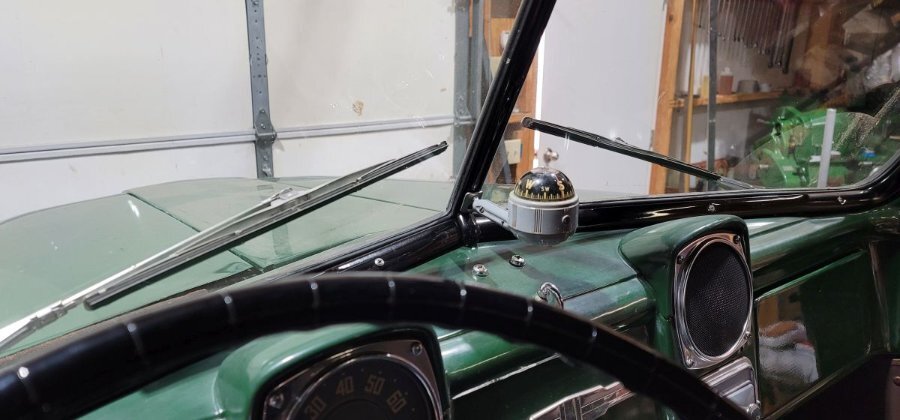
-
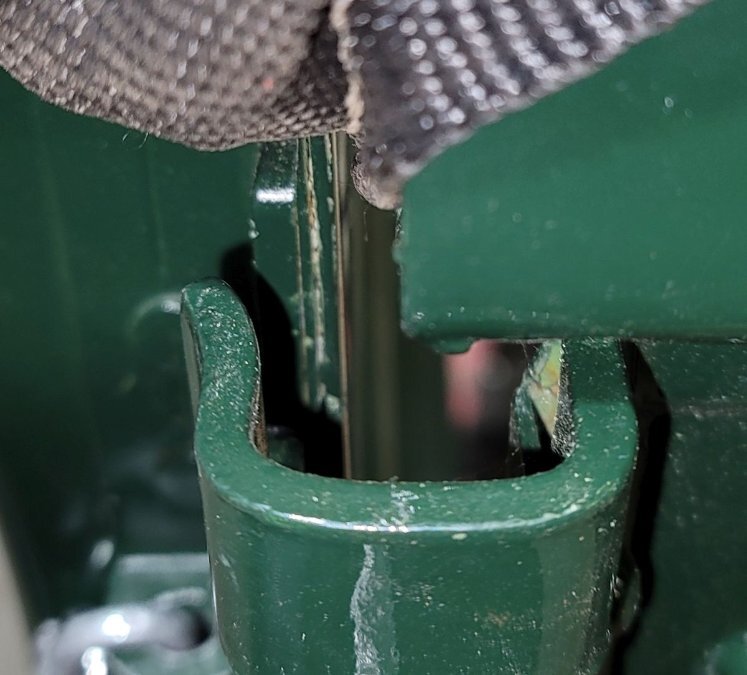
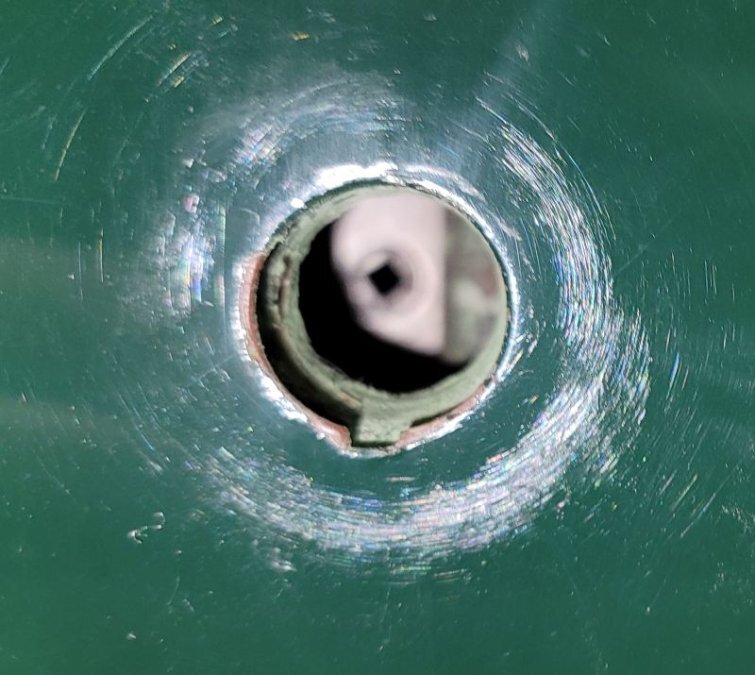
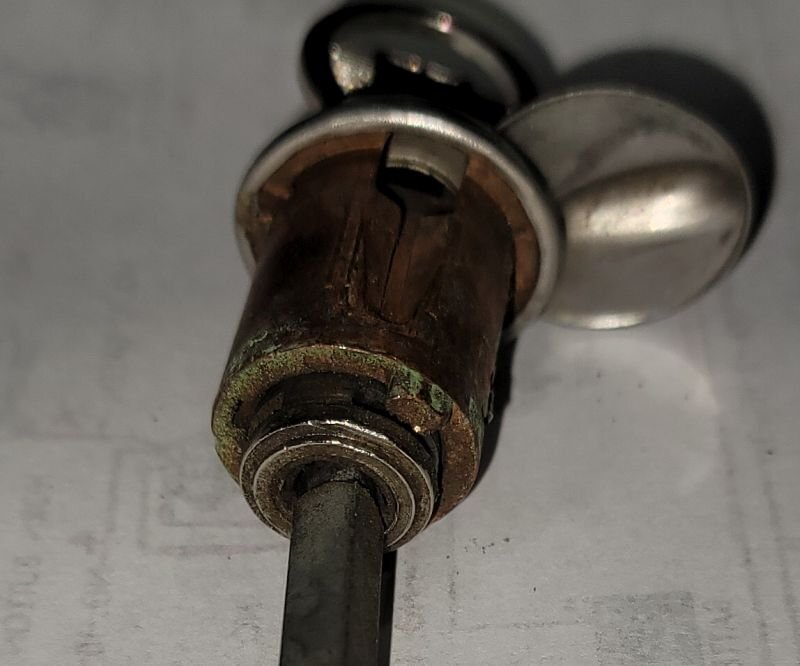
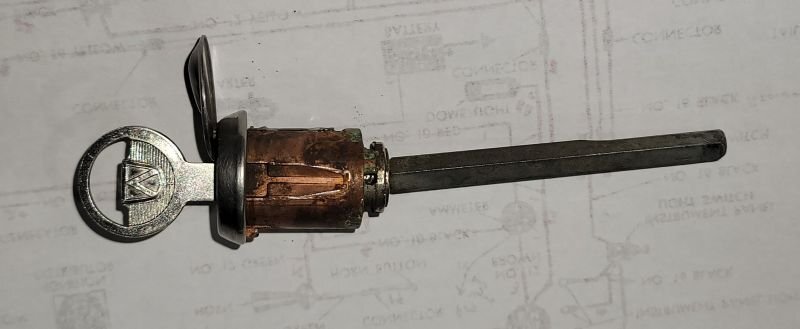
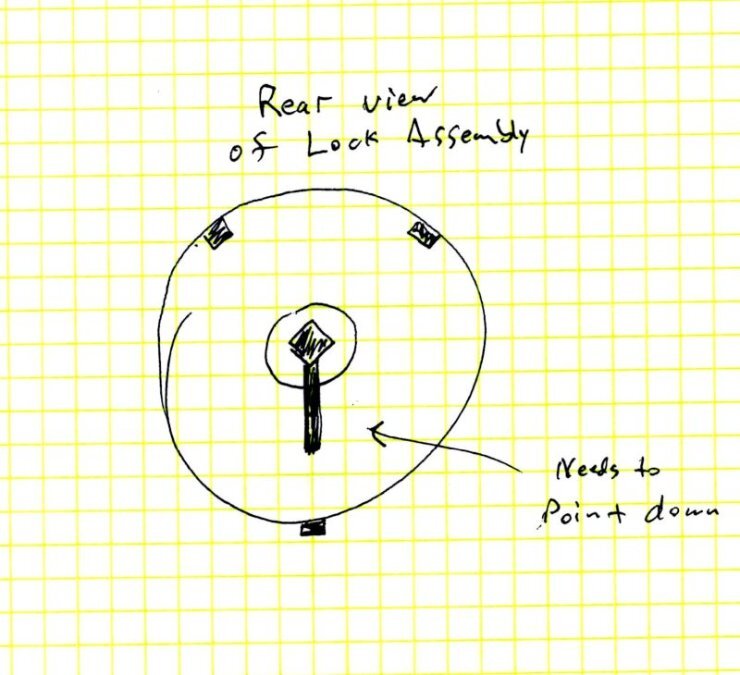
Success! The lock itself can only be oriented one way, there is a tab on the lock that matches with a tab in the hole in the door which orients the swivel cover so it pivots from the top. The square opening has the corner pointing up when the latch is in the locked and/or unlocked position. That's where it needs to be when inserting the key lock assembly. The lock mechanism that is in the latch assembly rotates 180 degrees. CW = unlock door and CCW = lock door. I tried several approaches and found that the key (no pun intended!) to getting it to work is orientation of the 3/16" square shaft that sticks into the door latch. The square shaft has to be rotated 1/2 rotation (roll pin pointing down) before being inserted into the latch assembly. I don't think it matters where they key is at this point, as long as the little pin in the 3/16" shaft is pointing down when you engage the door latch mechanism, it should work. When the pin is pointing down the 3/16" shaft will be oriented to match the opening in the door latch. I was able to reach in from inside the door and guide the shaft into the latch. It was a bit fiddly when doing so but I managed to accomplish the task six or seven times and got faster at each time
-
I didn't realize the key locks were supposed to be oriented a certain way. That helps a lot, thanks. That's something the manual doesn't cover at all. Earlier I had pulled the key lock out and brought it up to the house and I started tinkering with it. It turns out I can turn the lock fully clockwise and pull the key and vise versa I can rotate it fully counter clockwise and pull the key. The issue in the rotation is in one direction it is harder to pull the key out, and at the time I was trying to be careful and not force things. Tomorrow I'll squirt some graphite into the lock, just in case, and re-install again.
-
51 B3B build thread - after all these years
bkahler replied to bkahler's topic in Mopar Flathead Truck Forum
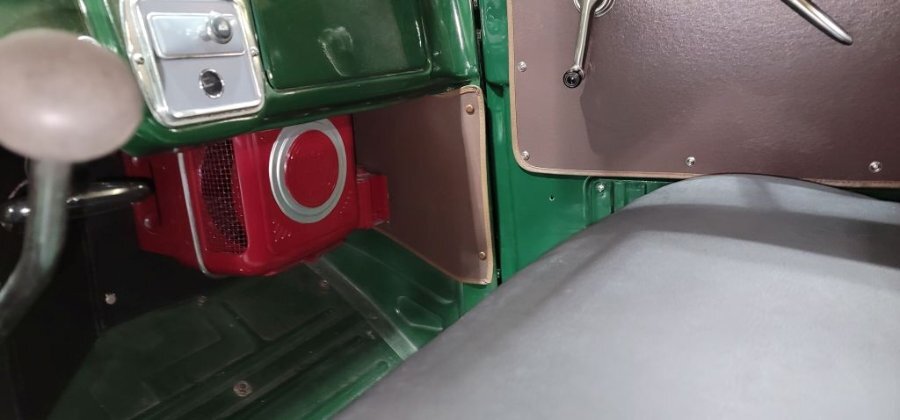
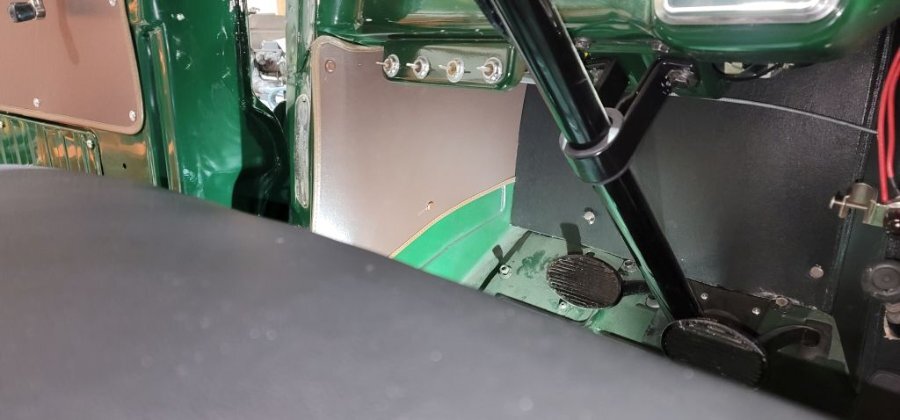
Kick panels installed.