builtfercomfort
-
Posts
372 -
Joined
-
Last visited
Content Type
Links Directory
Profiles
Articles
Forums
Downloads
Store
Gallery
Blogs
Events
Everything posted by builtfercomfort
-
Almost all hydrogen conversions are a scam. You can't run your car on water, either, and there is no $49.95 kit that will double your gas mileage. Sorry. Hydrogen is a very small molecule and wants to escape everywhere - through fittings, the walls of tanks, etc. If you have a tank (where do you fill it?) or a generator (running on what?) and can plumb your carb for hydrogen you can probably tune the motor to run it. But there are no hydrogen wells - you need to generate it somehow. So it's a net energy loss. That's why we use hydrocarbons. Propane will work, it has much less caloric content than gasoline (less power) but you can increase the compression ratio to compensate (for a propane-only motor). LNG works. Gasoline is even better - ever try to pour a bucket of propane into a tank, after you ran out of fuel by the side of the road?
-
Anyone ever balanced twin carbs ??
builtfercomfort replied to david lazarus's topic in P15-D24 Forum
The more difficult, inaccurate (but cheap!) old fashioned way was to get a length of vacuum or fuel line hose about 18 inches long and put one end on the edge of the carb while the motor was running, and the other to your ear. You would listen for the whistle the carb made through the line, and compare the two. If the two carbs were pulling the same amount of vacuum, you would hear the same tone, or if one was pulling more you would hear the difference. That's the theory, anyway. It's cheap enough to give it a try, I figure, and might get you close if you are way out. But the carb sync tool is surely the way to go in the long run. -
Test drive without the front clip on?
builtfercomfort replied to Arthur1947's topic in P15-D24 Forum
A cheap battery box from Boaters World (or equivalent) and some bungie cords would do the trick perhaps? Otherwise you would need to mount some plywood or something flat, and then the aforementioned bungie cords. -
Would a 39 Chrysler OD be the same internally? It has the column shift on the tranny. I'll have one (tranny/od /motor) for sale soon.
-
This belongs in the Tech section - it would be especially useful for the folks with pre-war cars.
-
You have the same air filter area as Don, which I think is good. Air in yours has an additional restriction - I can't see how much. It might be no problem at all. Air in yours has to either go thru the holes in the side of your stainless filter cover, or in thru the top - I can't tell what clearance you have between the top of the air cleaner and the sides of your stainless filter cover.
-
The radio grill holes look like they might restrict the AC flow? Maybe you will want to find a less restrictive grill material for the sides? Hard to tell from the picture, and of course you will want to drive it first to tell. It might move the air but cavitate giving you that annoying 'whoosh' sound all the time. And we await the remote radio setup info with bated breath... I've seen (on the web) a detachable face radio with wires run to the face, mounted separately from the main unit. They had mixed success with that method, the main problem was getting the CDs to eject.
-
Carter Ball & Ball Throttle Shaft Slop
builtfercomfort replied to crazycasey's topic in P15-D24 Forum
On an old IH 6 carb, I used some JB Weld type stuff on the outside of the carb at the throttle plate axle, to lessen the slop. It was also sticking, and my fix worked fine. But if it's not sticking and the idle works, I would leave it be. (Or go to a twin-carb manifold and the Webber/Holley 2 barrels like many here - vrooom, vrooom!) -
Are you sure this is not too restrictive? How many CFM would it flow?
-
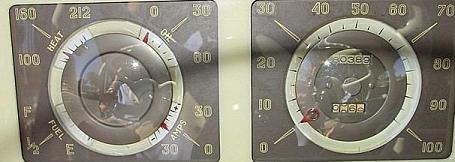
I'm thinking of putting new graphics on my gauges anyway because the old decals are falling apart. Thus I can put 'volts' where 'amps' used to be and change the numbers as needed. I'm looking at print-it-yourself decals and rub-on letters from this place- I'm hoping they can be made to work in an auto environment. The rub-on type can be printed on a laser printer, while the water-slide kind use ink-jet printers, and ink-jet ink often fades in sunlight. So it's still in research right now. I need to re-do my gauges (mine are bubbled and looking poorly) and I'm hoping this will work for me - assuming I can find the right font and get these decals to work. There are zillions of free fonts, one should be close enough for me. A restored version of my dash looks like the attached file - I don't need to match the font exactly if I replace everything.

-
I think the shelf life would be very long if unopened, and very short if opened. I believe most dry gas is fairly pure methyl or isopropyl alcohol. It used to be anyway - not sure about what's in the new ones. [These kids and their newfangled contraptions!] It's cheap and it works, so it may well be unchanged. You know how 'Everclear' is only 192 proof (91 percent?) that is because pure or 'absolute' alcohol is hygroscopic - it will suck the water from the air until it is down to 192 proof - it actually dissolves the water. If you mix 1 gal of absolute alcohol and 1 gal of water I think you get about 1.9 gallons of mix - something less than 2 full gallons. So the same principle works for dry-gas and it's methyl (wood) or isopropyl (rubbing) alcohol. It will combine with/dissolve the water in your tank and make it flow with the gasoline.
-
If you can jack the rear end up, put it in neutral and slowly spin the rear wheel and count the driveshaft rotations. Then you will need a vacuum source from somewhere else (shop vac? may be too strong?) and put vacuum on the thing-a-ma-bob, and see if it moves. That will be an interesting piece of the truck to work on. I'm just guessing, but you might need to spin the tires as if you were driving down the road, since I would guess that the actual gear changing uses some force greater than a vacuum actuator, and the only available force is your forward momentum. Default would probably be low range, so granny gear and reverse would work at low speeds, and high range only available on the highway. Edit: I took a closer look at that actuator- it looks like you can probably move it without a vacuum source. I would still guess you would want the rear end/driveshaft to be turning a little or the gears won't actually change (?)
-
I read this thread at the hotrodders.com forum - I'm mostly convinced to try a voltmeter, though I prefer an ammeter. The drawbacks they mention are: 1. You have a large, always-hot wire going into your dash. If you touch it with something grounded (like your hand) it will send power through things that should not have power through them (like your hand). 2. If using the old gauge, sending all your car current through this 70-year-old gauge. 3. If using a new gauge, it probably has a shunt. These shunts may get hot/old and die, and because you are sending all your current through the ammeter, your car stops. But I'm already planning on taking apart my dash and replacing the oil pressure & oil temp gauges with the guts from new 12v ones, (hopefully using the old needles) and perhaps replace the fuel gauge too (I first need to see how the stock one works with my new sender). So a modern, tiny ammeter that I trusted would be good for aesthetics - I'd put it in place of my stock one. I could put a voltmeter in the same area and work on the lettering, or just put tiny dots in at the calibrated points and leave it saying 'amps' but actually measure 'volts' - but I don't like that idea much. I don't have the skill needed to re-letter the gauge area to match, and don't want to pay the hundreds to get someone to do it - does anyone know of a source of old-timey decals for gauge lettering? I'd have to do all to match, but that would be okay with me. But since reading the thread linked above, I'm hemming and hawing... Hmmm....
-
I'm about to wire my 39 for 12v, and want to keep the ammeter - and so I am reading this with some interest. What do you think the resistance of the internal ammeter is? And how many watts would I need on a such a resistor?
-
As I understand things (as usual, someone please correct me if I'm wrong!) , the fat wire from the alternator to the battery goes to the ammeter instead, and the wire goes from there to the battery. All charging current thus flows thru the ammeter. That's all there is to it. I had an aftermarket one once wired backwards - but it worked.
-
It means it's been hangin' out with the bad crowd, wearin' dungarees, drinking moonshine and using foul language. It's bound to come to a bad end if it don't change it's wicked ways, mark my words! ---- Smoke from the tail pipe can mean various worn things - if blue-grey smoke, oil somehow gets burned either in the combustion chamber or in the exhaust. If white smoke, water / steam is getting into the exhaust.
-
It's a vague memory but I thought someone on the group was running Honda Civic spark plug boots to keep water out of the spark plug well on the flathead.
-
Another way of seeing spark is to pull the spark plug, put it in the boot, and ground the threads of the spark plug against bare metal on the cyl. head. You should see a spark jumping across the spark plug gap. This won't work too well in bright sunlight but it's usually good enough and keeps you from getting shocked. The high-volts, low-amps from a spark plug wire won't hurt you but it's startling.
-
They work for me, but I think you might have to try one. Can you find a used one to mount and try turning lock-to-lock on both front sides? This is the size I'll be running on my 39 Chrysler but I have disc brakes up front. Also I'm running the stock ride height. I had to adjust my wheel stops to work with the disc brakes so I can't tell if they would cause problems without that adjustment. These tires are a little wider but no taller than the 6.5 or 7.0 x 16s that they ran "back in the day"
-
Electronics Guru questions - DC Motor Controller
builtfercomfort replied to builtfercomfort's topic in P15-D24 Forum
Interesting - glad to hear what people actually did instead of calculations. I though I needed more ohms and watts both. Resistors are simpler - I like simple. -
Electronics Guru questions - DC Motor Controller
builtfercomfort replied to builtfercomfort's topic in P15-D24 Forum
I might end up with just a voltage reducing power resistor. I've seen some on the 'bay that I might use. They would need to be big and sturdy. The problem with resistors is the size and heat of such things when dealing with fairly high-amp motors. I've seen web pages that suggest I need a 6-Ohm, 150-watt resistor - the excess voltage would be dissipated as heat. The DC motor controller would be more efficient and also somewhat tunable - turn a dial a little and change the motor voltage, thus speed. If this idea works it could help a lot of people with 6v-12v conversions for wiper and heater motors. But I need to check out my existing wiper motor first, and rewire it. -
I've heard of using a DC Motor Controller (small circuit board) to provide lower voltage for using a 6v motor for 12v. I'd rather keep my 6v wiper motor in place as I wire the rest of the car for 12v, but I have not found a cheap high-amp 6v motor controller. There are lots of cheap 12v motor controllers available. Can someone who can read an electrical schematic take a look at this 21K PDF from this Ebay Auction and maybe tell me if they think it would work for running my 6v wiper motor with my 12v car? Would there be a resistor or something I would need to change? The way I understand it is that the timer circuit provides full voltage for tiny fractions of a second, giving you the equivalent of a voltage drop. This device says it will do 15 amps which should be enough for my wipers - if not there are other similar (bigger amp) units available. I picked up this idea from an Australian Vintage VWs forum - they have a string of "Dick Smith" electronics shops there that sell a kit for this that people have made work.
-
Interesting - there is a recent thread on the HAMB about using Ford Aerostar springs on that era Ford for about a 3" drop from stock, without the problems of cut coils. I wonder if those of you who want to get that 'low' look should look into this option. If 55 Ford springs work in the Dodge, then 90 Aerostar springs should also work. (I don't know if this applies to the P15-D24 or only the older pre-war cars. Spring info is below.) http://www.jalopyjournal.com/forum/showthread.php?t=260795&showall=1 Details on the part: Moog PN CC850 Fit 1990 and other year Ford Aerostar (3.0 or 4.0 engine) They are $65 at O'Reilly and $52.79 plus shipping at Rockauto.com. Dimensions: Diameter: 4.07" Wire Diameter: 0.735" Free Height: 11.65" Load Height: 10"
-
I believe the original quote is "There are no dumb questions, but there are a lot of inquisitive idiots." Luckily this does not apply at this forum where we are all above average.
-
Considering that it was either this repair or a new engine block, I'm kind of glad to see it. Maybe the repair man saved the owner a bunch of $ or saved the car from scrapping. Gotta agree with you on the (low) quality of the original repair though. Also gotta wonder how that oil passage got broken in the first place.