-
Posts
2,476 -
Joined
-
Last visited
-
Days Won
25
Content Type
Links Directory
Profiles
Articles
Forums
Downloads
Store
Gallery
Blogs
Events
Everything posted by DonaldSmith
-
More things to check. Gap the plugs right, to get back to where it was running smoothly at low speeds. Check the throttle plate for full opening. That would be a quickie. (Also the automatic choke linkage. It bit me before.) Check the muffler and tail pipe for obstruction? I could use a suggestion on how to do that. Check the carburetor for blocked passages (Per Mike's carbs). (I just noticed that the air horn has a cast-in passage from the main jet to the brass tube that sticks up into the air flow.) Take another look at the step-up piston. (James Douglas said something sometime ago about the piston getting stuck, and what that would do.) Then go to ignition?
-
Thanks, FarmerJon. You get the "solution" nod, for your ignition check list and the video on checking condensers. . No one ever told me how to check a condenser with a multimeter. No more crap shoot, if we know the relative health of the condensers. (My transmission is Ma Mopar's M5, postwar semi-automatic, with the fluid coupling. Typically, start in the High range (3rd gear) and "accumulate momentum". At some point, let off the gas, and the transmission will upshift to 4th. The video showing the capacitor testing is for a negative ground system. I would discharge the condenser first, using the DC voltage feature of the meter. The man in the video charges the condenser by setting the meter to mega ohms, (2000k ohms on my meter). This uses the meter's battery to send voltage through the object being tested. He connects the (-) lead to the condenser body and (+) lead to the end of the lead wire. Meter on, and it charges the capacitor until it can take no more. (My meter reads "1" in that case,) Keep the meter connected for maybe 30 seconds, to make sure the condenser fully charged. Switch the meter to DC volts, with 3 spaces to the right of the decimal point. Connect the meter and take a reading of the condenser voltage. The number should be dropping. Disconnect the meter and remember what the last number was. Wait a couple seconds, and reconnect again. The first number should be close to the remembered number. Repeat until the number approaches zero. A good condenser will readily accumulate voltage and will store it for a reasonable time. I would have to play with a number of condensers to see what sort of range I ge, to judge the relative health.
-
I sent a message to Mike's Carb, asking if there is anything in the high speed circuit that I might have missed in rebuilding the carb. Meantime. I turned my attention to the mysteries of the ignition system. I installed a new coil, Echlin, via NAPA auto parts. Then a bonehead play. The plugs for the Pertronix were gapped at 0.035. I thought I had better re-gap the plugs back to 0.030. Working too hard. I had replaced the plugs when I went back to points. They were already 0.030. I gapped them to 0.035. The car didn't like it. I think I'll re-gap them to 0.030, and clean off the soot. Meanwhile, I'm wondering if the centrifugal advance might not be working right. Is it possible, that ancient alien astronauts . . . . (different show) Is it possible, that there is something wrong with the centrifugal advance system that's affecting the timing at high speeds?
-
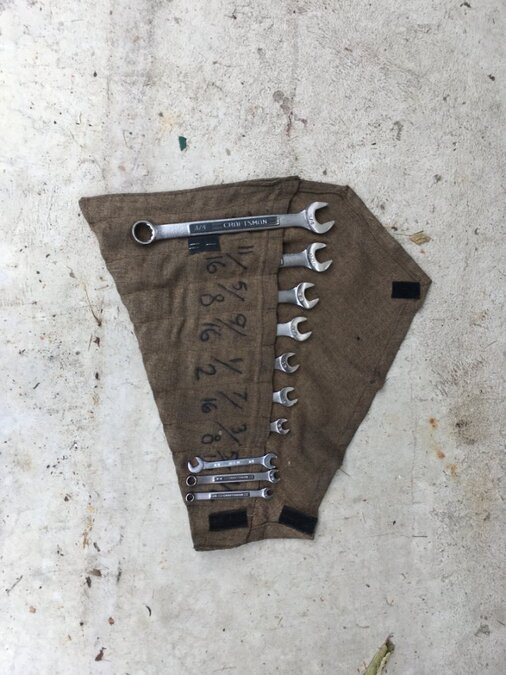
My favorite wrenches. Craftsman, plus one little odd double-ended open end wrench. Maybe 25 years old. Maybe almost that long ago, my wife sewed together the bag from some cloth I bought to go with the car. Each wrench has a marked pouch (except for the little, odd one). The flap folds over and is held with hook-and loop. The whole thing rolls up neatly. (I just found the set today, after missing it for months! It was rolled up, neatly, against some stuff on a garage shelf.)
-
The extra nuts and washers are probably sent as a courtesy for the fumble-fingered such as I, who drop one or more into the irretrievable chasm below the engine.
-
The new coil came with a lock washer and nut on each post, and a small bag with an extra set of lock washers and nuts. Should I leave the nuts in place, add the wires and add the new washers and nuts? Or is it OK to use just one sets of nuts? The studs look a bit short for an extra set, so I'll do what I have, lo these many years, take off the nuts and washers and use a single set. If the Wisdom of the Forum is different, I can always redo the connections. Or maybe I'm starting another unresolvable debate.
-
Per the "Won't Rev" thread, which should be allowed to rest in peace, the car would only rev so fast in 3rd, but could keep up with traffic in 4th. I rebuilt the carburetor to "rule out" carburetor issues. Oh, the car runs sweet at lower revs. And I developed great skills which I may never have to use, but I can tell people about. I took a more extensive drive this morning. Starting in 3rd, it goes well until it approaches 25. Then it stays at that speed, no matter how far I push the pedal. On Woodward, I could upshift at 25 and get the speed up to 45, maybe 50. I could keep up with the bus in front of me, but no better. At the top revs, the engine is not running smooth. I don't want to find out what an extensive run in that condition would do. I followed the carb rebuild instructions religiously. Did I miss something? High speed jet? I sprayed it and blew it out. I didn't try to remove it. Does it have a miniscule opening that should have been cleaned out with a fine wire? It is accessible from the bottom of the carburetor,. so I wouldn't have to take the carb apart. Any high-speed-jet gurus out there? If I can "rule out" the carb, I'll turn to ignition. I made a propitious offering to the gods, and bought an Echlin coil. I had left the Pertronix coil in place when I went back to points; maybe it resents the change. (I'll reset the plugs to 0.035 instead of 0.040 when I change the coil.) I had put a new condenser in, with the new points. Will I be playing the condenser game? Suggestions accepted graciously. I can try something, and take a drive. At least a short drive would tell the tale. I should be able to floor it in 3rd and get it up well past 25. Stay tuned.
-
It's worth a try. Thanks
-
(The forum is bugging me to select "Which post is most favorable? Mark as Solution." That's tough to do, when there are several reasonable suggestions and may be nothing hit the nail on the head. Maybe I'll make a final Executive Summary and designate that.) I did a test drive today. Starts well. Accelerates quickly (For Fluid Drive). Neighborhood cruise good. Starts in third, accelerates "briskly" up to 20, tip-toes into fourth. I got on Woodward, speed limit 45. Accelerated well to the point that it wanted to tip-toe into fourth. Seemed to bog down a bit. I tip-toed it into fourth and got to 45 mph OK. (Isn't the governor supposed to kick it into fourth when the engine revs up in third to about 45? Of course, I usually to tip-toe the upshift sooner.) I need to test it at higher speeds. Will it get to 60, 65, 70,without bogging down? Maybe the local freeway will have light traffic this holiday. Stay tuned.
-
Carb together by noon. On the car, primed, accelerator pump squirts, engine fired up. Engine died. (Had to set the idle speed.) Purrs. Revs up, a little roughness. Next, a shakedown cruise through the neighborhood. Stay tuned for the next exciting adventure.
-
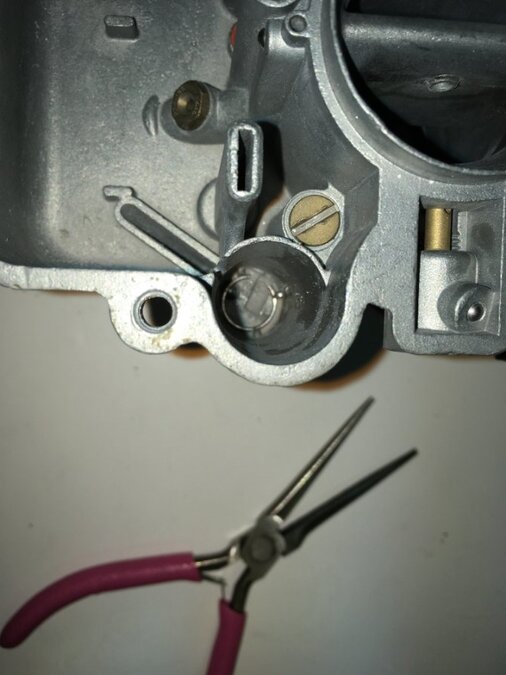
One day my neighbor saw me on the roof and asked, "Are you crazy?" I answered, "I may be crazy, but I'm persistent." So that I can sleep easy as I'm cruising down the road, I popped the clip out again and got it in right. With the small needlenose pliers gripping the clip over the ball, I was able to engage the ends in the lugs. I e-mailed Mike's Carb, "Never mind." On to the next challenge.
-

Errr, shure would like some help on this clutch problem
DonaldSmith replied to Los_Control's topic in Off Topic (OT)
I find that I can still put in a full day's work, but it takes me a week or two. -
So now he tells me. We'll see what Mike's Carb says about how I have the clip now. On the other hand, if it will keep me awake at night, or drive with trepidation, I might just pop it out and pop it in again, like I'm getting good at it. I'll see what I think in the morning. (Mike's did furnish me the ball, so that implies messing with the clip.)
-
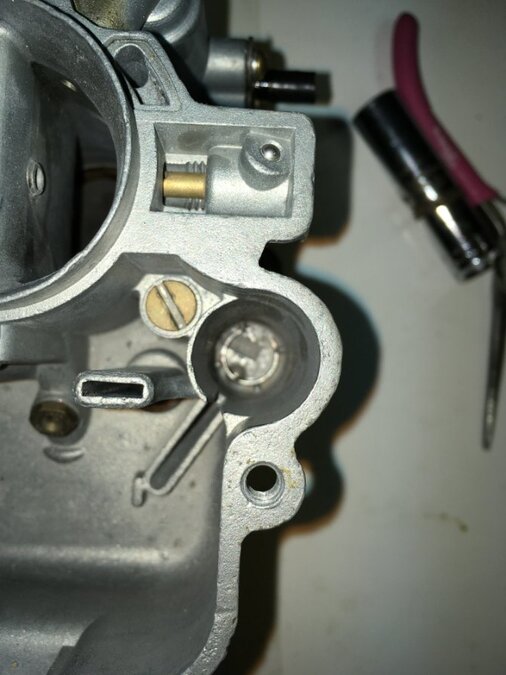
Snapped into place. But- I kept working on the clip, and I got it under the four lugs, but, the open end is not in the space opposite the ball, but in the next space. Is this a problem?
-
I can get the clip in position above the lugs, but if I try to compress part of the clip to get it into the notch of one of the four lugs, the clip will flip around. And it's hard to see what I'm doing. My new needlenose plyers can get the clip in position, but then I can't see where to poke a screwdriver. I put our a distress message to Mike's Carbs. We'll see if they have any suggestions.
-
Yep, two balls. (There are other balls permanently in place.) I got them in the right places. The small one nest in a depression at the bottom of the accelerator pump shaft. The problem with the wire C-clip is that it does not want to sit near the bottom of the shaft with the open end opposite the ball. Attempts to push the clip down and into place result in the clip flopping around out of position. I just bought a small pair of needle nose plyers. We'll see how they work. (The handles are pink, but I ca claim that the plyers are my wife's.)
-
C-clip conundrum - Carb going together, step-by step. Pump Discharge Pump Ball (the smaller ball) in place in a recess in the bottom of the pump shaft. To be secured with a wire C-clip that engages four lugs. The C-clamp keeps the ball in place. The ends of the C-clip should be opposite the ball. The C-clip came out easily enough, but I have trouble getting it back in place. Too deep and dark for needle nose plyers. "Special tool"? Another way to secure the ball? Artistic bend of a paper clip? Here's the carb body, with a view down the pump shaft, with the wire C-clip beside the carb. The ball is out of view, but two of the four lugs are visible. Hep! .
-
Someone could have a cottage industry making rear windows. Maybe have to be acrylic. I saw something where a glass company has a sand bed that they contour (per computer, I'm sure) to the required shape, and the hot, limp glass settles into the required shape. But probably big bucks. Somewhere in the process the glass has to be flash cooled, to set up the skin stress that makes the glass "tempered". Back to the 42 Imperial limousine with the curved glass windshield. A prototype, I'm sure. But how did Big Glass Co, custom bend glass for a car or two? A whole subject for internet searches.
-
Shazam! My big old screwdriver fit perfectly! All that angst over a special tool to remove the "Dash Pot Valve Cage". I blasted it with carb cleaner and compressed gas and now I can screw it back in. On to the next minutia. Step by step, check my work. When I got this rebuilt carb several years ago, I took photos of it from six views. Those photos are invaluable to check if I got the parts back together right.
-
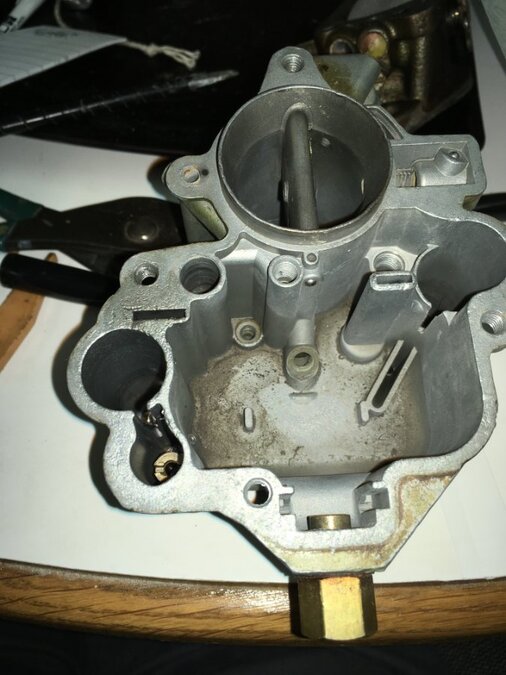
The Simple Green has been mixed, and the major carb parts are soaking in it. (2-hr max or the metal will discolor.) Then rinse, dry, blow out passages, ,etc. Been waiting for days for a special tool. Comedy of errors. The seller mistakenly cranked out a rebate for me. Then I received the tool and found that the tool is nowhere close to being right. Wrong info on the forum? I'll pay the postage to return the tool, and leave the rebate as it stands. I thought the tool came from Mike's carbs. No, they cobble their own tools if they need them. But soaking the parts should work. Maybe clear the passages with a wire. Don't remove the main vent tube - blow it out. I removed the throttle valve, for cleaning off gas residue, but they recommended leaving the choke valve alone. I'll clean the small parts as needed. Assemble per the book, per the book. Take my time. My Shop Manual illustration shows me that carburetors for use with the semi-automatic transmission have additional features: Kick-down switch built into the carb body. Dashpot system, with: Anti-Stall Magnetic lockout and Screw; Dash Pot Lifter Link and Pin; Dash Pot Rod and Plunger; Dash Pot Valve Cage, with Valve Cage Plunger and Rod and Operating Spring. I'll know these by heart by the time I'm through. Mike's Carburetors kit seems to have all the special parts, and then some. Two versions of needle valve seat, for different connections to the fuel line. Scads of gaskets, for every conceivable variant. Good instructions, but light on dash pot info. Wish me luck.
-
I've got a metal in-line filter on the tank side of the electric fuel pump on the frame rail, as recommended by the pump manufacturer, and a similar filter on the inlet of the mechanical pump. And the mechanical pump has he glass sediment bowl, I think I have it covered.
-
Glass bowel? (He means bowl.) An easy typo. I'll go back to my corner.
-
Class today on "Vent Tubes". Mike's Carbs' diagrams and instructions cover a thin tube that goes up at an angle from under the main body, No. 36, the "Tube -Main Vent". "Do not remove it unless you have a special tool." OK, I won't. Then there's that slotted brass thing at the lower left, for which I am awaiting the special tool, known only as a "Vent Tube"? This is the Fluid Drive, automatic choke carb, so it must have a special function, something to do with the large chamber beside it? Dashpot? Yes! My Shop Manual shows all sorts of dashpot parts. I should be working off the diagram in the Shop Manual, to supplement the instructions that came with the repair kit. Happy days.
-
I'm getting the Simple Green tomorrow, and through this week I can clean everything except the main body, which will still have the vent tube installed. I may use separate jelly jars for the related parts which I am keeping in separate bags, to keep each group together. I can begin to reassemble things that don't go in the main body, until I get that special tool for the vent tube. (An egg carton would work to keep the parts separate, but I can imagine myself bumping it and scattering the contents.)
-
Of course, I have to take things to extremes, like easy access to the mechanical brake switch. But I also have the Jiffy Jet bulb under the floor . So I cobbled a removable part of the floor pan. (Shown hers, with the main panel removed.) (Jiffy Jet plunger, between the pedal arms, pedals off. Mechanical brake switch arm and red wires, below the panel.)


