


DonaldSmith
-
Posts
2,412 -
Joined
-
Last visited
-
Days Won
24
Content Type
Links Directory
Profiles
Articles
Forums
Downloads
Store
Gallery
Blogs
Events
Classifieds
Everything posted by DonaldSmith
-
I looked through my photos of one of my door tatches. The rotor has star-shaped points inside and outside. The inner side is what keeps the rotor from moving when the door is latched. And the points of the inner star get their own wear. Also, the profile of the inner star may be different. So it looks like I can't switch the right rear with the left rear. This photo is looking at the latch from the outside. As the door closes, the outer points that we see come toward us. As rhe inner points move from our right to the left, the three springs keep the rotor from rotatoing back in the other direction. The latch mechanism works to lift those spring ends away fromthe rotor so that the door can open. Maybe there is a fault within the mechanism to keep these springs from doing their job. Maybe a nice wintertime project. Doug&Deb have a rotor kit for a 52. Also there are some on line for 49-52. Anone know if it would fit pre-49? (These were used on a number of cars. Someone on line fixed his 41 Stude with a kit.)
-Copy.jpg.e5e4ad621811a3473a55e69bf441144b.jpg)
-

Which is correct jack and wheel wrench for P10?
DonaldSmith replied to Ivan_B's topic in P15-D24 Forum
Yes, dear, I'll be careful. I jack up a corner of the car high enough so that the wheel clears the ground (or slab). Then I set a racheting jack stand so high that it doesn't clear the frame. Then I jack the car up so that the jack stand clears the frame, and I'll slip the jack stand under the frame. Finallly I lower the jack so the frame rests on the jack stand, and I'll close the valve of the jack. If I remove the wheel, sometimes I'll be triple-safe, and slip the wheel under the frame. -
-
Photo forom thread about 5 yers ago. x x x
-
I once tried to check TDC by pulling the plug on Cylinder No. 6. It was hard to tell when the stick really bottomed, especially with the problems I had turning the engine. Even with the spark plugs out, as should be, I could never turn the engine by pulling on the fan. A few times I would pry the flywheel teeth. Try that while watching the stick rise and fall. Then I started just tunking the starter; the engine always seemed to stop past TDC. Eventually it would hit a sweet spot. Lately, with the pusher fan working and the pulley fan removed, I have excellent shots with my battery-operated timiing light, from the right or left side of the engine, to see the timing marks clearly. As they used to day, "The proof of the pudding is in the eating." With the timing about 4 to 6 dgrees before TDC, manifold vacuum is about 19 inches of engine vacuum. Good enough for me. My damper/pulley must still be together.
-
In my photo, I have a wad of paper towel in that hole. That's where the dipstick tube screws in. Where's your dipstick? Here's my dipstick tube.
-
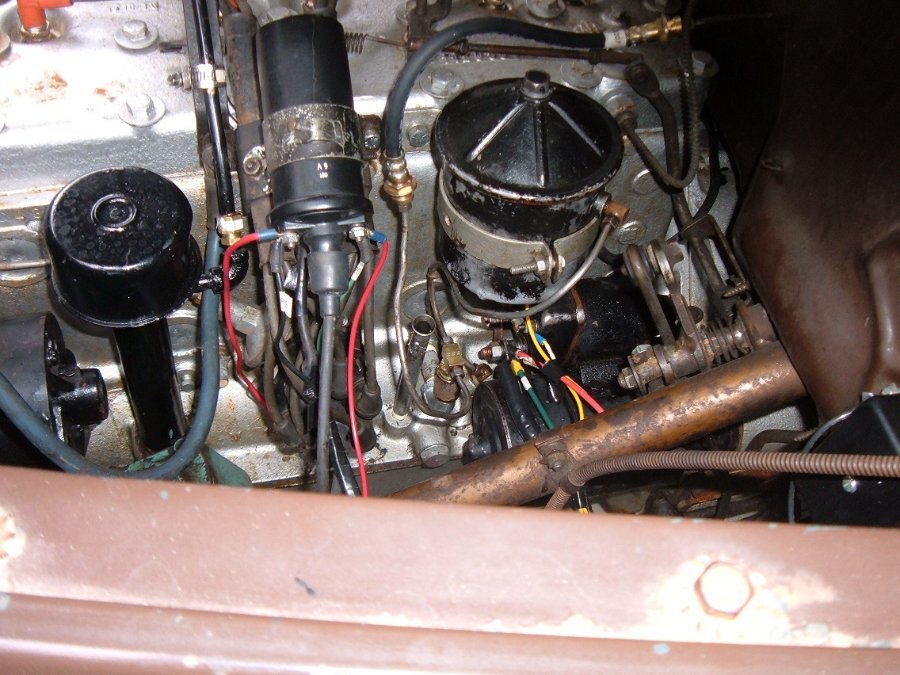
Here's a photo of the side of my 47 DeSoto engine from when I recently removed the oil filter housing. It might show the hole that Bingser is talking about. Side of head: Bolt at coil attachement - 2 bolts at oil filter bracket - Temperature probe. At welch plug - bolts, 1 at 7:00, one at 1:00 with ground strap to the body. Bottom of block: cluster of oil line holes. (Not sure what each one is for.) Vertical tube to oil pressure gauge (future tee to supply oil filter). Angled opening below the solenoid (future return line from the oil filter).
-Copy.JPG.daa3f082c674a5cbff2b27877226cd8e.JPG)
-
Jump for joy! That's what i did years ago when I got my radio working. I found an on-lne source for the capcators, and I zapped the vibrator with house current run through a light bulb. I love the hum.
-
"Spray can rebuild" - something like "Lipstick on a Pig"?
-
RAM 2019 Classic (continued 4th Gen) - filler tube issue
DonaldSmith replied to Eneto-55's topic in Off Topic (OT)
Maybe the volume of the pump might vary enough to make a difference between pumps. There's a ratchet in the handle for setting it at varous volumes. I know we all like to go full bore, but will a pump fill the tank easier at a lower setting?. -
Transmission Relay and Voltage Reg on '47 DeSoto
DonaldSmith replied to Bingster's topic in P15-D24 Forum
Transmission relay at the left (rear), voltage regulator on the rigtt (front)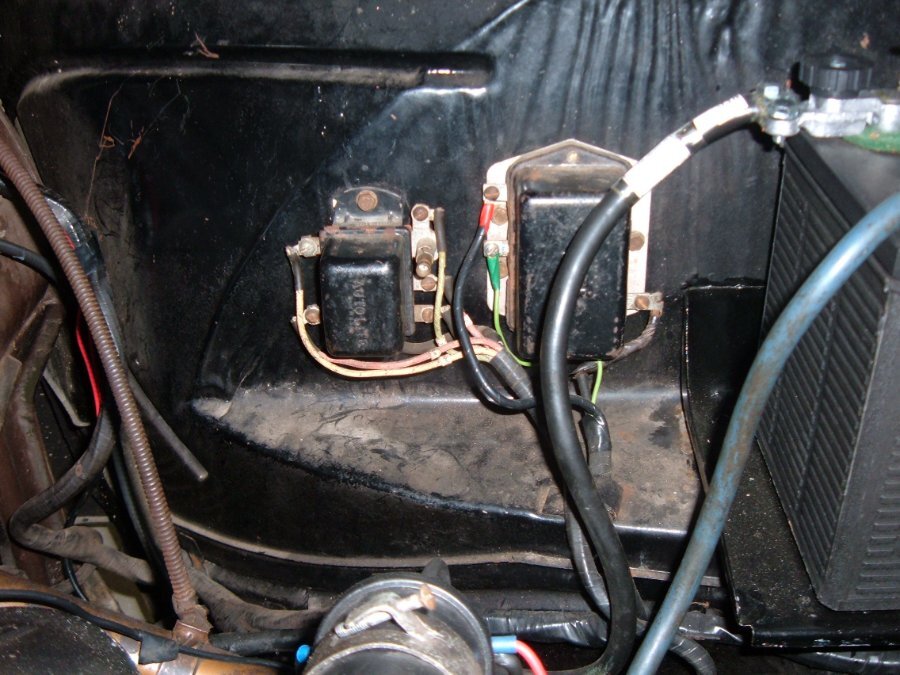
-
We've all Been There, Done That.
-
Look out for where the grease fittings are. The wrong tie rod end can smash its grease fitting against the pitman arm. Go ahead, ask me how I know.
-
My car has an air distribution box below the cowl vent. The box has its on drain hose to the engine compartment. FrarmerJon's car does not. Must have been an option. The drain hoses have to be cleaned out occasionally, to get rid of seeds, leaves and twigs. And the cowl gasket has to be right. My car had rust on the radio housing, from past failures.

-
If you short across the bottom posts, aside from giant sparks, you might get a snort from the starter. You would be doing what the solenoid is supposed to do. Yes, the bottom left post connects to the wire to the choke, but more to the point, connects to a copper buss bar that carries the current into the starter. Where to go from here? Maybe remove the starter and bench-test the solenoid and starter. I removed my starter yesterday, to get at the oil filter fitting at the block. Not bad for an octogenarian. Battery disconnected, car jacked up, left front wheel off (left-handed bolts), starter bottom bolt off. Starter supported by a rope to a pipe across the fenders. Top bolt off. (A little tricky wrench access; open end worked fine.) Starter pulled out partially. Not enough. Second rope. Starter all the way out, up out of the way. You'll want to disconnect the wiring at the solenoid before proceeding, and you'll want to lo lower the starter while you are under the car. (Text proofed, and ceertified 99% typo free.)
-
I mis-spelled "tje" on purpose. You've got to believe me! Back on track. I'm in the process of (re)moving my starter. I got the bottom bolt out. Observations: The bolt has a 5/8" head. The cluch linkage limits the arc of the wrench, but will not interfere with moving the starter forward to remove it. An open end wrench worked, with some flipping. A socket was tempting, but I could see that removing the bolt would back up the socket against the starter body. I got the bolt loose emough to remove it by hand. The engine block protrusions will not interfere with moving the starter forward to remove it.
-
I'll be pulling my starter out a bit, to get at the oil line fitting. As i remember from years ago, the starter pulls forward, easy peasy, Except it hit some Rube Goldberg piping I had for the oil filter, which I have since corrected. Sorta. I'm on about the third or fourth iteration of the oil filter piping. maybe this time it won't leak. It looks from the photo I posted, that when I pull the starter forward, I'll have to move it out sideways a bit from the engine, to clear a prrotrusion. But it should clear, since it went in. And at my age, I'll rig up some webbing to support the weight of the starter as I move it out of the way. For just moving the starter over a bit, I can leave the wiring connected. As a younger man,I removed the top bolt, got under the car, removed the bottom bolt, and carried the starter out on my chest. There. I think I got all tje typos.
-
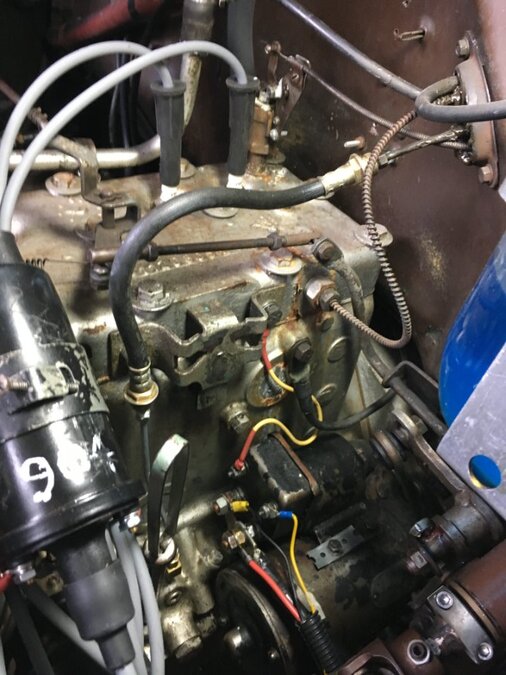
Here's a photo of my starter solenoid, with the oil filter removed, because of leaks in the fittings. (The plug in the block below the solenoid is where the elbow fitting had been leaking. I've got to loosen and move the starter to replace the fittinng.) The upper left post of the solenoid is grounded at an available bolt, in this case at the oil filter bracket. (Nearby, I have a thick ground cable connecting the engine to the body.) (I've got a welch plug below the bolt, to worry about. )
-
I think the only reason Ma Mopar grounded the solenoid post to the generator was to prevent the starter from cranking while the engine waas runnning. So forget the generator/alternator as a groud. Ground the post to a good ground on the engine block, like maybe a bolt holding the oil filter on. (Additional thought: I had grounded the post to the bolt holding the solenoid to the starter, but I figured that it had surfaces where the ground could be compromised by paint, dirt, etc. So I am grounding the wire to one of the bolts holding the oil filter on. I am working on fixing a leak in the oil filter plumbing, so I will have a good opportunity to make sure the surfaces at the bolt will be clean. (And I believe in start washers, to cut through the crud.)
-
Get or asssemble a momentary contact button with two wires with alligator clamp ends. Looking at the starter soleoid, the upper right post is where you would clamp a wire. (Thats''s the post nearest the steering column, for us who drive on the right side of the road.) The other lead clamps at the Hot post of the battery (The negative post if the car is positive ground, like most of ours.)
-
Check that the wire from the starter solenoid did not connect with the generator. If it did, just ground the wire, or run a shorter wire from that solenoid post to a good ground. Ma Mopar grounded the starter relay circuit so that if the engine were running, the genny would not provide a good ground, keeping the driver from grinding the starter and flywheel.
-
In Britain. a sedan is a saloon. In the old, wild west. a saloon was where cowboys would gamble, get drunk, and have gunfights.
-
Plastic Kit Car some assembly required
-
More Carry-All (49-53 Suburban similar):
.JPG.7cb60f8a653ad89659659d09b60b2c3d.JPG)
.JPG.260052515f4698189195181ff47e6c45.JPG)
-
ANSWERED First Start Minimum Coolant in Radiator
DonaldSmith replied to Bingster's topic in P15-D24 Forum
I've had yellow coolant in my car for the last 20 years. What's wrong with that? Why green? I vaguely rmember some discussions on this, but I forgot the details.


