-
Posts
2,513 -
Joined
-
Last visited
-
Days Won
78
Content Type
Links Directory
Profiles
Articles
Forums
Downloads
Store
Gallery
Blogs
Events
Everything posted by Sam Buchanan
-
Ok, another question....if I decide to pull the transmission, clutch and flywheel for a complete seal replacement, what are y'all using for an arbor to realign the pressure plate and clutch disc when everything goes back together? And if that happens, which seal now seems to be giving best service?
-
At the next oil change on the '48 P15 I'll probably drop the pan to replace the gasket and might as well replace at least the bottom half of the rear seal while it's accessible to slow down a persistent leak. There is the original rope-style seal and a more modern version, which one seems to be yielding the best service history?
-
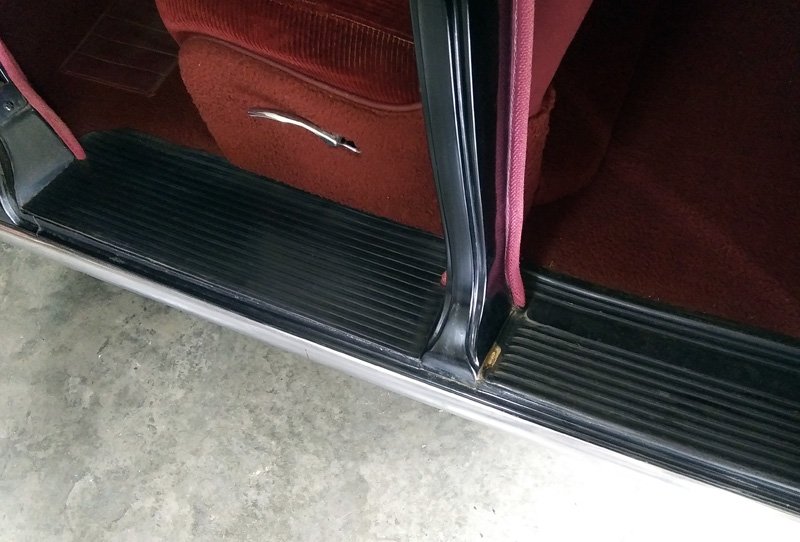
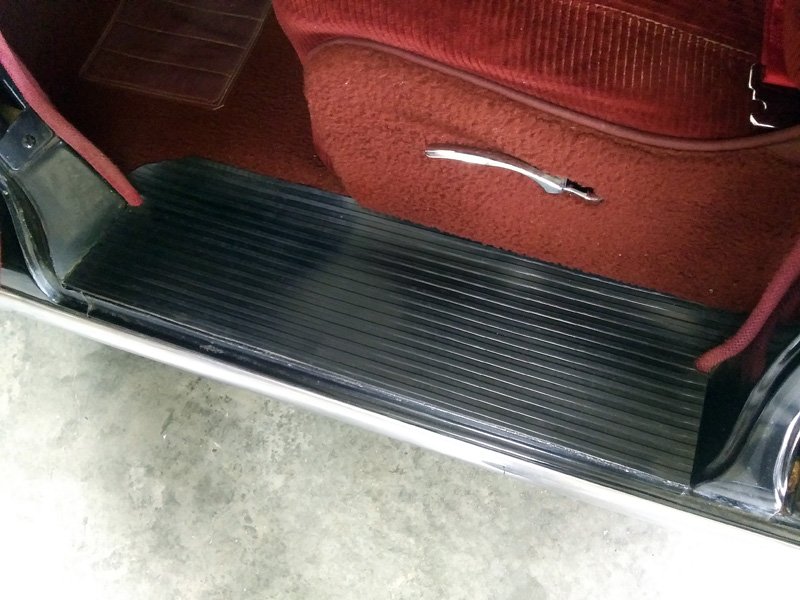
The metal was exposed on the front sills I replaced, now wondering if they were the originals. The metal apparently extended out to within ~1/4" of the edge of the rubber.
-
Andy Bernbaum has them in their catalog, $540, and here is another source for the same mats. $46 for 3' of running board mat seemed like a pretty good deal to me.....
-
They were in bad shape and I didn't have a use for them so they got tossed......sorry.
-
The front sills on my '48 were completely shot, coming all to pieces. The rear sills which are either original or repops are still in good condition. The price of new sills was cause for hesitation so I decided to try to come up with alternatives for the front sills. Here is the material I ended up using: The vendor markets this rubber mat as running board material, I never could find it as a generic product. A 3' length of the 18" width is just right for splitting to make two sills. I used a pry bar to pop the old sills loose, the rubber is vulcanized to a metal base. Barbed pins on the bottom of the base snap into rubber grommets in the body sill. The old base could be used as a pattern for the new sills but I used poster board to customize the pattern. After the pattern was fabricated it was used to cut galvanized metal sheet to use as a new base and this was riveted to the body. Double sided flooring adhesive tape secured the new rubber sills to the galvanized sheet. The pattern of the new sills is similar enough to the old sills to be more or less compatible for my driver car. The adhesive tape is really aggressive and I don't anticipate it coming loose, but if it does contact cement can be used.
-

Hooking up the Signal-Stat turn signal switch
Sam Buchanan replied to Sam Buchanan's topic in P15-D24 Forum
This one. -
Got real lucky....this particular LED strip is just the right size to rest in the bottom of the ornament and kinda gets wedged in as the ornament is remounted on the hood. Other strips might require a bit of RTV or something similar.
-
Just need to do the same thing I did.....hit the search engines until you find what you want. An initial search turned up this one and this one.
-
-
So....does Bernbaums ship Steele product or something else? If something else...whose? Looking like Bernbaums is ahead...by a nose......
-
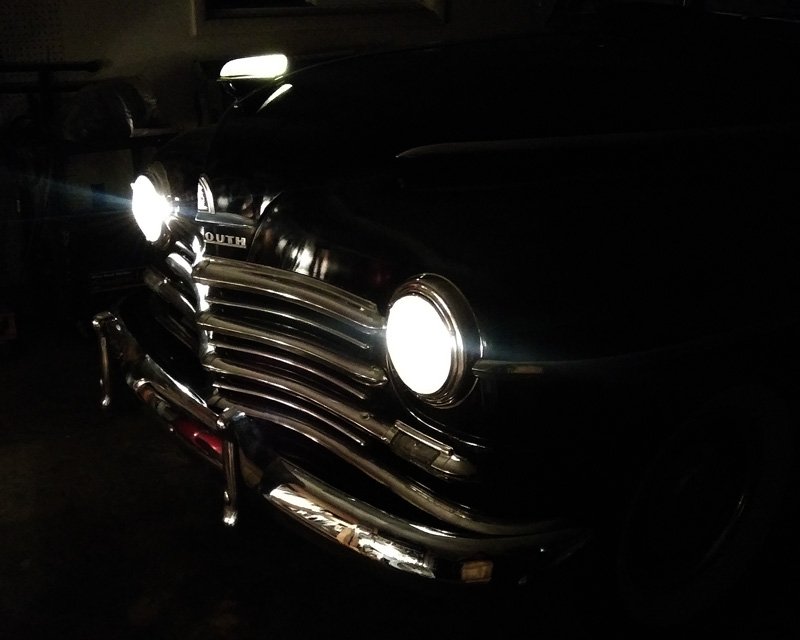
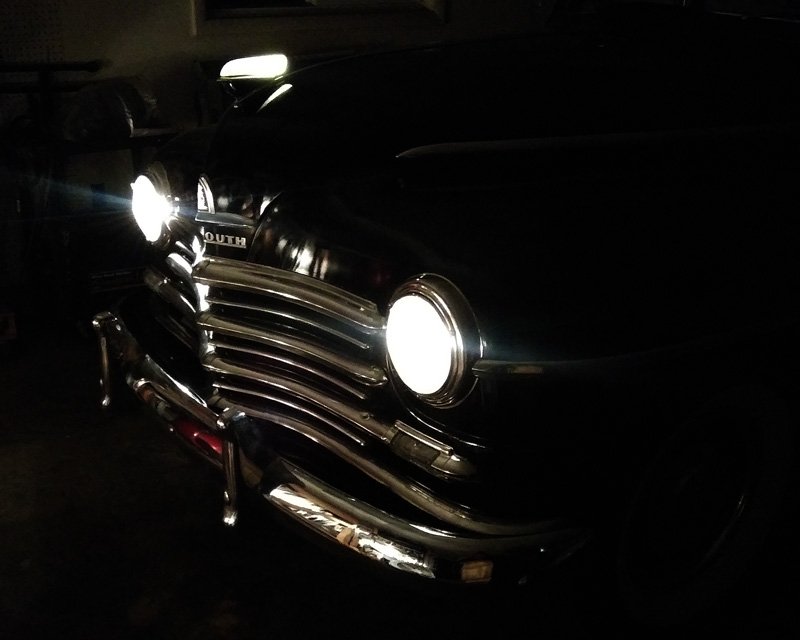
The entire ornament is lighted, I'll try to get a better photo when the shop is dark, the phone camera was struggling with the shop lighting. The lighting appears more even when not looking down on the ornament.
-
The ground through the hinges is working nicely. As I stated originally, the LED strip is grounded via a wire at one of the ornament attachment bolts.
-
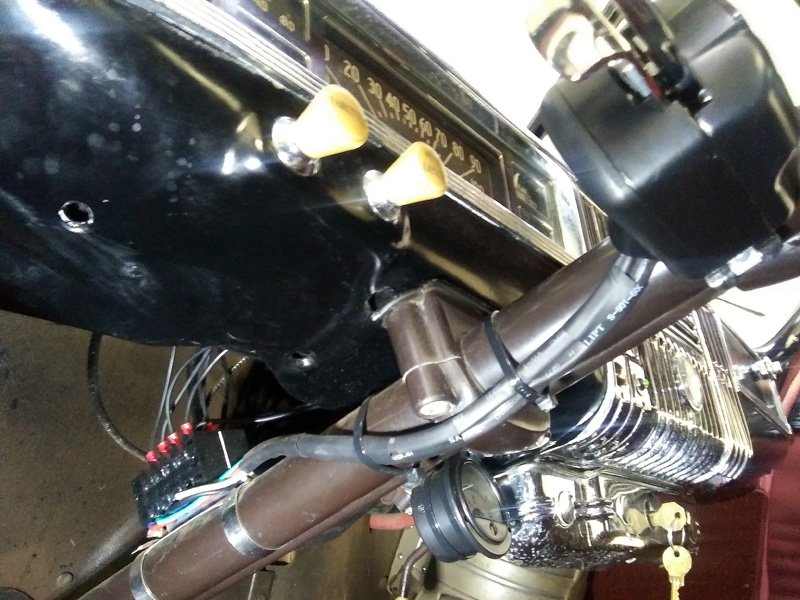
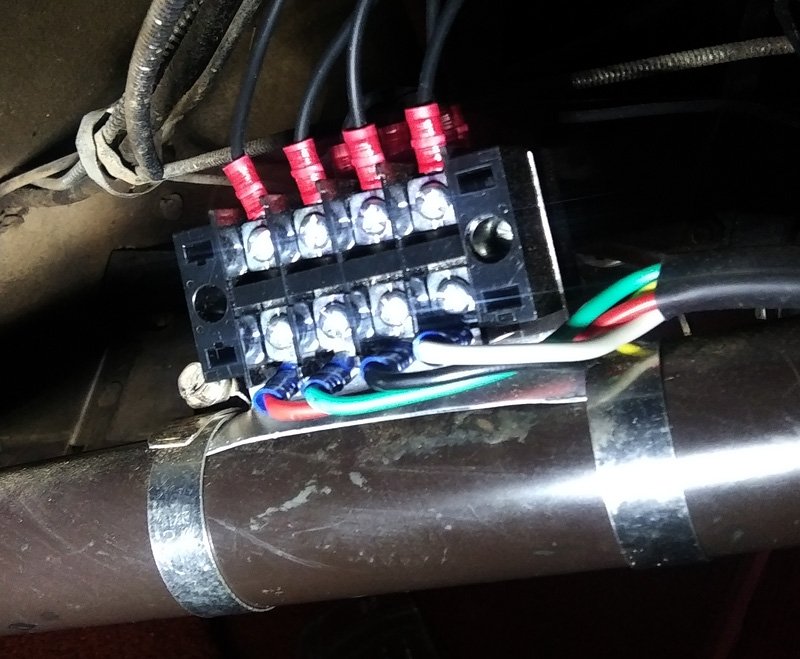
Instead of simple butt connectors to wire the turn signal switch into the P15, I mounted terminal strips on the steering column so connections could be quickly modified if necessary. The wire bundle from the switch was sheathed in shrink wrap and the terminal strips are attached to the column with a simple fabricated aluminum bracket and worm clamps. Here is one source for the terminal strips: https://www.ebay.com/itm/222183858589 Each strip accommodates four connections so two strips were mounted back-to-back so all seven of the wires coming out of the switch could be connected. Since one terminal is connected to the power bus it offers a convenient place to tap into power if other accessories are needed. The single filament light sockets were modified to dual filament with these commonly used adapters: The Plymouth now has three brake lights, one in each taillight and the original light on the trunk lid.
-
When the '48 first entered my shop the cool translucent hood ornament began begging for attention. I really expected to see a defunct bulb socket in the hood crystal but none was present. The ornament on my car is crazed from age but still in nice condition. However, when pondering lighting options I was concerned an incandescent bulb would run hot enough to damage the 70-year-old plastic. Some time perusing the huge auction site with a host of Chinese connections turned up the solution. Here is the 6v LED light bar I ordered for the whopping sum of $1.69........including shipping from China! Two color temps are offered, daylight and soft white. I went with the soft white (2700K) because it would be very close to the color of the headlights. The strip is the perfect size to fit in the hood ornament, the only installation required is to carefully solder power and ground wires to the strip. I insulated the connections with heat shrink tubing, attached the ground wire under one of ornament mounting nuts, and ran the power wire down the hood to an in-line fuse at the low beam terminal on the dimmer switch. This thing really looks cool! If I decide to spend some mad money I may splurge for a new repop ornament. I'm positive I can hear the old P15 chuckling when I drive it around town at night.
-
My '48 needs new rubber for the front vent wings and rear pop-out windows. I've seen reviews about the Steele mouldings that cause me to wonder if there are better options. Can anyone offer recent experiences/recommendations for Steele or other vendors? Thanks in advance!
-
Scott, enjoyed the visit with you and your bride a few days ago, should have taken time to look at your Dodge but was able to beat the rush traffic in the tunnel. One of the axle shafts has been excised from your Dodge's former rear end and is on the shelf ready for use when needed. Thanks again! (A great shop building with a two-post lift!) And yes......it is hot in Mobile. By the way, if you need more amps for the AC the 60A 6v alternator I put on the '48 seems to be working perfectly. Did you find the Steele vent wing rubber to be a good fit? I need to replace the ones on the P15 and have seen some comments about the product that makes me wonder if that is the best way to spend $125....
-
Nobody ever intended these cars to be on the road 70+ years after leaving the factory....supposed to be cast aside when those fancy modern '50 models hit the showrooms....
- 8 replies
-
- dimmer switch
- low beam switch
-
(and 1 more)
Tagged with:
-
The nut will thread onto the rear axle just as it does on the front.
-
Yes, new and purchased from an Amazon vendor, also available at McMaster Carr. It is 3/4"-16, you might find one at a good auto supply house or in the axle nut junk box of a gearhead. If using an experienced axle nut be sure the threads are still tight. The big-box stores will probably only have the course-thread 3/4"-10.
-
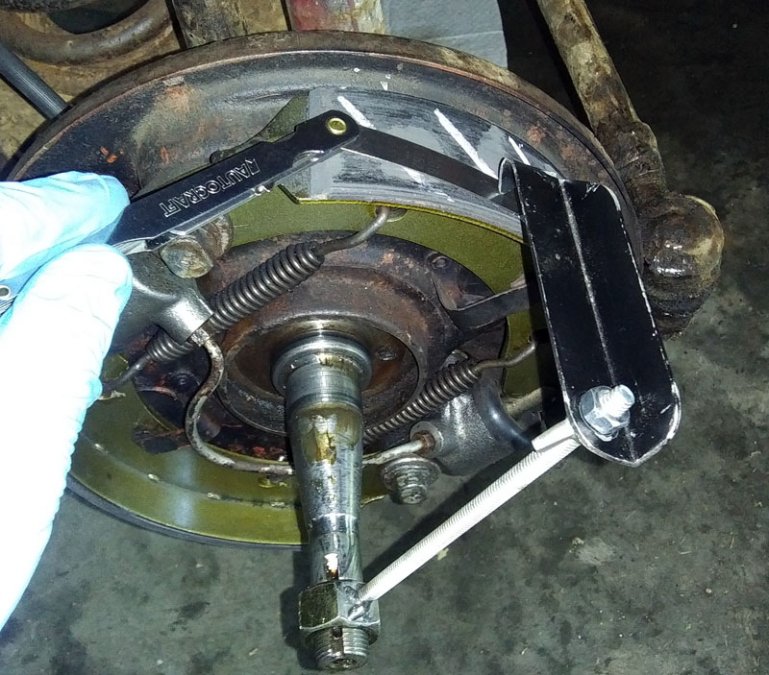
In a previous thread I showed how I made a brake adjustment tool using a length of steel tubing, some all-thread and a piece of angle. The tool worked fairly well but had some inherent imprecision due to the tubing not being a real tight fit on the axle threads. This was really obvious on the rear axles due to the threads being worn. I've modified the tool and it now works very nicely and accurately. Instead of the all-thread being welded to steel tube, it is welded to a 3/4"-16 nut. This removes any significant play in the indicator. Before removing the wheel drum, one minor cam adjuster is tightened enough to create noticeable drag on the drum. The drum is then removed and the brake tool is threaded onto the axle. The pointer is located over the portion of the shoe that contacted the drum which indicates the ID of the drum and adjusted for a snug fit on the shoe. If you want to get really fancy a 0.006" feeler gauge can be inserted between the pointer and shoe. I tried chalking the shoe to assist with indicating the high point during the initial adjustment but didn't find it to be of any advantage. Notice how these brand new shoes have not yet worn enough to have full contact with the drum. I'll readjust the brakes after some miles have accumulated on the shoes. Once the pointer is adjusted to match the high point of the shoe that was adjusted against the drum, the tool is swept over each shoe so the major and minor cam adjustments can be set so each shoe is concentric with the drum. Hopefully this will remove some of the mystery of adjusting the brakes and provide visual confirmation of proper adjustment.
- 21 replies
-
- 11
-

-

-
I don't care to get mired in this discussion (much rather discuss old cars....) but as a retired small business man I wish to offer a couple of comments. One, I think James is painting with a very broad brush. Yes, he is frustrated due to not receiving the engineering input he desired, but I think a major factor is his request for "something odd". By definition, a small business must be very focused on their specialty in order to survive. In my previous small business life I would have been very reluctant to engage with a customer who requested something totally out of my normal work flow. This didn't mean I didn't have an interest in helping, I just couldn't sacrifice my customary attention to regular customers with my limited resources in order to run down a rabbit trail that wasn't in my wheelhouse. Two, there are tremendously dedicated small businesses in many countries, especially the USA, providing fantastic service. That is how they survive! To insinuate poor service is somehow related to nationality is a train of thought I find hard to follow. I also suspect there may be a generational component to Jame's disenchantment with American small businesses. There, James is probably hacked off at me now.....and I've elaborated all I intend to do. Now...back to our regular programming.
-

Need helo in identifying these cars from 1945
Sam Buchanan replied to Bongopete's topic in P15-D24 Forum
The one in the middle appears to have one of those air conditioner things that folks used to attach to the passenger door.... -
Thank you for the offer, Sharps, I'll keep it in mind if I need to pursue it.
-
That's good to know, I'm sure one will turn up if/when I decide to replace the one I have....just not sure the threads will hold full torque next time I pull the drum.


