bamfordsgarage
-
Posts
932 -
Joined
-
Last visited
-
Days Won
15
Content Type
Links Directory
Profiles
Articles
Forums
Downloads
Store
Gallery
Blogs
Events
Everything posted by bamfordsgarage
-

Worn valve guides in-car fix... R&R or sleeve?
bamfordsgarage replied to bamfordsgarage's topic in P15-D24 Forum
Very clever, and I have a lathe and some old air-hammer chisels. Excellent video as always. All I had on hand last night that would fit down the guide hole was 5/16" standard steel all-thread. Obviously and as fully expected, the guides just laughed and snapped the rod in two. Our local nut & bolt house has 8 mm all-thread (largest that will fit down the hole) in stock in an "8.8" higher-strength alloy (this is, apparently, the metric thread equivalent to SAE Grade 8). I was planning to make a more durable puller from this, until reading the comments below. Not clear here Ken... current production for newer engines I can see different IDs and part #s, but since you mention the 230, were you able to source different intake and exhaust guides for that vintage Mopar? What I found online from BernBaum was one guide only intake and/or exhaust. You had me at "back in the old days"... my late father—gone 23 years now—earned his mechanics license about 1948 and I've been imagining us doing this job together, with the tools and techniques from when my heap was new. _ _ _ _ _ _ _ _ _ _ _ _ _ _ _ I have a stuck parts engine for practice. It's from a '40s D25 and carries a 1957 rebuild tag. The donor car had a 1972 plate, so the various parts have been together for 50+ years. Plan A is to combine Keith's custom driver with b4ya's controlled clobbering and see if that does the trick on a couple guides in my parts engine. If it works, I'll order up a set of 12 guides and go from there. Plan B would be guide liners. Plan C would involve engine removal. Or maybe dynamite. Thanks to all for your comments and suggestions. Very helpful and very much appreciated! -
Worn valve guides in-car fix... R&R or sleeve?
bamfordsgarage replied to bamfordsgarage's topic in P15-D24 Forum
Thank you Marc. I expect installing the new ones from the top down to be straightforward, as you suggest. Pulling the old ones up out of the block where the have been for 75 years… that is the challenge! -
I need to address the worn valve guides in my 1947 D25 (25" Canadian block). This is a job I am inclined to do in car. The existing guides were knurled back to size in 2011 are once again worn out of tolerance — I assume they are the original guides, and that a re-knurl is not feasible. The factory service manual recommends a Mopar factory tool "DD-849" for removal and replacement of worn guides. A google search turned up nothing, as did a site search here. Can anyone shed light on what this tool looks like and/or how it works, and if it was intended for in-car use.? Another option is to ream and sleeve the existing guides in situ. From what I read, bronze liners offer 3-5 times the wear of cast iron, and an 11/32" ID is very close to what we need for Mopar valves of 0.341 stem diameter. I welcome your comments, experience and suggestions on how to proceed from here.
-
Should valve & seat angles be equal or interference?
bamfordsgarage replied to bamfordsgarage's topic in P15-D24 Forum
Thanks all for your comments. We’re going to grind the valves at 44 and the seats at 45. And, probably, finish up with a light lap. The borrowed equipment I’m using has a good selection of stones of various angles. -
We have embarked on an in-car valve grind for my '47 D25. Two exhaust valves were burned and needed replacement. In reading up on the procedure, I find that there are two typical 'fits' between the valve and seat. One technique specifies an equal 45° angle for both components, the other specifies a slightly steeper 46° angle on the seat, the result of which is a slight interference fit. The drawing below from a 1970s auto-mechanics textbook illustrates both: A for equal angle, B for interference. Both are deemed OK, and the text instructs to follow the manufacturer's recommendation. I haven't found a Mopar recommendation for this fit. My factory workshop manual specifies the valve angle at 45° but is silent about the seat. My inclination is to go for the interference fit, but would like to know first what the factory recommended, and to hear learned and other opinions from the forum. Thanks in advance!

-
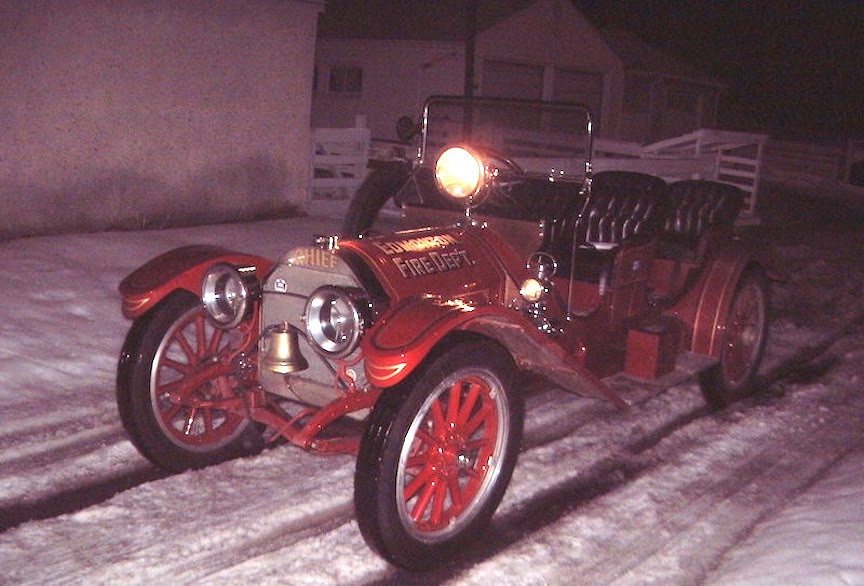
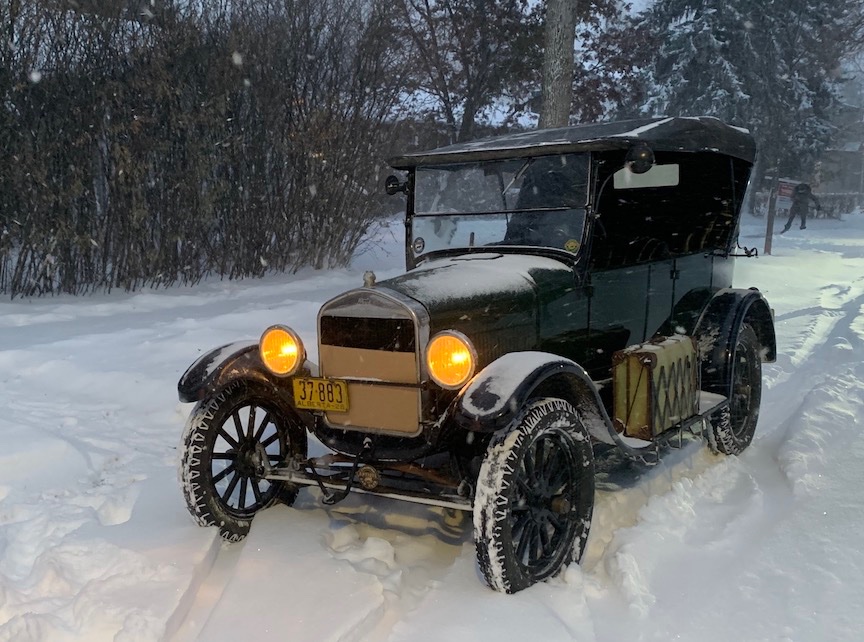
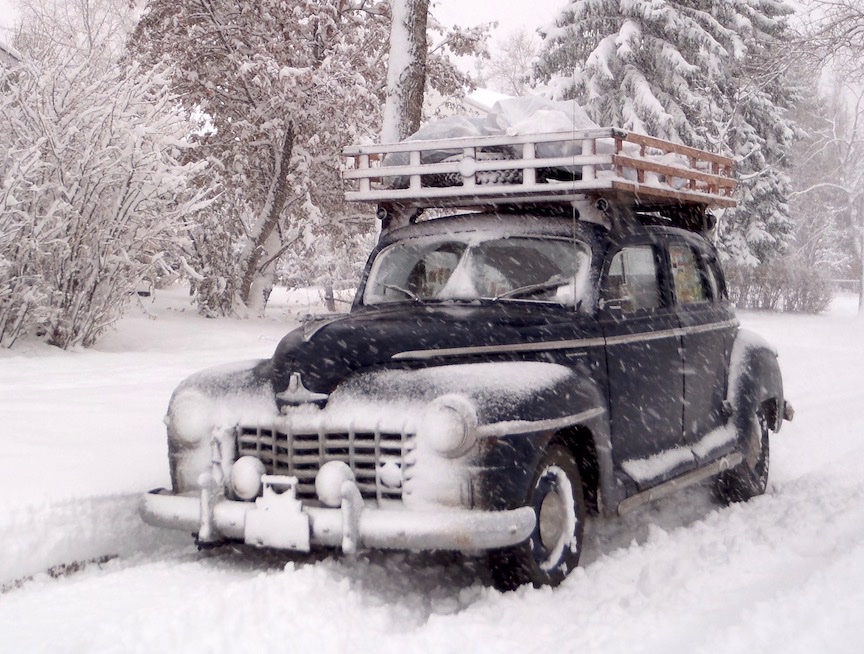
Sometimes winter just seems awfully long to go without driving the oldies...

-
Problem putting fan and pulley on new water pump. 48 DeSoto
bamfordsgarage replied to MarcDeSoto's topic in P15-D24 Forum
Suggest you grab your new pump and hustle down to Pro-Fast at 28061 Jefferson Ave... they should be able to help with whatever is needed. -
Replacement Spark Plug Questions...
bamfordsgarage replied to bamfordsgarage's topic in P15-D24 Forum
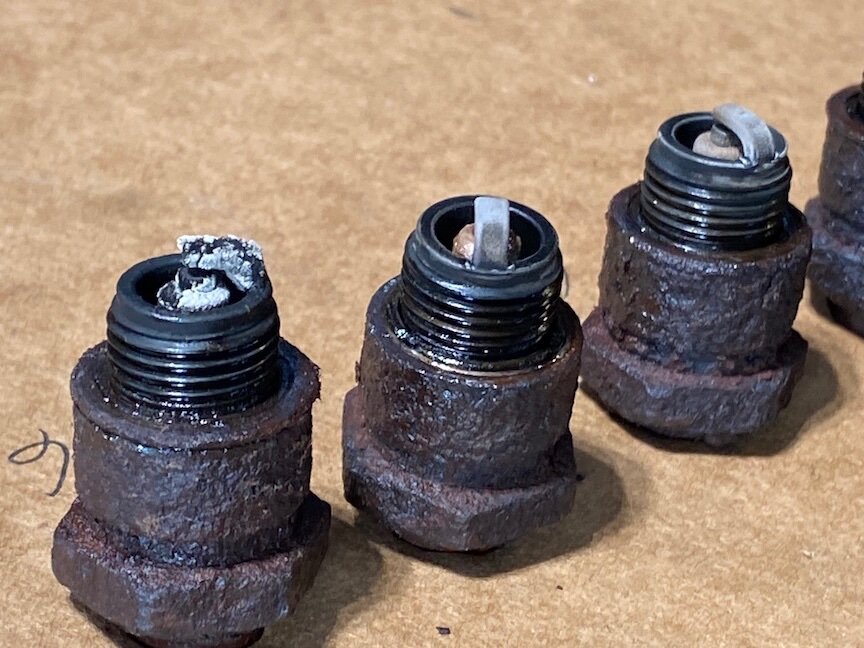
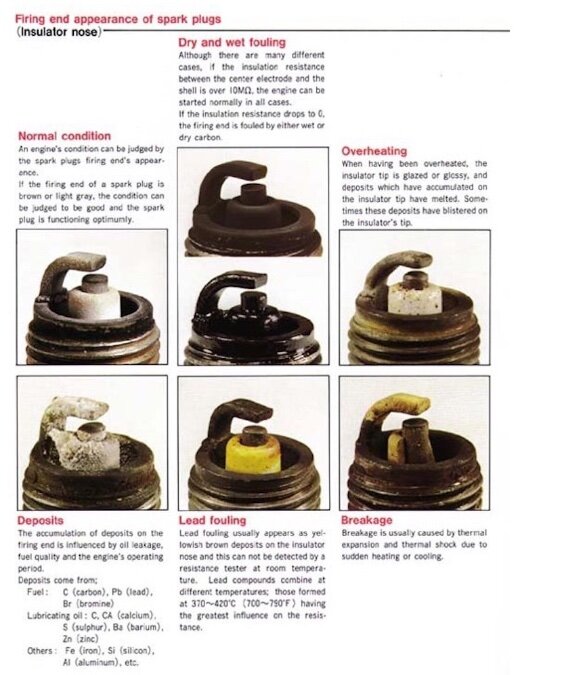
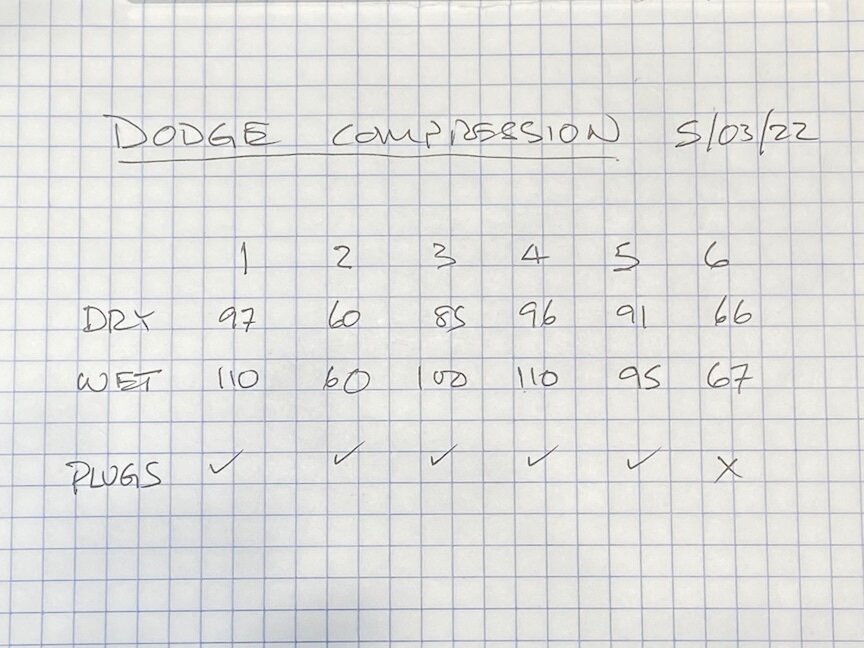
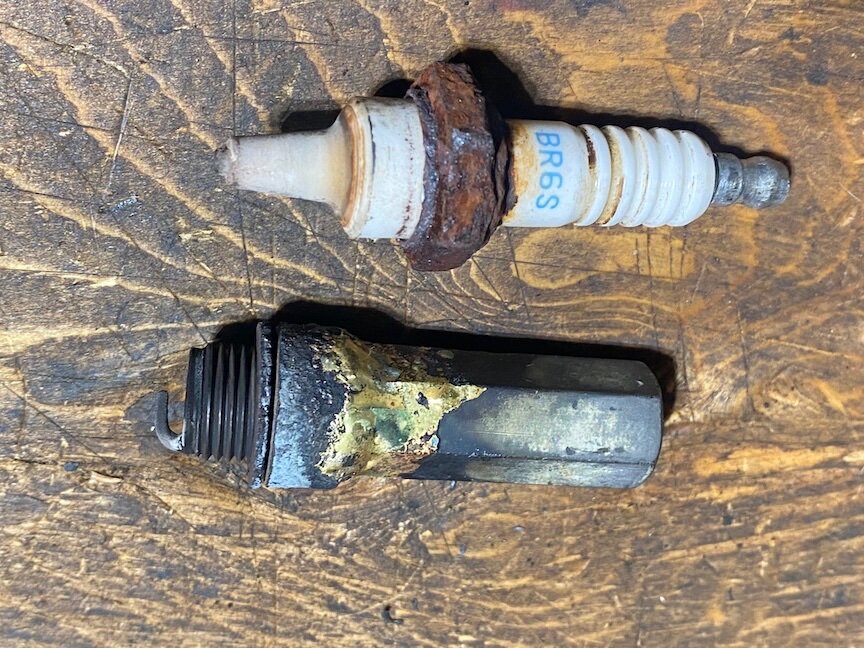
A quick follow-up to the previous posts re my search for a regular miss... Compared the six existing spark plugs including the #2 stub: All seemed OK aside from a rather crusty #6: Based on this chart and others, #6 appeared to suffer from excess oil, oil additives, or fuel additives. I discounted the additives possibility, in that 1) I don't use any, and 2) only the one cylinder was affected: Next step compression test, which was my plan on Wednesday afternoon before breaking off the #2 plug. Given the appearance of plug #6, my expectation was a ring problem in that cylinder: To my surprise, if there's a ring problem it's apparently a relatively minor one in cylinder #3, but there are clearly valve issues in #2 and #6. Installed the new plugs (gapped to 0.035 for resistor plugs), fired up the engine and the miss is still there. Strangely, it still sounds like only the one cylinder despite valve problems in two. I have a couple other vehicles down for major repair, so the old heap is going to have to wait its turn. One good thing about the old car hobby... it keeps me off the street!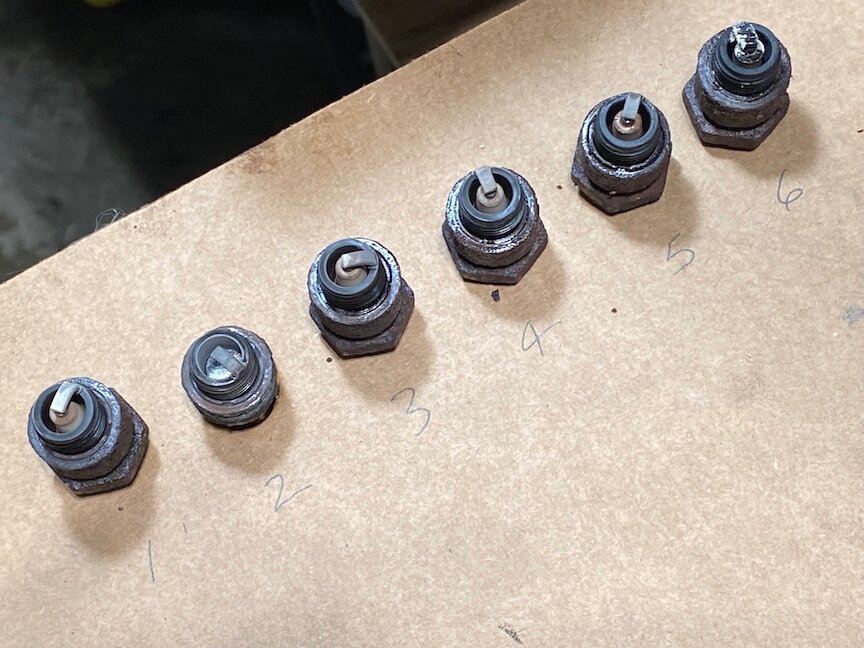
-
Replacement Spark Plug Questions...
bamfordsgarage replied to bamfordsgarage's topic in P15-D24 Forum
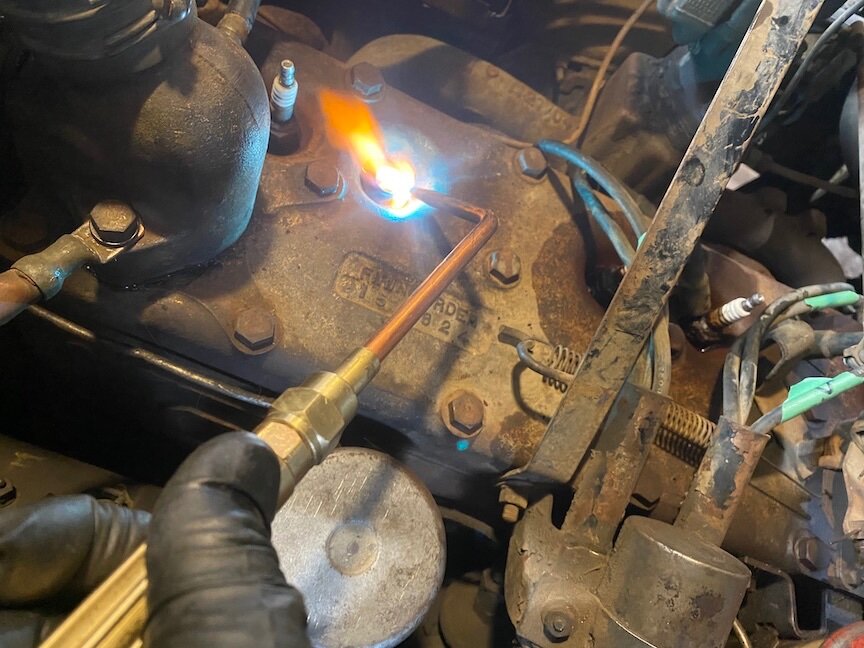
Continued... 8. Brazed the extension nut into the stub. This brazing alone was probably enough heat to break the rust bond without the earlier heat cycles: 9. Nut and stub turned out as easy as you hope for. Three or four foot pound at most: 10: This is a mock-up, but how I'll be installing the replacement plugs (which are the exact same type that come out. Minus the rust): Thanks to all for your suggestions and encouragement. Now where's my gapping gauge...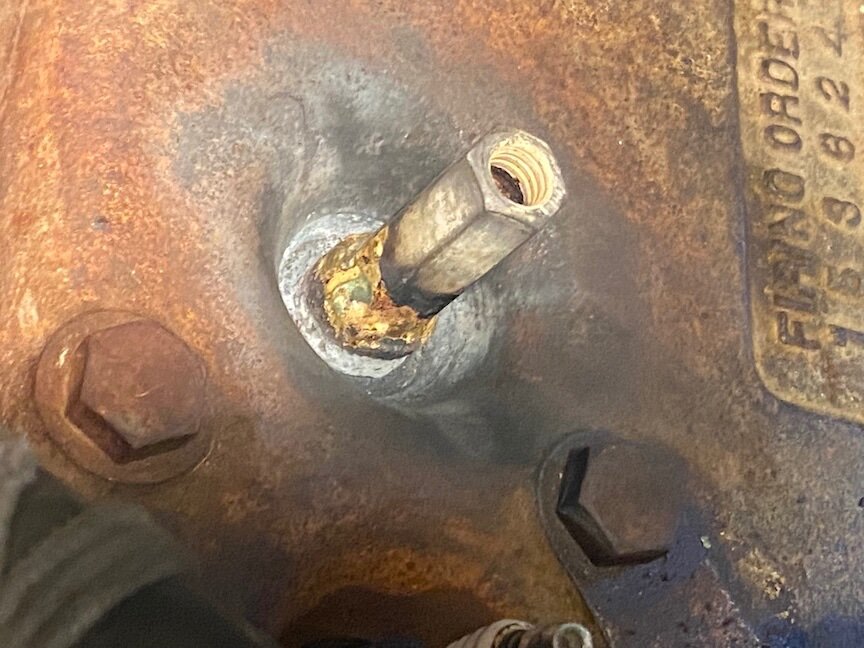

-
Replacement Spark Plug Questions...
bamfordsgarage replied to bamfordsgarage's topic in P15-D24 Forum
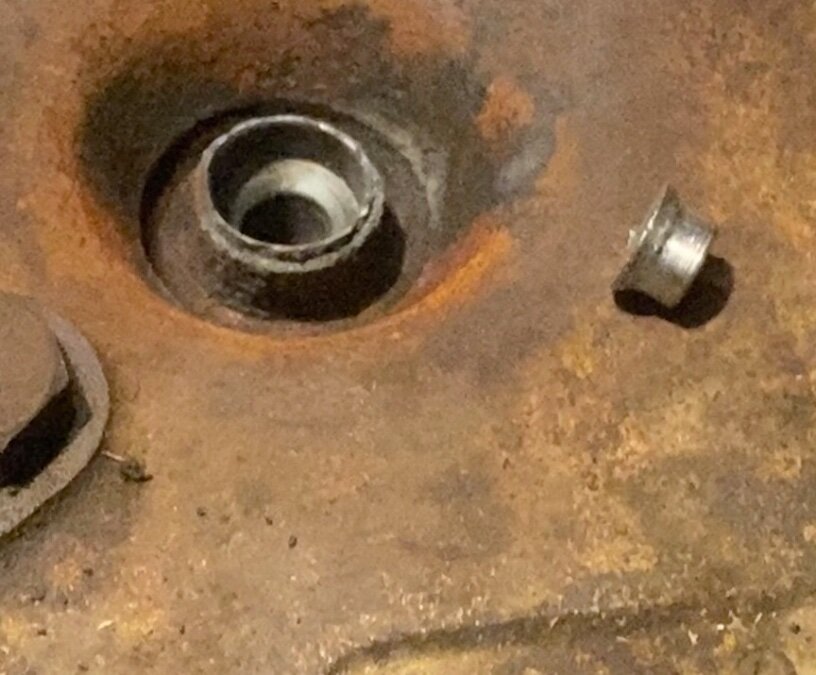
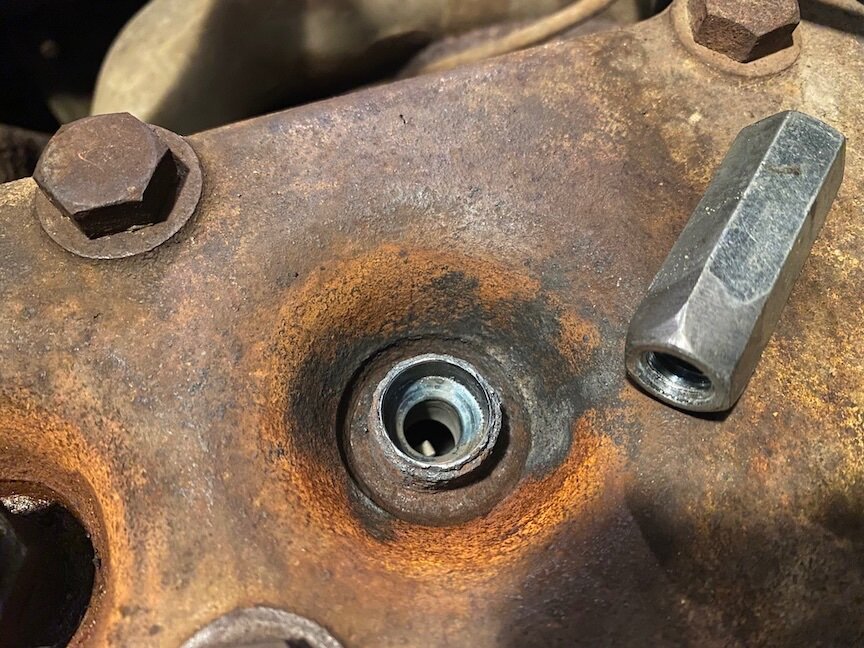
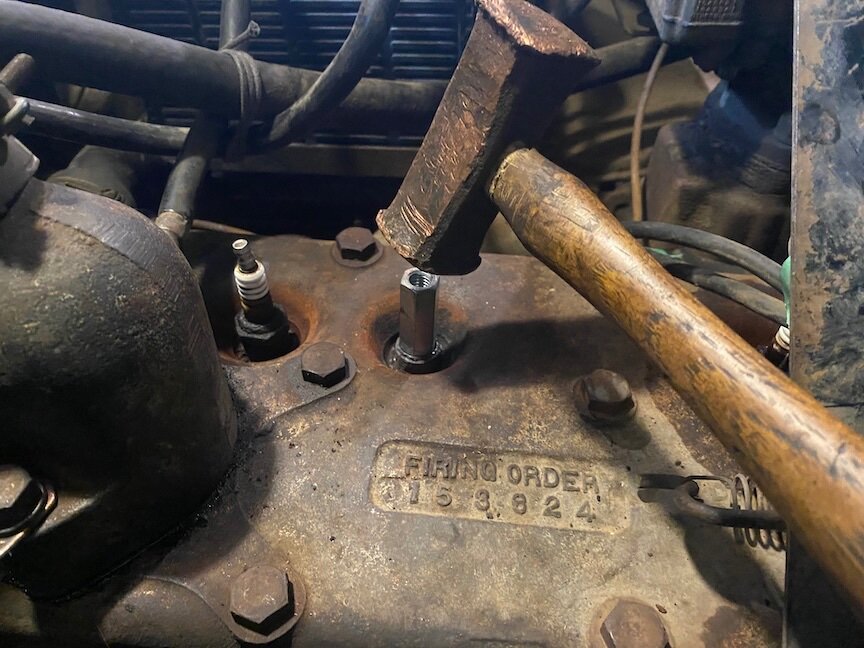
Success! I clearly hit the panic button too early, fearing most of the remaining five plugs would be equally recalcitrant, and that succesfully extracting one or more stubs would prove very difficult (hence my need for a new head gasket). 1. Two days soaking the five plugs and one stub with a 50/50 potion of acetone and ATF in the wells. 2. Tried removing the other five plugs before going after the stub... if they were also going to break, not much point in working on the one stub first. The other five did come out but not without some serious twisting. 3. The broken #2 plug offered a clear path into the cylinder: 4. Two heat-cool cycles on the stub. One might have been enough, but I favoured overkill. I figured my first shot at removal would be my best chance: 5. So far, so good. In event that I was successful, I didn't want any debris falling into the cylinder. I made this loose-fit plug from the straight shank of a 7/16" bolt: 6. I shaved the end of a 3/8" extension nut to allow a tight fit into the stub, and removed some plating to aid with brazing it into place: 7. Rat-a-tat-tat into the hole followed by a minute or so of medium blows to help dislodge the rust bond: Continued next post...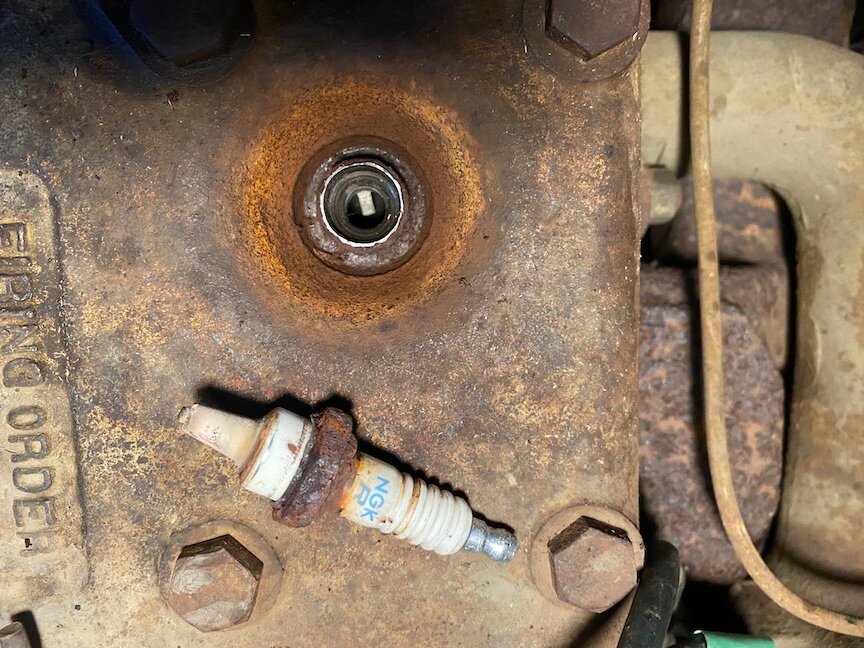
-
Replacement Spark Plug Questions...
bamfordsgarage replied to bamfordsgarage's topic in P15-D24 Forum
Thank you Belvedere and Sam… those look pretty clever. Sadly the Home Depots here in western Canada apparently don’t carry them. -
Replacement Spark Plug Questions...
bamfordsgarage replied to bamfordsgarage's topic in P15-D24 Forum
Thanks all for your suggestions. Another helping of penetrant this evening. Sniper, so where the heck were you when I installed these plugs a few years ago?? -
Replacement Spark Plug Questions...
bamfordsgarage replied to bamfordsgarage's topic in P15-D24 Forum
Well, that could have gone a lot better... In hindsight,I would have been smart to saturate the spark plug wells with a good penetrant (I use 50/50 Acetone /ATF) for a few days before attempting removal. Even that may not have been enough — these suckers have been in place for years, and have surprisingly little metal connecting the base and ceramic. Not going any further at this point... I can still move the car out of my sweetie's winter parking stall on five cylinders until I track down a new head gasket. This well and the other five are now saturated with penetrant to make removal easier once I get the head off. Live & learn ?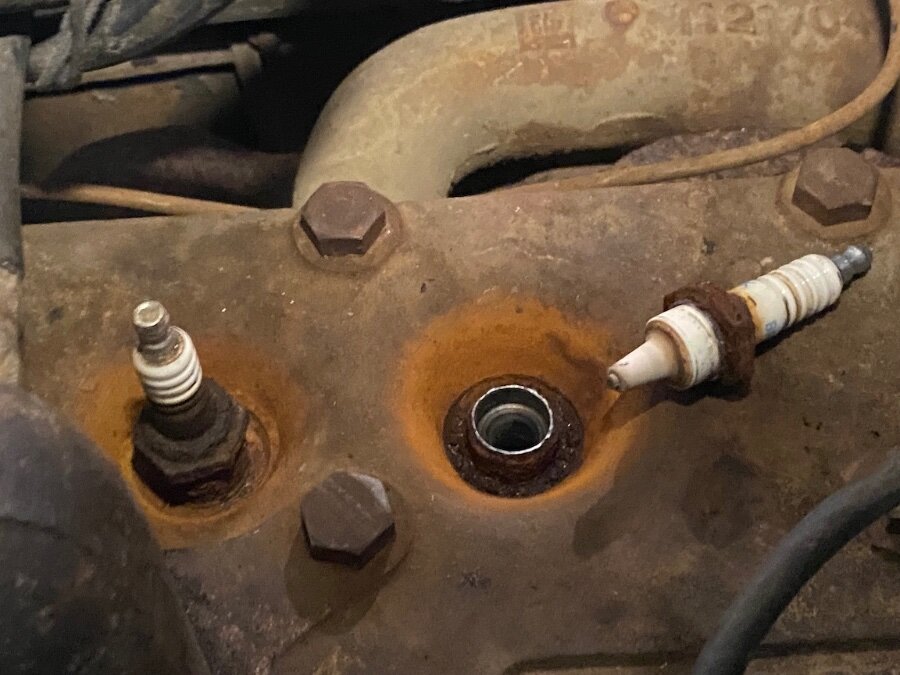
-
I'm replacing the spark plugs in my 1947 D25. No particular reason other than old age and I'm chasing a bit of a mis-fire. The current plugs are 10+ years and many thousand miles old. Most of my driving is lower speeds and shorter trips with occasional longer runs at 50-55 mph (had a 600-mile weekend February). I run no on-board electronics other than an iPhone. The P15-D24 Resources page lists a variety of spark plugs; none are stocked at NAPA and most come up as a different number/manufacturer anyway. NAPA recommends, and stocks, an Autolite 306 Resistor plug for the 1947 P15. • Should I avoid a resistor plug given my lack of electronics and the (I assume) advantages of a stronger spark? • Are there potentially better plugs (heat range, manufacturer, etc) to consider given my driving conditions? Spark plugs with all their myriad of variations have been largely a mystery to me. Your wisdom and experience will be much appreciated!
-
Right you are. I was thinking of arcing instructions expressed as so many thou clearance at each end of the shoe. If the correct shoe-end clearance results from a diametrical clearance of 0.030", that's very handy to know. Thinking further, the 0.030" smaller diameter is not enough of a spec in itself. Those linings could be 1/4" thick and be ground to a diameter 0.030 smaller than the drum, and still not fit. So, for my understanding would the correct formula actually be: Ideal lining thickness = 3/16" + (1/2 of drum diameter in excess of 11.000") - 0.015" (the radial clearance equal to the 0.030" diametrical clearance for arcing)?
-
Fair enough James, and I stand corrected. My ‘get r done’ method would, I am pretty sure, get those shoes in the drum and the brakes working but would not be optimum and by the book. I am puzzled however by your statement that the shoes should be a “perfect match” to the drums… no arcing for a bit of clearance at each end? Also, if Marc’s drums have any amount of wear, I reckon a few thou longer pin length will not matter. IMO. Not trying to argumentative… just trying to offer practical suggestions. I rarely work on stuff this new, so perhaps my standards are too casual ?.
-
Marc, IMO you need to heed Andyd and Allbiz… This is not complicated. Factory spec is for 3/16 lining. Your shoes were relined with 1/4” material. Your lining was 1/16” too thick. 1/16” is 0.0625”, roughly 60 thou. You had 30 thou removed last week, get another 30 thou ground off and you’re ready to go. Your pins look close enough to the same length… a few thou shouldn’t make any difference.
-
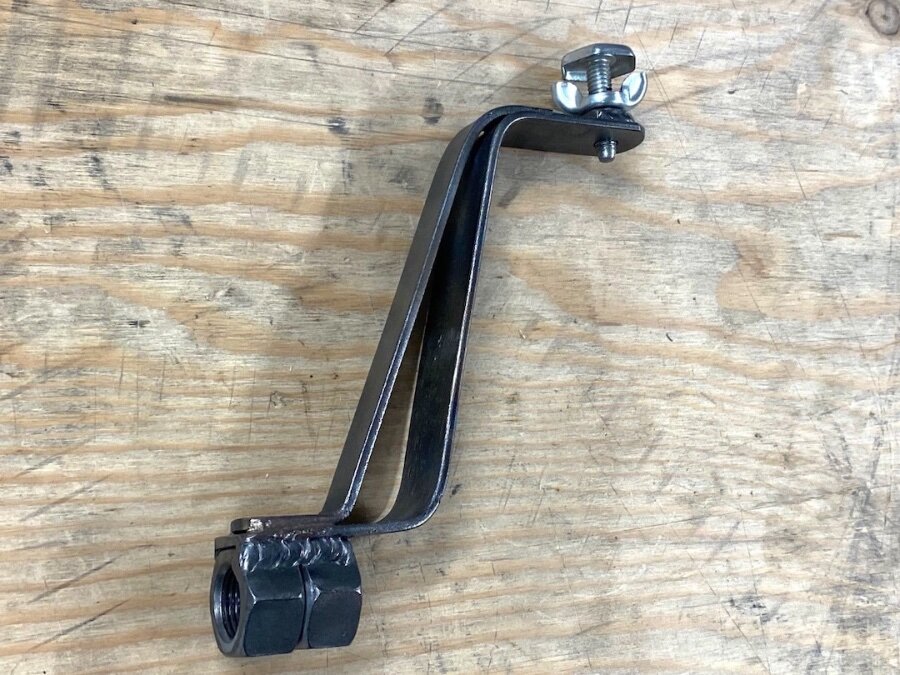
Inspired by Sam B's creation, I made this version last year and it seems to do the trick. The pair of nuts proved helpful; a lone nut had enough clearance at the threads that the tip would wobble unacceptably at the shoe surface. The two nuts are only joined by the welding at the bar and they are slightly mis-aligned. This takes up the thread play and the tool tip remains stable. Speaking of stability, I originally had just the one flat bar between the spindle nut and shoe gauge — that, too, was a recipe for floppiness. Triangulating the assembly with a second flat bar did the trick Thanks, Sam!
-
Running board rubber replacement 1935 PJ
bamfordsgarage replied to rrunnertexas's topic in P15-D24 Forum
My experience with trim adhesive is that some types never fully dry (similar to contact cement) and thus edges can lift over time if the material is so inclined. If it were me I would use a premium construction adhesive or Right Stuff gasket maker. This last stuff, in my experience, is like miracle in a tube. I’ve used it to glue all kinds of materials together and even ‘repair’ cracked water jackets — repairs that last for years. -
So, I've measured the ring land depth at 0.168" +/- and the ring hight as 1/4". Unfortunately, I have no P15 rings handy to check thickness and depth, and I was unable to find anything further on this site. Would anyone have the specs on these, or perhaps a few on the shelf they could quickly measure? Thanks in advance.
-
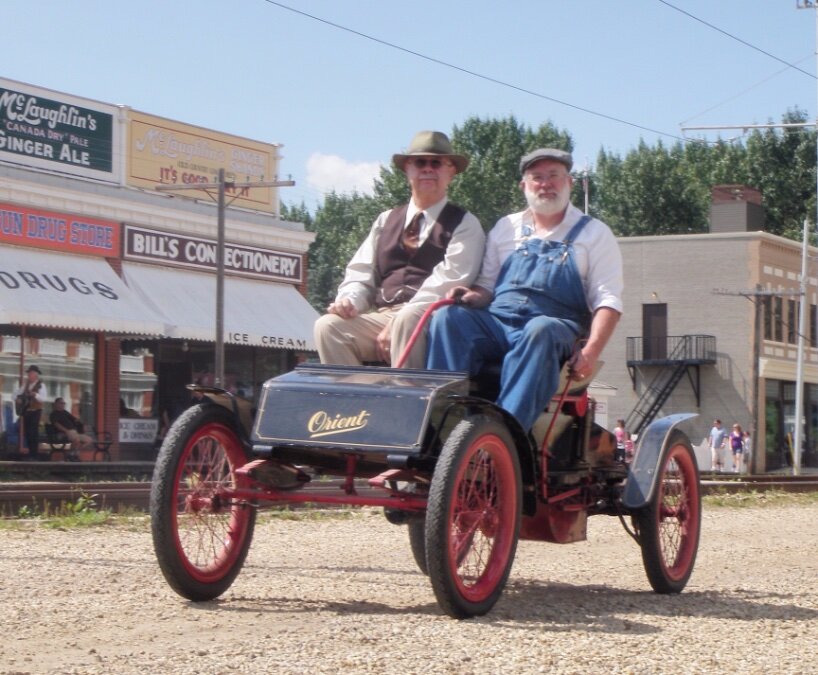
Yes and no: similar variable friction drive to the CarterCar and Metz for example, but moving the driven (spoked) wheel toward the perimeter of the drive (fly) wheel increases road speed, albeit with a reduction of torque (never plentiful at the best of times with this rig). Conversely, shifting the driven wheel toward the centre of the drive wheel reduces road speed but increases torque, just what's needed for hills and starting-from-stop. Moving the driven wheel past centre puts the transmission into reverse. I also use this position as the primary brake... there is only one dinky little band brake drum (like a P15 handbrake but much lighter) connected to the foot brake pedal.

-
Thanks for the replies… I missed the ring groove depth earlier, but have just measured it at 0.168” +/- 001”for all three rings.
-
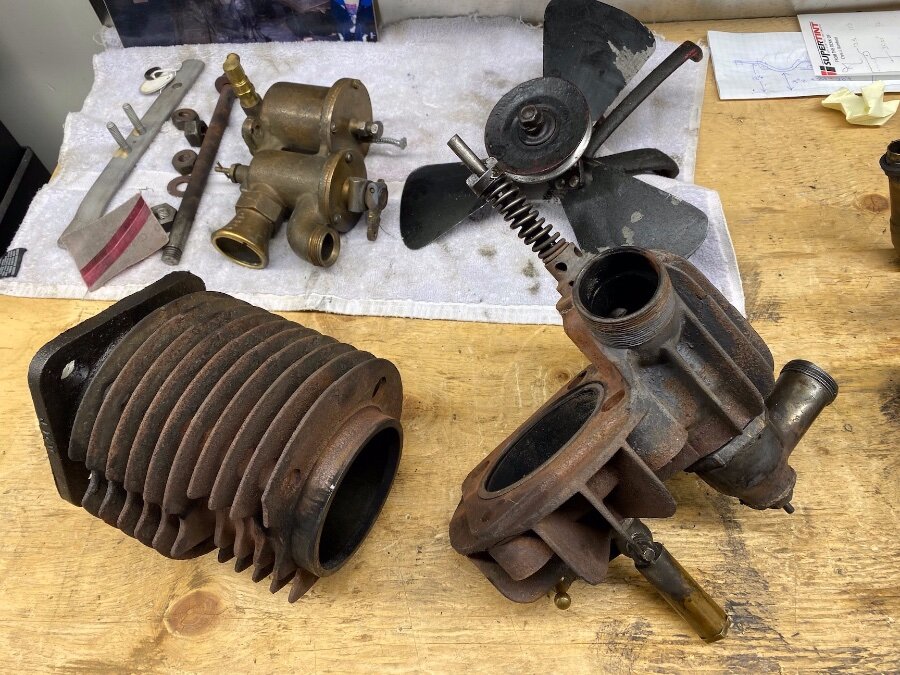
I'm working on my 1906 Orient Buckboard, a single-cylinder horseless carriage with a 3.25" bore and4-1/2" stroke, basically the same as a P15 or my Canadian D25. Compression is poor and the rings could use replacement... would P15 rings work in this application? The bore is correct although ring height could be different. See attached photos for dimensions and photos. All comments and suggestions welcome.


-
It’s been years since I had the starter out of my D25, but could you carefully jam something in that hole to catch the ring gear and keep the flywheel from turning? Given the large radius of the flywheel, stress on the ring gear teeth would (should?) be moderate.
-
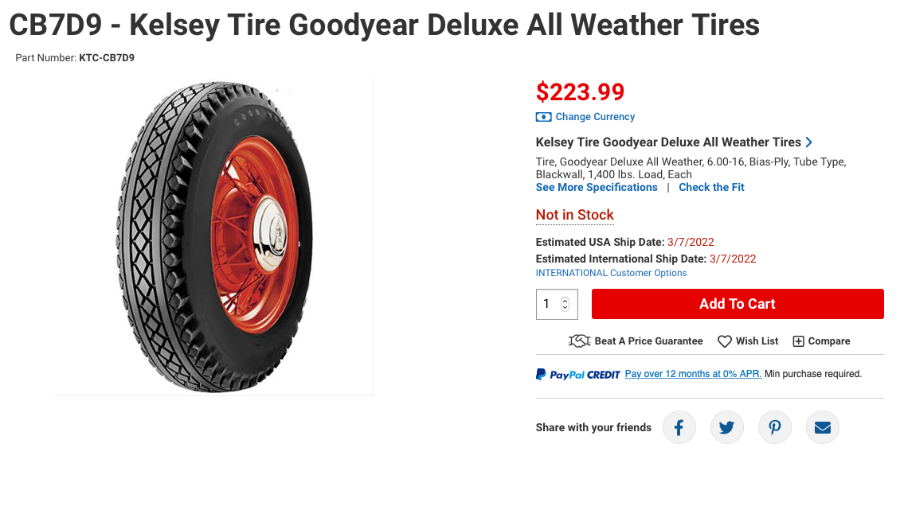
Thanks Sniper, much appreciated. I snagged the last four of this tire in stock, with Fed-Ex ground to western Canada for just over US$50. There were, as you suggested, several options including a summer-tread Coker for $168 each but I like the more aggressive tread of the Kelseys — my heap sees a lot of gravel and occasional mud. I'll likely leave them on next fall and see how they handle snow. Screen shot below shows "Not in stock" 'cause the four they had are now MINE! Bonus: I was having trouble locating replacement tires for my '26 Ford T and Summit had a bunch of Firestone 440/450-21s with a reasonably aggressive tread (gravel, mud and snow service again). Four less tires on that shelf now too. Credit card is still smoking...