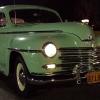
47heaven Posted February 10, 2007 Report Posted February 10, 2007 Planning to take the P15 down today for it's paint job. Got all of the stainless and chrome trim off the car, except for the mouldings that the outside door handles go through...can't figure out how to take the door handle off. Also, how do the winshield wiper arms come off the spindles? I've tried a couple things, but chance bending the arms. Is there a trick to taking the inside window and door handles off, as well? I mean, I saw the pins that hold them on, but these can't be unscrewed like other set pins can, so I don't know how they are supposed to come out. That's basically it. Just need to take the bumpers off, but might have them do that at One Day. Oh...any tips for removing the back and windshield glass? That's gotta go, too. Quote
John Mulders Posted February 10, 2007 Report Posted February 10, 2007 Door handles outside : turn the handle and you will see the screw that holds it. Had the same thing but someone pointed that out to me so favor returned Inside These pins need to be pushed out , you need to push the ring (esculon I believe) towards the door frame to access. Not sure whether it is going only out one way though. Wiper arms, I think these can be lifted . The hole on the arm is larger than where it is mounted on but the seem to stay in place. Not sure as mine are not in perfect state and I never use them.... Is on the list though. John Quote
47heaven Posted February 10, 2007 Author Report Posted February 10, 2007 Door handles outside : turn the handle and you will see the screw that holds it. Had the same thing but someone pointed that out to me so favor returned Inside These pins need to be pushed out , you need to push the ring (esculon I believe) towards the door frame to access. Not sure whether it is going only out one way though. Wiper arms, I think these can be lifted . The hole on the arm is larger than where it is mounted on but the seem to stay in place. Not sure as mine are not in perfect state and I never use them.... Is on the list though. John Thanks John. Yeah, I saw the screws on the moulding, but not sure if the handle needs to come out from the inside, first, then unscrew them, since they are only mouldings. Nonetheless, I'll give these things a try. Quote
bob westphal Posted February 10, 2007 Report Posted February 10, 2007 Exterior Door handle: There is a screw on the inside of the door exactly opposite the handle. The handle should pull out but you may have to help it out with a punch and hammer. Interior handles: Push the escusion in hard and hold it in. You will note that there are 4 holes in the handle mount. Drive the small pin out with a small punch or nail. I'm not sure what your question is about the wiper arms. However, There are two types of wiper arm fasteners. A bolt that holds the arm to the pivot and a clip on. Simply remove the bolt/nut. The clip on type can be removed by lifting the arm to its extreme point and pry on the lip of the socket where it slips over the pivot. You will probably want to remove the pivot assembly. This can be done by removing the bolt & clamp under the dash and disconnecting the linkage from the wiper motor. Quote
Guest Paul G (Dr Vinyl) Posted February 10, 2007 Report Posted February 10, 2007 If I remember correctly...the wiper arms have a locking tab under them. Lift the wiper off the windshield, or stick your finger under the hinged area of the arm. Probably need a screw driver but you release the tab and lift/pull the arm off the spindle. Quote
1just4don Posted February 10, 2007 Report Posted February 10, 2007 How do you remove the trim carefully enough to put it back on in great shape?? How do you release the clips of the fenders and such on that spear type moulding?? I have taken them off the BAD way,,,catching them in weeds etc. and jerking them off when they are so bad they would NEVER go back on. NEVER reassembled one except for a metal screw clear thru. How do the clips release??? THX--don- Quote
47heaven Posted February 11, 2007 Author Report Posted February 11, 2007 Thanks to you guys, I was able to remove a lot of the things I couldn't earlier. I did figure out the wiper arms after a bit of tugging and pulling, with a little swearing to help ease the frustration. The inside door handles and window cranks came off pretty easy after being told how the pin comes out, with the loss of one escutcheon. (By the way...where can I get more of these pins? I lost a couple when they fell out.) Also, took down the rest of the headliner and insulation that was still intact. Now, I need to wire brush all the old adhesive off the roof, which flakes off in the form of black crumbs. (Hope this headliner stuff has no asbestos in it.) I also managed to get the back window out, which was easy because I just cut the old rubber with a blade and the window popped out beautifully. Still need to work on the removal of the door handles and the windshield, though. Will do that tomorrow if we don't get any rain. All in all, it was a good bonding between man and his car. Quote
Normspeed Posted February 11, 2007 Report Posted February 11, 2007 I see you're getting serious about this old Mopar compulsion... My only advice would be, you're doing a great job, but take a breath, slow down and take some time to final clean and sand the body before it goes to the paint shop. Unless the paint shop has made it clear that they'll do a lot of prep work. Bottom line, I can't wait to see it all painted. Good luck! Quote
David Maxwell Posted February 11, 2007 Report Posted February 11, 2007 Be sure and label them before removing them. It may seem obvious where each one goes, but once you take them down, you might find out they don't go back so easy. They are marked, but the markings are not always perfect!!! Also, you have to know what number represents the front and which one the back. Anyhow, when I took mine out, four of the six were numbered and two were not. I went nuts trying to get them to go back in. All combinations seemed to be a bad fit. Finally, I just left them with the upholsterer and apparently he figured it out because their in fine now. Quote
47heaven Posted February 11, 2007 Author Report Posted February 11, 2007 I see you're getting serious about this old Mopar compulsion...My only advice would be, you're doing a great job, but take a breath, slow down and take some time to final clean and sand the body before it goes to the paint shop. Unless the paint shop has made it clear that they'll do a lot of prep work. Bottom line, I can't wait to see it all painted. Good luck! Norm...they are going to do all the prep and needed body work. There is a five-year guarantee for fading, cracking, etc,. I will mask off a lot of the places on the dash because I don't want overspray on it, since it's already painted and restored. Quote
47heaven Posted February 11, 2007 Author Report Posted February 11, 2007 Be sure and label them before removing them. It may seem obvious where each one goes, but once you take them down, you might find out they don't go back so easy. They are marked, but the markings are not always perfect!!! Also, you have to know what number represents the front and which one the back. Anyhow, when I took mine out, four of the six were numbered and two were not. I went nuts trying to get them to go back in. All combinations seemed to be a bad fit. Finally, I just left them with the upholsterer and apparently he figured it out because their in fine now. Dave...the bows are staying in. I remove one at a time as I scrub and then replace it before removing the next one. I have been able to find some good samples of the old headliner to send to a couple headliner companies to match as I was tearing it out. EZboy Interiors has the right shade of gray, but wrong type of material. I need the napped cotton. Where again did you get your headliner from? Was it from that place in L.A.? Quote
Niel Hoback Posted February 12, 2007 Report Posted February 12, 2007 You can make all the pins you'll ever need with a pair of wire cutters and a box of the right size finishing nails. All you need is one original to cut the right length. Quote
Brendan D25 Posted February 12, 2007 Report Posted February 12, 2007 Darin, your car looks to be in great shape. That's a nice job on the dash. Did you paint the wheel and column? If so what paint did you use? Thanks, Brendan. Quote
47heaven Posted February 12, 2007 Author Report Posted February 12, 2007 Darin, your car looks to be in great shape. That's a nice job on the dash. Did you paint the wheel and column? If so what paint did you use? Thanks, Brendan. Brendan....the dash was painted the color the exterior of the car originally was, which was Airwing Gray. I wanted sort of a two-tone effect between the dash and steering wheel and column. So I painted it a darker gray, but it needs to be repainted because I painted it on a cold, slight windy day and the paint stayed tacky. I first used an etching primer on the column, shift and wheel after sanding them slightly. Then, I used dark gray Rustoleum. It seemed to go on real nice, but I really need to do again, but on a warm, dry day so that it can dry better and quicker. Quote
Brendan D25 Posted February 12, 2007 Report Posted February 12, 2007 Thanks Darin, the dash and trim in my D25 are about the same color as yours and the column and wheel are brown, so I think I will be painting it later with grey. Brendan. Quote
47heaven Posted February 12, 2007 Author Report Posted February 12, 2007 Thanks Darin, the dash and trim in my D25 are about the same color as yours and the column and wheel are brown, so I think I will be painting it later with grey. Brendan. Yeah...my stearing wheel and column were brown, too, but since I don't have the woodgrained dash and trim anymore, the brown didn't go with the gray. Gray seemed to be a very common color inside of many late-40's and early-50's cars, from what I have seen. Even if I could afford the woodgraining, I would still stick to the painted dash and trim because it gives it a cleaner look, in my opinion. Quote

Recommended Posts
Join the conversation
You can post now and register later. If you have an account, sign in now to post with your account.