MartinsB3B
-
Posts
118 -
Joined
-
Last visited
Everything posted by MartinsB3B
-

1950 1/2 ton with 4bt cummins
MartinsB3B replied to Pilot house's topic in Mopar Flathead Truck Forum
Slick looking engine. How does the weight vary between your 4bt and the L-head? Also did you have to change the suspension/drag links? As far as your electrical goes, 12 volts should work fine with your gauges. My truck was originally 6v and the rings went bad so my grandpa changed it to 12v so it would crank faster. Only had the resistor put on because of the 6v sysrem. -
Nashville clutch supply I believe is the name, they'll rebuild it all for you.
-
Good luck to you! My brake handle Will have to be drilled instead of driving the pin out.
-
http://p15-d24.com/topic/37790-handbrake-questions/#entry393611 There's a picture in this thread that will give what you need. I'll be doing the same thing soon.
-
I would go with a pre 1993,this gives you no computer to deal with plus its a 12 valve. Half year from 98 and back are all 12 valve. Good strong engines, I planned on putting a 12 valve in a 37 dodge I had, could get one from a buddy for around $750-$1000.
-
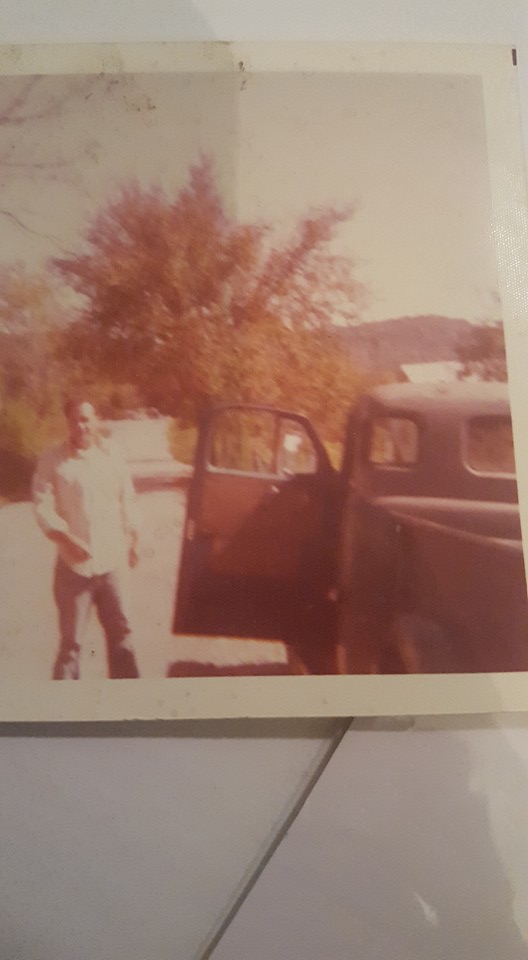
Mine was given to me by my grandpa who was the third owner, parked it in the early 70's. My dad and his friend got it started in the 80's and drove forward and backwards a few feet which were its last tracks. I've started with a small restoration/drivable truck again.
-
I'll be sure to download them. Thanks a lot!
-
Sweet! I lost a few of the seals so now the hunt is on. I'm probably going to do as you stated and fix the box up to showroom condition. Thanks, Martin.
-
Moving my truck around today to get more space to work on it and it would only to steer to the left. Move the wheel to the right and it would only get tight and the wheel would actually raise up out of the column. So upon taking the covers of the box off, when you would steer back to the left and the wheel would lower you could see that the bearing above the worm gear has come apart, and needles have come out. I had attempted to remove the steering box before but never noticed that the column had lowered any. Didn't think to get any pictures while it was apart. I'm hoping to be able to save the bearing, as well as hoping that it hasn't hurt any of the gears either. Anyone experienced this?
-
I'm glad you said that! I had forgotten to get that done. Im in machine shops all the time so should be a problem.
-
I would be many steps ahead if I were working in a garage. As soon as send my clutch and pressure plate off I'm ready to drop the engine in, put my wiring harness in from ez wiring. One of these days!
-
Two of the best I've gotten on my camera so far. After a year I've gotten a lot of use out of it. Definitely worth $100!!

-
I love my game camera. Had it out during deer season and was gettin around 100 pics at a time.
-
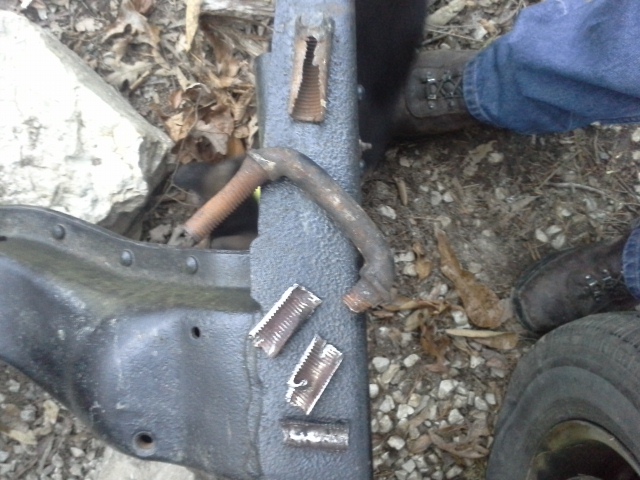
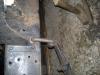
Heres what was left after drilling and cutting.

-
I work for a family business where we go in machine shops and fix their machines (long story short). Looking to expand, I had a few ideas. Hypothetically speaking; if you needed a part made because you can't find it anywhere else or it's just too expensive and there's a machine shop you could go to to have them make this part, what would it be? I want to know what kind of parts you guys run in to that you need and can't find/or could be made or modified. We have a cnc mill and a manual mill at the moment, hopefully a lathe soon. Hope to hear yalls input on this. Thanks, Martin.
-
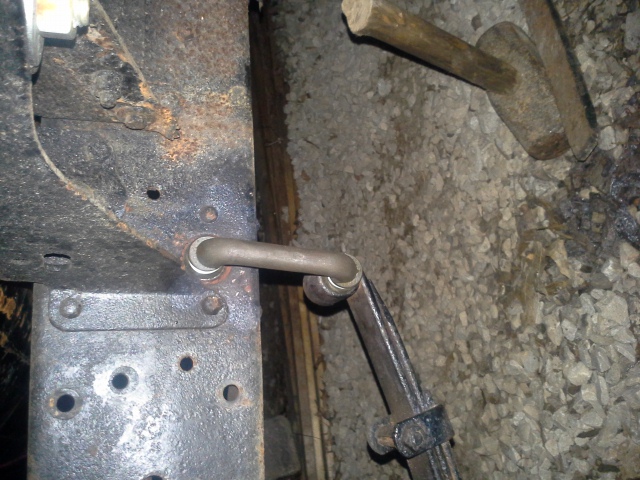
Pictures will be up after I get off work. Drilled the shackle inside of the mount at 1/4 then worked up to a 1/2 drill. Drove the shackle stub out (in two pieces) with a 1/4 drift pin. I then took a hacksaw and cut the bottom and top of the bushing, then drove the bushing out (in two pieces) with the drift pin as well. Lastly I took a round file and filed around the inside of the mount (inside of the frame rail) checking the I.D often with the new bushing not to file too much material off. I only had to file because of all the hammering I done with drift pin before drilling. Hopefully no one ever goes through what I have with this shackle,BUT, if you do this will help.
-
How Many Pilot House Trucks Have Survived?
MartinsB3B replied to Bradley S.'s topic in Mopar Flathead Truck Forum
I'm in love with this style truck!! -
Yeeehaa! Shackle is on! Had to take a round file and file Around the inside of the mount and install. Works perfectly.
-
Talking with my grandpa about the whole ordeal and gave me the idea of using a hacksaw to cut the bushing in half, and it worked. Going to buy a new blade while I'm in town.
-
Been spending the majority of my time playing with the new puppy and doing a little four-wheelin while the weather was nice! Off of work tomorrow, hopefully I can post a picture of the new shackle on tomorrow.. at least lets hope.
-
I mic'd the bushing, I.d. is around .670 , cant remember O.D. I'll mic it before drilling it.
-
I was able to get the shackle stub out by drilling with a 1/2 inch. Need to go with 5/8 or up drill to get the bushing.
-
Awesome video! As far as that all coming out, IT WILL. I can't guarantee the condition it will be in, but it won't be stuck in the mount. I really appreciate the knowledge and effort you guys have put forth to help. Thanks.
-
I'm just goin to stick with drillin, I hope I have time tomorrow between work and picking up my new puppy to start workin on it again.
-
They are left hand thread, I believe the bottom of the shackle is right hand as the top is left hand.