Jeff Balazs
-
Posts
4,314 -
Joined
-
Last visited
-
Days Won
43
Content Type
Links Directory
Profiles
Articles
Forums
Downloads
Store
Gallery
Blogs
Events
Everything posted by Jeff Balazs
-
Me too. I have been looking for something unique. Has anyone ever seen a truck painted with that faux stone splatter paint? Jeff
-
Merle; I knew I was not the only one who had ran into this. Relined item should be back soon. Then I get to put it all back together. Again! I decided to go the prudent route and remove the timing case and oil pan before running this engine. I am glad I did. Too much slack in the chain and a fair bit of sludge in the oil pan and valve galleries. Good news was no metal bits. So now it is all clean and painted and just about ready to reassemble. Looks to me to have been running rich and probably picking up too much oil from the improperly plumbed PCV system that was on it. I guess that is better than running too lean. Jeff
-
Thank you DodgeB4ya; That clarifies things quite a bit. My hub does not have a dampener or this recess. There are quite a few variations like this in these trucks aren't there? I seem to run into one every other time I work on this truck. Quite a bit of them are either not too well explained in the manual or just omitted. I ran into one a couple weeks back when working on my E-brake. My 52 3/4 ton has a fluid drive 4 speed. I found out that in order to remove the e-brake lining for renewal you actually have to unbolt and remove a frame cross member. Not a big deal.....but in looking through photos something that is not required on some of the other models. Thanks again for clearing this up. Jeff
-
Thanks Don; I wondered about this. When I disassembled mine this was not in place. Do these last very long ? It seems like they would rub quite a bit but perhaps I am missing something. Thanks, Jeff
-
Hi Guy's; Does anyone have photos or an exploded view of the timing case sealing arrangement? I bought a Felpro gasket set that has a large diameter, thick felt seal which I believe is a dust seal for the timing case. It seems to fit over the hub on the main pulley. When I disassembled mine it did not have one of these fitted. Not sure it belongs there but I can't find another use for it. The manual I have is pretty weak on this sort of detail. Thanks Jeff
-

Tool for removing timing case oil seal
Jeff Balazs replied to Jeff Balazs's topic in Mopar Flathead Truck Forum
Never mind....... It was too easy.....was expecting something more involved. Of course there is the bolt from the inside of the crankcase to the engine plate ...... Good thing I was all set to drop the oil pan. Jeff -
Hi Guy's; What is the best way to get the oil seal out of this cover without doing any damage? Mine seems to have a metal retainer that is press fit into the cover. Also since we are on the topic what sort of pullers work best to remove the timing chain pulleys? Thanks for your help, Jeff
-
fenders (inner and outer) cab and front clip
Jeff Balazs replied to ggdad1951's topic in Mopar Flathead Truck Forum
Mark; Oh ya I know......and I have my sights set a fair bit lower than you did. All I really want is something that runs decent and tick's Hank off. Still trying to come up with just the right paint scheme.......... wish I had enough original paint left to do a patina truck. Maybe I'll just have to buy the old cattle ranch brush guard that's been on Ebay forever and do a Ben & Howdy (the Rounders) truck. I am still jealous though.....how often do you get an offer of help from someone that is willing to show you what not to do? I've needed that my whole life. You guy's have a great day! Jeff -
fenders (inner and outer) cab and front clip
Jeff Balazs replied to ggdad1951's topic in Mopar Flathead Truck Forum
I'm jealous Mark Jeff -
48532Dodge; It looks like they have 3 different variants for sale in the fuel section of their online catalog. Not sure if any of these are the correct configuration for a Pilothouse. Possibly the civilian PW model? The price is $17.50.....that seems very reasonable. I just wouldn't want to get one that did not fit correctly. Perhaps someone here know's? Jeff
-
Hi Dave; Yes there are probably some fit up issues. I have seen some photos of these fenders mounted on what looks like the same bed that I have. I don't know if they came that way or somebody retrofitted them. What can I say? I just like that shape better. Jeff
-
Mark; Perfect......I will point Jon to this file. Should make this fairly simple. Hank owes you a cold one! Jeff
-
Hank; I will give it to Jon, a buddy of mine here in the complex my shop is in. He is busy....but he has a CadCam plasma cutter and all the other required tools. It is probably just as easy to make a few as one. We will see what he has to say. I do understand what you are saying about clutter under the hood. I want to keep it to a minimum as well. I just know that the benefit of a proper working PCV system far outweighs the alternative. I think this system can be plumbed in such a way as to keep the clutter down. Just have to give it some thought. I am just as stubborn as you are about some things. My big bugaboo is all the electronics and unnecessary electrical devices found in vehicles today....the day I need power windows, a butt warmer etc or worse a computer talking to me in the truck.....you have my permission to just shoot me. I don't even have a people leash (cell phone) Certainly the primary installation (road tube to intake manifold) can be accomplished pretty cleanly. Making the mod to the air cleaner itself is some work but isn't that big a deal assuming you want to do the switch over to a element instead of oil bath. I think the answer is to come up with a well thought out - period looking piece of plumbing to go between the filler tube and the air cleaner. Something easy to remove or swing out of the way when you need to put oil in or work on other systems. Should be fairly simple. Jeff
-
Thanks Guy's; I figured it was probably a good idea to have it fitted. John T53; On a side note......I am considering fitting 53 style rear fenders on my 52 (116") bed. I was wondering if you could measure the running boards on your truck when you have time? I am guessing that they are a different length than the ones I have....but I don't know. Thanks, Jeff
-
49Dodge1ton; Good point. I had not considered that in regards to the secondary system. Will have to give the air cleaner mod some additional consideration. I was thinking of putting a K & N element in it already. One question though.....since there was a form of this system installed how can you tell if the carb has stock idle orifice or the revised one already in place? Thanks for your insight. Jeff
-
Guy's Thanks for your replies. Thanks to this forum I had already picked up on the 180 thermostat For me it is not a question of omitting a PCV system. I worked in a couple of garages that did fleet maintenance in the very early 70's. At that time many of the vehicles we serviced had PCV systems but some of the older ones did not. Being a young grunt I got all the line mechanics dirty work. The engines without PCV systems were always a mess.....even with regular oil changes. Once you have seen it from that prospective it is a absolute no-brainer. The only PCV related problems I ever recall seeing were worn out PCV valves and more often... vacuum leaks. Both of these can be dealt with easily. I reckon I will do a variant of these ideas. To me the big thing with these sorts of installations is making it easy to service and check for leaks. If possible I don't want any of this system under or behind the manifolds. I think I will adapt the road tube and plumb it outboard of the manifolds similar to one of the examples shown. My intake manifold already has the provision for this. I don't believe it is actually necessary to plumb the filler/breather up to the air cleaner however. I think that all that is really needed is a true breather cap with a provision for a filter. I am pretty certain this will work just fine and certainly make for a cleaner looking installation. Hank......you are too funny. You know where all that sludge came from don't you? Those expelled petrochemicals...... Well you paid for them......and guess what? They burn just fine. Take a look at the millions and millions of engines equipped this way. You are going to have to come up with a much better reason to not go green than this. Thanks; Jeff
-
Thanks Mark; I will send you a PM. I was wondering what folks experience with this item was? It is easy to see why it might have been left off..... Jeff
-
Hi Guy's; My truck had a funky looking PCV arrangement on it when I got it. The road tube had a rubber bung in it. Some one had punched a square hole in the front valve cover. There was a plastic hose fitting shoved into this hole and a PCV valve hung off this with hose back to the intake manifold. It may have functioned OK but I would like to come up with a cleaner looking and more reliable arrangement. The way mine was done servicing and checking for vacuum leaks would have been a bear. Do any of you have photos of your PCV installations you can share? Thanks, Jeff
-
Hi Guys; When I got my truck (not a runner....yet) it was not fitted with one of these shields. I am wondering how critical this item may be. I suspect it might be a good thing to have in a warm climate like we have here in SoCal. What's your experience with this? Do most of you truck owners have this item in place? Thanks, Jeff
-
Steering Wheel Restore Chronology
Jeff Balazs replied to pflaming's topic in Mopar Flathead Truck Forum
Rockwood; Yes I think the preparation and being patient is really important .... there are probably several different products you could use and get good results. Jeff -
Steering Wheel Restore Chronology
Jeff Balazs replied to pflaming's topic in Mopar Flathead Truck Forum
Paul; There is a Bondo type product that comes in a small tube and works well on minor imperfections. I believe that this is what Rockwood is referring to. You can even use it in between coats of paint. I used JB weld on my wheel. It is not as stiff as the POR product you are using. I had to make dams with tape to do some of my repairs and fill more than once. Spent more time waiting for it to cure.....but it worked really well. Because it is thinner I could get it to run into the fine cracks. Whether you use glazing compound or do it the way I did.....you can get the same results. You just have to be patient. Spray a coat of finish and walk away. After it has had time to cure try rubbing it out with fine sandpaper and a scotchbrite pad ..... look closely for imperfections and go over them with glazing compound. Prep and spray again. It may take a few passes like this but you will get good results. Hope this helps, Jeff -
Steering Wheel Restore Chronology
Jeff Balazs replied to pflaming's topic in Mopar Flathead Truck Forum
I did a cheap fix on mine. It was so nasty that I didn't even want to put my hands on it........that's pretty bad if you consider how my hands usually look. Surface prep was about 2 hours of careful sanding. Got all the old coatings and crud off. I used JB epoxy on mine. Took 3 applications......to get all the cracks filled, filed and sanded flush. Cost $7. For a finish I used rattle can plastic patio furniture finish in Satin Black. Looks really good. Another $7. Honestly this wheel was so bad I didn't think it was worth the time..... I am happy with it now. Jeff -
Rear axle: 97 Wrangler to a 52 Dodge 1/2 T
Jeff Balazs replied to pflaming's topic in Mopar Flathead Truck Forum
Paul; Great thread.....I will be following this with much interest. I wonder if the original wheels will fit on this swap? Maybe someone already knows... Best of luck with this. Jeff -
Fishing fun (?) in a Pilothouse
Jeff Balazs replied to Jeff Balazs's topic in Mopar Flathead Truck Forum
Hi Dave; I am doing this with the engine in place for now. So far it does not appear that I absolutely need to remove it. I was trying to bring up the fact that flushing with the engine in and the head in place leaves something to be desired. Jeff -
Fishing fun (?) in a Pilothouse
Jeff Balazs replied to Jeff Balazs's topic in Mopar Flathead Truck Forum
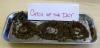
Catch of the Day; Here is a photo of the stuff I fished out of the water jackets with the head off. I had already flushed it with a power washer and a small wand while the head was on. I flushed until nothing more came out. As you can see there was quite a bit of "stuff" still in there. I am not really surprised ... most of this came from the center of the block. I am planning to flush again after I put the head back on. I am really glad I took the time to do this......at least I know for certain that none of this stuff will find it's way into my new radiator. Jeff