


JBNeal
-
Posts
5,720 -
Joined
-
Last visited
-
Days Won
61
Content Type
Links Directory
Profiles
Articles
Forums
Downloads
Store
Gallery
Blogs
Events
Classifieds
Posts posted by JBNeal
-
-
I'm not for sure what them holes were for, they're on the stainless bars as well as the painted bars. My only guess is that they were used in the forming process of the brackets.
It is metal-to-metal contact on the stainless bars & the painted bars. I'm gonna try putting a 1/16" bead of black RTV on the back of the bars and let it cure to make a gasket. Or use some old inner tubes and cut small strips bonded to the back of the bars with rubber cement.
-
My '48 B-1-B-108 & '49 B-1-D-126 both are sportin' Monroe -
Front: 31000
Rear: 32207
-
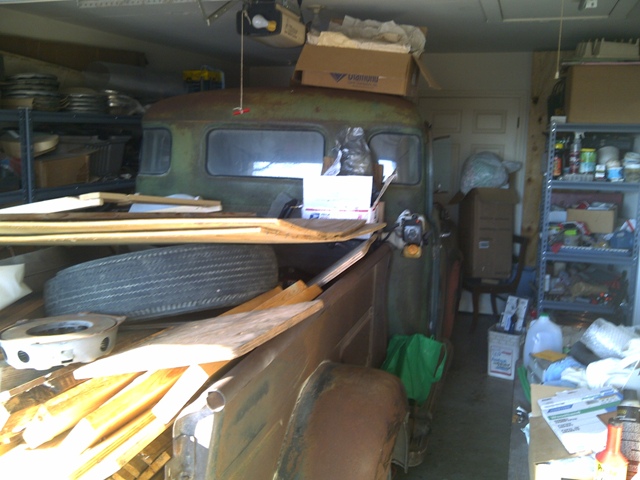
truck picture B-1-B-108:
we didn't get that much snow in this neck of the woods, but I've got a li'l digging out to do before I can get back to work on the '48:
-
The LF tire is still on that Jimmy, the RF is probably in the bed of that B-3...probably headed to the next town over at a blistering 35mph.
-
Wiper pivots '51-'53 (or '54) were different than '48-'50 as they were placed further from the center of the cab so the wpers could cover more glass area and stow flat. Vacuum & electric wiper motors shared linkage geometry for respective model years, so the pivot linkage & arm were riveted together, presumably to reduce production cost.
This is a four-bar linkage, so the system geometry is critical in determining component interchangeability. I attempted to install a '53 electric motor in my '49 after doing some calculations & modifications to the wiper linkages. My calcs were a tad off as the wipers slapped the cowl & A-pillar, so after 4 more attempts I got it in the ballpark. The problem was that even though the pivots looked the same, the electric motor links had different lengths & axes, so the pivot sweep was out of whack.
-
Get a new one, it's waaay cheaper than getting the potential paper-weight sleeved. I sleeved mine in the '48 & the '49 cuz new ones could not be found back then, not even at NAPA or the local parts store, Roberts & Bernbaum were out of stock, and I didn't know enough to look up VPW.
-
I've heard there is a way to convert the sealed bull's eye to a halogen H-4 housing by refurbishing the reflector & polishing the lens, so I picked up a few candidates on eBay to restore some day. The radio knock-out plate is missing from the dash, I've seen a few of those on eBay as well as 802 radios. I'm gonna convert that tube-type radio to a solid state AM/FM receiver with mp3 ports someday. Yessir, someday is gonna be real busy & expensive.
As for the seat control valve, that is for a lever at the bottom of the seat that contols the opening that allows air to exit the seat cushion area. Basically it's a spring dampener for the seat that was optional equipment back in the day.
My advice about this forum is to read every post; you'll find a wealth of information and a plethora of links to parts and services. I've got a spiral notebook chockfull of details, from engine repair tricks to wiring diagrams. And then there are the upgrades: 180 t-stat, PCV system, seat belts, turn signals, gener-nator, disc brakes, tubeless radial tires, etc.
-
is your door warped? all the doors on my '48 & '49 were warped, and it took a block of wood and strategic straightening with my shoulder and both legs. They aren't perfectly straight, but are visibly acceptable to me.
-
I'd guess fine thread sumthin'ruther. I tackled this in '04 to replace the mangled door latches in the '49. Took one look at that durn thing and immediately went for the plug-in drill. Started with smallest bit I had, dulled it so used 3 more to get a pilot hole thru. Then went up bore sizes gradually until the lock fell out. The thought was to use a self-tapping screw into the old set screw to hold the lock, but may use a screw that sits proud of the boss but loose in my bore and JB Weld it in place. If I ever need to remove that lock in the future, the proud standing screw can be easily broken free. In theory.
-
I recall that list being in one of Bunn's Bibles, but I've had a disagreement with the transmission being a 'natural' color. Both of my '48 & '49 had oil leaks that eventually coated a small part of the original paint on the transmissions. From what I've seen, they were primer red with aluminum oxide top coat. From a manufacturing perspective, engine assemblies would be assembled, tested, then primed or painted for warehousing or shipment. Same goes for the transmission & bell housing assemblies. From the flatheads I've seen over the years, they've been aluminum, Massey red, Clark yellow, Miller blue...
-
from the looks of Reg's photo (presumably from one of Bunn's Bibles), the engine/transmission assembly was painted aluminum oxide as a unit, manifolds included, as evidenced by the overspray on the parking brake handle. Oddly enough, the water pump pulley is aluminum oxide, but the fan & mtg.bolts are black. From memory, I reckon the oil fill tube is aluminum, but the cap is black. The generator mtg.bracket is aluminum, but the generator & adjusting bracket are black. The distributor body is black, but the distributor timing/mtg.plates are aluminum.
The starter foot pedal, starter pinion arm, accelerator linkage, firewall clamp for the choke & throttle cables + temp.gauge tube, and horn mtg.brackets are aluminum also. But the horn is black, as is the starter and steel fuel pump heat shield. Something I've played with is fabricating an aluminum heat shield for its heat reflectivity; it also won't need painting.
I assume the distributor clips are black, since the dist.body & cap are also black. The fuel pump & fuel filter housings were a dull greyish color, and carburetors were coated with yellow or white zinc.
I don't recall any of the engine components being of a shiny or glossy nature. Forgot who pointed this out, but might as well replace that freeze plug that is only accessible when the transmission bell housing is removed. Then paint everything before installation back into the truck.
Some folks spray paint, but when it comes to cast iron, I use a foam brush to dab the paint into the casting pores. The finish is thicker and less likely to get rusty if the original rust was treated or encapsulated. Also, foam brushing uses less paint, although it does take longer, but ya don't have to worry about inhaling any overspray and getting a case of the rainbow snots.
-
if that oiler cup & cap is rusty, then it'll be purt'near impossible to remove it without destroying it. I reckon these things are installed much like the filler neck engine block, and rocking them back & forth allows ya to wiggle them loose. Maybe contact one of those distributor / generator resto services, maybe they'll have the materials and some words of wisdom that might could get ya moving in the right direction (a tribute may be required).
-
dunno if y'all have tried this, but with the head off & the starter installed, maybe the crankshaft can be spun at low speed to see how the valves & pistons interact with the camshaft & engine block. Maybe shoot penetrating oil on the moving parts to get them pre-lubricated before final assembly. This would probably be the same as applying assembly lubricant to a completely disassembled engine.
-
One spring break, I went to the junkyard on the other side of the county, for parts off of their yard truck, a B-3 flatbed they had just retired. Next to it was a '48, almost intact except for the front axle. I went to pull the gas tank out, since mine was riddled with rust holes. Wanted that gas tank so bad that I was disturbing a fire ant mound just to access the rear mounting bolts. Got the tank out, and in the TX sun, it was clear that this tank was in just as bad shape as the one I already had. But I pulled the rear drums (and pocketed the wiper knob) to show something for the ant bites and resulting pounding headache. Went back 6 months later to see if I could get anything else, and the junkyard had converted to a salvage yard, and anything older than 20 yrs had been "disposed of"...D'OH!!
-
my 2 cents: take it all apart, clean & check everything, put it back together and fire it up with no worries. I'd rather find a defect on a work bench instead of on the side of the road, it's cheaper too. The '48 & '49 were parked out in the elements for decades, but when I popped the heads off I was relieved to find nearly flawless machined surfaces, but stuck rings on the '49 & a nearly broken ring on the '48. And the SLUDGE...it was everwhar!
-
the phrase "drive it like ya stole it" is more succinct than what I was told. Driving at varying speeds, hammering the throttle on hills, making more rpms before shifts up and downshift braking help to get the rings broke in well in the first 500-1000 miles. Dad drove my '48 after I had the engine broke in good, and he was surprised at how much more power that 218 had than when he had driven it on the same hilly roads 30 years earlier.
I just rebuilt the 230 top and bottom so after break in I should be OK. Many years ago I heard an engine does better if after break in it is ran at the higher rpms along with in-town traffic. T or F? Obviously they don't mean redlining the crap out of it.
-
to change over from DOT 3 to DOT 5, all of the DOT 3 has to be removed, so a brake system disassembly, cleaning & overhaul would be the best time to make the switch. Rubber components may absorb some of the DOT 3, and that's where the biggest cleaning problem would be. Long runs of metal brake line would have to be flushed thoroughly, and this would probably best be done with the lines in a vertical position, removed from the vehicle. Since I had replaced the metal & rubber lines and all cylinders on the '48 & '49, I went with DOT 5 since none of the components had been in contact with DOT 3.
IMO, if one has a working brake system on DOT 3, changing to DOT 5 could be a real headache; it's easiest to start from scratch when switching to DOT 5.
-
My '48 has the 4.1, and I could drive it around 55mph, but there was an odd vibration that radiated through the floorboards and not the steering wheel. So I self-governed to 45 mph, and that 218 seems to agree with that kind of loading.
-
I've been using DOT 5 since '98 when I completely overhauled the brakes, new lines included. The '48 sits for long stretches, and the pedal is still firm, and the fluid is still purple. I saw what the original DOT 3 did once it was saturated with moisture: pitted wheel cylinders, corroded lines, and a leaky master cylinder.
-
from what I've read about the industry change from bias ply to radials, it was a goal of tire manufacturers to make the radials backwards-compatible with car & truck wheels that ran on bias ply to make more sales on replacements. From looking at the rims on the '48 and newer rims I'm gonna put on my '52 daily driver, the metal thickness and bead profile are very similar. Side loading of the bead from air pressure is practically the same whether a tube is used or not. Bead sealing on lock rim wheels is only possible with a tube, so maybe some local grease monkey put the fear of Jesus in the PO to put some gorilla welds on the original rims. Grinding the welds off might clean off the unnecessary weight, but dunno how well the wheel will be balanced or if the welding was done so poorly that the surrounding metal has been fatigued. If you're up to the challenge, maybe you could try to carefully grind off what ya can and see how it balances out.
-
it looks kinda like the Dodge axle in my '48 B1B, but the part number is a tad newer, probably from '56? According to my parts book, the gear ratio might be located under that fill plug; also, there might be a drain plug at the bottom of the case.
-
that sounds an awful lot like that truck has been modified, maybe with a Jeep axle. Take measurements, look at the numbers & such on the gear housing, maybe post some pics and somebody 'round here might be able to ID your mystery parts.
-
One of the tips I was told from several older machinists was to do the speed variation break-in for the first 500 miles; if done in a hilly area, it yields the best results. The theory was that the combustion chamber temperature would vary more significantly than it would if the first 500 miles are driven slow & steady. This would have the effect of tempering the piston rings, effectively extending their service life and producing a stronger motor because of reduced blow-by. After the 1st 500, that's the ideal time to switch to synthetic blends if desired.
-
looks just like the prototyping stuff I do at work: build something from a list on a piece of paper, take it all apart, then put it back together again...NICE
whistle
in Mopar Flathead Truck Forum
Posted
sounds like that truck has got character...I don't reckon the vent was designed for quiet at 65mph as much as to move air (or as Grandpa used to say, "stir up the rat turds")