Loren
-
Posts
810 -
Joined
-
Last visited
-
Days Won
16
Content Type
Links Directory
Profiles
Articles
Forums
Downloads
Store
Gallery
Blogs
Events
Everything posted by Loren
-
My 49 has a 6 volt Delta Mark Ten CD ignition and it works perfectly. The way the ignition interrupt works is to ground the spark. Since the spark is going to the ground away your ignition doesn’t notice. The purpose of the ignition interrupt is to take the torque off the gears until the solenoid can retract. It happens so fast you can’t hear it from the engine note or feel it.
-
I have a Delta Mark Ten CD ignition ( 6 volt ) and my Overdrive works fine. If you look at the diagram the ignition is only momentarily interrupted by the solenoid through the throttle switch. In operation you’ll never feel it or hear it. All it does is make sure there’s no torque on the drive train so that the solenoid releases. As for a problem for the ignition, remember the spark is going to ground anyway and if it goes to ground before it gets to the spark plug, the engine misses. Engine miss doesn’t hurt the ignition.
-
If you’re on the left coast, in Reno, NV there’s the shop I use. Nevada Speedometer I am a little fuzzy on the address cause you know Reno must be close to hell, close enough you can see Sparks! A local joke sorry.
-
Any time I can support my local speedometer shop I do. They’re swiftly going the way of shoe repair shops. When I have the dash apart the speedo goes in for lube and calibration. The last time it was off by 5 mph! Since that is just outside of the enforcement limit, I think I saved myself a ticket. Cheap “bulb type” temp gauges were about $30 and I have one for when the stock one is sent out for repair. The cost of repair is really spendy! If I remember it was $300! However the shop replaced everything from the cylinder head to the back of the gauge, so there were no weak spots or unseen cracks. The last one I had done was a while ago so your mileage may vary. It’s hard to compare the cheap replacements with the cost of a repaired original, I know.
-
There are some aftermarket king pin kits with an oversize bushing to replace the upper bearing. It could be this car has 11 or 12 inch brakes. A swap that I have done on my Plymouths ( I’ve only done the 12 Chrysler Windsor brakes so I don’t know about the 11s ). It shouldn’t be a problem changing to the bushings. Honestly the needle bearings I have dealt with were a pain in the neck. Brand new ones in a box ( decades old ) were so stuck they spend a lot of time in the heated ultrasonic cleaner to get them loose. I can imagine what old installed ones could be like. Plymouths are light and really won’t benefit much by using the needle bearings. There’s a reason they aren’t made anymore.
-
I am working on a set of 52 Suburban tails right now. It’s well known the chrome was not very durable during the Korean War because of material shortages. The chrome was all pitted and just plain awful so I bead blasted the remainder off and the pits went from cheese grater depth to just bumpy and rough. Funny thing about blasting chrome, it lights up. I studied how to fill the pits and it ranges from multiple coats of primer, epoxy fillers with aluminum powder in it, to finally a cadmium/tin soldering system from Muggy Weld. The epoxy stuff doesn’t like repeated heat curing cycles and the chrome powder coat is dependent on three separate coatings or more. The Muggy Weld solder can be plated so if powder coating doesn’t work out, I suppose it could be stripped off and plated later. The idea of trying to remove an epoxy repair doesn’t sound like fun. The powder coat cures at 400 degrees but the Muggy Weld melts at 350 yet they say once it cools it can be powder coated. Of course I am thinking lead based solder and not an alloy that takes on the characteristics of the base metal. To get it to work you use a flux and you have to grind out the pits and sand the rest just before soldering, because pot metal oxidizes so fast. Which to my mind means you can only do small spots at one time. It files and sands very nicely and can be used to join two pieces together. In my mad mind this sounds like the right direction to take. More to come
-
 If you look on the side of the differential carrier on the flat under the fill plug you will see a number stamped on it. Your Chrysler probably has the number 3.9 stamped there. That is a 3.90 to 1 ratio. Your modern tire size is probably 225/75r15. Pictured is a 3.73 such as is probably in your 49 Coupe. ( that’s what came in mine )
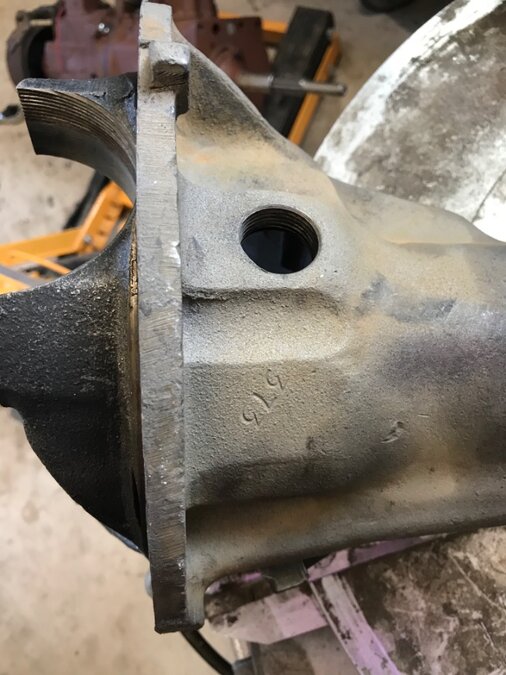
-
There’s a few things that are subtile. Keys must always be pulled in such a way that there is no side thrust on the key. To illustrate, if you put the key pointing up you must pry at 6 o’clock or 12 o’clock. Never at 9 or 3 o’clock. ( this is for straight shafts. Hubs tapered and keyed but the side thrust rule still applies ) Now any puller you use on hubs must attach with the lug bolts and the heavier the puller the better. If one of the legs is damaged make certain it doesn’t pull against the key, if it does it will bind and you’ll never get it off. If you buy a puller it is best to get a heavy one. The more heft the better. The one in the video above is a Snap-On Blue Point brand. They are good and are only found on eBay used. The one I have is very good too. It usually takes two licks with a 3 1/2 lbs. engineer’s hammer ( aka BFH ). Any puller lighter than those and you’ll be hammering all day. At bottom of the photo is the piece you hammer on to tighten the puller. You can tap on the puller screw to set the puller as well but most of the hammering is on hammer piece. I have heated hubs, I have drenched them in penetrant oils and the one thing I have found that works is the right puller. Get the right puller and the job is a pleasure to do. I’ll never get rid of my tapered and keyed axles because I have the right tool.

-
The Solenoid and the relay are voltage specific. All the switches and governor are the same.
-
I saw an old friend of mine the other day and he told me of a car that another guy had done major surgery to and could not get the low beam head lights to work. Nothing the guy tried would get them on, so he drove with high beams on for a couple years! My buddy borrowed the car and in a short period decided that high beams were not the way to drive at night so he had a look. He discovered that both low beams had burned out. This case reminded me of a lesson I learned 40 years ago to find electrical problems. It's called the split half method and it works like this: DC electric power goes from the battery to the load and then back to the battery. Now there could be many stops along the way like switches and fuses but it always starts and ends at the battery. The split half refer to the quickest way to find the problem. You divide the circuit into two halves. You start at the load, if you have no power to the load then the problem is from the load to the battery. If you don't have power then you divide the circuit again and halfway will likely be the switch. If the switch has continuity when closed but no power then the problem lies between the switch and the battery. Divide the circuit again and that will probably be a fuse. Anyway you get the idea. A shotgun approach is a waste of time. With electrical problems you have to be methodical to be fast! Yes, most electrical issues are bad grounds because "rust never sleeps" and you might think starting at the ground is the quickest way to repair and you'd be right. However if you are going to look at the ground side of things, start at the load and go back to the battery. If our friend had done that he need not have gone any farther because he was right there. Mechanics is not art, it is science. Don't get overwhelmed by what looks like a confusing nest of wires.
-
Your points are well taken. I live on the coast and everything gets coated in briney dew. So all steel gets the worst treatment even in the garage. Ornamental chrome is I think a lost art. When every car had a chrome bumper the repair work was pretty good now days not so much. When I was in the machine shop business we used a lot of hard chrome plating so I am well aware of the problem filling pits and dings. While the local governments have tried to chase the aircraft industry out of the L.A. area there are still a couple of industrial chrome shops I would use there. Ornamental chrome is another matter however. That’s why I was interested in the powder coat process. You can get a set up for a very low price from Harbor Freight and when you start looking at the media prices it’s an eye opener. I guess it follows if spray paint is expensive powder coat media will be too. Realistically speaking you are always better off having professionals do this kind of work, but if you lose your go to guy what are you going to do? I have a powder coat shop within sight of my shop and they have tripled their prices, won’t give quotes and the work quality has gone down…so we don’t use them anymore. In frustration you start considering diy.
-
I was at a friend’s shop and he showed me a BMW motorcycle part he had powder coated in a chrome-like color. He said the steel parts rust too quick when they are chrome plated but this powder coating is cheaper and lasts longer. Polished stainless looks better and real chrome does too but this seams like a real alternative for a driver quality car. If all you have are rusty pitted bumpers on your daily driver this might be a sensible alternative to chrome plating. That said I have to tell you even powder coating will rust in time. It seems there is nothing permanent, except a government program. lol Harbor Freight and Eastwood have powder coating kits for small stuff. A bumper might be too big for the DIY folks.
-
I just re-engineered my kick down switch and when I tested it, I tested the adjustment of the switch not the entire circuit. I used an ohm meter to tell me when one set of contacts broke and the other made a connection. The whole idea of ignition interrupter is to take pressure off the drive train so the solenoid can act and when it does the ignition is restored. In operation you should not feel a thing.
-
I made a minor discovery today. The thread on the lid of the Master Cylinder is the same as the end cap where brake lines screw in. Which means if you want to put a remote reservoir on the firewall say, it’s easily done if you have an old master cylinder rusting away in your junk pile. The end cap has two holes for the front and rear circuits. It will screw right into the top and then you have a ready made adaptor for remote reservoir. When you hook everything up you can use a plug in the extra hole to purge the air from the master’s reservoir. I am putting in my VH44 power brake booster and figured this out because the end cap has two holes and I only need one for the booster signal, I have to plug one of them. I chucked an old rusty cylinder in my vise and removed the end cap with an 1 1/2 inch socket and an impact wrench. Cleaned and took it to my NAPA store for the plugs. ( 3/16 ths double flare is the size ) Once back at the shop I was curious to see if it would thread into the fill cap opening and it does. eBay has a cheap VW remote reservoir for $13 which will work very nicely. So Wednesday I will go back and terrorize the NAPA folks again for more fittings. I love it when a plan comes to gather!
-
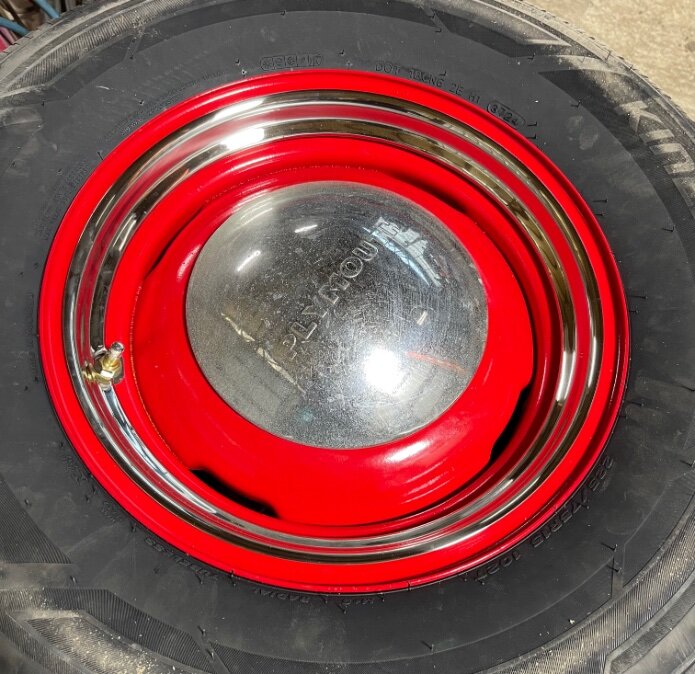
In 1949 red rims and trim rings were the bad boy Mags of the day! I have photos of even foreign cars having red rims and trim rings. Unfortunately I am old enough to remember that.
-
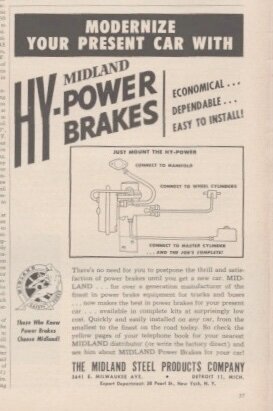
I bought some early 50s car magazines and this ad popped out at me. The plan is to get my parts book out, copy the pages for the Chryslers with this kind of Power Brake unit and see how close I can come. There's a sign on a building near my storage that says a Power Brake Booster rebuild outfit occupies the building. I am thinking I will stop by and get educated on remote PB boosters.
-
WWW.oldmoparts.com = Andy Bernbaum = AB The trim rings I think are pretty nice. They are thin stainless steel so they are easy to put on. $41 each. They sell the clips at a hefty $3 each but they don’t sell the rivets. I got the rivets from my local lumber yard who has two isles of Hillman fasteners which I have seen many places such as True Value, Do it best, Ace and Tractor Supply. The rivets are “4 lbs. Tinner’s rivets” they are just barely big enough in diameter and length. You have to be careful when you set them. I used a big bolt as a buck that happened to be the right size, a long 3/8 diameter punch and a BFH ( about 3 1/2 lbs engineer’s hammer ). I set the wheel on the floor and slid the bolt under the clip and rivet. If the buck is a wee bit longer than the distance between the floor and the rivet it will hold everything in place. The BFH is required because you’ll be pounding and messing up the rivets for hours with a little hammer.
-
These were the caps on the 49 when I got it. “PLYMOUTH” is raised on these while I seen it indented on others.
-
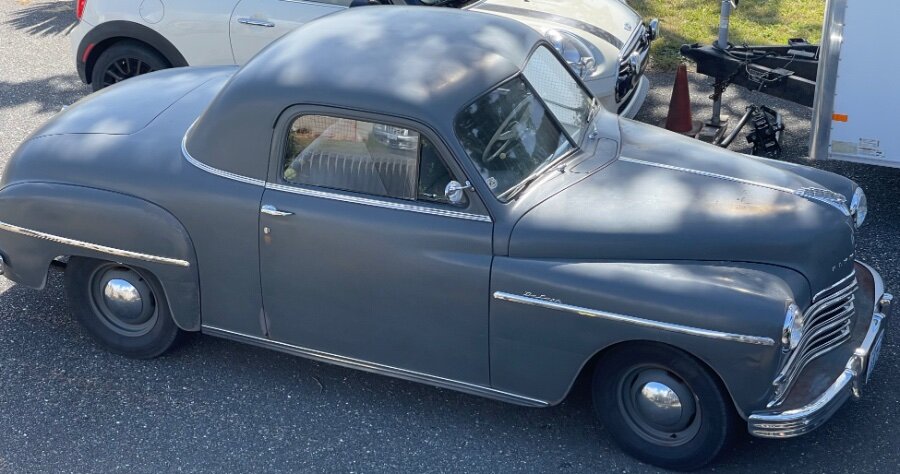
One of my projects was to put 12 brakes and a power brake booster on my 49. The very first problem was the Plymouth wheels didn't fit over the drums. So I got some aftermarket wheels and I wasn't very happy about it. I wanted Mopar wheels of the era. Anyway the tires were 205/75R15 Now in case you're shopping for tires those fit the original rims and they are close to the 6.70 15 tires ( a little wider but the same diameter ). One thing you need to know about them is they are a standard size for trailer tires. If you're shopping for price trailer tires are cheaper than car tires. I am thinking it's not a good idea to put trailer service tires on a car. The "P" metric size is P205/75R15. The trailer service size is ST205/75R15. So you can see the confusion. Well for my other Plymouth ( a Suburban ) I acquired a 50 Windsor chassis for the brakes and other pieces. It came with wheels too. 68CD7B15-A578-4E9E-87CB-614AFC5249DE_1_201_a.heic As you can see the are wider than stock. So I decided to investigate what tire would fit on them. P225/75R15 is just about what a Windsor would have on it today. I got them blasted and painted. However the Chrysler wheels used full wheel covers and didn't have the hub cap clips. So I had to buy the new AB trim rings and clips to hold the dog dish hub caps. I never really looked at the hub caps before and thought they were kind of heavy. The caps are a composite of a steel cap with a veneer of stainless steel over that. You can't straighten them but you can polish them. My local lumber yard ( Do it Best hardware dealer / Hillman fastener dealer ) had "4 lbs Tinner's Rivets" which are almost right to hold the clips. 1C24079E-D200-4720-AE36-0BF15DC96169_1_201_a.heic So I am really happy with how they look.
-
You know I’ve thinking about this too. However I was going in a different direction. I was thinking of using an old propane tank or a refrigerant tank that you could put oil in and pressurize it with a tire valve then connect it to the engine oil galley. If you look in the shop manual the factory talks about an oil pressure leak down test. You take the pan off and pressurize the galley to see where the oil is leaking. They even had a special tool to do the test and criteria for how much leakage was allowed. That’s a lot more than I had in mind though. All I wanted to do is lube the engine before a first run. What I was thinking was this is a way to make sure the oil pump was primed ( of course you’d have to roll the engine over to turn the pump several rotations before it would prime ) Summit Racing and others have such equipment but it’s pricey.
-
Do a search for posts on steering gear work. describing what to do takes too long to repeat. Basically you will want to change the seal on your steering box ( they leak and allow the gears to run dry ). Do not touch the gear engagement adjustment on top, you’ll only make things worse. The key adjustment is the bearing preload. Grab your steering wheel and pull up ( towards you ) and push downward, if there’s any movement it will show up in the car wandering.
-
Back in the 1980s ( a lifetime ago ) I was a dealer Saab mechanic and off road racer. Finding a lube that could keep a transmission in those old cars was a challenge. Even the factory was on it. I won't go into the evolution ( again ) of how we hit on lower viscosity oil and Redline products in particular. I have three vehicles that are coming up on a transmission oil change, two automatics and a 1949 Plymouth Overdrive. So I thought I'd start the selection process before need. The first is a 2013 M-B GLK 250 which is a 7 speed automatic which has a change interval of 70,000 miles. I didn't make it that far because it started slipping in high gear at about 60,000 miles. When I read the procedure it sounded more like an engineering project than maintenance. There's no dip stick/fill tube. You have to use a device to pump the fluid in from the bottom, then run the engine to warm up the transmission which you have to check with an inferred thermometer. Once it warms up the temperature determines the level. The torque converter has a drain plug but nobody drains it so the car owner only gets 50,000 miles till the transmission slips again. The second time I bought the equipment and did the change myself. It's near the change interval and no slipping. The Mercedes spec is designated as M-B NAG-2. A check of the Redline products indicates D6 ATF meets that spec. The second is a 2008 Ford F 250 Diesel. It is a whole lot simpler than the Benz but it requires Mercon LV. The Redline D6 ATF meets that spec too! Now we are getting somewhere! I like the idea of using one lube in as many vehicles as I can. Makes it worthwhile to use the better stuff. The Plymouth used to use GL-1 lube which surprisingly is still available. Over the years I have learned that if you want to clean the inside of a manual transmission before you rebuild it you can drain and refill it with cheap ATF. The inside will be clean as a clock! A quick read of the Redline D6 ATF spec sheet tells you it can be used in manual transmissions replacing all but GL5. The main issue with the Overdrive is the Sprag Clutch. Extreme Pressure ( EP ) lubes can cause them to slip and so that is why GL1 used to be spec'd. Automatic Transmissions use planetary gear sets and Sprag Clutches so we know ATF is compatible. Red Line MTF is plenty good for a regular 3 speed transmission and is a little cheaper. Plymouth transmissions are well designed and don't require crazy expensive lube oil. However if you put the money out for an Overdrive you might want to feed it the best you can get. My inventory of transmission lube just got much simpler.
-
On another topic for carburetor repair. Whenever you take a carburetor apart from an engine that was running, shake the float. Sometimes they develop a pin hole and they fill with fuel. There's some debate as to why this happens but I don't think it matters. Only the detection and the repair matter. If you suspect fuel in the float get a pair of pliers and hold the float in them then take a match to the float. When you heat it the fuel will want to come out and it will identify where the hole is. Note where the hole is and continue heating with the hole on the bottom till there's no more fuel in the float. Now you can repair the hole with a soldering iron and electronic solder. In the good old days they sold a lot of floats, then they went to the black foam plastic floats. Those days are gone but it's no big deal to repair a float that has only a single hole.
-
Yes those old parking brakes are suspect! They hold real good when you leave they on! ( After a couple of blocks ) On a dark foggy night in San Diego, my 49 started to slow down on a flat road. I gave it full throttle and it did a sudden nose dive. I restarted it and let out the clutch and the engine died again without so much as a wiggle of the car. As I sat there looking at the dashboard trying to figure out what was going on, tendrils of smoke drifted up between me and the dashboard! I opened the car door and leaned down to look under the car and there was a bright orange glow on the ground. Once I released the hand brake I was able to proceed on my way like nothing happened. I knew a guy who washed his old Plymouth for a date, then went in to shower. When he came out the car was gone! He heard a commotion down the street and saw his car upside down in the middle of the intersection. In those days a 1949-54 Plymouth was a "Transportation Car" and you could buy a good one for $150. ( 1964 ) By Monday he was driving a 1953 and it was nicer than his late lamented 1950. Those days are long gone so be real careful with your "Survivor Car".