HanksB3B
-
Posts
3,506 -
Joined
-
Last visited
-
Days Won
6
Content Type
Links Directory
Profiles
Articles
Forums
Downloads
Store
Gallery
Blogs
Events
Everything posted by HanksB3B
-
How come you didn't end the video by saying "Bob's your Uncle" Thanks for making it, Hank
-
Strange Brake Problem or..Sorry for the book.
HanksB3B replied to HanksB3B's topic in Mopar Flathead Truck Forum
Dave, Thanks for responding. I looked at having the wheel cylinders rebuilt and they were $40 ea. or $60 ea. if they had to be re-sleeved. Roberts Motor Parts offers the Master at $129, the rears (upper and lower) for $24 ea. and the fronts for $45. The rears can only fit one way for UR, LR, UL, LL. However I guess the double piston fronts could possibly fit on either the right or left side of the vehicle. If in fact they have different pistons sizes they could be on the wrong side. I'll double check with Gary Roberts on Monday. I kind of doubt this is the case but it may be a possibility. Thanks, Hank P.S. Gary tells me that the cylinders are manufactured by the company that originally made them for our trucks back in the day. They installed no problem and seemed like a perfect match. He does know my trucks a B3B. -
Strange Brake Problem or..Sorry for the book.
HanksB3B replied to HanksB3B's topic in Mopar Flathead Truck Forum
I'm still not an expert at adjusting the brakes and getting the heal adjustment and toe adjustment just right without the Miller Tool. My brakes aren't locking up, but even though it seems to be stopping well I can still lock up the fronts if I push down really hard. Now, both fronts (rather than one) will skid at the same time. Is it just a matter of a fine tuning with a minor brake adjustment that will ballance out the braking system so that all four wheels get the same amount of stopping power when the pedal is applied? How critical is the pedal free-play adjustment and what are the symptoms of it not being just right? ? I'm not sure I understand the adjustment of the piston in the master cylinder and how it affects the overall braking Any input would be helpful, Thanks, Hank -
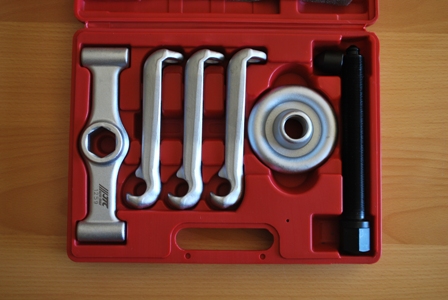
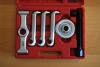
because of the 5-lug pattern it was a little goofy in that two of the legs had to be on the bolt right next to each other. I guess it's got to be the same for the vintage tool as well with a five lug pattern, but the bottom line is that it worked. Hank
-
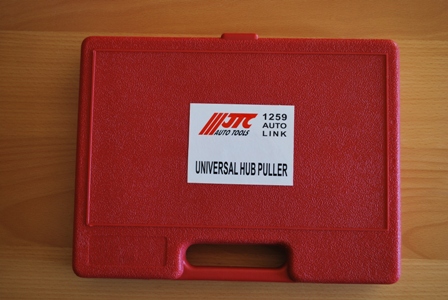
I looked at a bunch of them. Starting from Snap-On, OTC and a few other manufacturers they ranged from $200 to $169. The one I bought is a knock off of the one I rented and it worked perfectly. I haven't used it yet but the wheel nuts fit into the hole just right. Shipped, it was well under $100.00 and that even included some for Aaanold, not that deserves it. I really like the way it disassembles and fits into a flat case. Thanks for posting, Hank Now Ed, go ask your Dad if he has two MT-34-B tools. If he does, put one in a box and Fedex to me and I'll send you 100 bucks. Dad doesn't need two of the same tools, now that's just silly isn't it. (ha, ha,ha)
-
I have a particular love/hate relationship with specialty tools. Tired of paying for gas back and forth (x2) and $renting$ a brake drum puller, only to find out the next day I still need it. I saw this on Ebay and just couldn't help myself. Hank
-
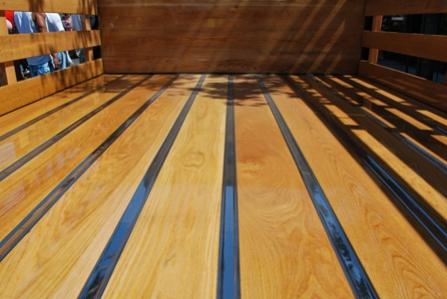
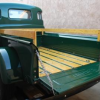
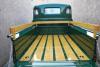
My truck's retired from slavery as a roofing truck. (Is there such a thing as "Truck Abuse"? I like your idea of a "ribbed-plastic" bedliner, but I doubt you'll find one. Like pflaming said: "These beds are not made of the thin/cheap metal new beds are. After you experience how hard it is to put a make a dent, you may opt for original. One thing I've seen on old work trucks was sheet metal cut-to-size and anchored to original bolt holes in the bed. If you ever intend to fully restore your truck you probably want to use a method of protection that is simply removed without extraneous effort or permanent damage to the bed. If yours is in good shape why not just use a piece of exterior plywood on the bottom, and just a couple of 3/8" interior sides just for protection when you need it. Protect you stake pockets and good luck! Hank P.S. I just saw that California Car Cover makes custom rubber mats for the bed area. It says for "most" trucks. Ours is so straightforward I'll bet they would make one for you.
-
1950 Pilot House at Barrett-Jackson
HanksB3B replied to Monkey Truck's topic in Mopar Flathead Truck Forum
I think the value our trucks is very under-rated. I've got somewhere between 12-14 into it along with a lot of time crawling around in dog hair (and worse) at the various junkyards, resto-yards, and the paint shop, along with a bunch of sacrificed Saturdays and Sundays, not to mention all the time spent treasure hunting on the web like we all do. I think it's just a matter of time. Meanwhile Enjoy, Hank


-
Speedometer problem '48 Pilot House
HanksB3B replied to Monkey Truck's topic in Mopar Flathead Truck Forum
so let me help you with yours: 1. You mean the cable is working but the speedo is still going crazy? That seems to be my problem too. It made some wierd noise and would jump all over the place, so it's disconnected at this moment. I plan to use some fine oil for the cable (bicycle chain lubricant) and then (and this is what I'm hoping will solve the noise and jumping around...I think there is a screw-post that exposes a felt lubricant blotter on the back of the speedometer that keeps the speedometer mechanism oiled. I will lube both the cable and the unit and re-attach the cable, then take it for a test drive. Are you sure you want to take it apart? (If it aint broke don't fix it) 2. I carefully drilled out the brass eyelets on both my speedo and instrument cluster. The brass eyelets I am told are available at some hobby/craft stores, but I used a S.S. phillips head machine screws and S.S. finish washers in my re-assembly. I could always re-do them to original if I found the brass eyelets and installation tool. Hope this helps, Hank
-
That would be great and much appreciated. I'll PM you. Thanks, Hank
-
Need a Source for Headliner and Firewall Pad Fasteners
HanksB3B replied to Bradley S.'s topic in Mopar Flathead Truck Forum
I used Plastic Anchors 8-10 x 7/8". I found what worked best was to clip off the tip of the blue anchor, start a #10 screw (3rd item from left) into the anchor, place it into a vise grip, run the screw all the way till it seats and then give it a half twist so that it almost strips. Remove the #10 and then push the anchor into the steel channel and give it a tap so that it seats flush. Next screw the #8 (what you see it the blue anchor) into the anchor and unscrew it making sure the anchor does NOT turn. After about 5 applications, I got the feel just right and it went smoothly. If you want black, the phillips head trim screw with the entrapped finish washer would give a real good look. (The reason I didn't use them is that I got #10's and you need #8's. Once the anchor/screw assembly is installed I tried a pull-out test and there is at least ten pounds of force needed to remove the anchor/screw assembly, whice is more than enough to secure the cardboard to the cab. P.S. I looked and Don Bunn's book to get a rough idea of the correct position. Next I held the cover plate up to the headliner and used masking tape to form a rectangle to act as a guide. I thought about removing the headliner (again..?) but decided I had the best chance just to cut it in place. I got so nervous when it came to cutting the hole for the Dome Light (possibility of ruining the panel) that I almost punked it! After I cut it I noticed I was shaking when I screwed the rest of the fastners in. That was a weird feeling. I still will need to loosen the four screws to drop a seatbelt backing plate into the "B" pillar. I feel that use of the screws in lieu of the clip anchors is the way to go (unless you are building a museum piece..which I'm not). I know the cardboard will more than likely rip if you ever did need to remove it, so Bradley S. PM me if you want the package of clips I now don't need. They were painted black over brown with epoxy enamel because Robert's only stocks (or ran out of black..not sure), so they're yours if you want them. Hank


-
but I thought the workmanship and finish were oustanding! Hank


-
Need a Source for Headliner and Firewall Pad Fasteners
HanksB3B replied to Bradley S.'s topic in Mopar Flathead Truck Forum
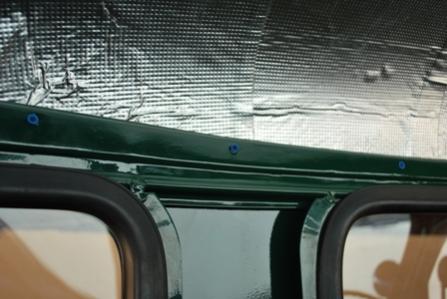
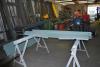
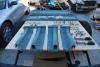
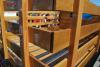
more forgiving. I'm working on my interior roof today. I'll show you the picture but it's looks are deceiving. The green tape was used to serve as a horizontal index only, to locate the holes. A vertical measurement was taken at each of the 15 original holes, a scribe (compass or divider) was used to measure and chart each hole's vertical location. Next with the headliner in place, I pushed a small hole in Roberts $500 bucks worth of cardboard as we Californians like to call it (Gary I apologize, I know that's a little exagerated) In the next step, the headliner was removed and a hole punch used to make clean holes in the headliner (not while in the cab). Once again, I test-fitted the headliner and every hole matched perfectly with the holes from the factory. I stopped here because the sun was going down. Tomorrow I'm going to cut out to allow the dome light to be installed. I've already run the wire but I intend to attach a ground wire to the fixture as well. (you know how ground goes) Well since I'm in your thread in answer to your question here goes: I'm undecided as to whether to use the clips supplied with the interior kit. The reason is I think they are unforgiving in that I think they are too strong and if for any reason they have to be removed, I think they'll cause damage to the cardboard. I'm thinking of these nylon button head fasteners that have a ribbed spline. I also might consider using threaded nylon anchors press fit into the steel channel (the ones you put into the wall to hang stuff) that way I could use the stainless steel oval phillips head finish screws with captivated dimpled washers, like used by the factory on the door cardboard (except thet were not s.s). From Don Bunn's book it looks to be that way. I think it'll look correct to all but the purest of the pure and since I don't think I'll be entering a Concors de Ellegance with my truck, I like the idea of being able to remove the headliner i.e. if I want to add more insulation. Don't forget also that you have to fasten through two layers of cardboard above the rear windows (that will be another thought challenge to me). P.S. You won't have to order anything, just a trip to a good hardware store. I'll see how it goes, Hank
-
Is it...? If so I'm thinkin a CRANE... not wrench... Good luck and more than anything...be careful, Hank

-
and it's anatomically correct. anything will look better than the hole. God Bless Ebay, Hank P.S. Now if I can just find an original oil cap.
-
Strange Brake Problem or..Sorry for the book.
HanksB3B replied to HanksB3B's topic in Mopar Flathead Truck Forum
You sure know alot. It's time to really dig in and write down my trucks info, the engine # and whatever I can find on the id plate on the door. I sure do appreciate your resourcefulness as I've noticed everyone else here does. Thanks, Hank -
Someone called my wheel caps ugly...
HanksB3B replied to HanksB3B's topic in Mopar Flathead Truck Forum
am I going to find a Farm Supply Store. I don't think anyone around me would know the difference between a cow and a bull around here. Just kidding, I'll look in to it. Guess I'll take a few measurements or try to see what the Parts Manual specifies. I also need to find some John Deere TY25083 Corn Head Lube for the steering box. (Wonder if I have a plaid shirt around anywhere...) Hey Thanks, Hank -
Someone called my wheel caps ugly...
HanksB3B replied to HanksB3B's topic in Mopar Flathead Truck Forum
just the dust covers over the axle nut/cotterpin. Any ideas? I'm in Torrance California, I can see the snow up in the mountains, but I think it'll reach 68 in the shade today. Thanks, Hank -
Strange Brake Problem or..Sorry for the book.
HanksB3B replied to HanksB3B's topic in Mopar Flathead Truck Forum
Mike Fowler Wrote: Hank-contamination on the brake shoe linings will definitely cause them to drag or lock up (grease, brake fluid, etc) and the hotter the shoe gets, the deeper the contaminent works into the shoe. I don't know of any way to removed anything other than suface contamination w/o relining the shoe. I'd also be looking to make sure that the shoe linings are tightly bonded to the metal shoes and not coming apart. They appear to be fine but will double check Has the right front drum been cut or cleaned? Does it have any surface inperfection or greasy coating that would cause the shoe to grab? Drums were recently turned within maybe 100 miles of use Since you replaced the flex lines, were they NOS or newly manufactured? I've seen these collapse internally and cause the shoes to hang up. Napa supplied the lines but you can’t assume anything so I’ll ask a friend to press on the pedal while I observe. What type of shape were the return springs in, and did the shoes on both fronts move freely on their anchor pins? Return springs are all strong and a typical bitch to get on. Finally, and I'm only guessing here-is there a long shoe and a short shoe on your vehicle? Could you have both longs on the right front instead of one long, and 1 short (sorry I don't remember if these were identical shoes or of differing legnths. I'm sure other folks will be able to offer other suggestions. Good luck. Mike Long Shoe Short Shoe humm I’ll double check Old Mopar Wrote: If the right wheel cylinder leaked then that is the problem as Mike explained the fluid that leaked onto the shoe caused the other problems. The right rear was the one that leaked but the right front would lock-up If this was a new cylinder I would check 1st to be sure there is no damage to the bore and the piston is ok and the correct one if it look ok then get a rebuild kit, new rubbers, just to be safe and reinstall the cylinder I’ll ask a friend to gently depress the pedal while I look to see if there is equal action at the cylinder level You do need to check all parts before install I just replaced the brakes on my dump truck used all new wheel cylinders and found one of the pistons was frozen so had to exchange it before install. This truck used 2 different size pistons in each cylinder so maybe someone put the wrong one in at the factory. Rockauto replaced the cylinder and even paid for return shipping. You don’t mean that there was supposed to be 2 different size pistons do you? Don’t know enough to doubt that but it would seem unusual. I don’t think this is the case on a B3B. TodFinch Wrote: Question-01: Is it possible that because the right rear got wet that it could cause the right front to lock-up ? No. But you said you replaced the master cylinder. If the push rod is not adjusted correctly so that the relief hole is cleared by the piston when the pedal is up the brakes will lock up and, at least on my old Plymouth, that happens on one wheel slightly before the others (probably a wheel/shoe adjustment issue). I have a feeling you have hit the nail on the head and will make this the first plan of attack (it’s the simpliest) Question-02: Does anyone know of someone that has the Ammco or Miller tool and would be willing to either adjust my brakes or let me use it. They are heavy to ship. I've loaned my Ammco tool out and would do so again but only to someone local to me. Neither your post nor your profile show where you are located so that might limit the number of offers you get. I will fix my profile but I’m in Southern California, Torrance to be exact. 90503 zip. Question-03: Any suggestions, opinions and a workplan would be greatly appreciated. If your drums are out of round I find that the "by feel" method you attached to your post does a better job than the Ammco tool. And it is possible to get decent, maybe not perfect, but decent brake adjustment that way. I’ll go with the by feel method. Should both the heel and toe have equal clearance with the drum? Double check those areas that you worked on prior to the front wheel locking up. I don't see how a change in a rear cylinder could affect a front, but I do see how a change in the master cylinder could affect everything. I hope you are right. Thank you all so much, Hank -
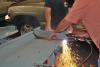
The right rear wheel slave cylinder leaked and I barely made it home with no brakes. I examined the cylinder and it appeared that the person in charge of rebuilding the cylinders did a very marginal job and only must have replaced whatever didn’t work at the time. Since I had replaced the steel lines and rubber hoses I looked into having the master and slave cylinders rebuilt at a shop specializing in that. They told me the cylinders would be examined and sandblasted and re-built like new. $40.00 ea. for the slave cylinders and $60.00 each if they needed to be sleeved. Since Roberts has been my primary source over the years I called Gary. At $129 for the master and $24.50 (x2) ata the rear wheels and $45 for ea front and that Gary said they are still produced by the original manufacturer for a little over $300 the truck would have a completely new braking system. I replaced the master the only funny thing with that is that the cover plate had to be rotated 180 deg. so that the filler cap was in the front just like the Truck Manual shows Everything else fit perfectly. I didn’t do a major adjustment as the pads were new and after the cylinders were in place I just put the drums back on and bled the system. Everything was working fine (no leaks). I went to the car wash and hosed down the inside of the right rear wheel to wash off all the brake fluid on the inside of the tire. O.K. heres where the problem begins. The front right wheel would lock-up and skid. At first I had to put the truck into reverse, step on the brake to free it up. I limped it home and found that soft pedal pressure would bring the truck to a stop without locking it up, but step on it too hard and screeeeech! I looked through the Manual (and wished I had the specialty tool). I found a P-15 D-24 cheat sheet for brake adjustment that someone skillfully put together and studied it as well (see attachment). The next day I took the right front hub off to get a look. I adjusted the heel pointers so that they pointed toward each other and then did the best I could without the tool I wish I had and just used a caliper type brake tool that measured the drum and the shoes. I put it back together. The truck exhibited the same problem and so I decided to take it to a very reputable alignment and brake shop that’s been in business for a few family generations. Steve told me that once shoes get soaked with fluids either brake or oil it could cause another one of the brakes to lock-up. Question-01: Is it possible that because the right rear got wet that it could cause the right front to lock-up ? Question-02: Does anyone know of someone that has the Ammco or Miller tool and would be willing to either adjust my brakes or let me use it. Question-03: Any suggestions, opinions and a workplan would be greatly appreciated. My plan (if the shoe contamination theory is valid) would be to only replace the right rear shoes and somehow manage to do a major adjustment on all four brakes. Thanks, Hank I know somewhere far away from computers along a dusty highway miles away from anything close to Ebay…there’s an old rusty toolbox by the side of the road..I stop and open it up. I looks like an Ammco 1750… no, it looks more like A Miller MT-34-B .

-
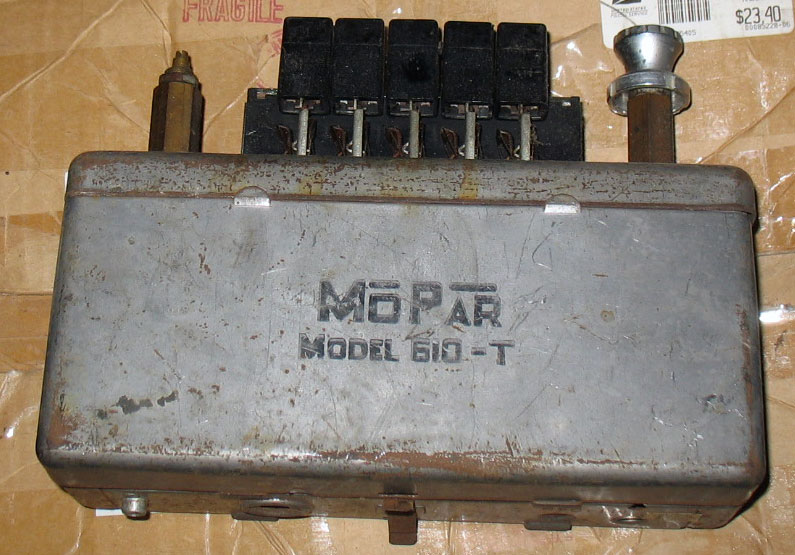
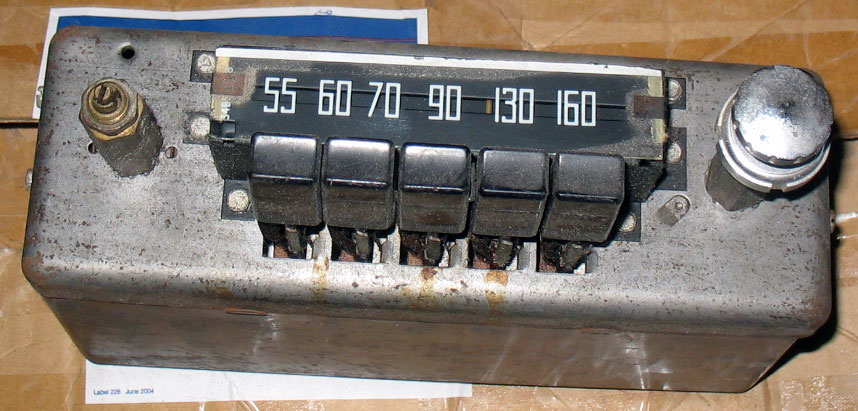
My truck is a 51 B3B someone correct me, but I'd guess the 610T was used from 50-53? I'd be motivated at that price to find one. Hope you are. Thanks, Hank


-
If you look at the picture in the first post on this thread...that's it. Hope you find one.. Thanks, Hank
-
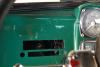
hence the Radio Delete Plate. Will probably end up with an iPod in the glove box and some 12 volt speakers hooked up to a 6v to 12v converter. Hank
-
and they are right. I guess anything that takes a pounding for 59 years would look that way. I don't even have ones for the rear wheels. Anyone know what sixe the are and where I could get 2 fronts and two rears? Do any current Mopar trucks use the same size as a 1951 B3B so that a Chrysler Parts Dept would have something that would work?> Thanks, Hank
-
Thanks, but somehow that doesn't look like the right one. It's not quite as radiused on the top edge, and the original doesn't have the bottom skirt that the Ebay one does. So...still looking anyone? Hank