TomP
-
Posts
67 -
Joined
-
Last visited
-
Days Won
3
Recent Profile Visitors
1,805 profile views


-
Just a couple of pics where I'm a, Thanks dcotant & PT81PlymouthPickup for your speedy replies, got on my back on the crawler board to have a look and yes like you say, no problem. I,m no bodyman, my eyes are past their best but I'm pleased with the results


-
Looking for a bit of advice, finally got the cab anchored down as it should be but have realised that I haven't put the Clutch and Brake pedals on the shaft. Will I be able to fit the pedals without lifting the cab.and will I be able to fit the woodruff key for the clutch. Thanks Tom
-
The cabin will be a long way from stock but the rest will be as original as I can make it.
-
More updates can be found here :- https://ctrestorations.com/
-
More updates can be found here :- https://ctrestorations.com/
-
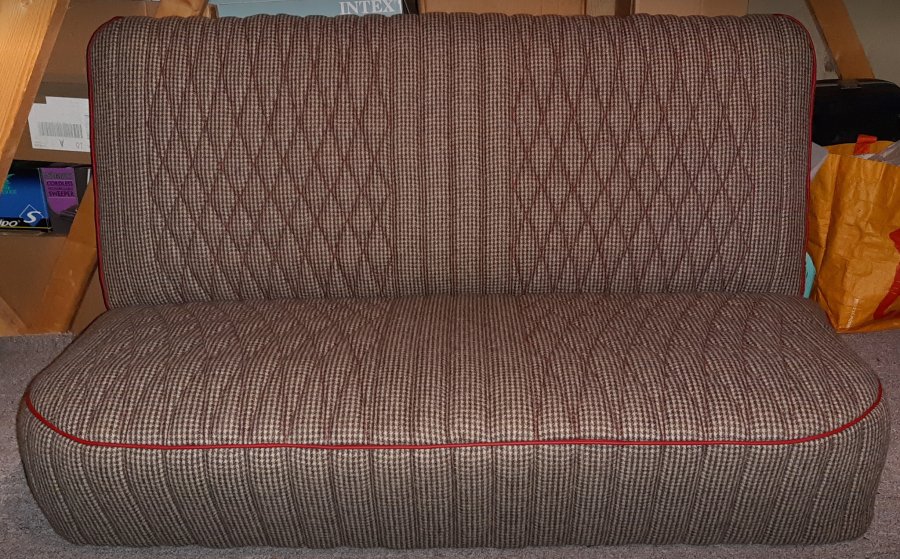
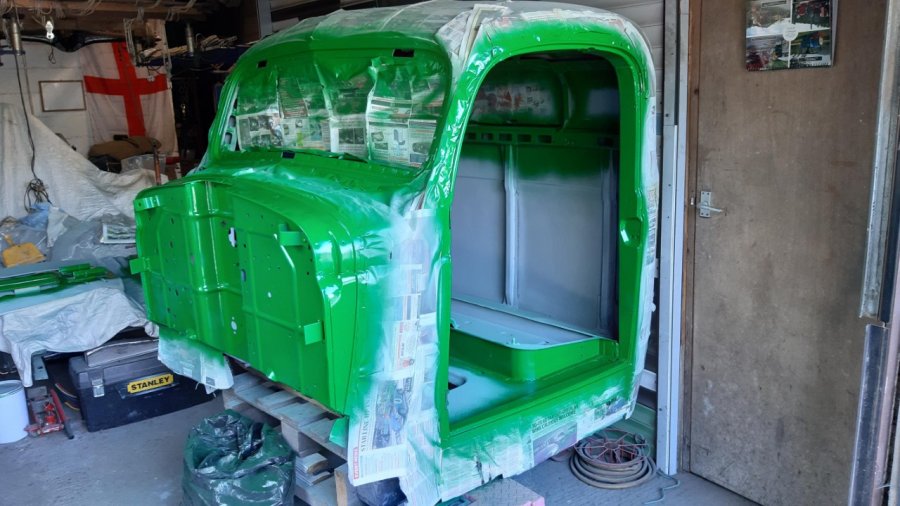
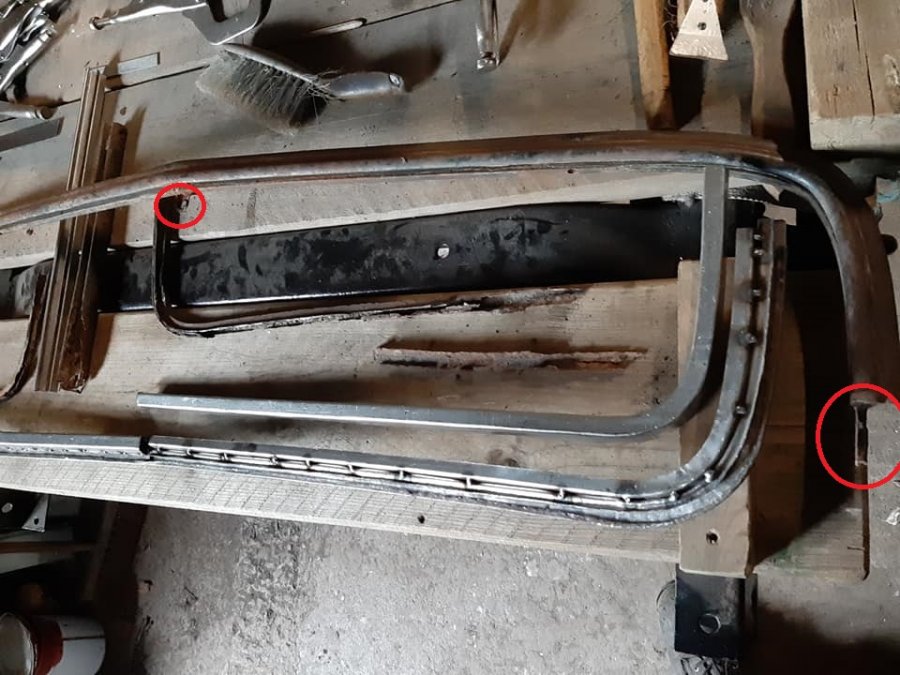
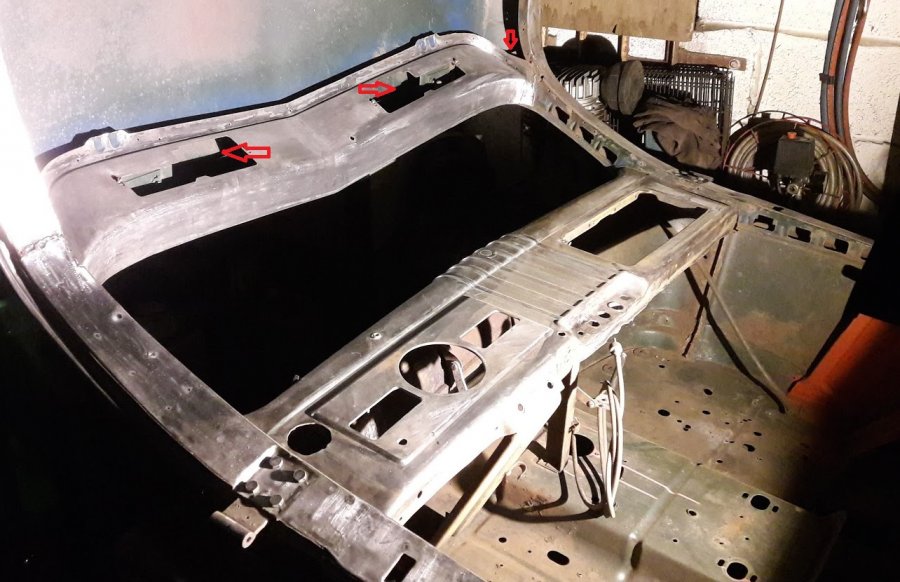
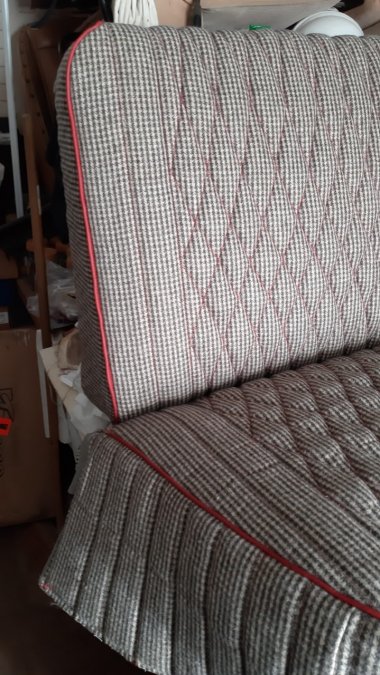
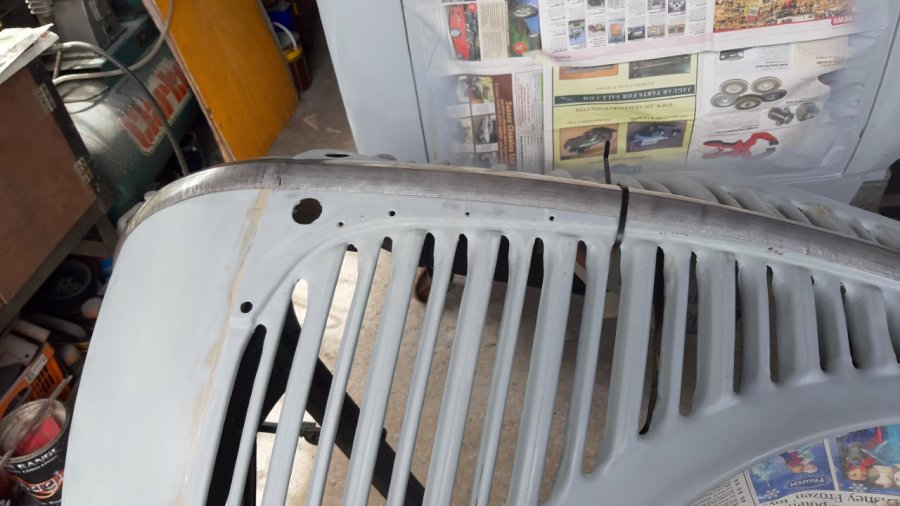
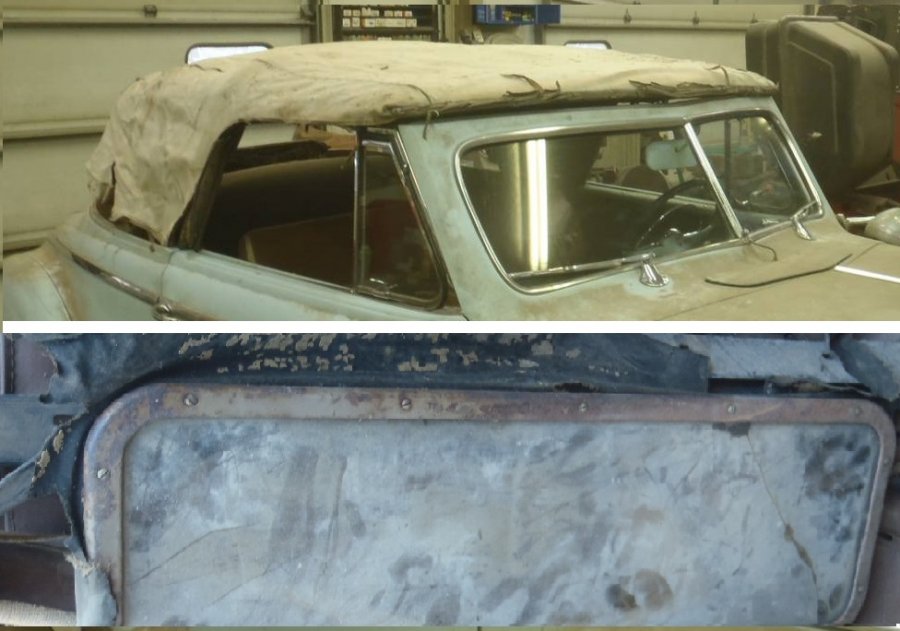
Can't believe it's been 18 months since last posting, so lets see what I can find. Once it was rolled out of the container the Cab was removed single handed, I didn't want to remove the steering wheel incase it fell apart, so with the help of 4 6/1 pulley blocks I lifted the back much higher than the front and then by lift the front at the same time as lowering the back the wheel came through the toeboard opening. Then the rolling frame was pushed forward until I could lower the Cab on to a boggy. The lower inner section of the windshield frame was shot, once the frame was split the outer section of the lower was salvaged. A 3/8" sq hammer form was made to replicate the main section of the inner, no easy task but with shipping cost to the UK plus duties there was very little to lose. Laid the Cab on it's knees got insideand stipped the paint making sure that all the details were sharp, nothing worst than driving along and seeing all the imperfections. The Seat, not something I wanted to do at this stage but after being let down by a sand blaster (£300 job took 4 months) I was fast running out of things to do. Had spent time making up my own wiring loom and installing it as far as I could, time on my hands. Upholstery is one of my strings so lets just say it's my mark on the restoration. Just a bit of prep work before the paint man works his magic.( ignore whats under the cable tie, just a small job that came my way for a PT105 ) Have now got the first fix of the inner front fenders with the fender brace and radiator in position, the lower grille with the fenders all bolted up solid putting 2 penny washer where the welting goes.
-
One more time on the ever popular P15 frame serial numbers
TomP replied to BobT-47P15's topic in P15-D24 Forum
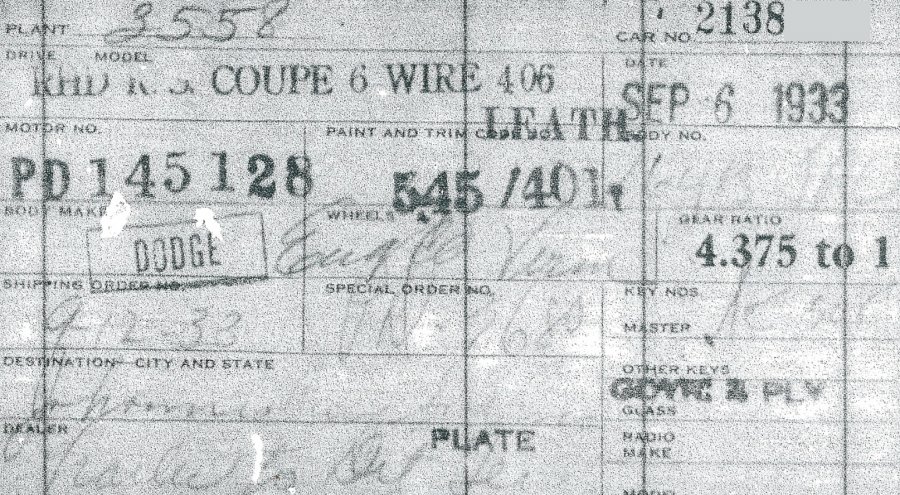
Hi Bob, apologize for hijacking your thread. My early Plymouth's both have the engine numbers stamped on the frame with a prefix of the model ie PD or PE and a suffix of the model yr 33 or 34. for Build Cards you must have the serial # from the A pillar tag, that is the way Chrysler has filed the microfiche plates. As you say engines get changed out and at times it becomes impossible to decipher. -
One more time on the ever popular P15 frame serial numbers
TomP replied to BobT-47P15's topic in P15-D24 Forum
Hi Tod, I have an old thread on AACA which we have exchanged post, JB has records on ownership since the 80's when it was in South Africa. Imported to UK in 2002, I purchased it in 2012 regarding colour it has several coats of paint to the point that the definition of the bead lines have been lost, the shades are old english white with mid brown bead work and fenders, chrome to Shell, Buckets and Horns. There were not give away chalk markings of codes under the interior. the seats are upholstered in Tan vinyl which I don't believe to be original. This car was exported to Johannesburg Sept 33 if that helps. -
Hi Robin, thought I would drop by to say hello, need to talk Rag Tops
-
What's the news, Tom?
OR what are your questions?
-
-
One more time on the ever popular P15 frame serial numbers
TomP replied to BobT-47P15's topic in P15-D24 Forum
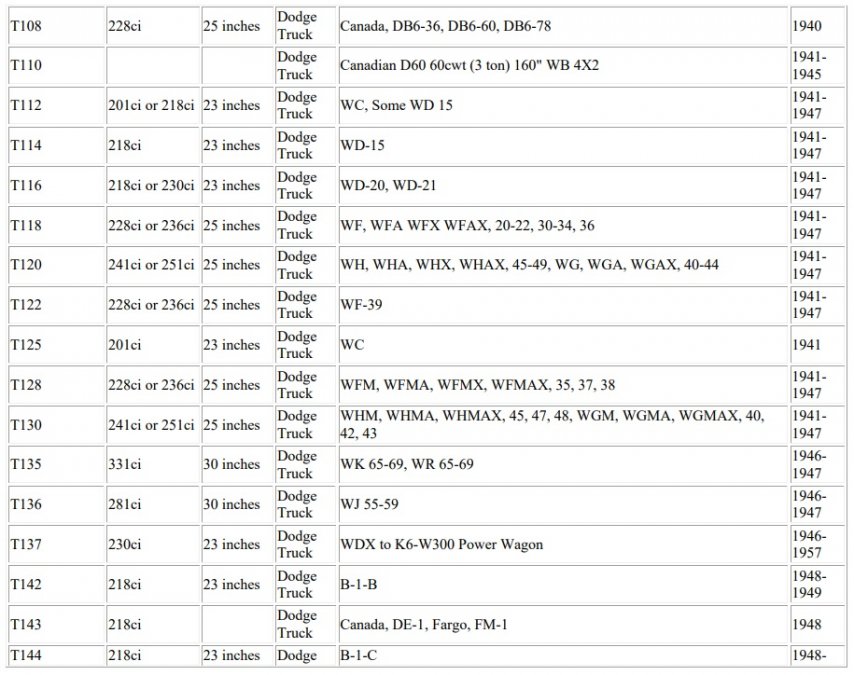
Hi Greg, my understanding of engine # starting T were all assigned to Dodge Trucks, The engine I am putting in my 41 Ply 1/2 ton pickup starts T120* which from the table below is a 1948/49. On the subject of Build Cards I have one for each of my 33 PD and 34 PE easily obtainable from Chrysler Historical at no charge, records from LA plant are patchy and I think Windsor records went up in smoke.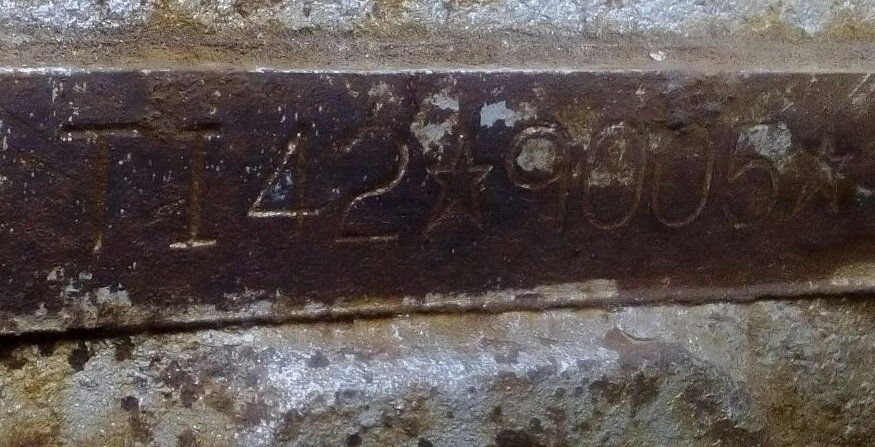
-
Latest update from Josh Hey folks I just want everyone to know that dad's RC Drown grave side service will be at 10am Friday after Thanksgiving at the Grahamsville cemetery all are welcome thank you all so very much.
-
Hi gents, this is a message I received from Josh, Bobs son that he stayed with for his last 3 months. Please if you know of other thread out there could please give me a link to them, the only other link I have is on the Plymouth Bulletin forum. Thanks. https://www.plymouthowners.club/talk/index.php?topic=3653.msg19147#new Tom this was so heartwarming and sad at the same time thank you all so very much. Josh
-
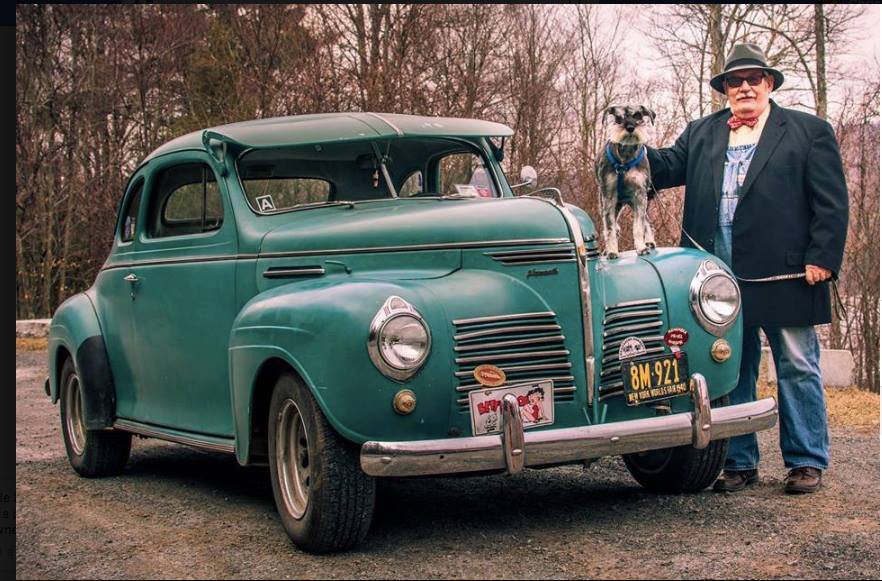
With a heavy heart our good friend Bob lost his fight with cancer in the evening of Halloween, just 5 month, 156 days after loosing his bride Patty, by him moving to Fletcher OK with Josh and his family solved the fear of what would happen to his co-pilot Cooper, which I know gave him much stress while in Neversink. Rest easy my friend, miss you loads. God Bless You.
-
Job Done, in the end I removed the 4 screws which hold the right hand rear floating mount, within an hour the bracket was aligned to the mounting and bolted back into the frame. Didn't even break a nail. Now to get ready to firer it up.
.jpg.8ec9efef2fc50e56b3365c03606badf5.jpg)