


Jim Gaspard
-
Posts
423 -
Joined
-
Last visited
Content Type
Links Directory
Profiles
Articles
Forums
Downloads
Store
Gallery
Blogs
Events
Classifieds
Posts posted by Jim Gaspard
-
-
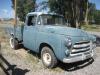
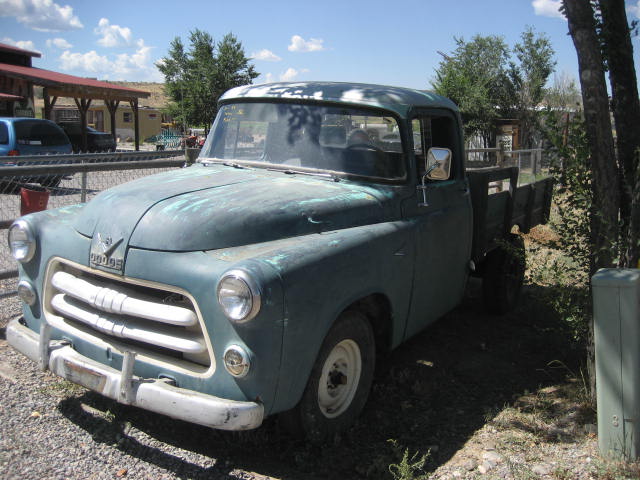
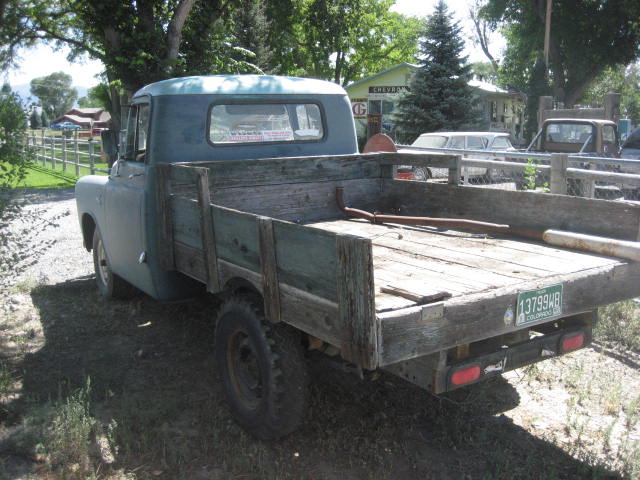
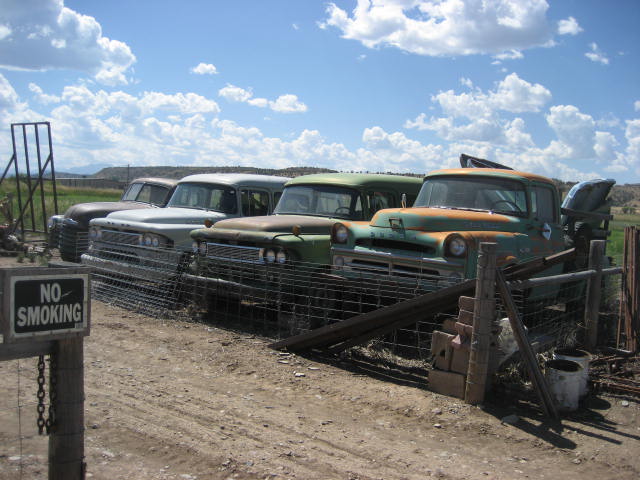
I found this 1956 Dodge stake truck and a cache of old Dodge trucks (and 1 cheby) at a roadside stop a few miles south of Montrose, Colorado.
The sole '56 stake truck was for sale for $1800. Appeared fully stock and good metal, 8 cyl.

-
The archived threads are conflicting as to the correct replacement sock filter for our original canister. Can someone outline what they are using for a 52 B3B, standard 3 shift on column, part number and source? This is for my driver truck now.
Thanks
-
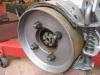
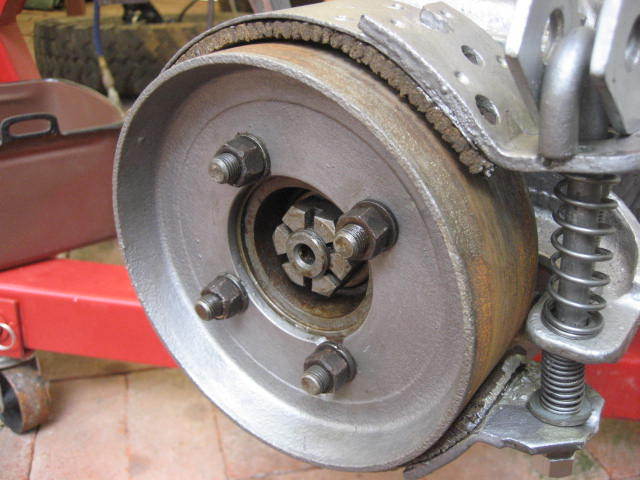
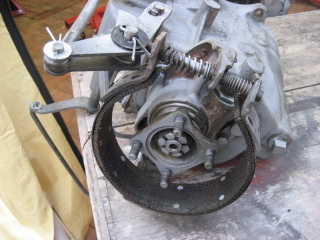
That's the way it is on my parts truck, but the drum on that B3C is larger diameter so I can't interchange them. The flange on the parts truck is also on the outside (towards differential) of the drum like you suggest. On my Fluid Drive the flange is almost center to the drum, thus it off-sets with the compression pad by 1/2 inch. I want to find out if this is the right drum for a Fluid Drive which in many cases Fluid Drive is different from standard transmission.
-
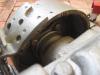
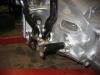
I just took this photo of the disk and pad that do not align. Do I have the right disk?

-
Calling out to anyone with 52-52 B3B with Fluid Drive, column three shift. I can't get my hand brake disk to align with compression pad. I suspect somewhere in its history the correct disk was replaced with another part.
Please post a photo. Merle, do you have a photo like below but more view of the hand brake disk?
Thanks,
-
Go to Techinical Archives on the P15-D24 home page. There is a Heat Riser R & R thread which leads you to a great 'heat riser what and how-to' from the car side. It also applies to the truck side.
Jim
-
I rebuilt my B3B heat riser, spring and flap, last year for my frame-off project. It's a very simple job, maybe a couple of hours. The original rebuild-set came from Bernbaum. I just ordered another Heat Riser set from Clester's (to make up a full order) for my B3B driver manifold. The Heat Riser function is probably not as effective for engines in temperant climates, but Dallas does have hot/cold extremes so I elected to keep the heat riser functioning for those cold-start days. The kits cost under $50.
Jim
-
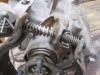
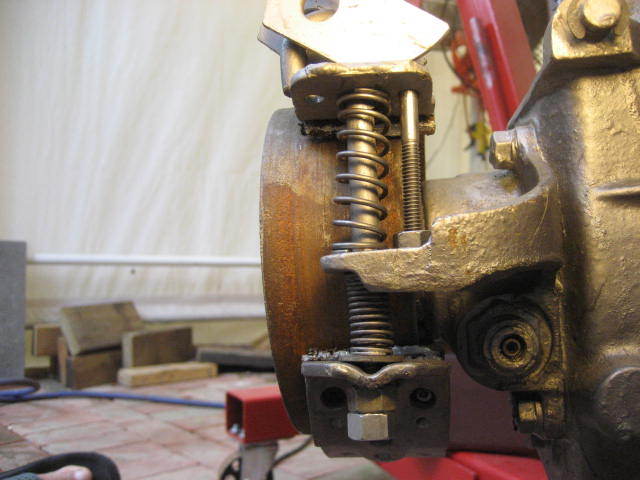
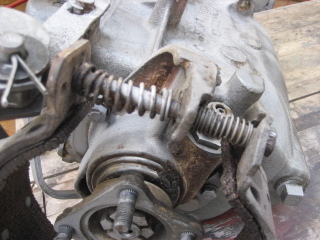
Is there a way to adjust the cork brake pad. I am in my reassembly and the cork sits 1 - 2 inches outside the compression sleeve. I can't find a way to move it to align with the sleeve.
Thanks,
-
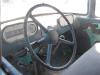
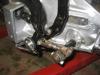
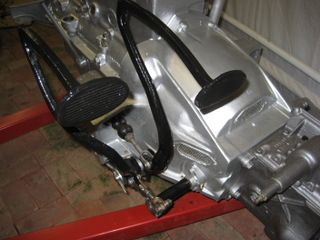
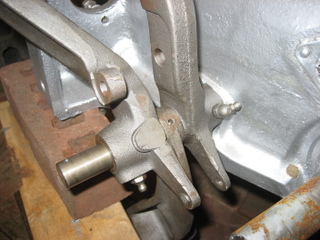
Sounds like you have the linkage worked out. I put mine back together this weekend and this gives a good angle of the connections. Both of my pedals were re-bushed and a new shaft installed. Thanks to Merle for his earlier threads on how the linkage and set-up works in the B3 Fluid Drive. I have found that using the SEARCH feature is the answer to my lagging memory. Pictures say it all.

-
Outside diameter of outer twist ring is 3 - 5/8"
Inside diameter of outer twist ring is 2 - 3/4"
Thickness of outer ring is 25/1000"
Aperture size of tank opening from which sending unit sits is 1 - 1/2"
Jim
-
Do these help?

-
Merle said Fluid Drive pedals for clutch and brake are on separate shaft. Mine are on same shaft but all other indications are that it is Fluid Drive..Not that it matters at this point since I am deep into the restoration and will forge ahead regardless. But I may not the rare Fluid Drive badges.
Maybe I need to order my orignal build card from Chrysler.
-
Tell me it ain't so. Merle's thread said the pedals are on same shaft. I just got my rebushed pedals back this week and want to start reassembly this fall. I thought I had a Fluid Drive B3B, three on column. Everything looks original and it has the FD badges. The bell housing appears to have the Fluid Drive Filler Plug in the right location.
What do I have? Fluid Drive or faux?


-
I haven't been here yet, but Don Coatney posted this some time ago. The Search feature on this Forum makes it a cinch to find a technical answer if its been posted before.
"I think you are making this way too difficult. With your harmonic balancer top dead center timing mark is lined up with the pointer on the timing cover remove the distributor cap and note the position of the rotor. It should be pointing to the location of the #1 spark plug wire. Normally this is near the 7:00 O'clock position. If it is at the 1:00 O'clock position you are still OK but you should rotate the crankshaft one revolution and this will place the rotor at the 7:00 o'clock position. Once you have established where the rotor is pointing at the number one position than connect the spark plug wire to the hole where the rotor is pointing and to the number one spark plug. Next place the number 5 sparkplug wire in the next hole clockwise in the distributor cap and connect this wire to the number 5 sparkplug. Continue with number 3, next 6, next 2, next4. The firing order is 1-5-3-6-2-4. Once this is done engine should start. Then you can dial in your timing to where the engine runs the best with no pinging. Don Coatney"
Jim Gaspard
-
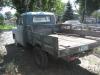
There aren't too many Pilothouses in this part of Texas for some reason. This one looks like a good candidate for restoration.
B3C: Overpriced but best offer requested.
http://dallas.craigslist.org/dal/car/753450025.html
and also 1950 Panel:
http://dallas.craigslist.org/dal/car/754333757.html
There are only a couple of Forum members in North Texas. Hoping to add one.
Jim
-
That's a good investment already in new parts. Can you post pictures of the truck body condition. What part of Southern California?
-
It looks to me to be a true B3B, 108" wheel base, high bed, floor shift with Fluid Drive transmission. Or at least the missing emblem on the hood sides are similar to my B3B Fluid Drive. Bumpers, wheels, tires, antennae, seat covers are not original.
-
Come visit us on the truck side every once in awhile. There's a lot of crossover information.
-
I called VPN in my quest and they said the bushing for the PW pedals would not work. If you find out differently, let us know.
Thanks Jim. I'm going to call around today and see if I can find that type of bushing. Seems a place like Vintage Power Wagons might have something like that. Also, I recall the same kind of setup when I rebuilt my kingpin assemblies. I don't remember seeing small holes in those bushings but I think they came with the rebuild kit. Maybe they were Oilite. -
I took in the pedal and shaft to the bearing supplier. They matched the best they could with a standard bushing. The part number is on the receipt posted earlier. They cost $0.56 each. Inside Diameter is exactly 3/4" However, because of the thickness of the bushing, the OD is slightly larger than the original bushing. The machine shop is boring the pedals to make the OD of the new bushings fit. However, if Roberts makes the exact replacement bushing, I may call the shop and hold off. I would rather make it a full length bushing even though I don't believe it will ever get much wear with the limited driving I plan to do.
-
Can someone post the link or contact information for the Roberts Auto Parts referenced in this string. I need to order the catalogue.
Thanks
-
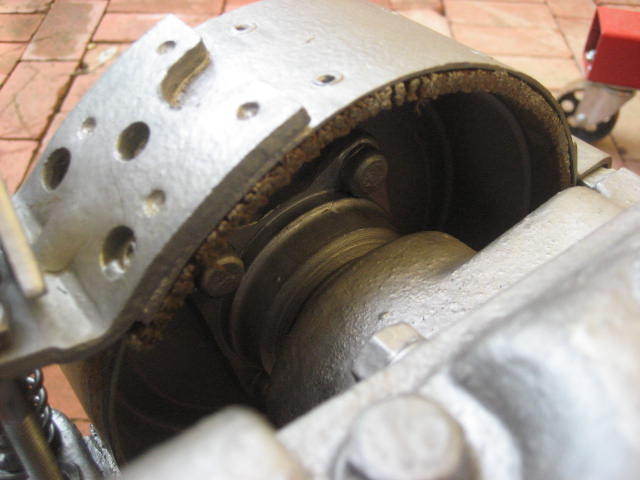
I am replacing my bushings in brake and clutch pedals, fluid drive, 3/4" shaft (also replacing). Picture shows the bushing before punching out. Same holes as yours for transfer of grease. Unless you can find NOS parts, the most comparable replacement I've found are 'Oilite bushings' which are pre-saturated. I couldn't find right length so we punched in two and cut off excess. Drilled hole for zerk for additional lube. Good luck.


-
I have a small 5 gallon blaster that I need to fill three times per sack of #4 silica. I'm been on it for 8 hours and seven 100 lb bags. I am half finished. I estimate will finish next weekend, 16 hours and 14 bags total. I do not have a recovery system so my alley looks like a giant sandbox.
I'm rethinking blasting the sheet metal and may send it in pieces to a soda blaster group.
-
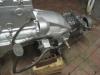
When I'm ready to connect the bellhousing back to the engine what do I do about the dowels? Leave them out. What was their orignial purpose, as a set pin to correctly marry the bellhousing to the engine block? Thanks.
O-h-h! I just read Grey Beard's response and that sounds complicated. Maybe I'll leave it alone for now. Thanks.


Windshield Rubber - Roberts vs Bernbaum
in Mopar Flathead Truck Forum
Posted
Last year I started buying various rubber pieces from Bernbaum for replacements on both my frame-off and my driver, both B3B's. Three weeks ago I decided to go ahead and replace my driver glass where the rubber was hard and brittle and leaking like a sieve. After several hours of trying myself to get the center rear cab glass in, I gave up and took it to a local shop that specializes in vintage cars/trucks.
The operator called back and said the rubber for the front windows did not fit well. The rubber front lip barely covered the metal and he said it would not keep out water. I ordered another front window rubber kit from Roberts Motor and they got it to me in five days.
So that you do not make the same mistake, I took photos each front window rubber so you can see the difference. The left piece is Roberts Motors and the right piece is Bernbaum. I know there are other sources for rubber like Steele, but the Steele Rubber tends to be pricey. I called Bernbaum to see if I could return their clearly bad fitting rubber and they seemed offended I would ask. Not only am I out the cost of the Bernbaum rubber, but the glass shop charged another $15 to pull out and replace the Bernbaum rubber. To give Bernbaum some credit, their rear cab rubber fit ok, center and two corners. Draw your own conclusions.