plymouthasc
-
Posts
108 -
Joined
-
Last visited
-
Days Won
1
Content Type
Links Directory
Profiles
Articles
Forums
Downloads
Store
Gallery
Blogs
Events
Everything posted by plymouthasc
-
Thanks for posting the tools photos. You have a great collection of original tools!
-
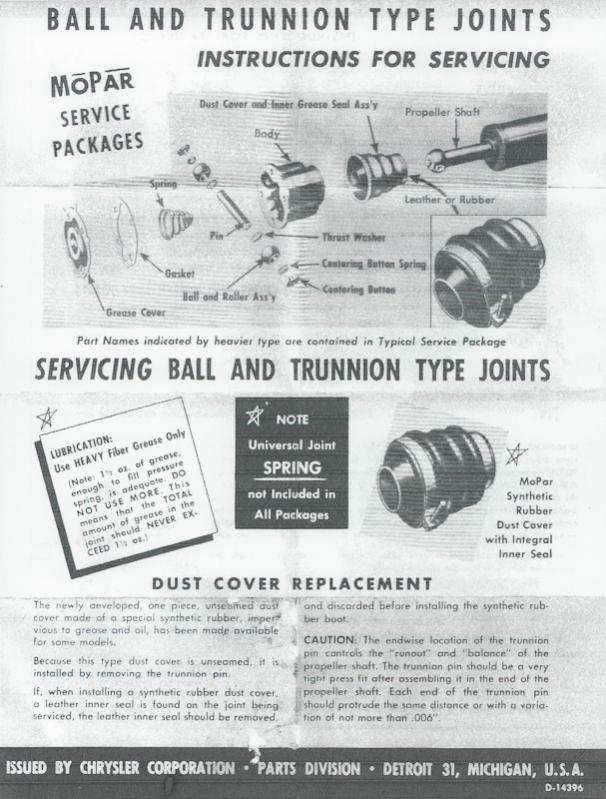
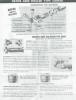
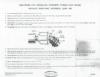
Here is a little more clarification from the instruction sheets that were packaged with the original MoPar service parts.
-
Very Nice!
-
I have attached some photos for reference. They are: (1) New wiring harness for the headlight using a reproduction plug. (2) Original three prong plug. (3) Headlight bucket with mud before removing from car. (4) Same headlight bucket after cleaning, media blasting and plating. These are from my '41. Don't know how they changed over the years. Mark


-
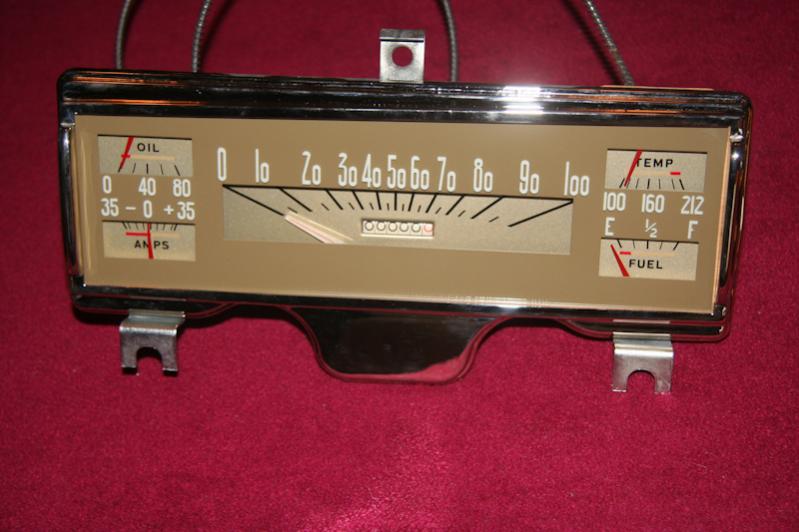
The set up in my '41 is not so elaborate. It is just a piece of multicolored plastic with the instrument panel lights beneath. The end of the clear speedometer meter sweeps past and transmits the different colors as the speed increases. Mine was in good condition except it needed to be glued back on. My needle however was yellowed. I found an insturment repair shop that had lots of spare parts and they had a needle in near perfect condition. If you are missing the colored strip, or it is in poor shape, perhaps an instrument repair shop would have a spare to sell. Mark
-
Yes that one is for the ignition switch. It fits on the bracket that holds the ignition to the dash.
-
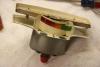
Joe, I had the same problem with my regulator. It was out of adjustment. The spring tension and the gap on the points need to be set so the points open and close at the correct times. I am not an expert by any means, but this is what I learned from my experience: 1) Use a strip of manila folder to clean the points. Anything more abrasive will ruin the points and they will burn out. 2) The voltage will drop slightly when the cover is put back on. This is compensated for in the adjustment made with the cover off. The cover is not necessary to make the regulator work. If you watch my video on YouTube I have a section that tells about the problem I had with my regulator that sounds very similar to what you experienced. I just needed to have the right person bench test and fix the problem. It took him all of about 3 minutes! Jump to 4:25 using the bar at the bottom of the video to see the section about the regulator. Mark Mark
-
I was surprised that the price to have a Plymouth clock rebuilt (not including painting the face or plating the bezel) is rather reasonable. I checked two places (Williamson Insturment and RS Guage) and as I recall the price was about $95 including replacement of any bad parts and a 1 - 2 year warranty. It seemed reasonable to me for an item that can be rather expensive to replace. I would go that route rather than mixing parts between two clocks.
-
It sounds like they are not all on. There are five of them in total. Make sure you have checked the ones at the top of the panel too. They all only come on when the dash light switch under the dash is in the correct position too.
-
I have the same issue on my '41. I had to slip the pump out enough to prime it after I rebuilt the engine. Although the shop manual says to drop it out... I could not get it out past the frame. I did not need to remove it completely because I only needed to prime it. I was wondering why the manual said it could be removed, but it hits the frame.
-
1941 P12 ASC Restoration Progress Videos
plymouthasc replied to plymouthasc's topic in P15-D24 Forum
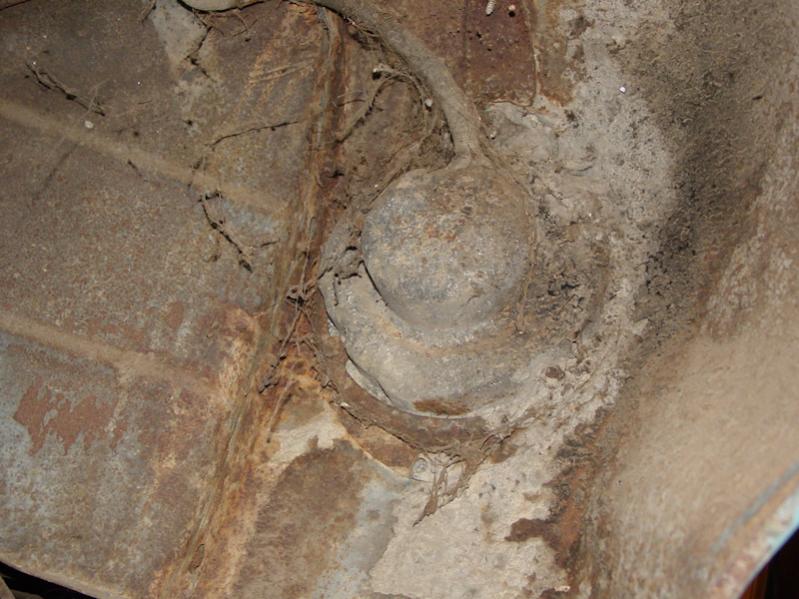
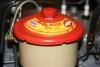
Hi! I posted video #13. I did a step-by-step assembly of one of the doors. The car will be in the upholstery shop this week. I got a look at the seats partially covered and I am pleased with what I see so far. They are being very careful to match the original upholstery that has been in the car since new. The fabrics are slightly different, but I think they are a good representation of the original materials. I also did some follow-up on the "virtual judging" you all did on my engine compartment. I found the original oil cap. It had several rust holes in it, but I was able to fill them with JB Weld and I think it came out fine. Photo below. I also followed up with the POC 1941 technical advisor. He said the heat shield was painted black on these cars. Finally, I was able to get the fellow in Poland who makes the id tags to make me a Body ID Tag that matches my original. The coupe bodies were built by Dodge (not Briggs) and therefore they have a different body number tag. I have attached a photo of the tag I had made. These are very high quality tags done in the original acid etch method with raised letters. He has more of these if you are interested. Thanks for everyone's support and feedback. There are a couple of items I have not been able to find (like the battery hold down frame). I will post a list of these items soon. Hopefully someone will know a good source. Mark
-
Have you tried Silke's Auto Parts? He has an eBay store and also sells over the phone. I have had good luck finding rare parts like you are trying to locate through him. eBay store: http://stores.ebay.com/SILKES-AUTO-PARTS-INC
-
1941 P12 ASC Restoration Progress Videos
plymouthasc replied to plymouthasc's topic in P15-D24 Forum
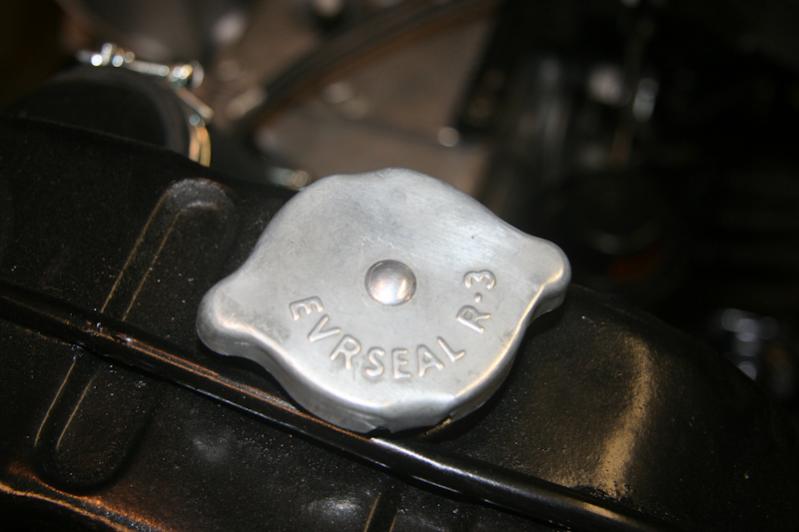
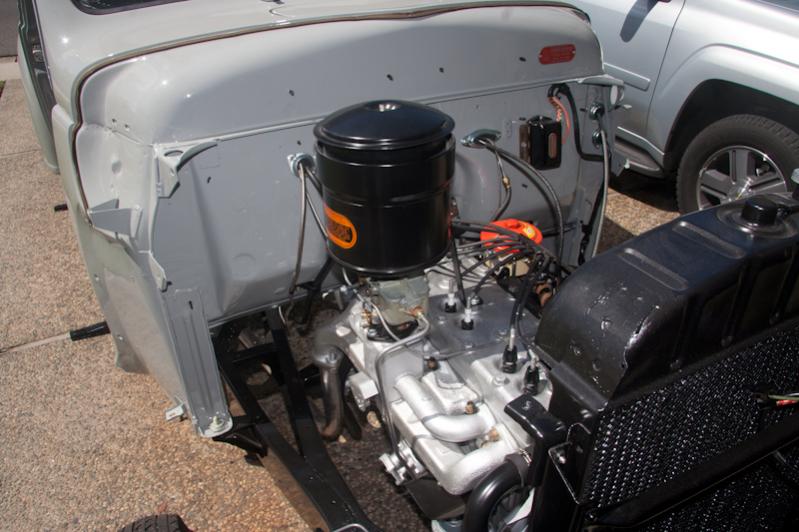
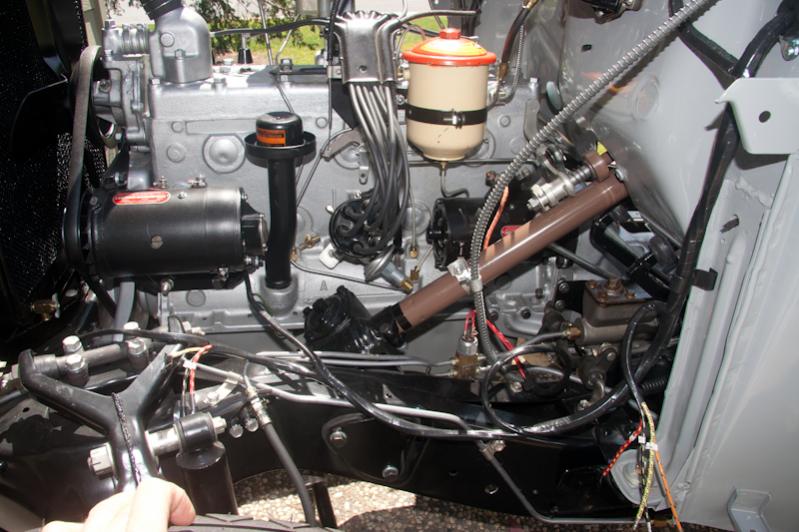
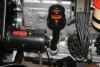
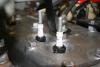
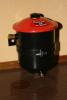
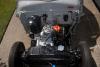
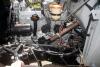
Thanks for the feedback on my engine compartment photos. I will summarize what I found out and respond here: The oil cap I have is for a later model. I found I had the correct one in a box of old parts. I had not used it because it was rusted through. I have repaired the holes with JB Weld and painted it up. I will make that change for sure! The sparkplug covers were original equipment. I have attached photos to show them illustrated in the engine diagram and installed on my car. I imagine these were one of the first parts to be discarded by a mechanic. They are a bother when working on the car. The covers are made from brown bakelite. There are companion pieces that cover the terminals on the distributor cap. You will also note the original A7 (without the *) that came on the car. I only point this out, because I was pleased to find them and then discovered you can't even see them with the spark covers installed. The distributor is in the correct position. I varified with a photo in the original shop manual. Good catch on the body tag! Mine was completely worn out. The fellow in Poland who makes the reproduction tags using the acid screen etch process is making me a new one. The coupe body was actually built by Dodge (this is verified on the build sheet) and not Briggs. So rather than having a Briggs body number tag, the Coupes have a Body Number XXXXXX Chrysler Motors tag that looks a loot like the manufaturer's tag, but smaller. I have called the club technical advisor about the color of the heat shield. I have a paint list that show it as being black. I want to verify that. What color is it otherwise? I know the comment said he had never seen one black. This will be an easy fix either way. I have attached a couple of other photos with quesetions. Is the Everseal R3 radiator cap correct for this era car? I am confounded by the oil filters. I believe the filters were usually added by the dealer and there were several option available. I believe the one I have is correct, but it may be a later model as I believe the part number is too long for a '41. I used this filter rather than some others I have because it was NOS out of the box with an original decal. I have talked to the head judge about the filter/ filter number/ filter style etc. and he was not sure what exactly was correct either. So I am not sure what to do about that. I have attached a photo of another filter I have. It was the one that was on the car, but the color scheme was one I figured out from research and the decal may be wrong too. Your discussion is appreciated on this topic. Thanks again for everything. Mark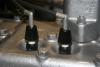

-
I bought some at Napa. They seemed exactly like the originals to me.
-
1941 P12 ASC Restoration Progress Videos
plymouthasc replied to plymouthasc's topic in P15-D24 Forum
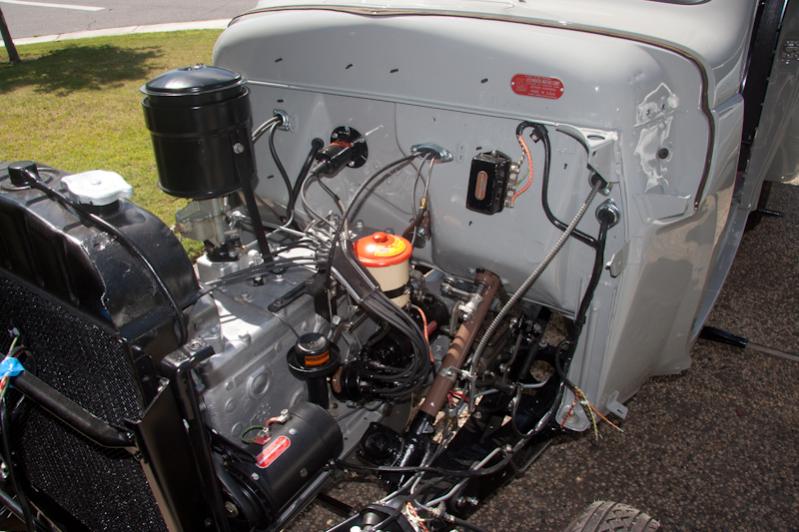
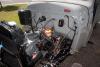
I have posted video #12. Please look at the video and the attached photos and tell me what you think needs to be changed to make the engine area more authentic. I know there are a couple of things missing or wrong already. I will see who catches those items! Leave a comment here or on the video if you see some things that need my attention. I am also giving away a digital copy of the 1941 Miller Tool catalog to anyone who is subscribed to my YouTube channel (http://www.youtube.com/ihazwings) You can request a copy of the catalog by emailing me at mark@ytmonline.com with your YouTube name and request. I hope to have 100 subscribers by the time of the Plymouth Club car show in July. I want to create a Plymouth/ car restoration community on YouTube to further support our hobby. You don't need to make videos to have a YouTube account. However, with an account you can comment and favorite videos to help spread the word about Plymouths. The upholstery is getting done this week and next. I am looking forward to seeing the finished interior. Thanks again for all the support of fellow restoration enthusiast! Mark Here are the items that lead to deduction during judging. Thanks for helping by being a "virtual judge." ENGINE COMPARTMENT CATEGORY Each of the following is a deduction: Unclean Wrong color -- engine, firewall, block, head, oil filter, etc. Plastic wire (pre 1949) Incorrect chrome parts Missing parts Missing body tag Incorrect parts ( ie. carb, master cyl lid, generator, regulator, batt. switch etc.) Leaks -- water, oil, gas Unpainted, dented, welded parts Poor body or mfr. Tag (1/2 each) Missing decals -- oil filter, oil filler, air cleaner Worn generator, starter, distributor tag Other (specify) ______________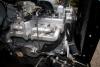

-
The shop manual says to torque the bolt you mention after installation of the spring, but it does not say to put the weight of the car on the suspension first. I would interpret that to mean it really doesn't matter. I understand your quesiton, however, with the axel riding up and down the bolt in the silent block is going to twist against the bolt no matter if it is tightened with or without weight on it. It seems the available information is not very specific about this point.
-
Does it seem odd that he is selling it because he is moving and doesn't have room for the car...but he is willing to trade for another car??
-
I really appreciate the research you did and the graphics you uploaded. I agree with Tod. This response really helps clarify things. Mark
-
I found a shop that had a MoPar battery cable book. It said the cable was 1 gauge. The person also was sure the connectors were traditional straight connectors with cloth covered wire. Let me know if you know differently. Otherwise, I am going with this information. Thanks!
-
Does anyone know the exact specification for the positive to ground cable on a 1941 Plymouth? The parts manual has the legnth (I think it said 24") but I need to know: Gauge of wire Type of wire cover Type of positive post connection Type of ground bolt connetion I also need to know if there is any special connector or connector orientation used at either end of the cable or if they are straight connectors. I am assuming there is a lead bolt type connector at the battery post and a straight flat connector at the grounding bolt, but that may be wrong too. I am trying to get at what was absolutely original, so ideas on what will work as a replacement really won't help. Thanks! Mark
-
1941 P12 ASC Restoration Progress Videos
plymouthasc replied to plymouthasc's topic in P15-D24 Forum
Yes. Your eyes are deceiving you.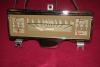
-
I am guessing it would be a piece of rubber cut the same size as an original. However, there were different mats made for different models based on the size of the trunk, the spare tire location, etc. The original mat was cast from brown rubber and was ribbed in the middle with a textured boarder.
-
1941 P12 ASC Restoration Progress Videos
plymouthasc replied to plymouthasc's topic in P15-D24 Forum
The parking light was done by a local place that I recently discovered. They had been here for 40 years, I just had never used them. Other parts were done at various placed depending on the type of plating, restoration, etc. All of them used the same process so the pieces match nicely. -
1941 P12 ASC Restoration Progress Videos
plymouthasc replied to plymouthasc's topic in P15-D24 Forum
Thanks for the information and advice. I will definitely wait until things start to break in. I am just glad the pressure isn't zero! -
1941 P12 ASC Restoration Progress Videos
plymouthasc replied to plymouthasc's topic in P15-D24 Forum
Thanks for the nice compliment!