


Ivan_B
-
Posts
1,187 -
Joined
-
Last visited
-
Days Won
13
-
Reminds me of that other topic, about oil, here, where it was determined that, hey, it's okay to leak a little. We all do it too 😂
-
Resurrecting and diagnosing…
Ivan_B replied to Matfirstattempt's topic in Mopar Flathead Truck Forum
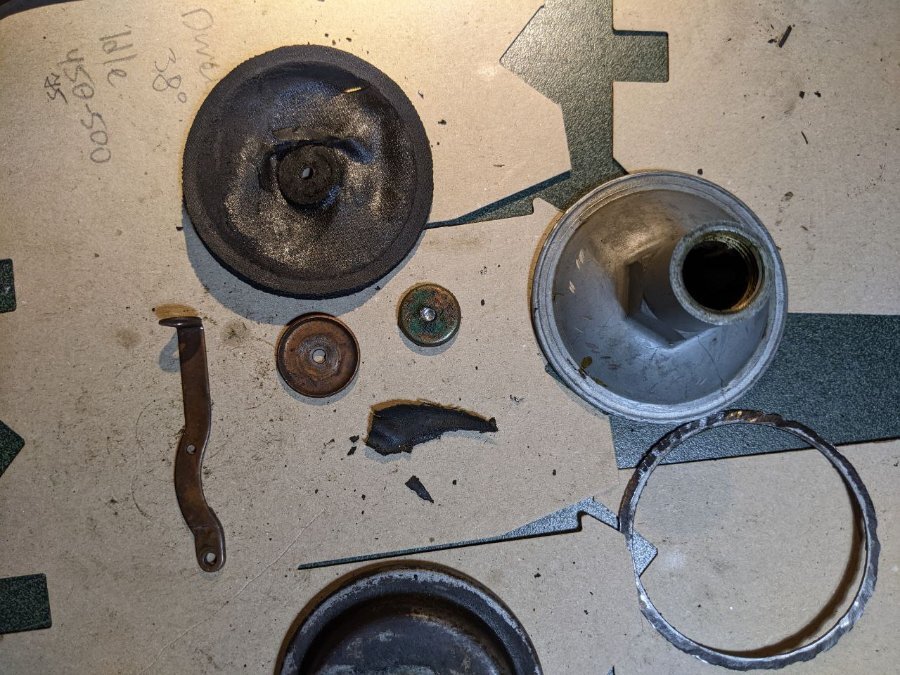
Did you remove and check the valves for wobble, as well? And how does the flashlight test in a dark garage look now? -
Resurrecting and diagnosing…
Ivan_B replied to Matfirstattempt's topic in Mopar Flathead Truck Forum
I use permatex #2 for sealing threads, and put in some studs (instead of bolts) anywhere I can 😄 How did you valve look? Any pictures of the seats and valve edges from #3? -
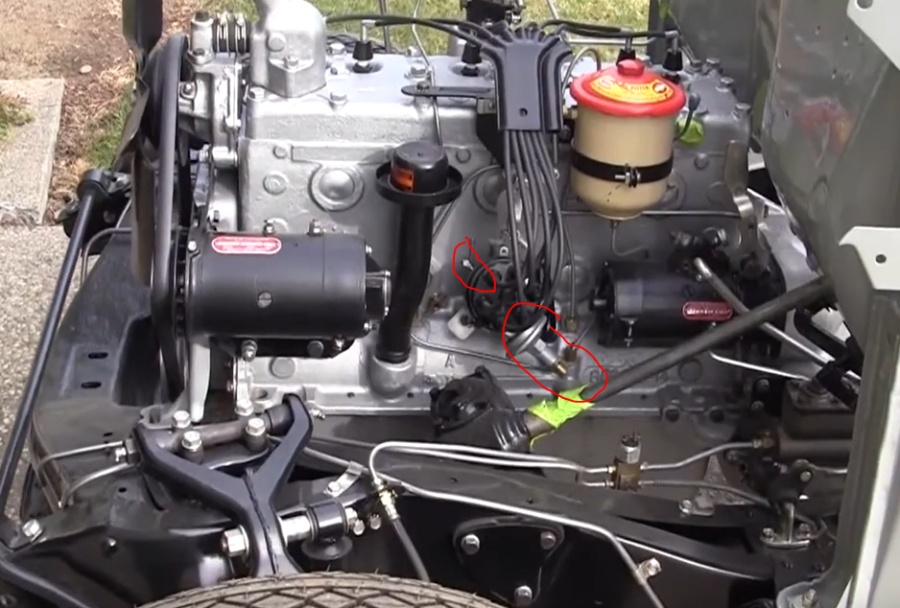
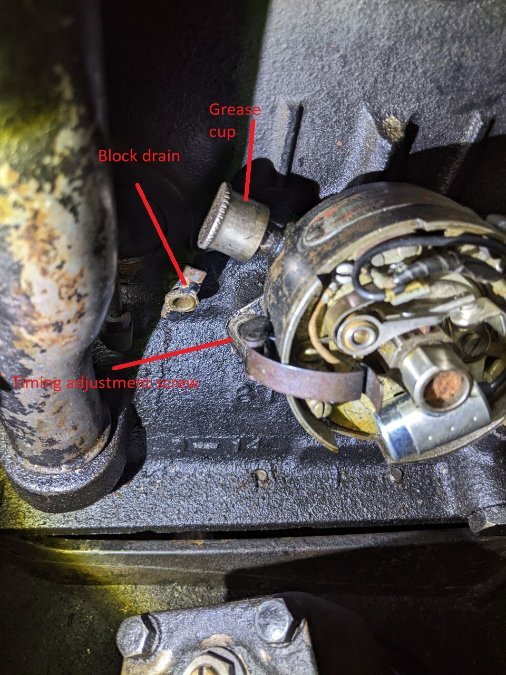
Los, Thanks for the picture, but this engine has been obviously tinkered with, a lot. I think I might've figured-out what's going on, here. My #1 plug firing position is currently at 6 o'clock, while it is supposed to be at 7. I suspect that my oil pump is one tooth off, and this is probably what's causing the oiler cap to hit the timing adjustment screw. I'll re-clock the pump and see if it clears 😀
-
You, sir, need to get a good quality car cover, now 😬
-
Los, Do you have some illustrations of the presumably OEM setup for the 1938? All the materials, I am finding, seem to indicate that it must be mounted like on my last picture. And I am mostly going by the 1938-1941 Plymouth commercials, so these are authentic historic records 🙃 @desoto1939 Rich, do you have an opinion on this one? I saw you've discussed the different distributors, in depth, about 11 years ago 😅
-
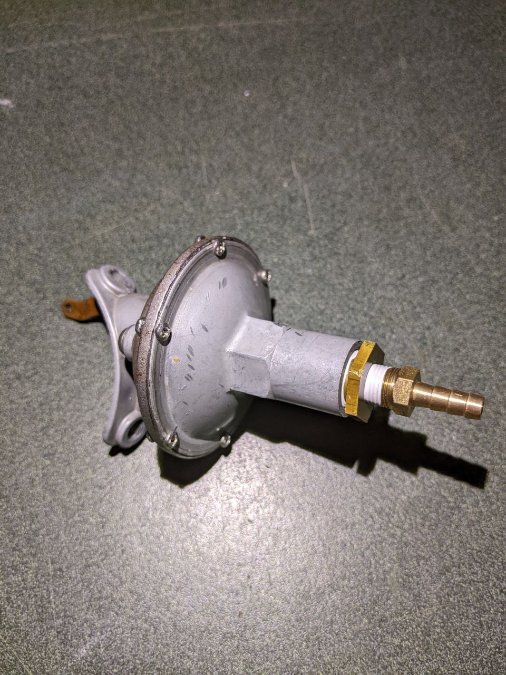
Doug, Let's take it one step at a time. Let's test it with your electrical pump, if it works, you can use it for now until you have time to mess with the mechanical one. I prefer the mechanical setup purely for authenticity reasons. There is nothing wrong with using either type, and I doubt that a back-up is ever needed. Either a good quality electric, or a properly functioning mechanical pump should function without questions for many-many years.
-
Did a bit more research in the old forum threads. Here is a setup with a liquid oiler the way I have it right now (and presumably incorrect): And here is the OEM position: How does the oiler clear the timing adjustment screw? 😲
-
Oh, come on, it's just a little stubborn problem, nothing out of the ordinary. The car is old and, well, sometimes it gets a little difficult to deal with. Do you think old folks are always easy to deal with, as they get older? 😁 It just takes a little extra time and dedication. We are here to help... So, does the car currently run without issues with the electric pump or not?
-
I believe that it was already quite scientifically confirmed that this is not the case, here 😅
-
For the OEM setup - yes. I am running a standard transparent paper filter before the pump, and the fancy rock sponge after
-
@Dave72dt don't pay attention to the hose barb, this is just for vacuum testing. There will be a 90-degree fitting and a copper line going over the head, just like it is supposed to 😉 @vintage6t thanks for the picture. This appears to be the later-style 10:30 position. According to my research, the earlier cars had it pointing the opposite direction, at 4:30, and that's the problem. It does not seem to fit well this way 🙄 Ihazwings have it mounted correctly, but his distributor is different (41 had a different model number) with a liquid oiler, at the opposite side of the vacuum advance unit.
-
Hi everyone. 1940 201, with the stock IGS-4109-1 distributor. I finally managed to replace my old vacuum advance diaphragm, so it now holds vacuum. It's time to do proper vacuum line routing and I am having problems with the correct distributor position. When I bought the car, the coil wire tab was at 12 o'clock, the vacuum advance unit at 4:30; based upon some old pictures I found, this appears to be the correct OEM position for these cars. However, when installed this way, my grease cup is hitting the timing adjustment screw and is obstructing the block drain valve. When I removed the vacuum advance unit for repairs, I turned the distributor 60-degrees CW, so that the grease cup is in the clear, but now the vacuum advance is a bit too close to the steering box. I know, on later cars, the vacuum advance unit is mounted at 10:30 (180 degrees around). Any ideas how they managed to fit everything on the 36-42 models? 😐
-
Normal, I do this all the time and have both indoor and outdoor covers.
-
I've bought some replacement parts with the grease fittings on them, about 10 years ago. Definitely would not expect it on a new car, though. I believe that, at least some, commercial trucks still use them (because these types of parts are more durable/stronger). So maybe the Silverado wants to be perceived as a real truck? Or else, they just use some of the same parts with the big ones Is there anything about these said in the owner's manual? Like get a grease gun and lubricate them every time it rains? 🥲

