OUTFXD
-
Posts
948 -
Joined
-
Last visited
-
Days Won
17
Content Type
Links Directory
Profiles
Articles
Forums
Downloads
Store
Gallery
Blogs
Events
Everything posted by OUTFXD
-
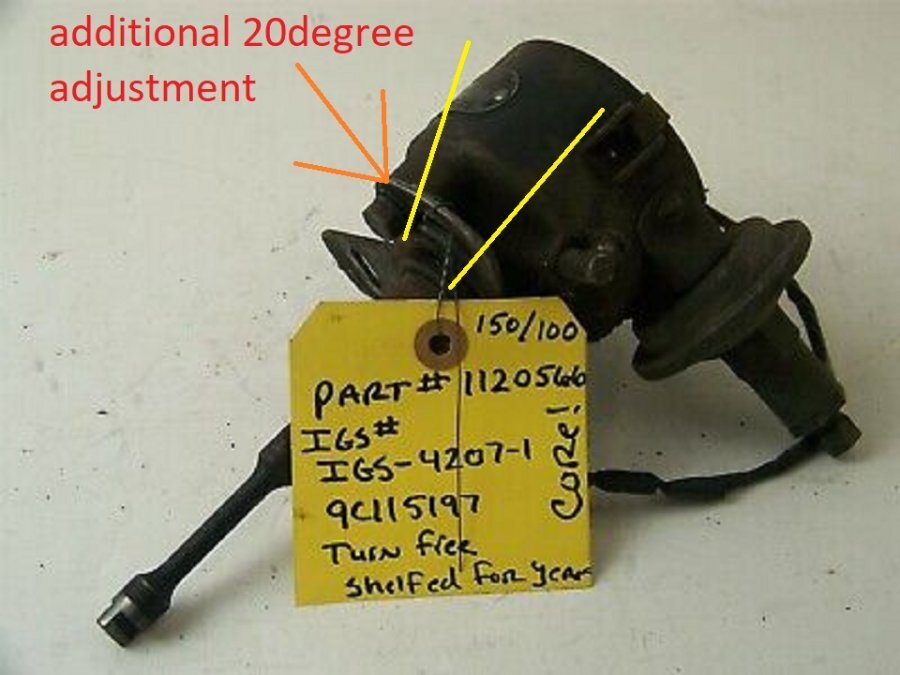
I loosened the distirbutor to block screw to rotate for timing adjustment, and on the opposite side on the underside of the distributor is an screw which allows further rotation of the destributor, but I now think it is for dwell adjustment.
-
Fighting with the distributor again. Under DonaldSmith's suggestion tried setting timing by Continuity. Broke out the old MultipulDigitReader, Set it for continuity, started messing with the distributor. Getting inconsistent readings. pressed the leads together to check the MDR was working. "Beeeeep" Check against the dist, nothing. Put BOTH leads against the head, nothing. Both leads against the block, nothing. Went out of my way to find Bare metal ( In this case the casting stamp on the block), nothing. Now, I may be having a mentally foggy day, But I am pretty sure that I should be getting continuity on a single piece of cast iron! What in tarnation is going on? Suggestions on what would cause this? Could this be the root cause of all my electrical issues? HELP!
-
I'm sure this has been gone over a bajillion times. But as noted before, my google-fu is weak! Looking for the last few degrees to get my timing dead on accurate I loosened some of the adjustments and now she wont start at all and for the life of me I cant think where to start o set up the dist. anyone have a link to basic set up for the dist? Also, for some reason I thought the timing should be set up at 8 degrees BTD. According to the manual initial timing should be bang on TDC. what is the appropriate initial timing?
-
Gorgeous car! and welcome to the club! That is actually one of the colors Jacquiline was painted Before I got her!
-
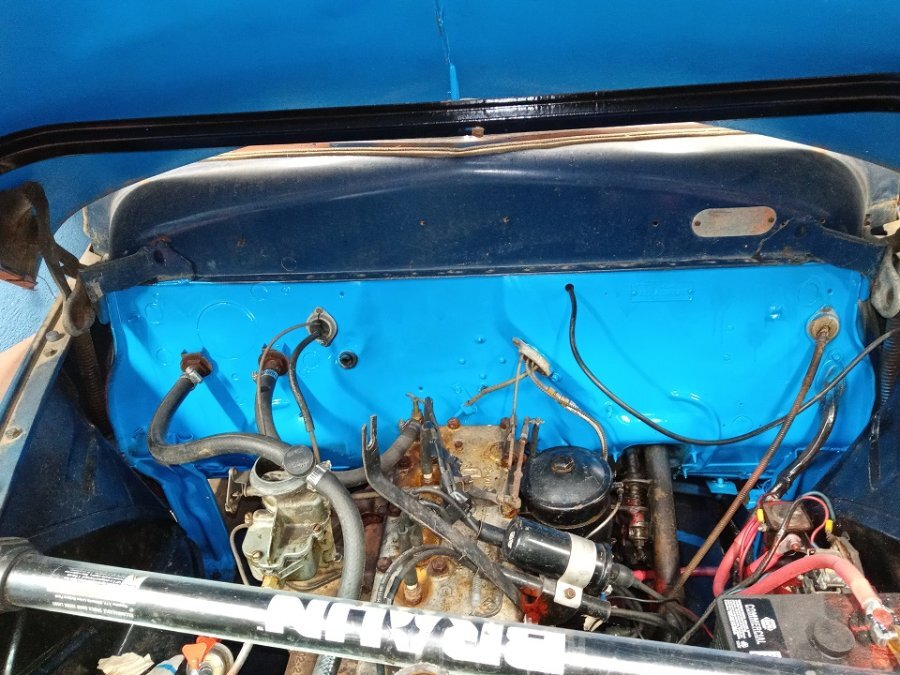
That is one sexy engine compartment! I.. am... jealous!
-
That is crafty! I like that idea!
-
One again dealing with electrical issues. This time I noticed that I loose a lot of cabin power, when I turn the headlights on. New battery, New Battery cables, New whirly charger(Alternator). My conclusion is that the wire between the whirly charger and the battery wasnt up to snuff. Simple fix, just run a new wire. Maybe 18" of 10g wire. Checked the stash but only had smaller wire. Started Looking online. Found one quick... labeled as Copper clad aluminum. suspicions raise I kept looking and found "Oxygen free copper" wire with silicone insulation and "tinned"<?> copper. Its starting to make my head spin. Day was you just walked up to the counter and asked for 10g wire. The guy measures out however much you need and your done. What is the (conductive) difference between these wires? I know Aluminum is NOT as conductive as copper. I would think that "copper clad aluminum" would be the same as "Gold plated". It looks right, but it doesnt do the job. all opinions and any information appriciated! Thanks!
-
So. Charging problem was alternator didnt have a good ground. The continued no charging? well... In my long experience with learning about electricity, I have learned two things.... and several new swear words. 1) before you start messing with the electricals, Undo the ground battery cable. and 2) when you are all done messing things up and are ready to be done with it. TIGHTEN THE GROUND CABLE BACK DOWN!!!! God I'm such an idiot.
-
actually... thats what I am running...
-
In the ongoing tango of three steps forward, two steps back progress with Jacquiline, More electrical issues come creeping up. Lately her battery has been droopy so I took a scenic drive. About 20 miles down winding country road, And stopped at a Gas Station. Fueled up, Got in , flat battery. Got a jump. Drove back to town and stopped at a hardware store. Came back, Dead battery. At this point, having just replaced a dead generator a couple months ago, I am thinking the battery is shot. Drove to the local discount parts hause and had the battery checked. According to their technodohicky the battery was still good. Started her up and checked the charging system which showed an anemic 6.6 volts and flickered non-functional. Drove home, as soon as I hit the garage I shut off and tried to restart the engine. Flat battery. Checked the wiring and the wires & connections looked good all the bolts where tight. Grasping at straws I moved the ground wire from the thermostat housing to the alternator adjusting bolt. 7.2 volts. Figuring I got the problem licked I took her for a quick drive (about six miles) Got home and.... Battery flat. So, I put it to you. Why would a charging system work, but not charge the battery?
-
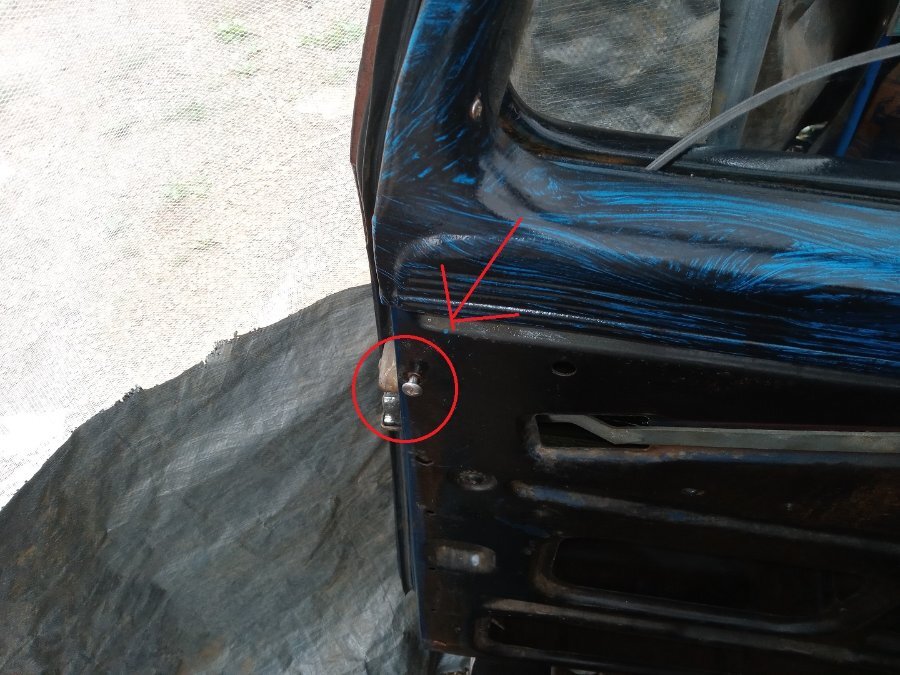
Started working on Jacquiline's Door panels. Pulled off the door cards to be presented with a problem I had long forgotten about. On the inside of either door near the back edge and just under the window is a screw that sticks out 1/4 - 1/2 inch. it apparently holds the outside door opening handle. It wont thread deeper. taking it off doesnt seem to allow the door handle to be removed. Looking at interior picks of other peoples cars I dont see the screw, meaning that it must be intended to lay flat under the door card instead of going through the door card. I cant see a wat to get it to lay flush. So, is this piece supposed to lay flush or go through the door card. If it lays flush does anyone know of an easy fix?
-
I used a windshield washer resivior as an emergency gas tank to get me the last couple miles home once... Zip tied it to the hood support so it would be above the carburetor, no fuel pump needed.
-
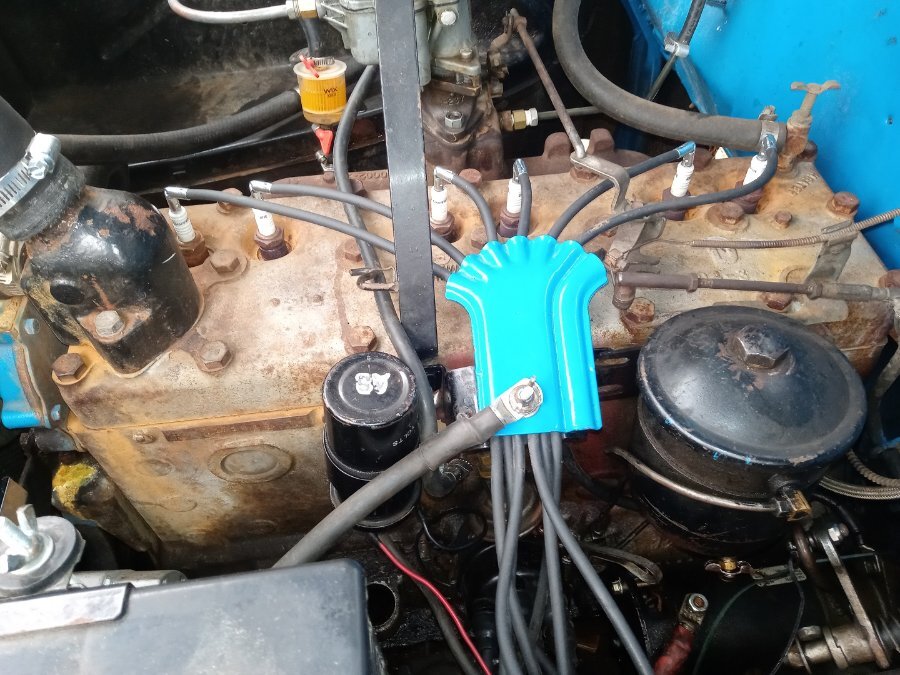
Well, Financial apocalypses stopped happening, Makes me kinda nervous really. Back to "fun" projects. Finally got to put new Plug wires in. While I was at I put in an old school (Older school?) wire separator. not 100& happy but it looks better and she runs better, I had to relocate the Coil. The wires from the harness are very short so I couldnt move it far. The way I have it interferes with the Crankcase breather and the main ground. I plan on relocating the coil to the firewall. but I dont have enough wire at the moment. (edit pictures are before/after)
-
"Solid Core" Wires are just wires, metal Core with an insulated sheath. this is as opposed to "Radio suppression core" Which is simply made of material that suppresses High Frequency Electronic noise, Which is just fancy talk for "Stops your ignition from causing your radio to buzz". Solid core is more conductive and serves better in high performance applications where audio quality is not an issue. Suppression core is better suited to every day cars where you are going to be listening to the radio alot.
-
nope nope, That was meant to be said in the past tense. The float would work if I took the top off the carb and looked at it, if I put the top on the carb the float wouldnt work. The result changed depending on weather or not you where observing it. This was meant as a joke.
-
So... This was the very definition of Quantum Physics. The result changes depending on weather or not you can observe what is happening...
-
Check the Pin clip. I noticed when I put pressure on it it changed the float height. Also noticed that when It was under pressure The float would move down with the fuel. But would not move back up to shut the needle and seat. A coupe light whacks with a hammer to "shorten" the Float pin clip and everything seems to be in working order. Thank you all, special kudos to Ivan_B , sniper and Sam Buchanan for helping me out!
-
The float should move around the pin, I'll check and get back to you. I took the carb apart several months ago and there was no Pin clip at all so I home built one. it could easily be to big/small/fat/out of shape....
-
Went out this morning. checked the bolts and nuts. Cranked her over till the float closed the needle and seat. Fired her up and let her idle for 10 15 secconds with the top of the carb removed. got out and checked., No leak. Turned the engine off. Put the top on the carb, Fired her up, IMMEDIATELY gas starts cascading out from under the float bowl. So... Between top on and top off. something changed. Suggestions?
-
Needle and seat are new, Float works fine. I must have the float level messed up. Well. Back at it. Thanks for the advice!
-
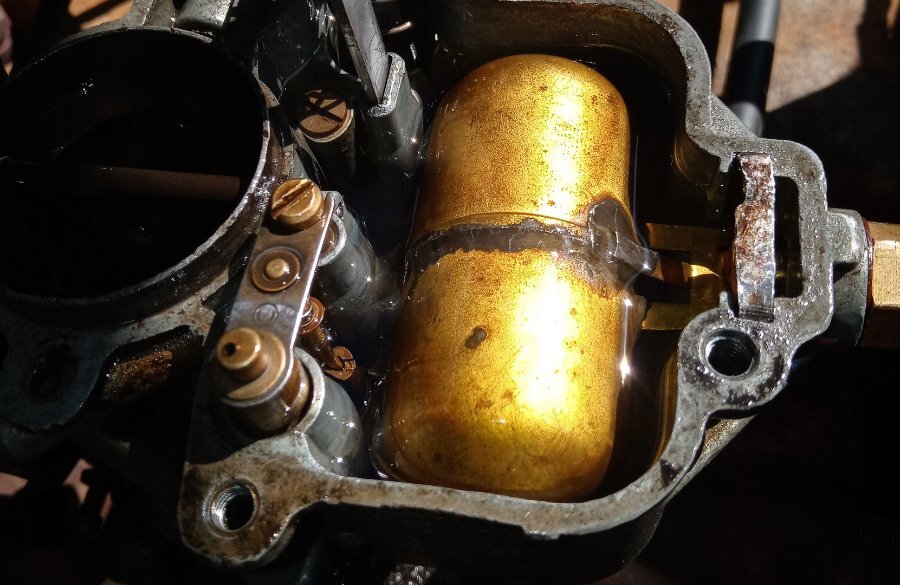
Went out this morning. Let the car turn over a few times. I have to admit I was encouraging the engine to flood. Looked under the hood and fuel was just cascading down the manifold! Took a couple pics. #1 view from the engine compartment #2 Fuel level in the float bowl. #3 opening that fuel is leaking through.


-
I'll try to get a pic tomorrow. Ironically, the leak is more prevalent when the fuel in lower in the bowl...
-
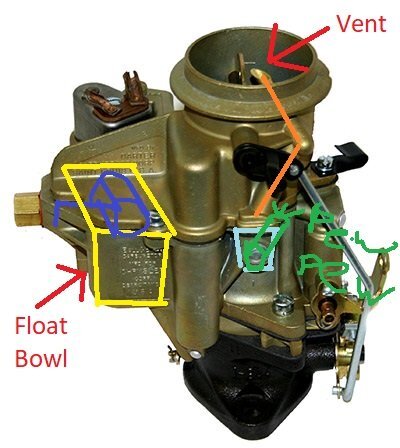
Filled the car.. After driving her I noticed a potent gas fume smell. Pulled over and popped the hood, The bottom of the carb was coated in fuel. Pulled the carb apart worked the throttle linkage and nothing, Put the carb back together work the throttle and it starts leaking out the Accelerator pump linkage opening. Thought occurred to me the float bowl was getting pressurized. First stop, float Fuel bowl vent. After tearing the carb down. The only thing that looked like a vent, didnt go to the float bowl. It went to the space that holds the Accelerator pump discharge nozzle, and didnt have any obvious connection to the float bowl What am I missing?
-
Right you are! i had to go back and check my service manual. For some reason I thought it was 24.5 to 28 degrees
-
Dwell meter came in. Gave it a run out and it read 65 degrees. Pulled the distributor out. Turns out the Points had closed up... alot. adjusted points to 0.20, Put her back together, Reset the timing, adjusted air fuel mixture. She reacted well to adjustments, Checked the dwell. Down to 25 degrees, running great!