49WINDS
-
Posts
95 -
Joined
-
Last visited
Content Type
Links Directory
Profiles
Articles
Forums
Downloads
Store
Gallery
Blogs
Events
Everything posted by 49WINDS
-
That's awesome you were able to fix it without too much trouble. I know what you mean about trying to trace wires up under the dash but not seeing where they go. I'm sure eventually I'll figure out the stuck light on mine, but at least for now everything else functions as it should and she's drivable. It's fun to go out and see the looks you get in an old car like these!
-
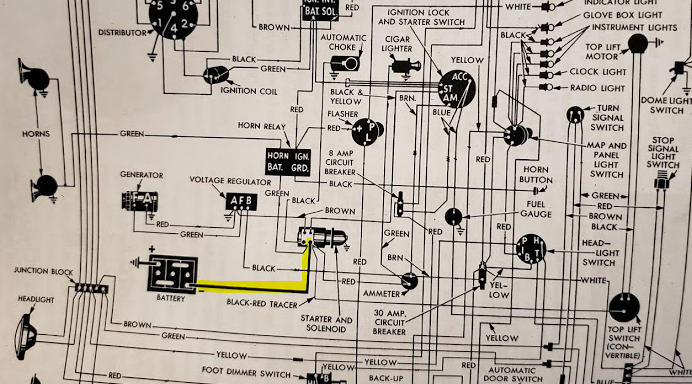
I think the "cylinder" you're referring to might be an in line fuse. The wiring diagram on my car looks very similar to yours (I'm sure a lot of things are similar between our models) and I've been trying to figure out a different problem of my own. The turn signal indicator light comes on as soon as you switch on the ignition and it doesn't ever blink. I found the the flasher relay was wired backwards when I installed a new one for the LED bulbs and thought that would fix it but still no luck. The one culprit I can think of is that the wire going to or coming from the hand brake switch has been cut and maybe this causes the indicator to not function correctly? I too am tryin to fix several electrical issues on my car but sadly a lot of them are caused by some former "mechanic" just cutting connections instead of fixing the problem. Back to your issue though-it may be very basic but do you know if your flasher relay is working properly? Mine was fine before I took it out and I'm not sure if I saved it but if you need one and I can find it in my spare parts I'd be happy to send it to you.
-
I changed the front and rear turn signals as well as the instrument and dome lights in my car and it made a huge difference! I also bought a new relay (https://www.ledlight.com/flasher-6-volt-led-3-prong-120-watt-positive-chassis.aspx) and had to do a little rewiring but it works great now. The great thing about this site is you can choose the color of your bulbs too. I did red for the turn signals which helps them look better through the faded lenses and then chose a cooler 3000k warm white for the instrument and dome light bulbs so they still looked like incandescent and not the blueish white you get with most LED's.
-
Actually if I'm looking at my wiring diagram correctly it seems like I do have it wired correctly. I mean it at least starts and runs fine so that's usually a good sign right?
-
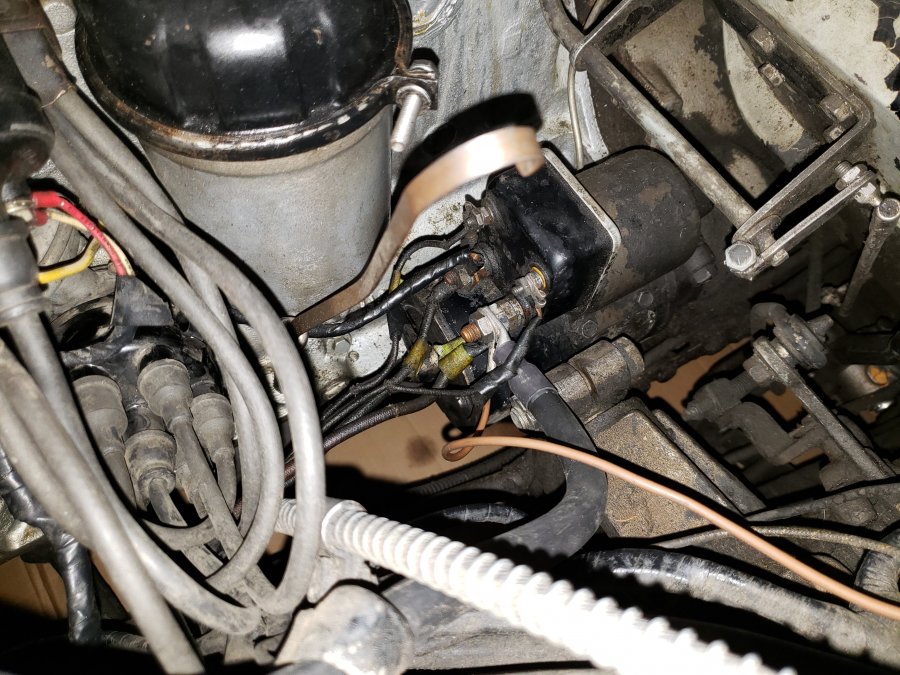
Hmm I think my starter may be different from yours. It looks like mine just goes straight to the solenoid, or at least that's how it was wired when I got it. I wouldn't be surprised if more things were done incorrectly on it though, if you look close enough at this picture you can see the high quality wire repair with bare wires showing everywhere. Think I'm gonna have to break out the shop manual and double check that wiring diagram because I'm not even sure it's hooked up to a relay.
-
Damn I didn't even know that was there! Guess I'll be diving back down under the hood this weekend to see if that one has been messed with too. Thanks!
-
Haha yeah those clamps were terrible!
-
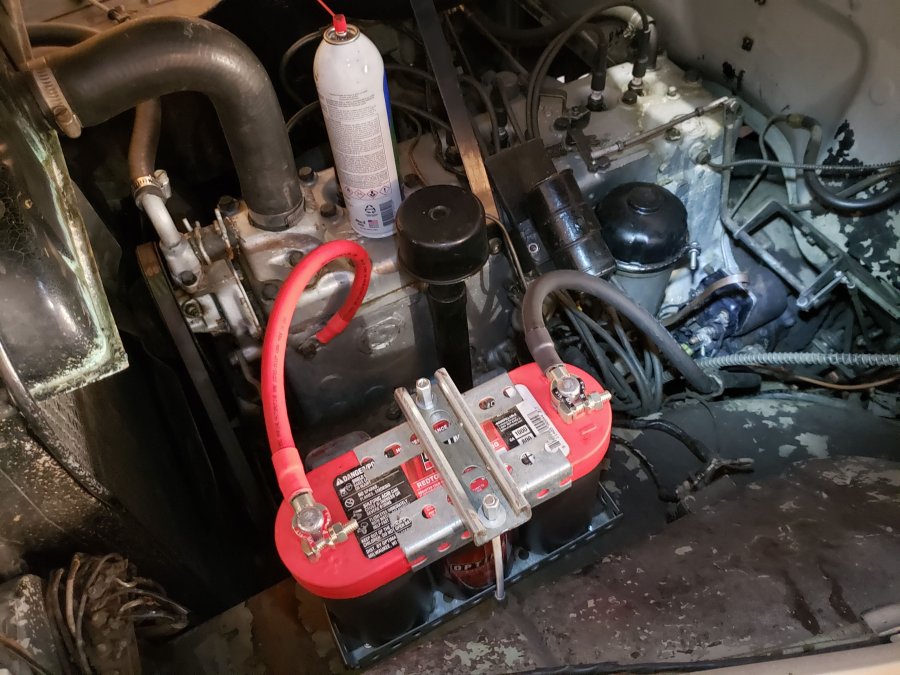
Part of the fun of working on this car is discovering all the things that were done wrong to it. Thanks to this forum not only did I discover that it was grounded incorrectly (negative instead of positive), but also that the battery cables were probably not the correct gauge for 6v systems. I'd seen you could buy reproduction cables for a hefty price but I'm not looking to make this a show car. After doing some searching I came across BatteryCablesUSA.com and was very impressed with their selection. You can choose the gauge of wire, length, and type of connections you want on the ends and all for a decent price. I ended up getting some 1/0 cable for about $37 with tax. Definitely worth the money as they look much better and after switching back to positive ground and correct cables the car starts like a dream now!

-
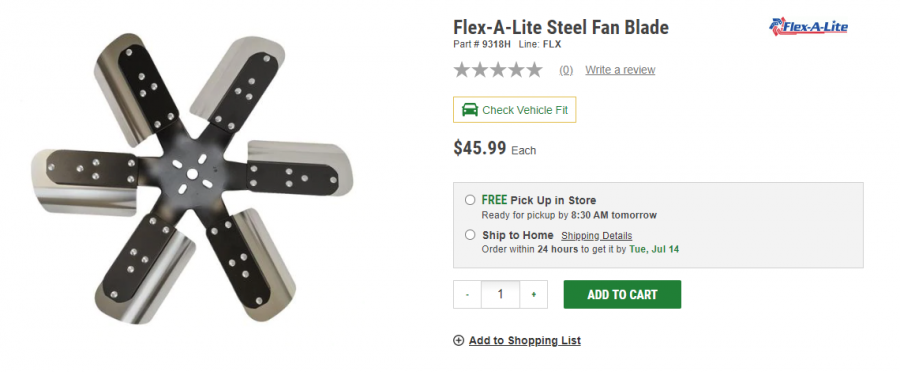
Good to know the added noise was too much. Kind of why i'm still leaning towards something like this:
-
My car only has the 4-blade fan, although I see the 6-blade fan on the speedwaymotors website for a decent price. I liked the idea of a flex-a-lite fan but I was a little concerned that the blades may stick too far back and hit the belt at low speeds. Has anyone had any experience in putting one of these fans on?
-
I've actually been thinking about either switching to an electric fan or possibly a flex-a-lite fan in my 49. I flushed quite a bit of sediment out of the block when I first got it, and it now will easily stay at or under 180 degrees while driving. The only time I had it start climbing was while sitting in a long drive-through line on a hot day. The only factor I'm not sure of is the condition of the water distribution tube since I haven't had the motor apart enough to tell. I'm curious if the stock fan is good enough if everything else is in good working order or if changing it out might still be the better option?
-
I know it's not exactly the correct tool, but I rented this front wheel drive hub puller from O'Reilly's and used it with my 1/2" air impact gun. It was a little too small to fit entirely over the raised portion of the drum, but it still matched the bolt pattern just fine. Even with an air impact it still took quite a bit of hammering away to break loose, and like so many other have mentioned before though-be sure you leave the axle nut on by a few threads at least. When that drum finally breaks loose it will jump quite a bit and give you a scare if you're not expecting it.
-
Lol no he didn't, he just picked it up out of the box I brought them in and looked it over in the parking lot.
-
Well I got my tool about a week ago and put it to use as quick as I could. The only slight problem I had with it was since the nut was thinner than the ones used to hold the drums on it in turn would wobble a little bit and not give an accurate reading. I was still able to make it work by trying to put constant pressure on it and adjust the shoes the best I could. I didn't use any feeler gauges as I know my shoes aren't perfectly arced to the drums, but just using this tool to adjust the major adjusters definitely made a difference. The pedal height is much better now and I can confidently go drive it around to bed the shoes in without fear of not being able to stop. As they've started to wear in a little more I can even get them to begin to lock the tires up on heavy stops so that's quite an improvement! The only (small) issue I have now is I think the drums may be warped as when I'm almost to a complete stop I can feel them grab kind of pulse-like. I don't feel a vibration in the pedal however, and it stops very straight as well so I'm not sure if I'll bother taking everything back apart to get the drums machined or not. I actually did take them to a shop before I did all this work and the employee who looked at them with me said they looked in such good shape that he wouldn't bother turning them if it were him. They did look near new as there were no ridges or scoring on any of them, so am I being too picky and still expecting them to behave as smoothly as 4 wheel discs on most modern vehicles?

-
Funny you mention this because I came across the same exact thing last week when going to adjust my handbrake. I get a little chuckle (and some frustration) every time I see something either missing or horribly hacked together on this car. At least now I know how to go about fixing this issue!
-
Haha ok I won't wait for your help then, but don't expect me to drive down there if you ever need help either!! ? Actually a family member works in a 4x4 fabricating shop near me and he's going to try and replicate the one from Sam's earlier post. I'll be sure to post pics of me trying to use it.
-
Sorry I forgot to mention that I'm in Denver, Colorado. It seems like most members I've seen in this forum are on the Eastern side of the states. Thanks for the link to your article Sam! That looks like a fairly easy and inexpensive route to go. I don't have a dial indicator as I've seen some people use, and while I don't want to have to spend a lot of money to get the brakes set correctly, I suppose anything is cheaper than what I've seen the 1750 selling for on eBay right now.
-
Hello all, I've been browsing this site for weeks in trying to find a solution to getting the brakes set up correctly on my '49 Chrysler Windsor and am still stuck. I have all new shoes, wheel cylinders, & master cylinder from Andy Bernbaum, have bled them several times, tried adjusting the minor adjusters, and still have a very low pedal grab with little stopping power. I did find that if I pump the pedal twice then the brakes seem to grab better, which made me wonder if there was still air in the system, but when I pulled a drum off to check how the shoes were wearing I could tell they're definitely not adjusted right. They look to only make contact on the heel, to which confused me more because if I followed the instructions in the https://p15-d24.com/page/p15d24/tech/brakes.html/ article to adjust the position of the shoes, that would just increase the heel contact even further. I'm hoping that someone here either has an adjusting tool they would be willing to loan me, or even instructions on how to build my own would be helpful as well. I'm good at repairing cars but not very good at fabricating so I'm lost at trying to make something work. Any help would be greatly appreciated!!